


![]()
This is a free sewing pattern for a chef coat, designed in response to user requests.
Unlike regular clothing, the front panels are constructed symmetrically with a double-layer overlap. This allows the wearer to switch sides to hide stains and provides extra heat protection with a four-layer structure.
The sleeves are intentionally made longer than standard designs and are worn folded up. The extended cuffs can function as pot holders when needed.
For authentic chef coats, knot buttons or traditional fabric buttons are recommended, as they allow the coat to be removed quickly if hot oil or other hazards occur. You can make your own knot buttons using Asian cord techniques such as the Shaka knot or Awaji knot. Tutorials for these knots can be found on YouTube.
For cosplay or casual use, fabric-covered buttons offer a simpler alternative. If you plan to wear clothing underneath, choose one size larger for comfort.
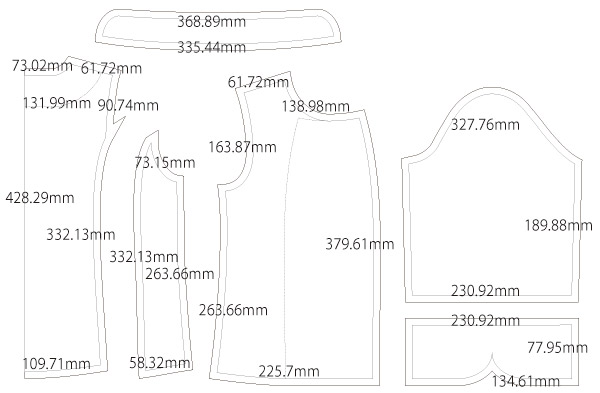
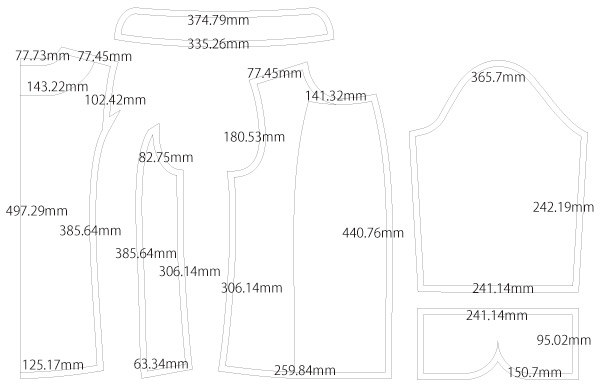
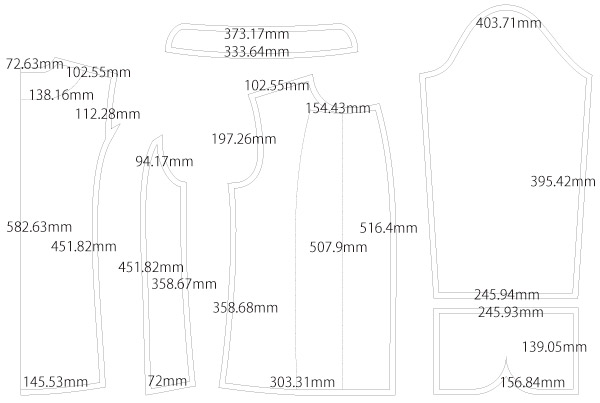
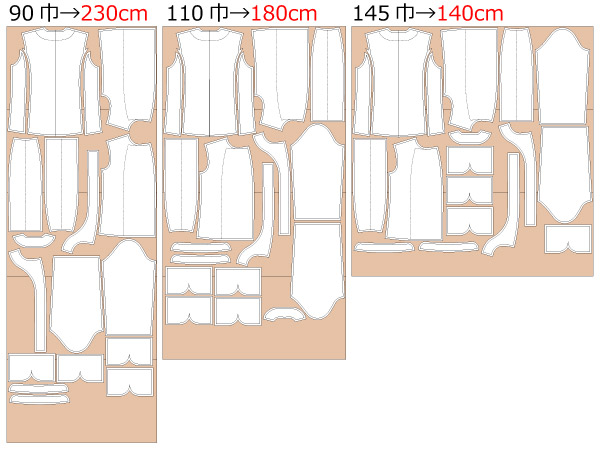
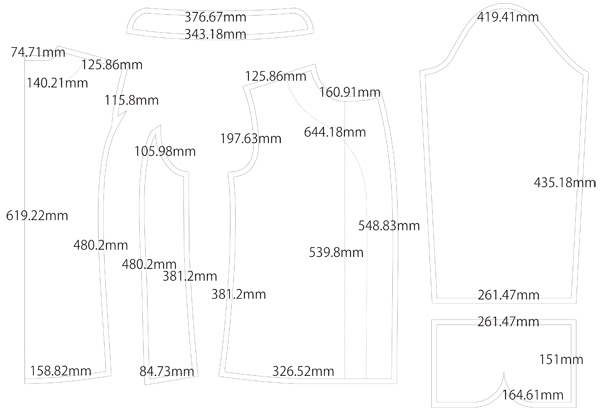
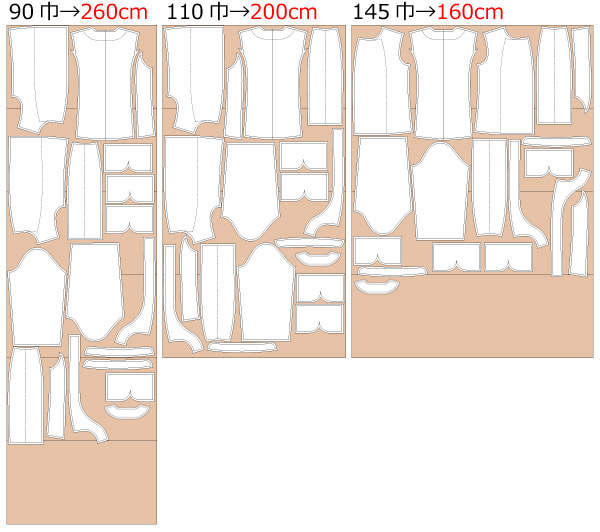
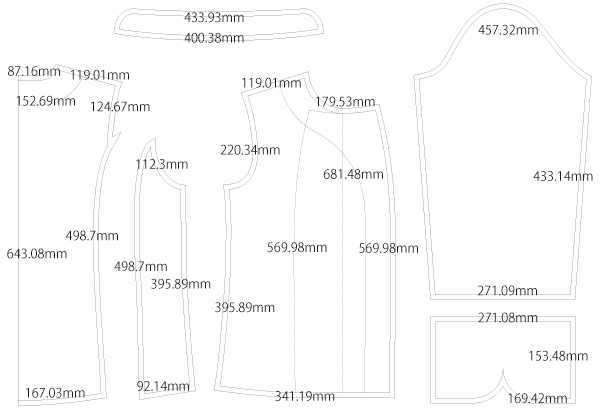
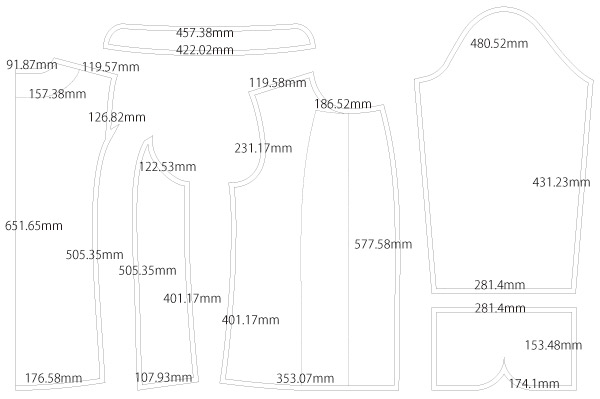
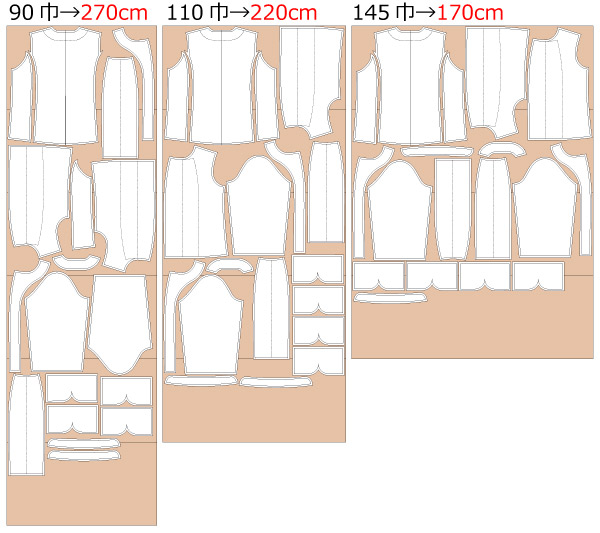
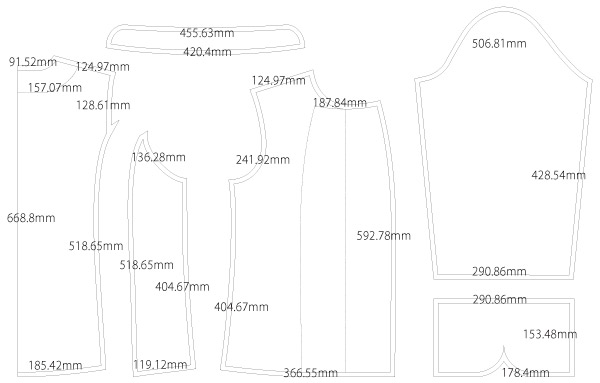
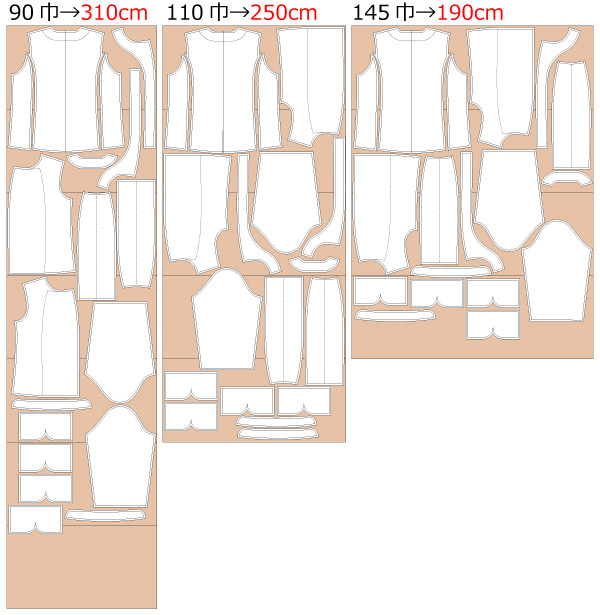
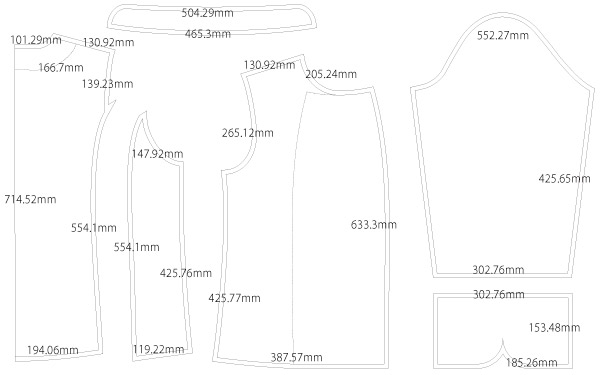
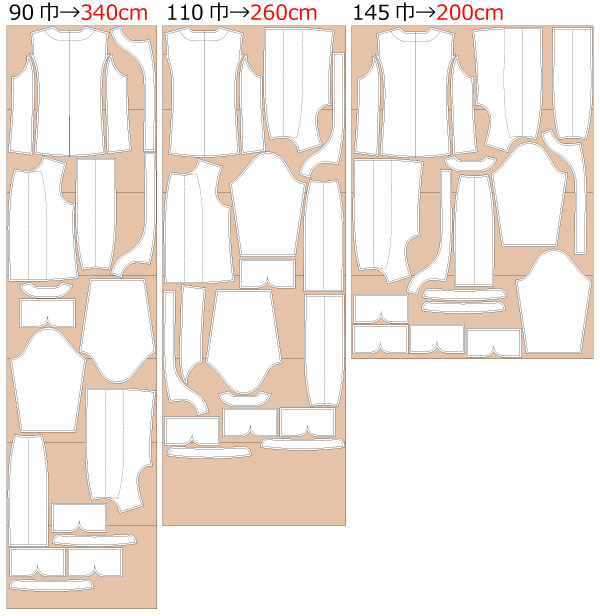
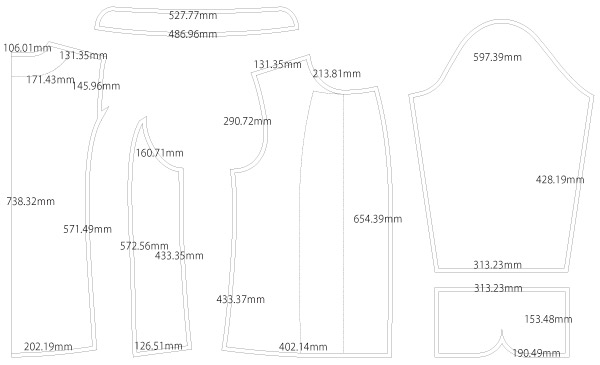
After printing, align and paste the pages along the matching lines, then cut along the pattern. Seam allowances are already included, so you can start sewing immediately.


The production process is explained with translation software.
If you have any suggestions on how to write like this, please let us know at info@dr-cos.com
We operate this site with your cooperation.
(1) Fold one side of "Bib" inward and stitch it to the front to make a double layer.
* Symmetrical, 0.25" around the bib should be temporarily fixed with a sewing machine to make it easier to sew.
(2) Side and shoulder of "Front Bodice" and "Back Bodice",Serging the sides of "Back Bodice(side)",Sew them together,Press seam allowances open with an iron.
(3) Attach fusible interlining to "Collar",Stitch them together,Turn the "Collar" over and iron it into shape.
(4) Apply fusible interlining to "Facing",Sewing together,Serging the outside.
(5) When sewing "Facing" to "Bodice", insert "Collar" together,seam allowance and turn inside out.
(6) Fold up the hem of the "Bodice" by 0.5 inch and sew it with a sewing machine.
(7) Stitch the fusible interlining to the "Cuff",Sew the sides together,Press seam allowances open with an iron.
(8) Sew the "Cuff" inside out and fold the seam allowance so that it can be easily inserted into the "Sleeve".
* It is better to cut the seam allowance of "Cuff" so that it can be easily turned inside out.
(9) Serging the sides of the "Sleeve",Sewing together,Press seam allowances open with an iron,Cuff the hem of the sleeve with "Cuff" and sew it.
(10) Sew the "Sleeve" to the "Bodice",Serging the armhole.
(11) Make buttonholes at the buttonhole positions and attach buttons at the button positions.
![]()
Free Paper Patterns are possible because of your support.
If you use our patterns, please share them on social media and tell your friends.
Your support helps DRCOS continue to provide patterns in the future.
![]()
![]()
Children's-100
bust60.5cm length42.5cm 10sheets of A4 size (or legal size)


Children's-4
bust23.8in length16.7in 10sheets of letter size

Children's-120
bust68.5cm length49.5cm 11sheets of A4 size (or legal size)
Children's-8
bust27in length19.5in 14sheets of letter size
Children's-140
bust79.5cm length58cm 16sheets of A4 size (or legal size)
Children's-10
bust31.3in length22.8in 16sheets of letter size
Ladies'-S
bust87.5cm length62cm 17sheets of A4 size (or legal size)
Ladies'-S
bust34.4in length24.4in 20sheets of letter size
Ladies'-M
bust92.5cm length64cm 19sheets of A4 size (or legal size)
Ladies'-M
bust36.4in length25.2in 20sheets of letter size
Ladies'-L
bust100cm length65cm 20sheets of A4 size (or legal size)

Ladies'-L
bust39.4in length25.6in 21sheets of letter size
Ladies'-LL
bust106cm length66.5cm 21sheets of A4 size (or legal size)
Ladies'-LL
bust41.7in length26.2in 23sheets of letter size
Men's-L
bust110cm length71.5cm 23sheets of A4 size (or legal size)
Men's-L
bust43.3in length28.1in 24sheets of letter size
Men's-LL
bust114.5cm length73.5cm 25sheets of A4 size (or legal size)
Men's-LL
bust45.1in length28.9in 26sheets of letter size


