


![]()
Comments are made using translation software.
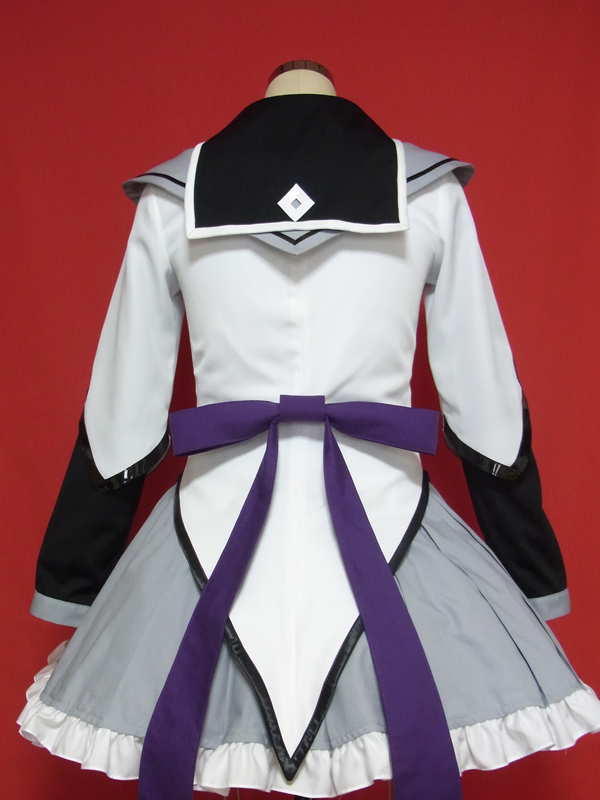
* This is a pattern for the black inner seen in the reference photo.
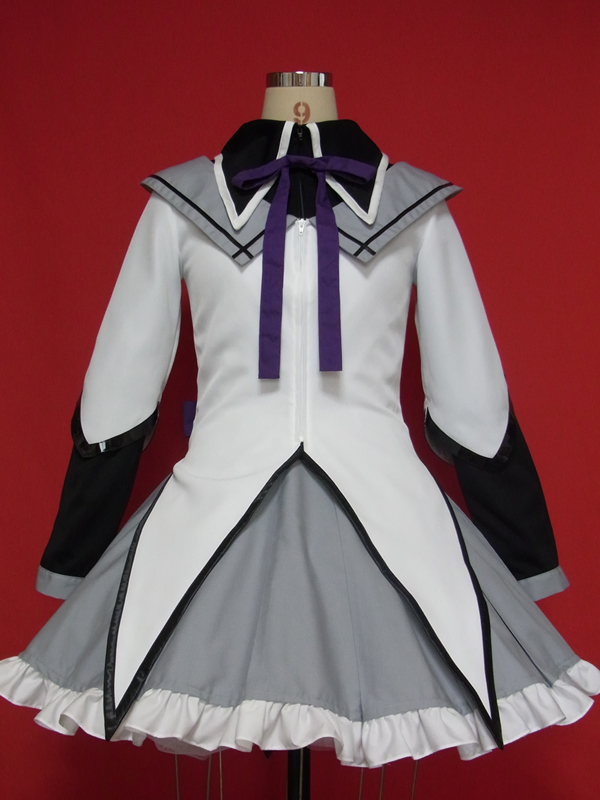
It's a pattern and instructions for a slightly unusual blouse that looks like a normal collar from the front but has a sailor collar on the back.
It's a bit tricky because of the stand collar, but it's a very cute design pattern with the collar section emphasized.
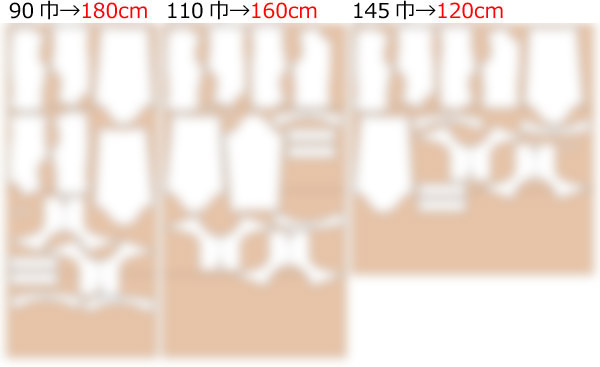
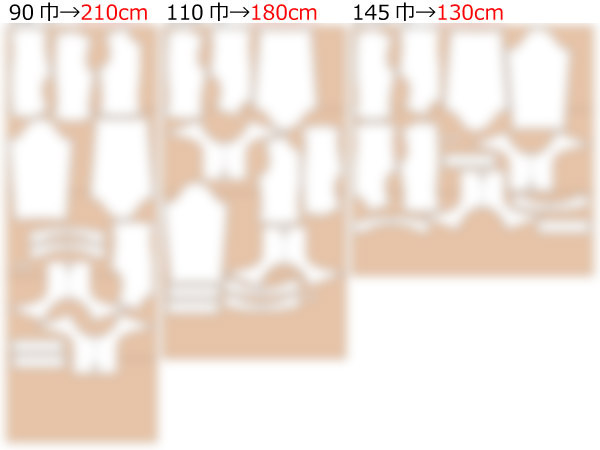
After printing, paste it according to the pasting line,Cut and use.
The pattern has a seam allowance, so it can be used as is.


I'm not so good at English.
So all explanations/instructions were translated using AI.
This is not always perfect and I apologise for any parts that are difficult to follow.
(1) Attach "Fusible interlining" to the “Collar” and “Collar stand.”
(2) Layer the two pieces of “Collar” together and baste the edges with a 5mm(1/4in) stitch.
(3) Sandwich the “Body” between the two pieces of “Decorative Parts” and sew them together.
* For "Decorative Parts," use materials like faux leather or enamel that do not fray, even without Serging.
(4) Sew around the edges of the “Collar,” except for the “Collar Stand Attachment Position,” using bias tape.
(5) Sew the sides of the “Collar stand” together, sandwich the “Collar,” sew, and turn it inside out.
* Iron the seam allowance (S/A) of the "Side to Sew with the Body Inserted" of the “Collar stand” to make it easier to insert later.
(6) Serge the center, sides, and shoulders of the “Front Body” and “Back Body,” and both sides of the “Sleeve.”
![]() How to Serge/overlock (sewing machine & overlock sewing machine)
How to Serge/overlock (sewing machine & overlock sewing machine)
(7) Sew the shoulders and sides of the “Body,” the center of the “Back Body,” and the sides of the “Sleeve” together, then press the seam allowances open.
(8) Serge the hem, fold it up by 1cm(1/2in), and sew with a sewing machine.
(9) Iron the seam allowance (S/A) of the center of the “Front Body” to shape it.
(10) Insert the “Collar stand” into the “Body” and sew it in place.
(11) Attach the open-end zipper starting from the top of the “Collar stand.”
* Sew the seam allowance (S/A) shaped earlier together with the zipper.
* Apply stay tape before attaching the zipper.
(12) Sew the “Cuff” into a loop and attach it to the “Sleeve.”
![]() How to sew sleeves and sleeve cuffs
How to sew sleeves and sleeve cuffs
(13) Attach the “Sleeve” to the “Body” and Serge the seam allowance (S/A) of the armhole.
If you cannot see the SHOP due to 403 error
Price: ¥600 (JPY)
Approx. USD — / EUR — (for reference)
![]()
![]()
Ladies' S size
bust 80cm waist 66.5cm A4 paper size 12 sheets
Sleeve parts 43 size


Ladies' S size
bust 31.5in waist 26.2in letter paper size 12 sheets
Sleeve parts 43 size

Ladies' M size
bust 87cm waist 73cm A4 paper size 12 sheets
Sleeve parts 44 size
Ladies' M size
bust 34.2in waist 28.7in letter paper size 12 sheets
Sleeve parts 44 size
Ladies' L size
bust 94cm waist 79cm A4 paper size 13 sheets
Sleeve parts 47 size
Ladies' L size
bust 37in waist 31.1in letter paper size 14 sheets
Sleeve parts 47 size


