


![]()
This is a free sewing pattern and tutorial for a Shinto shrine maiden top (miko jacket), designed with seam allowances (S/A) included for beginners.
The basic structure is similar to a kimono, but with differences in the sleeve design and a simplified double-layer collar for easier sewing.
This pattern is for the top only. For the bottom, pair it with our shrine maiden hakama skirt or hakama pants pattern, depending on your preference.
Since this is a simplified version, those wishing to make an authentic traditional miko outfit should refer to a Japanese kimono sewing guide.
If the fabric is thin or lacks structure, apply fusible interfacing to the collar area for better shape and durability.
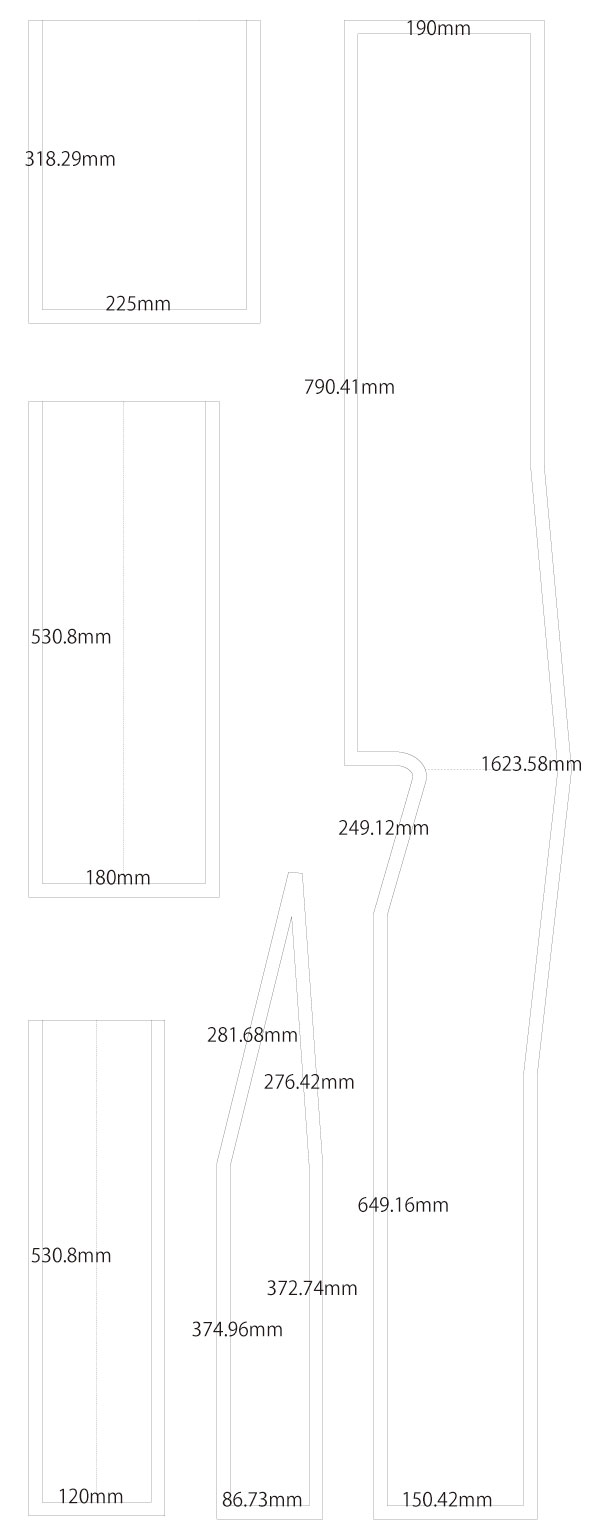
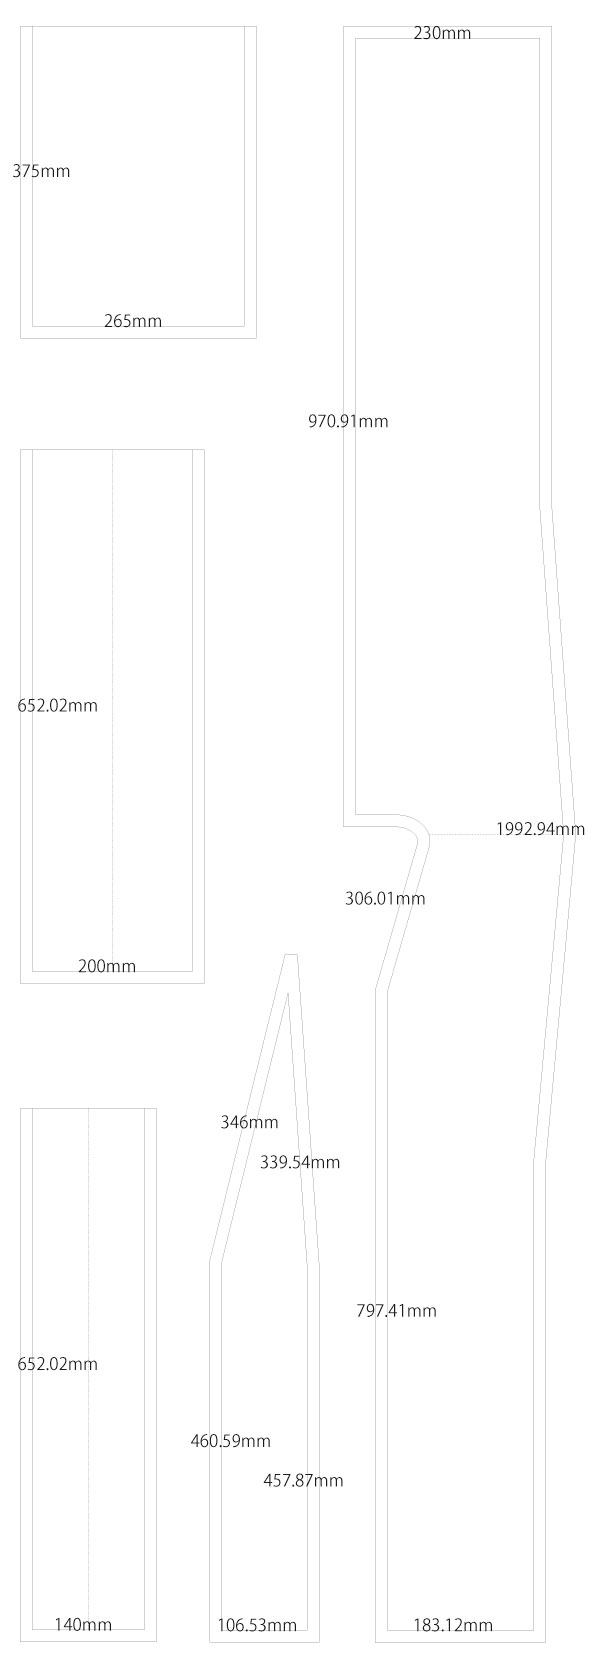
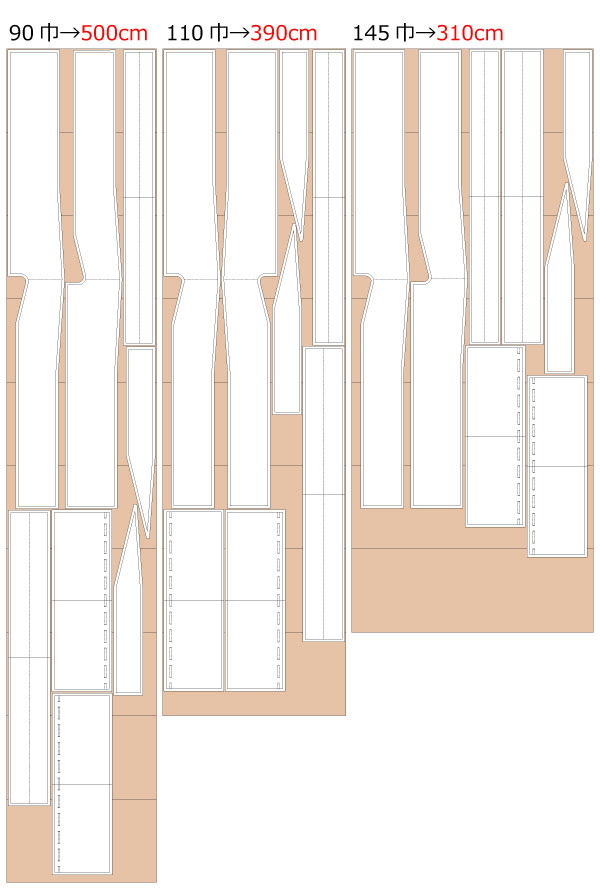
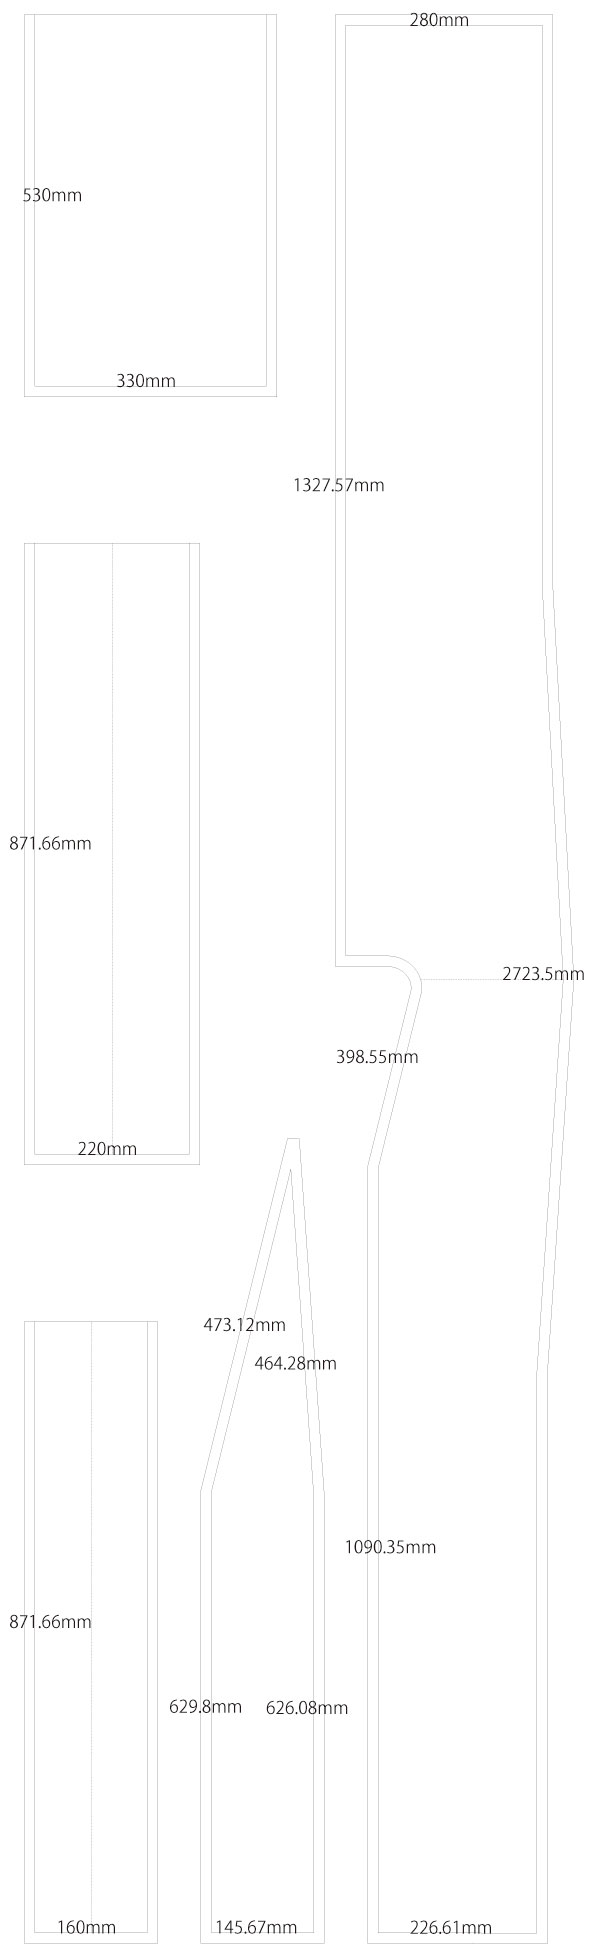
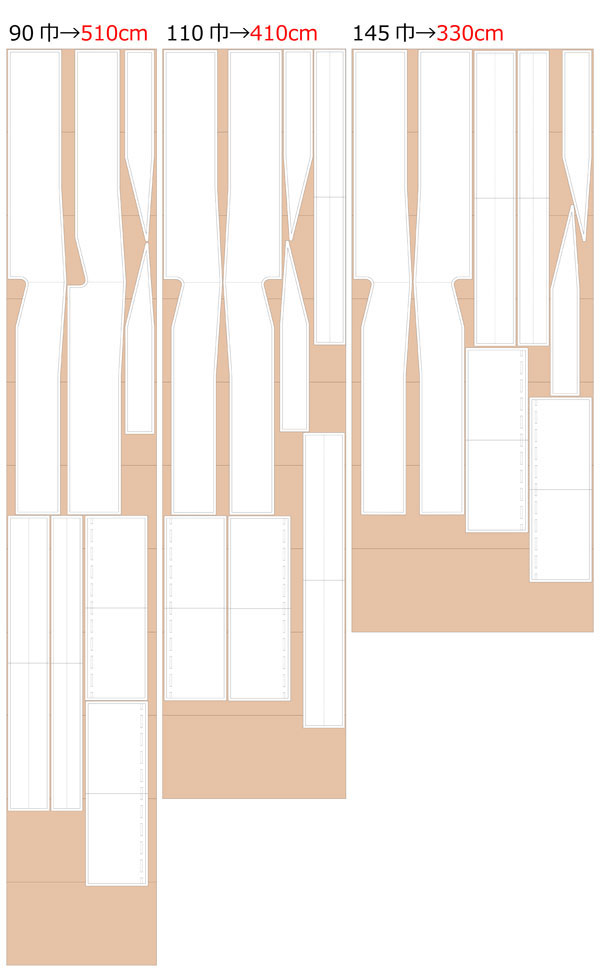
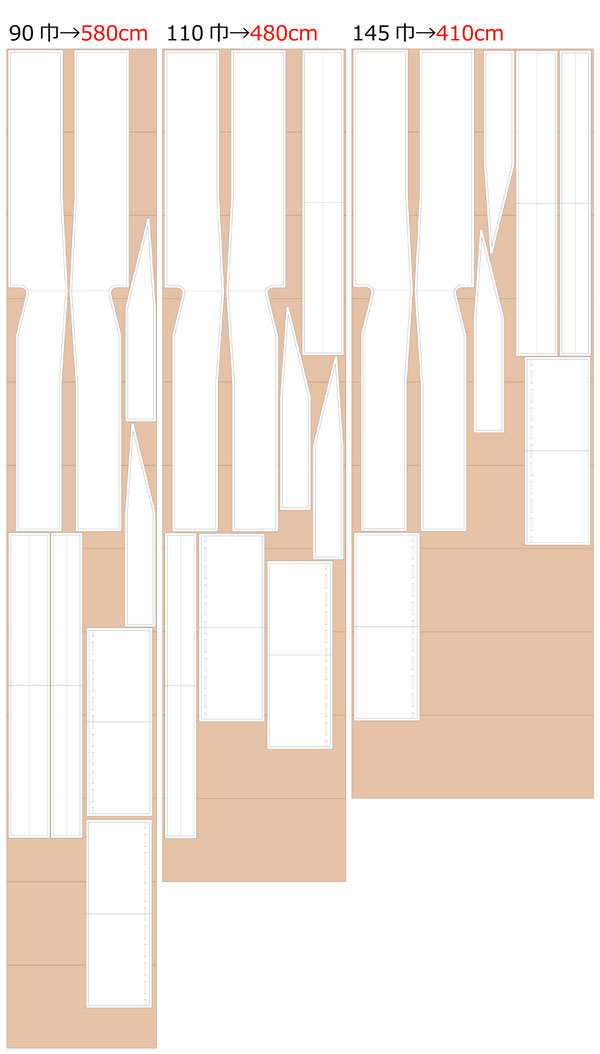
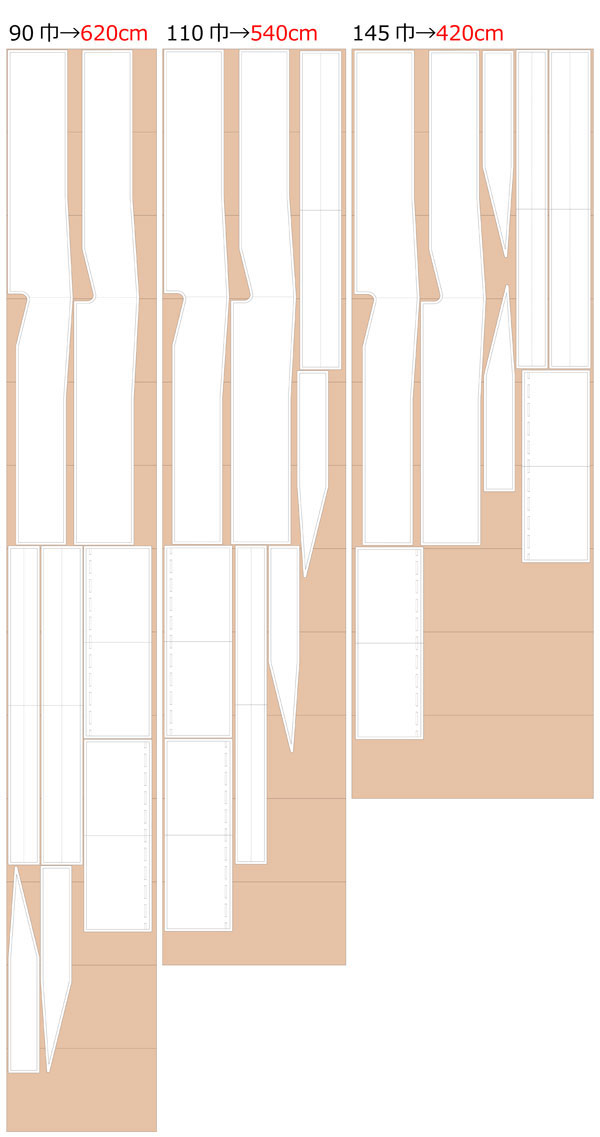
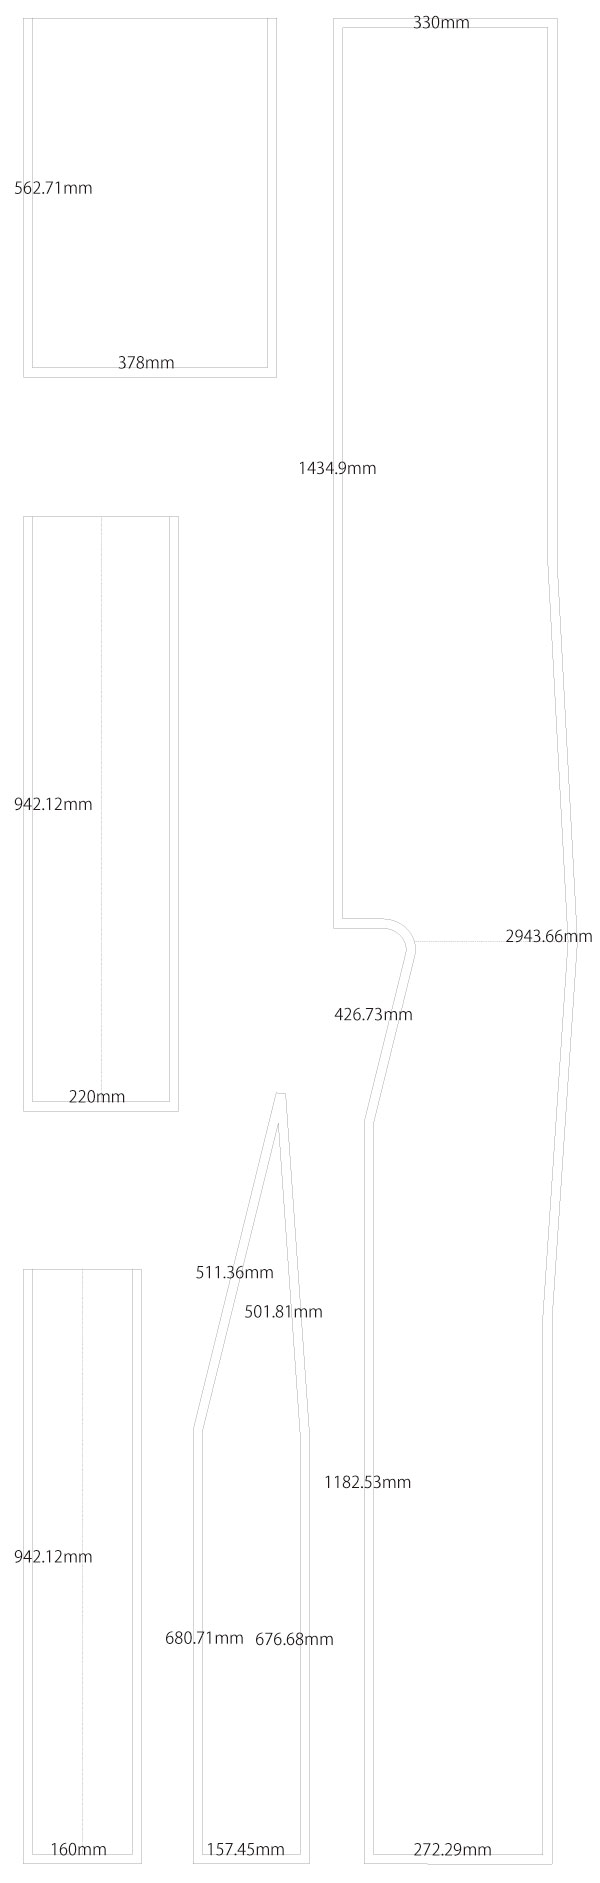
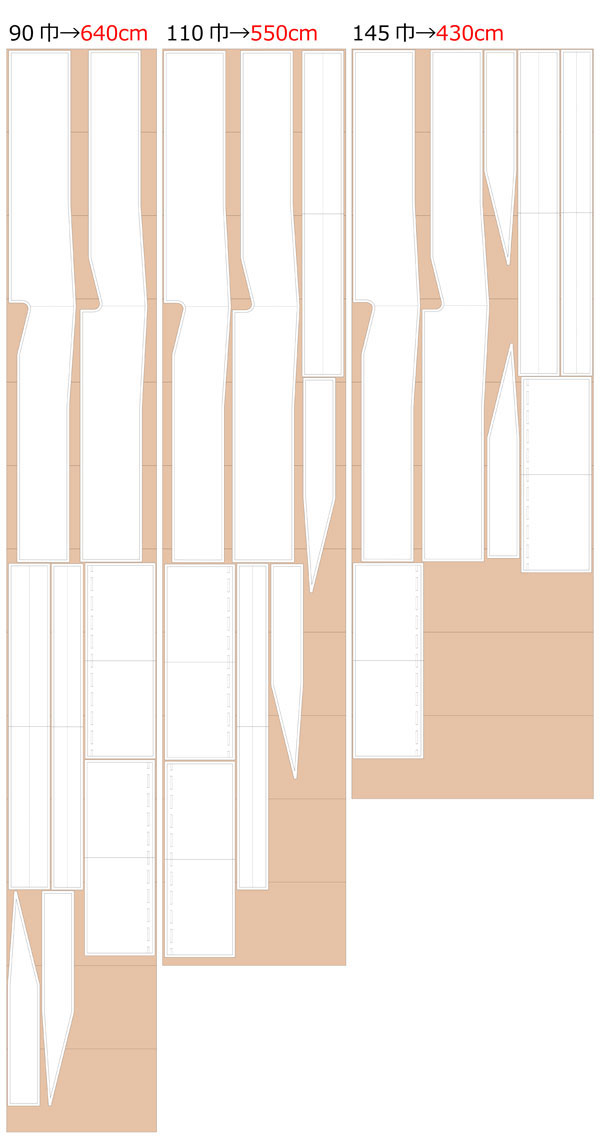
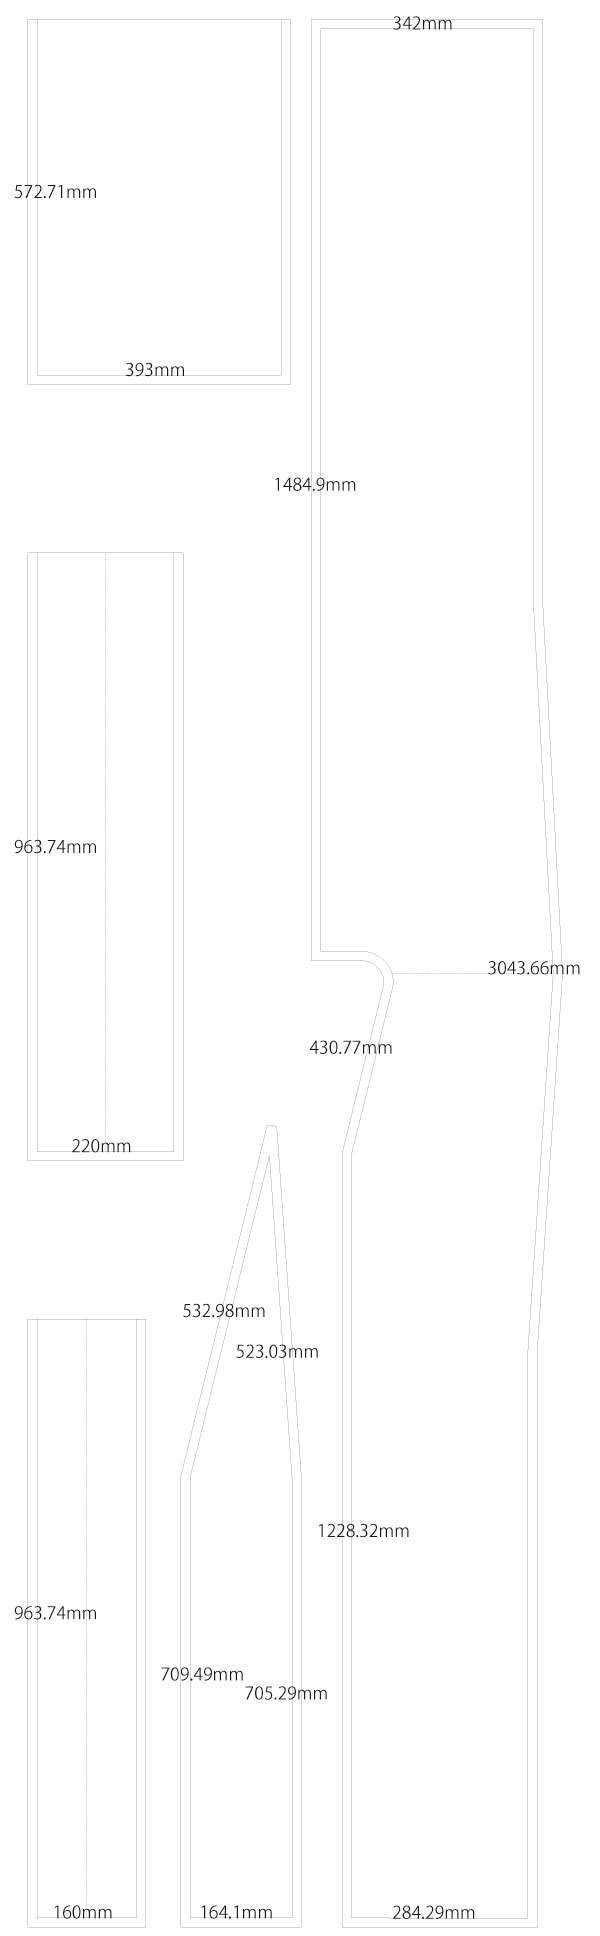
After printing, align the pages along the guide lines, cut along the edges, and the pattern is ready to use. All patterns include seam allowances (S/A) for immediate sewing.

The production process is explained with translation software.
If you have any suggestions on how to write like this, please let us know at info@dr-cos.com
We operate this site with your cooperation.
This pattern is only for a simple miko costume for cosplay.
If you want to make a full-fledged miko costume, please refer to a Japanese sewing book.
Also, since it is a simplified version, it is not lined.
Please download the hakama part from the following page
Skirt type
https://dr-cos.info/fp-hakama.html
https://dr-cos.info/fp-kakun1.html
Pants type
https://dr-cos.info/fp-riderhakama.html
https://dr-cos.info/fp-hakama4.html
(1) After sewing the back center line and serge/overlock, iron the seam allowance to one side.
(2) After sewing "Okumi" on the Okumi adjust position of "Body", serge/overlock and iron the seam allowance to one side.
(3) After serge/overlocking the sides of "Body", sew them together and press seam allowances open with an iron.
(4) Serge/overlock the bottom of "Okumi" from the collar adjust position and around the hem, fold it up with an iron, and sew it together.
(5) After folding "Outside collar" first to make a shape, sew "Outside collar" to "Inside collar", fold both sides of "Inside collar" by 15mm, fold at the center first, and then attach it to the body by "Inside collar". Then, attach it to the "Body" while inserting it between the "Inside collar" and the "Collar".
(6) Make a buttonhole (or cutout) at the buttonhole position of "Sleeve".
(7) Sew the "Sleeve" to the "Body" after sewing the seam under the cuff, and thread the cord through the "Sleeve".
![]()
Free Paper Patterns are possible because of your support.
If you use our patterns, please share them on social media and tell your friends.
Your support helps DRCOS continue to provide patterns in the future.
![]()
![]()
Children's-100
height100cm ±3cm 18sheets of A4 size(or legal size)


Children's-4
height31.9in 18sheets of letter size

Children's-120
height120cm ±3cm 23sheets of A4 size(or legal size)
Children's-8
height39.2in 23sheets of letter size
Children's-140
height140cm ±3cm 31sheets of A4 size(or legal size)

Children's-10
height45.7in 31sheets of letter size
Ladies'-S
height155cm ±3cm 36sheets of A4 size(or legal size)


Ladies'-S
height52.5in 36sheets of letter size
Ladies'-M
height160cm ±3cm 37sheets of A4 size(or legal size)
Ladies'-M
height53.5in 37sheets of letter size
Ladies'-L
height165cm ±3cm 38sheets of A4 size(or legal size)

Ladies'-L
height54.3in 38sheets of letter size
Ladies'-LL
height170cm ±3cm 38sheets of A4 size(or legal size)

Ladies'-LL
height56.3in 38sheets of letter size
Men's-L
height175cm ±3cm 39sheets of A4 size(or legal size)
Men's-L
height57.9in 39sheets of letter size
Men's-LL
height180cm ±3cm 43sheets of A4 size(or legal size)
Men's-LL
height59.8in 43sheets of letter size


