


![]()
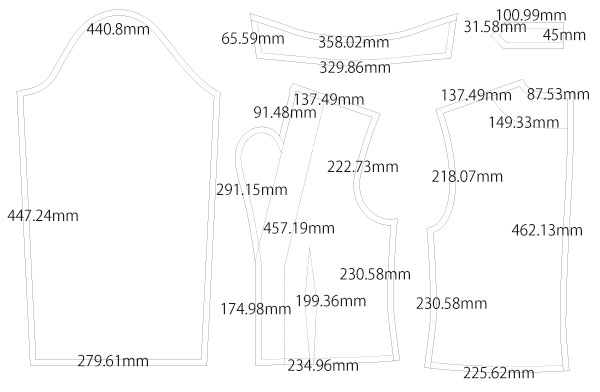
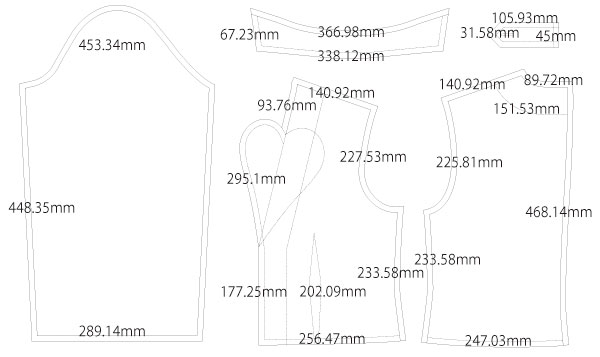
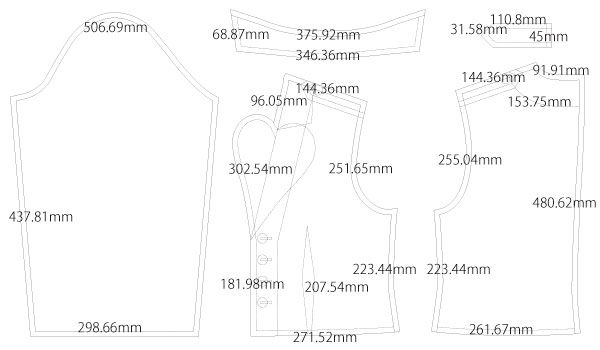
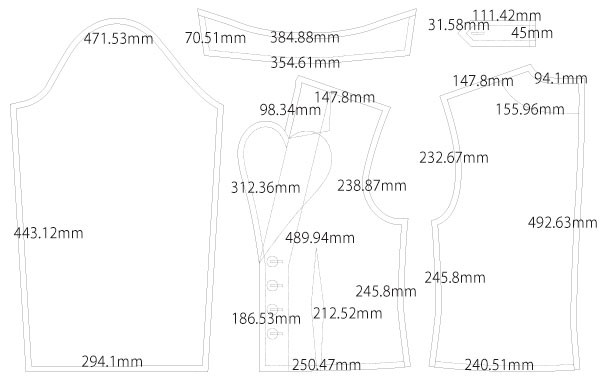
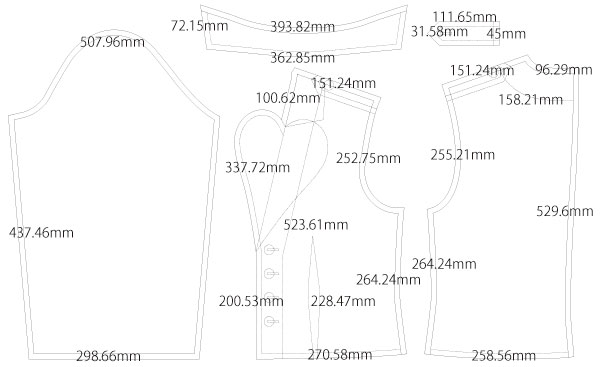
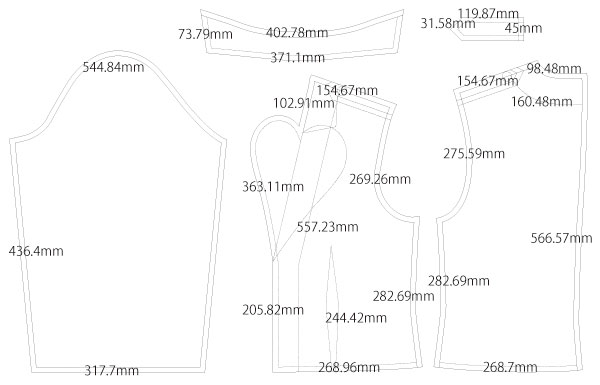
This is a sewing pattern for a short jacket with a heart-shaped lapel. It was created based on many requests from users.
The collar area is constructed by sandwiching the lapel between the facing pieces, which makes it easier to sew compared to a traditional tailored collar.
The design keeps the front open and it is not intended to be closed. The large opening creates a distinctive and stylish silhouette.
This jacket does not include pockets, so the construction is relatively simple. However, some parts such as bias tape finishing may be slightly difficult, so helpful tutorial links are provided.
The sleeves are made from a single piece, which keeps the structure simple and easy to sew.
You can also use this pattern as a base for customization or design modifications.
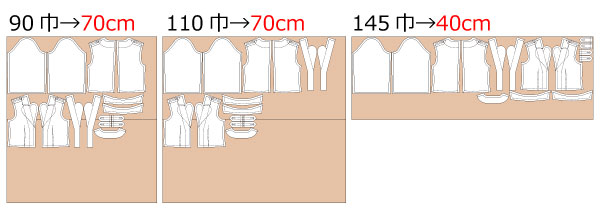
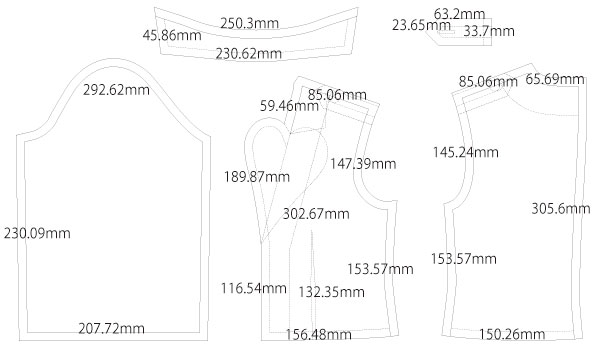
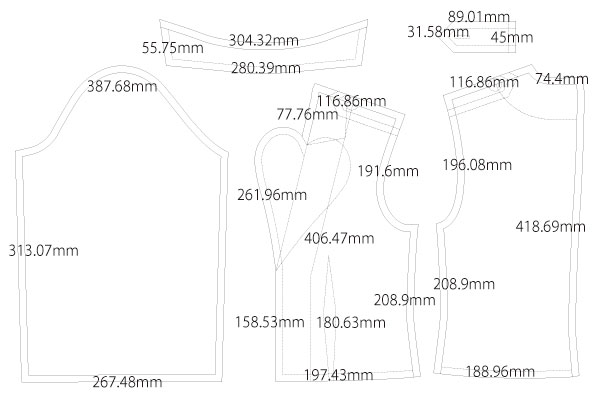
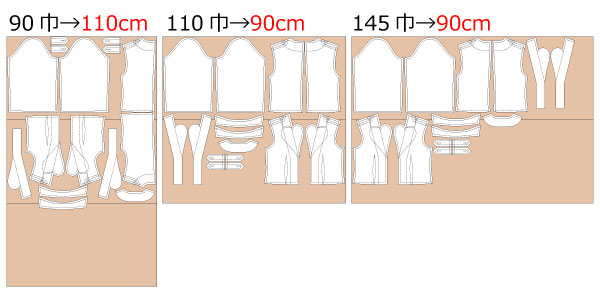
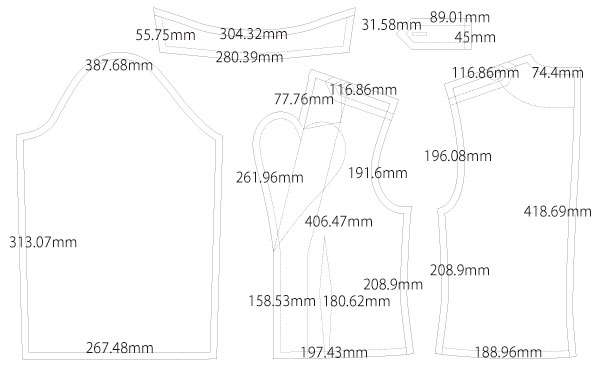
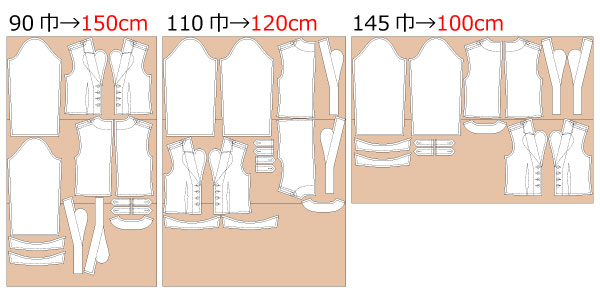
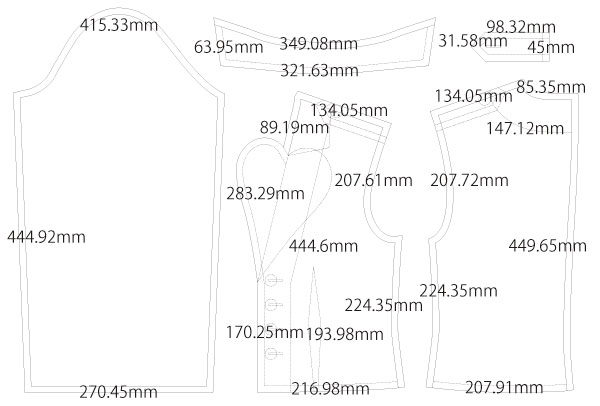
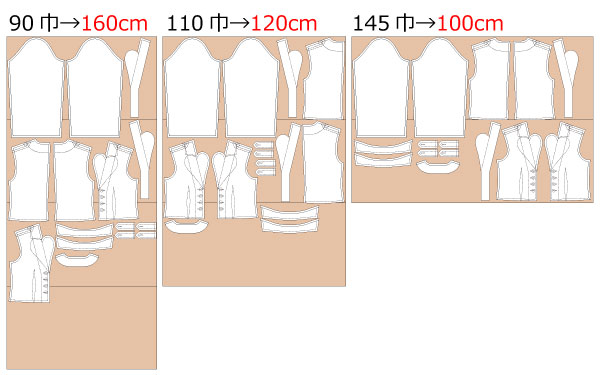
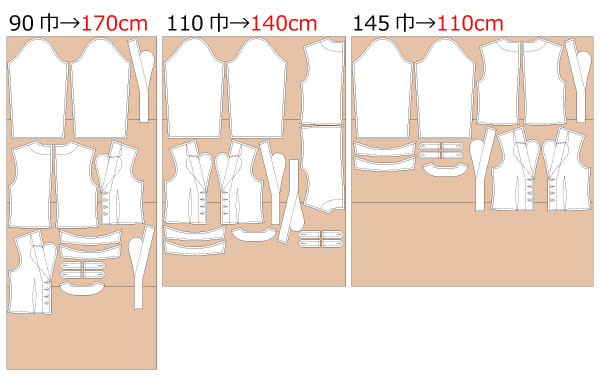
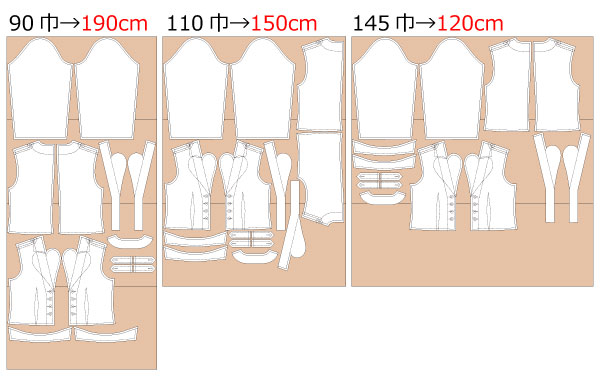
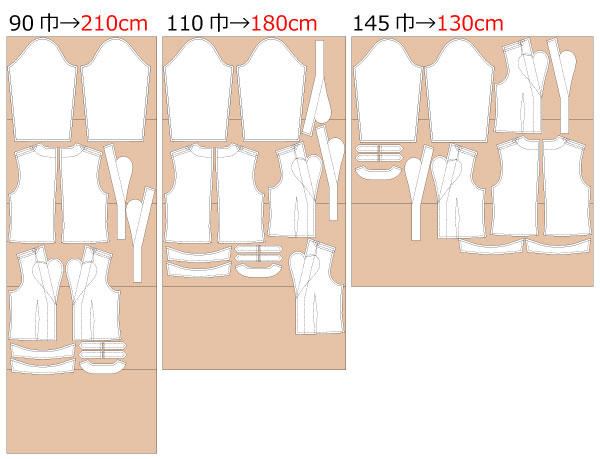
After printing the pattern, align the joining lines, tape the pages together, and cut out the pieces.
Seam allowances are already included in the pattern pieces, so you can use them as they are.


(1) Wrap the epaulette with bias tape first, sew it with a sewing machine to shape it, and make the buttonhole in advance.
(2) Sew the darts and press the seam allowances toward the inside with an iron.
(3) Apply fusible interfacing to the facing pieces. Sew the front facing and back facing together, press the seam allowances open with an iron, and finish the outer edges.
![]() How to Serge / Overlock (sewing machine & overlock sewing machine)
How to Serge / Overlock (sewing machine & overlock sewing machine)
(4) Apply fusible interfacing to the collar. Wrap it with bias tape and sew it with a sewing machine so it can be inserted between the bodice and facing.
![]() How to sew bias tape (method 3)
How to sew bias tape (method 3)
(5) Finish the edges of the front bodice sides and shoulders, and the back bodice sides, shoulders, and center back.
(6) Sew the center back, shoulders, and side seams of the bodice, then press the seam allowances open with an iron.
(7) Insert the collar between the bodice and the facing, and sew up to the seam stop position.
(8) From the seam stop at the base of one heart-shaped lapel, finish around the hem with bias tape until the base of the opposite heart-shaped lapel.
* At the base of the heart lapel, attach the bias tape so that it slightly extends to the back side.
(9) Fold the lapel along the fold line and press it with an iron.
(10) Finish the sleeve side and hem edges. Sew the sleeve side seam, press the seam allowances open, fold the sleeve hem up 1 cm with an iron, and sew with a sewing machine.
(11) Insert the epaulette at the epaulette position on the shoulder of the bodice, attach the sleeve, and finish the armhole edges.
(12) Sew the buttons at the button attachment positions.
![]()
Free Paper Patterns are possible because of your support.
If you use our patterns, please share them on social media and tell your friends.
Your support helps DRCOS continue to provide patterns in the future.
![]()
![]()
Children's-100
shoulder width28.5cm bust63.5cm length30.5cm 6sheets of A4 size (or legal size)

Children's-4
shoulder width11.2in bust25in length12in 6sheets of letter size

Children's-120
shoulder width32.5cm bust72cm length35.5cm 7sheets of A4 size (or legal size)

Children's-8
shoulder width12.8in bust28.3in length14in 8sheets of letter size
Children's-140
shoulder width36.5cm bust80cm length42cm 9sheets of A4 size (or legal size)
Children's-10
shoulder width14.4in bust31.5in length16.5in 9sheets of letter size
Ladies'-S
shoulder width42.5cm bust88cm length45cm 12sheets of A4 size (or legal size)
Ladies'-S
shoulder width16.7in bust34.6in length17.7in 12sheets of letter size
Ladies'-M
shoulder width43cm bust95cm length46.5cm 12sheets of A4 size (or legal size)
Ladies'-M
shoulder width16.9in bust37.4in length18.3in 13sheets of letter size
Ladies'-L
shoulder width44cm bust104cm length47cm 12sheets of A4 size (or legal size)

Ladies'-L
shoulder width17.3in bust40.9in length18.5in 13sheets of letter size
Ladies'-LL
shoulder width45cm bust110cm length48cm 13sheets of A4 size (or legal size)

Ladies'-LL
shoulder width17.7in bust43.3in length18.9in 13sheets of letter size
Men's-S
shoulder width46.5cm bust101cm length49.5cm 13sheets of A4 size (or legal size)
Men's-S
shoulder width18.3in bust39.8in length19.5in 13sheets of letter size
Men's-M
shoulder width47cm bust107.5cm length53cm 15sheets of A4 size (or legal size)
Men's-M
shoulder width18.5in bust42.3in length20.9in 15sheets of letter size
Men's-L
shoulder width48cm bust114cm length56.5cm 15sheets of A4 size (or legal size)
Men's-L
shoulder width18.9in bust44.9in length22.2in 15sheets of letter size
Men's-LL
shoulder width49cm bust119cm length60.5cm 17sheets of A4 size (or legal size)


Men's-LL
shoulder width19.3in bust46.9in length23.8in 17sheets of letter size


