


![]()
Comments are made using translation software.
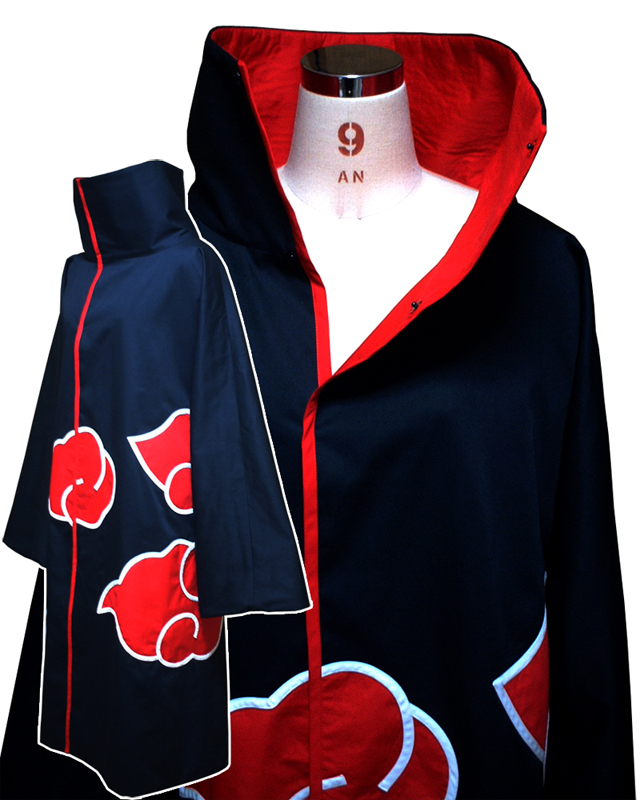
This is the pattern for an oversized French sleeve coat, and by applying pile interfacing to the collar part, the collar stands up as shown in the photo.
You can create a stylish look by using oversized snap buttons for the closure.
We have also provided a pattern for the pattern design.
Since there is no zipper and it features French sleeves, the construction is basically simple. However, the handling of the sleeve cuffs and the side gussets may be a bit challenging.
After printing, paste it according to the pasting line,Cut and use.
The pattern has a seam allowance, so it can be used as is.

I'm not so good at English.
So all explanations/instructions were translated using AI.
This is not always perfect and I apologise for any parts that are difficult to follow.
(1) Attach “Cotton batting” to “Lining (Collar).”
(2) Sew the center of “Back bodice,” then press the seam allowances open with an iron.
(3) Attach “Underarm parts” to the “Back bodice.”
(4) Sew from the shoulder to the sleeve opening, from the sleeve opening to “Underarm parts,” and from “Underarm parts” to the hem on both sides. Shape the “Bodice,” then press the seam allowances open with an iron.
* Use the same steps (2)(3)(4) to shape “Lining (Bodice),” but note that the sides will be reversed.
(5) Sew “Collar” to “Bodice,” then press the seam allowances open with an iron. (Make the “Lining” in the same way.)
* Add notches to areas where the seam allowance fabric is taut to smooth it out.
(6) Attach Cloud pattern to the “Cloud pattern position” on the “Bodice.”
* You can cut the Cloud pattern either face-up or face-down to customize the design.
(7) Sew the upper part of the “Collar” and hem of the “Bodice” and “Lining” together with right sides facing. Turn it right-side out and press to set the shape.
(8) Pull the sleeves through and sew the sleeve openings together, then press to set the shape.
* If sewing the sleeve openings is difficult, fold the sleeve opening edges with an iron and secure them using topstitching.
(9) Secure the left and right front edges of the “Bodice” using bias tape.
(10) Sew snap buttons to the “snap position.”
If you cannot see the SHOP due to 403 error
Price: ¥800 (JPY)
Approx. USD — / EUR — (for reference)
![]()
![]()
Ladies' F size
length 155cm-165cm bust 105cm A4 paper size 34 sheets


Ladies' F size
height 61-65in bust 41.3in letter paper size 36 sheets

Men's F size
length 165cm-175cm bust 112cm A4 paper size 40 sheets

Men's F size
height 65-68.9in bust 44.1in letter paper size 43 sheets


