


![]()
This is a simple sewing pattern and how-to for making a beret.
It has a round shape, so please use it as a reference and create cosplay accessories that match your image.
It looks cute as it is, but since the design line is very simple, you may modify the pattern a little to suit your taste.
It is recommended for beginners because the sewing steps are easy.
If you use polyester or other soft materials that do not hold their shape well, add topstitching to help keep the shape clean and neat.
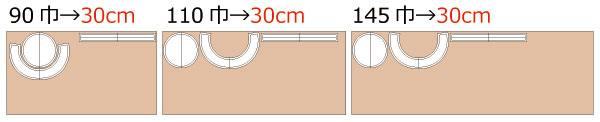
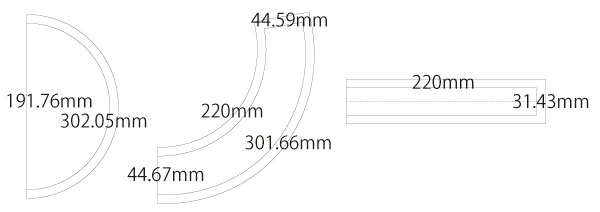
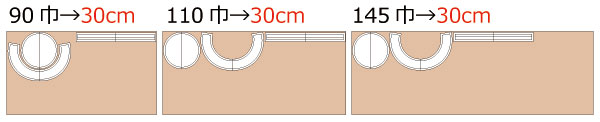
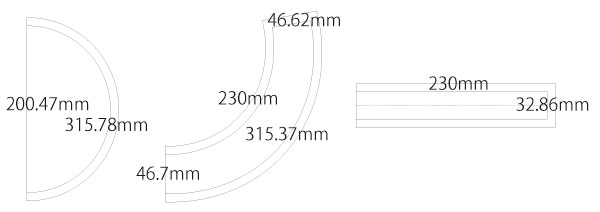
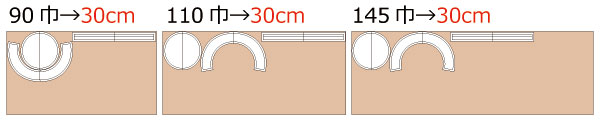
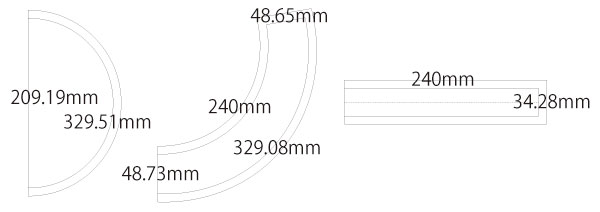
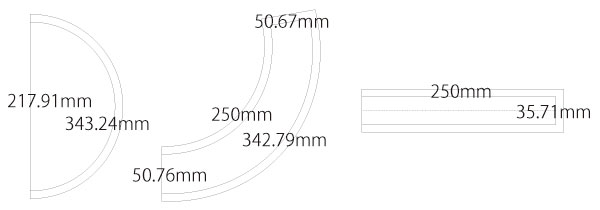
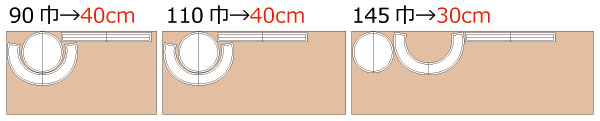
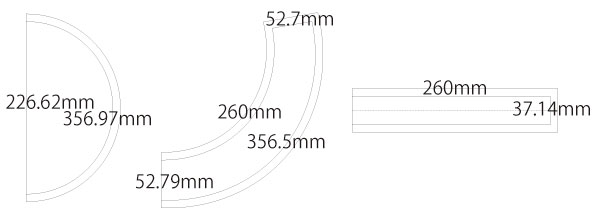
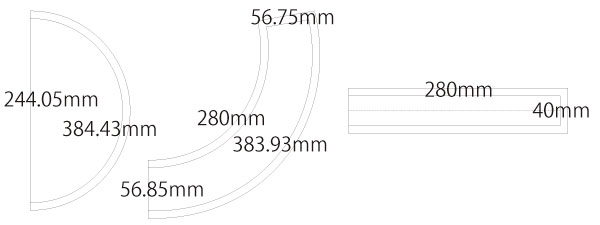
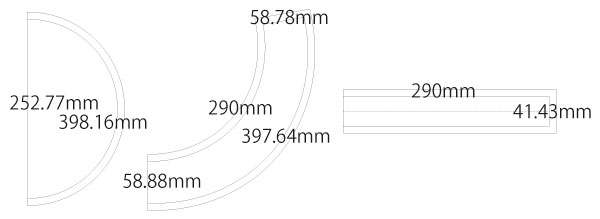
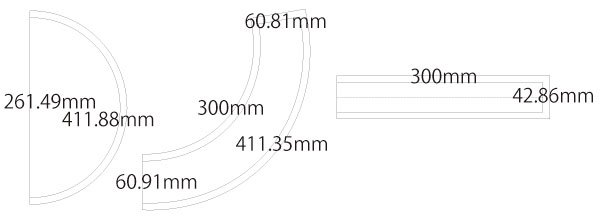
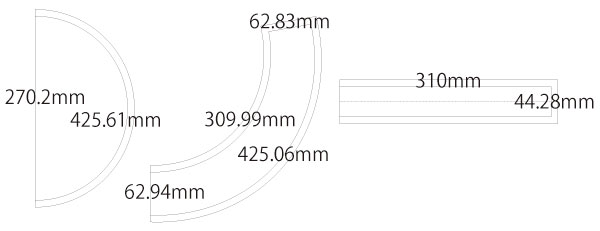
After printing, match and paste the pages along the joining lines, then cut along the outlines. Seam allowances are already included, so you can use the pattern as it is.

(1) Finish both side edges with serging or overlock stitching, then sew them together to make a loop.
![]() How to Serge/overlock (sewing machine & overlock sewing machine)
How to Serge/overlock (sewing machine & overlock sewing machine)
* When making a hat, it is easier to sew if you mark four equal points with pins.
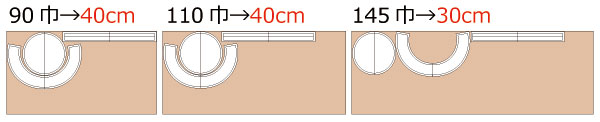
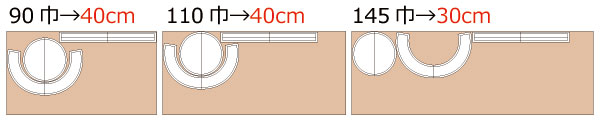
(2) Sew the top part and the side part together, then serge or overlock around the edge.
(3) Sew the belt into a loop and attach it to the side part.
* How to attach the belt: 1. Fold it on the bias and sandwich the edge before sewing. 2. Or, fold it in half, sew, and finish the edge.
* Insert elastic inside the belt to help keep the hat in place. When inserting the elastic, leave a small opening in the belt seam for it to pass through.
![]()
Free Paper Patterns are possible because of your support.
If you use our patterns, please share them on social media and tell your friends.
Your support helps DRCOS continue to provide patterns in the future.
![]()
![]()
Children's 44 size
head size44cm A4 paper size 2 sheets

Children's 5 1/2(17.3in) size
head size17.3in letter paper size 2 sheets

Children's 46 size
head size46cm A4 paper size 2 sheets
Children's 5 3/4(18.1in) size
head size18.1in letter paper size 2 sheets
Children's 48 size
head size48cm A4 paper size 2 sheets
Children's 6(18.9in) size
head size18.9in letter paper size 2 sheets
Children's 50 size
head size50cm A4 paper size 2 sheets

Children's 6 1/4(19.6in) size
head size19.6in letter paper size 2 sheets
Children's 52 size
head size52cm A4 paper size 2 sheets
Children's 6 1/2(20.4in) size
head size20.4in letter paper size 2 sheets
Children's 54 size
head size54cm A4 paper size 3 sheets

Children's 6 3/4(21.2in) size
head size21.2in letter paper size 3 sheets
unisex 56 size
head size56cm A4 paper size 3 sheets
7(22in) size
head size22in letter paper size 2 sheets
unisex 58 size
head size58cm A4 paper size 3 sheets

unisex 7 1/4(22.8in) size
head size22.8in letter paper size 3 sheets
unisex 60 size
head size60cm A4 paper size 3 sheets
unisex 7 1/2(23.5in) size
head size23.5in letter paper size 3 sheets
unisex 62 size
head size62cm A4 paper size 3 sheets

unisex 7 3/4(24.3in) size
head size24.3in letter paper size 3 sheets
unisex 64 size
head size64cm A4 paper size 3 sheets
unisex 8(25.1in) size
head size25.1in letter paper size 3 sheets


