


![]()
This is a sewing pattern and instructions for a simple flat cap (hunting cap).
The key points are to use firm interfacing for the brim and to finish the seam allowances neatly for a clean look.
You can freely adjust the brim design or use this as a base pattern for your own variations.
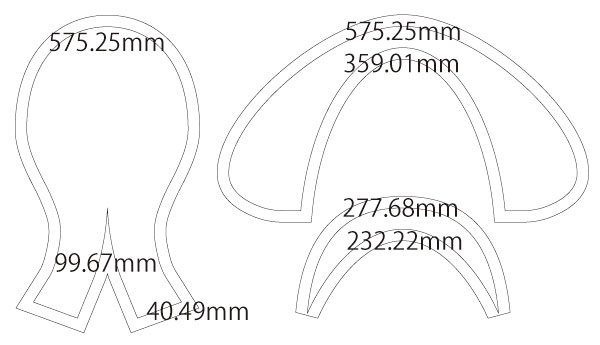
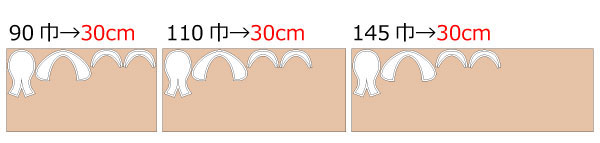
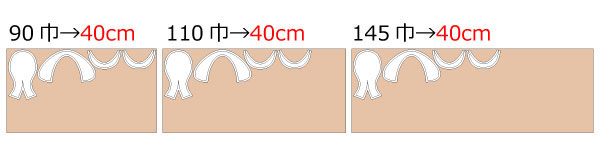
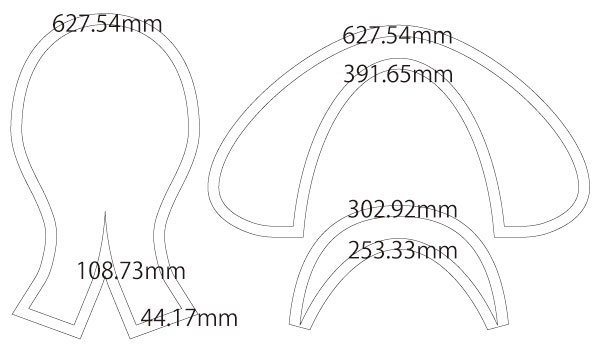
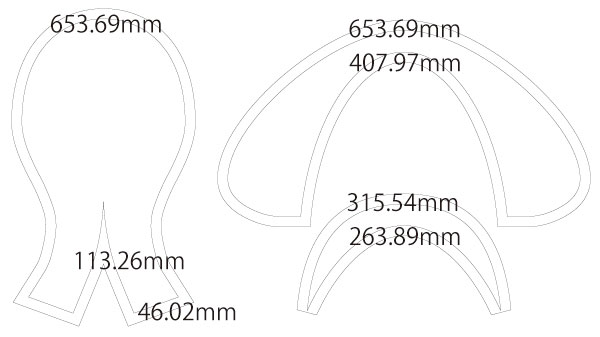
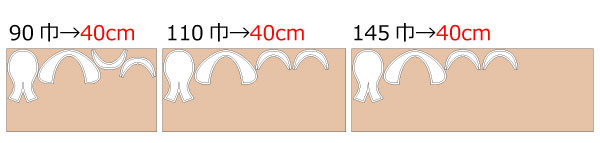
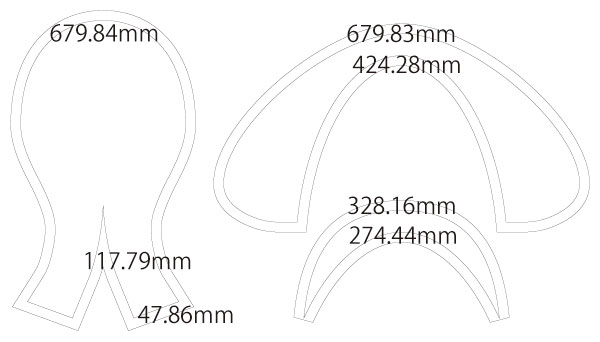
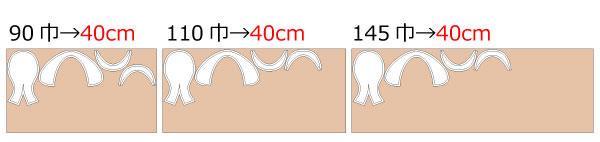
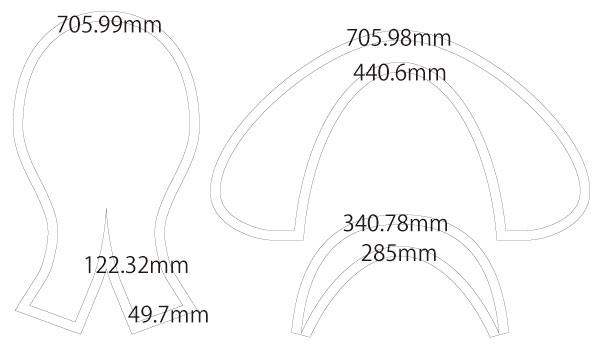
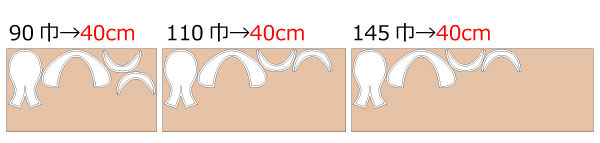
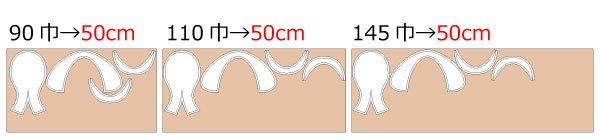
After printing, align and paste the pages along the matching lines, then cut along the outline. Seam allowances are already included, so you can start sewing right away.

(1) Sew the V-shaped darts on the top part, finish the seam allowances, and press them to one side with an iron.
(2) Finish the edges of both the top and side pieces, then sew them together.
* To create a rounder shape, press the seam open and topstitch.
(3) Sew the brim pieces together, turn them right side out, and insert firm brim interfacing inside.
(4) Attach the brim to the side piece.
* Finish the joining part with a hat band or bias tape.
![]()
Free Paper Patterns are possible because of your support.
If you use our patterns, please share them on social media and tell your friends.
Your support helps DRCOS continue to provide patterns in the future.
![]()
![]()
44cm
head size 44cm 3sheets of A4 size(or legal size)


5 1/2(17.3in)
head size17.3in 3 sheets of letter size

46cm
head size 46cm 3sheets of A4 size(or legal size)

5 3/4(18.1in)
head size18.1in 3 sheets of letter size
48cm
head size 48cm 3sheets of A4 size(or legal size)
6(18.9in)
head size18.8in 4 sheets of letter size
50cm
head size 50cm 3sheets of A4 size(or legal size)

6 1/4(19.6in)
head size19.6in 4 sheets of letter size
52cm
head size 52cm 3sheets of A4 size(or legal size)
6 1/2(20.4in)
head size20.4in 4 sheets of letter size
54cm
head size 54cm 4sheets of A4 size(or legal size)
6 3/4(21.2in)
head size21.2in 4 sheets of letter size
56cm
head size 56cm 4sheets of A4 size(or legal size)


7(22in)
head size22in 4 sheets of letter size
58cm
head size 58cm 4sheets of A4 size(or legal size)

7 1/4(22.8in)
head size22.8in 4 sheets of letter size
60cm
head size 60cm 4sheets of A4 size(or legal size)

7 1/2(23.5in)
head size23.6in 4 sheets of letter size
62cm
head size 62cm 4sheets of A4 size(or legal size)

7 3/4(24.3in)
head size24.4in 5 sheets of letter size
64cm
head size 64cm 4sheets of A4 size(or legal size)
8(25.1in)
head size25.1in 5 sheets of letter size


