


![]()
Comments are made using translation software.
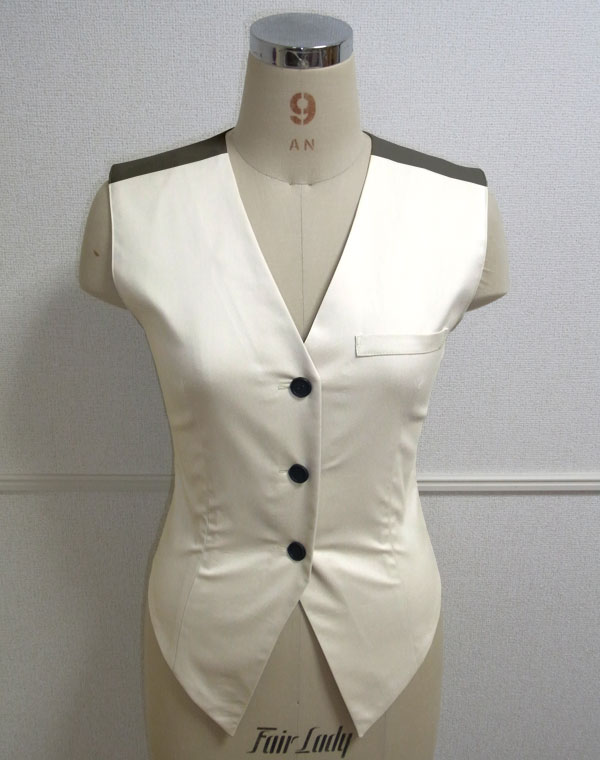
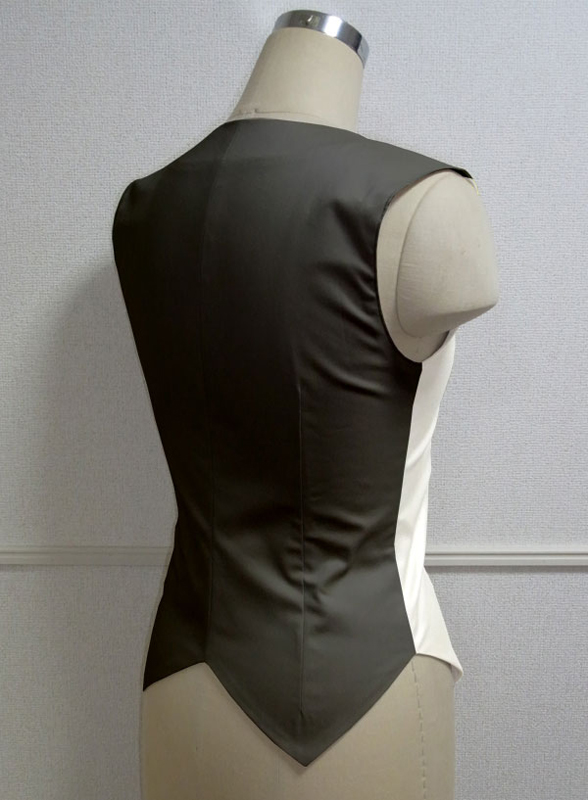
This is a pattern and instructions for a slightly tight-fitting vest.
The shoulder connecting part is positioned on the front bodice side, and the design of the hem is slightly pointed.
It's a pattern with lining attached, and the pockets are dummy pockets.
After printing, paste it according to the pasting line,Cut and use.
The pattern has a seam allowance, so it can be used as is.

I'm not so good at English.
So all explanations/instructions were translated using AI.
This is not always perfect and I apologise for any parts that are difficult to follow.
(1) Attach the Dummy pocket to the Dummy pocket position on the “Front bodice.”
(2) Sew the Dart on both the “bodice” and “Lining,” then press the darts with an iron.
* Press the Dart on the “bodice” toward the center and the Dart on the “Lining” away from the center.
* Clip the seam allowances where the fabric pulls at the darts.
(3) Sew the center → sides → shoulders of the “Back bodice” on the “bodice,” then press the seam allowances open with an iron.
* Clip the seam allowances where the fabric pulls at the side seams.
(4) Attach Fusible interlining to the “Facing,” then sew the “Front bodice Lining” and the “Front Facing” together. Press the seam allowances open with an iron.
(5) Sew the center of the “Back bodice Lining,” then attach it to the “Back Facing,” and press the seam allowances down with an iron.
(6) Sew the sides → shoulders of the “Lining” together, then press the seam allowances open with an iron.
* Clip the seam allowances where the fabric pulls at the side seams.
(7) Pre-fold the seam allowances at the armhole sections on both the “bodice” and “Lining” with an iron.
(8) Pre-fold the Fold line for the button attachment side on both the “bodice” and “Lining” with an iron.
(9) Place the “bodice” and “Lining” right sides facing, and sew around, leaving the sections folded in step (8) open.
(10) Before turning inside out, clip the fabric where it pulls at the seam allowances and trim the corners. Then, turn inside out.
(11) Press the edges with an iron to smooth and settle the fabric.
(12) Topstitch around the edges, including the “Position to turn inside out.”
* When applying the topstitch, sew over the “Position to turn inside out” section to close it.
(13) Close the armhole sections with a topstitch.
(14) Create buttonholes at the Button & Buttonhole position and attach the buttons.
If you cannot see the SHOP due to 403 error
Price: ¥500 (JPY)
Approx. USD — / EUR — (for reference)
![]()
![]()
Children's 140 size
bust75cm shoulder33cm length46.5cm A4 paper size 11 sheets


Children's 10 size
bust29.5in shoulder13in length18.3in letter paper size 12 sheets

Ladies' S size
bust81cm shoulder37.5cm length54cm A4 paper size 13 sheets
Ladies' S size
bust31.9in shoulder14.8in length21.3in letter paper size 13 sheets
Ladies' M size
bust88cm shoulder39.5cm length57cm A4 paper size 14 sheets
Ladies' M size
bust34.6in shoulder15.6in length22.4in letter paper size 15 sheets
Ladies' L size
bust95cm shoulder40.5cm length60cm A4 paper size 15 sheets
Ladies' L size
bust37.4in shoulder15.9in length23.6in letter paper size 16 sheets
Ladies' LL size
bust101.5cm shoulder42.5cm length61.5cm A4 paper size 17 sheets

Ladies' LL size
bust40in shoulder16.7in length24.2in letter paper size 18 sheets
Men's L size
bust108.5cm shoulder44cm length65.5cm A4 paper size 20 sheets
Men's L size
bust42.7in shoulder17.3in length25.8in letter paper size 20 sheets
Men's LL size
bust113cm shoulder45cm length70cm A4 paper size 22 sheets
Men's LL size
bust44.5in shoulder17.7in length27.6in letter paper size 21 sheets


