


![]()
This is a slightly advanced tailored-collar vest pattern with sewing instructions.
The lines have been carefully adjusted to the limit, resulting in a sharp, short-length vest.
This is not a bulky or old-fashioned vest pattern, but a clean and modern short vest design.
The sewing steps are explained in a simplified way, so it may be a little difficult for beginners.
This pattern is recommended for those who already have experience sewing tailored collars.
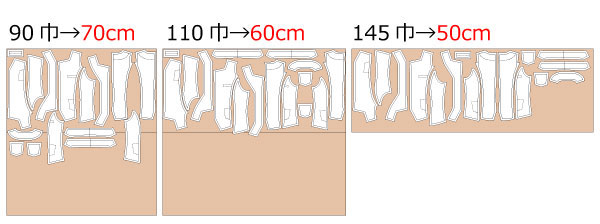
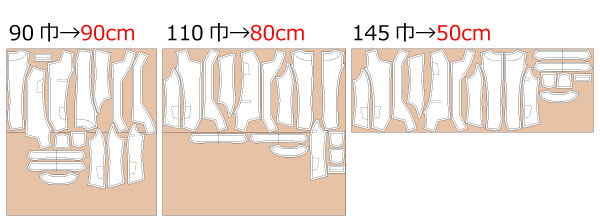
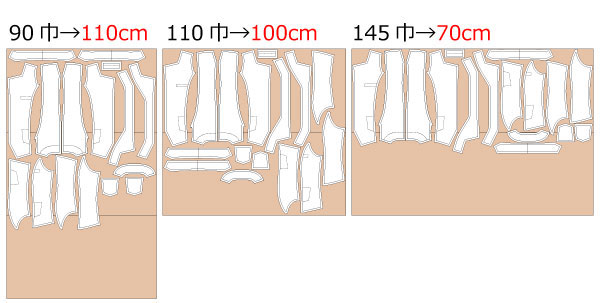
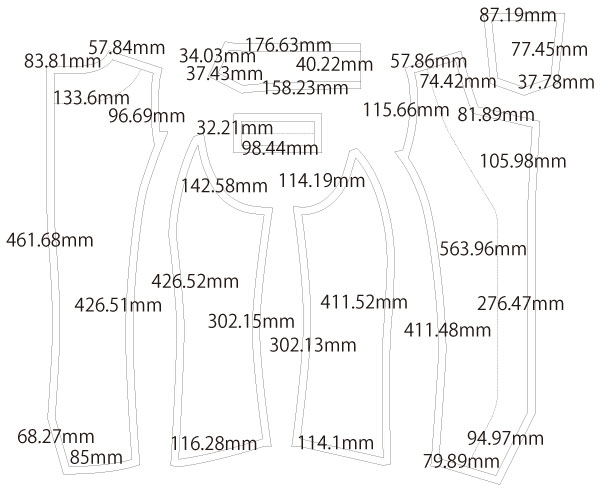
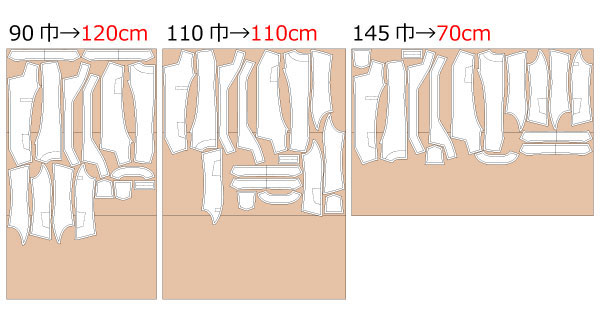
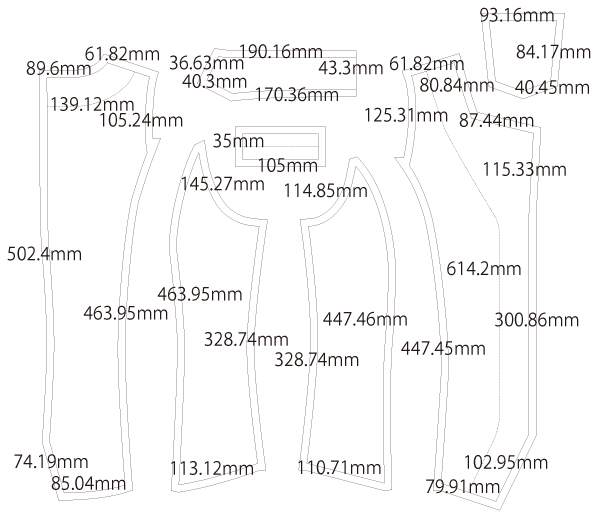
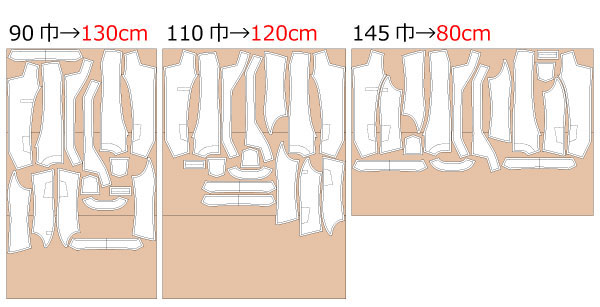
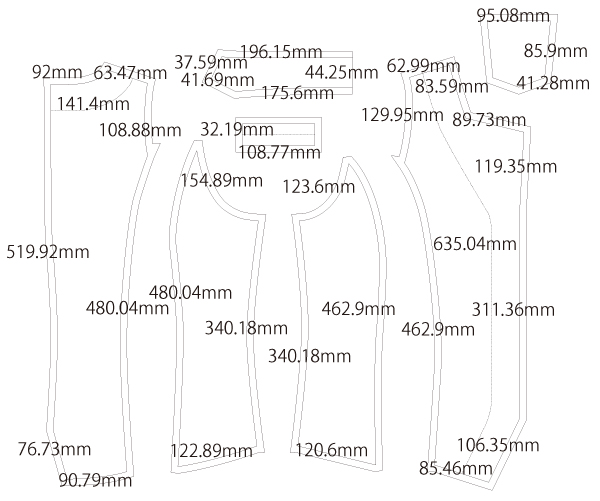
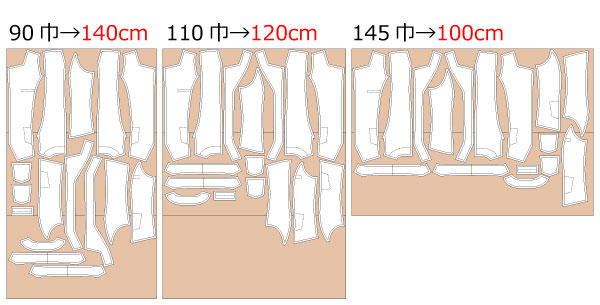
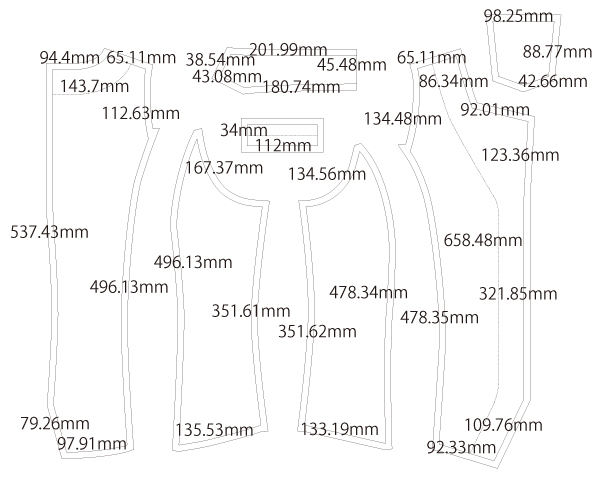
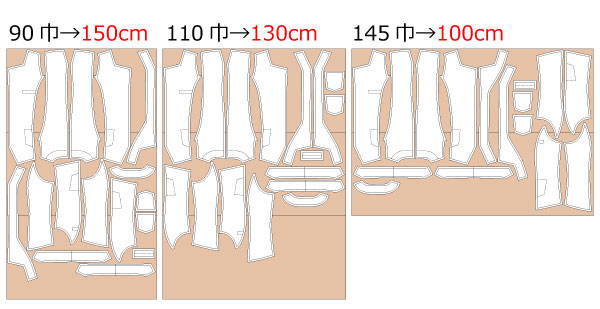
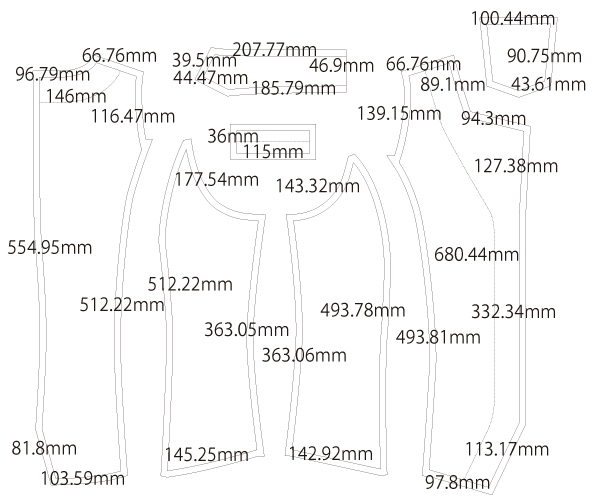
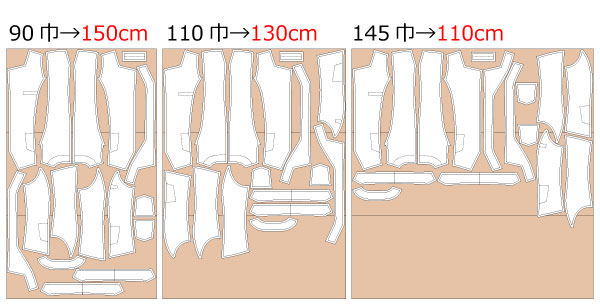
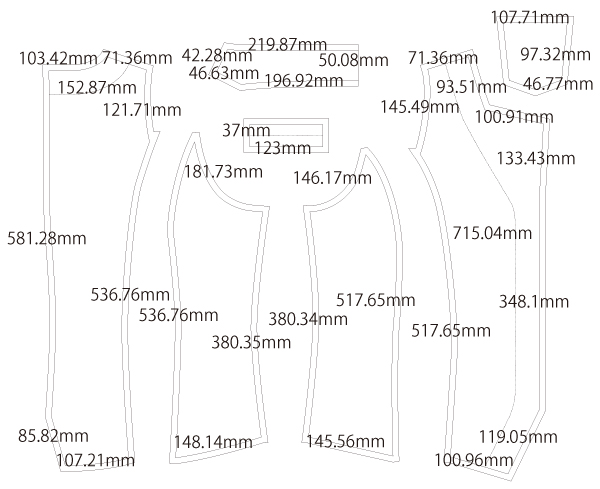
After printing, align and tape the pages together along the indicated joining lines, then cut out the pattern pieces. Seam allowances are included in the pattern, so it can be used as-is.

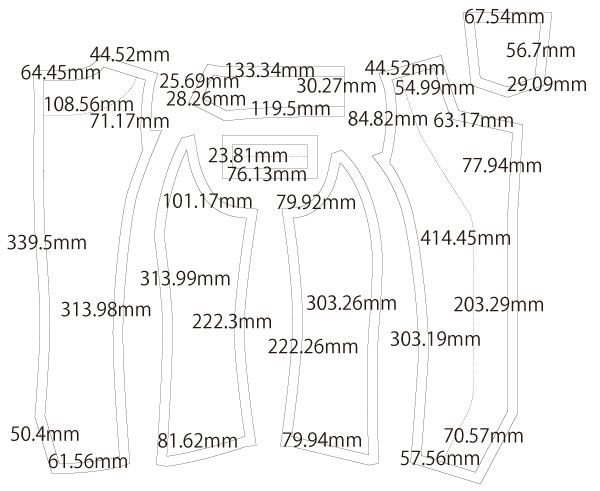
What is grainline and cut on fold? Please refer to this page.
(1) Sew the Front Body to the Front Body Side, and the Back Body to the Back Body Side with a sewing machine. Press the seam allowances open with an iron.
*Clip the seam allowances at tight or stressed areas to reduce bulk and allow the seams to lay flat.
(2) Sew the pockets and dummy pockets onto the body with a sewing machine.
*The breast pocket is a dummy pocket. If you wish to make a welt pocket or piping pocket, construct it at this stage.
How to sew pockets Please refer to this page.
(3) Sew the collar to the body, and sew the collar to the facing separately, stitching each up to the indicated stopping point.
(4) Sew the body and facing together with a sewing machine, turn right side out, and press with an iron.
(5) Sew the lining fabric pieces together and attach the lining to the body.
(6) Make buttonholes and sew on buttons at the indicated buttoning positions.
How to make buttonholes Please refer to this page.
How to sew on buttons Please refer to this page.
![]()
Free Paper Patterns are possible because of your support.
If you use our patterns, please share them on social media and tell your friends.
Your support helps DRCOS continue to provide patterns in the future.
![]()
![]()
Children's-100
bust63cm waist51cm length38.5cm 8sheets of A4 size (or legal size)

Children's-4
bust24.8in waist20in lenght15.2in 8sheets of letter size

Children's-120
bust67cm waist55cm length45cm 9sheets of A4 size (or legal size)

Children's-8
bust26.4in waist21.7in lenght17.7in 10sheets of letter size
Children's-140
bust87cm waist73cm length52.5cm 11sheets of A4 size (or legal size)
Children's-10
bust34.2in waist28.7in lenght20.6in 12sheets of letter size
Ladies'-S
bust87cm waist71.5cm length57.5cm 13sheets of A4 size (or legal size)
Ladies'-S
bust34.2in waist28.1in lenght22.6in 14sheets of letter size
Ladies'-M
bust94cm waist77.5cm length59.5cm 14sheets of A4 size (or legal size)
Ladies'-M
bust34.2in waist28.1in lenght22.6in 14sheets of letter size
Ladies'-L
bust102cm waist85.5cm length61.5cm 16sheets of A4 size (or legal size)
Ladies'-L
bust34.2in waist28.1in lenght22.6in 16sheets of letter size
Ladies'-LL
bust108cm waist91.5cm length63.5cm 16sheets of A4 size (or legal size)
Ladies'-LL
bust34.2in waist28.1in lenght22.6in 16sheets of letter size
Men's-L
bust112cm waist94cm length66.5cm 16sheets of A4 size (or legal size)
Men's-L
bust34.2in waist28.1in lenght22.6in 19sheets of letter size
Men's-LL
bust117cm waist98.5cm length69.5cm 18sheets of A4 size (or legal size)


Men's-LL
bust34.2in waist28.1in lenght22.6in 19sheets of letter size


