


![]()
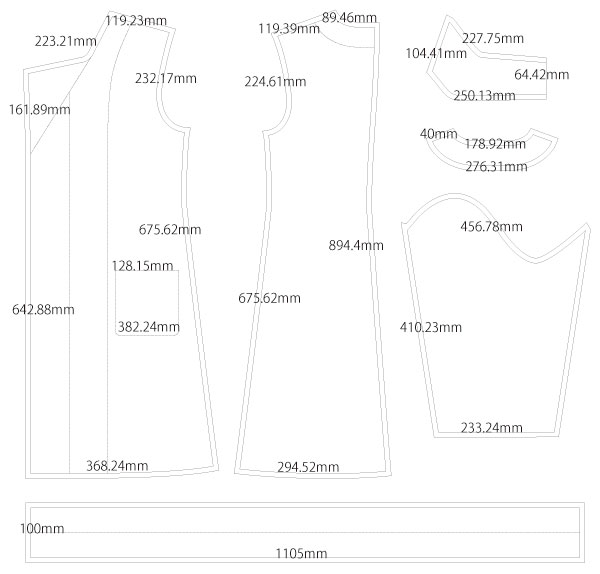
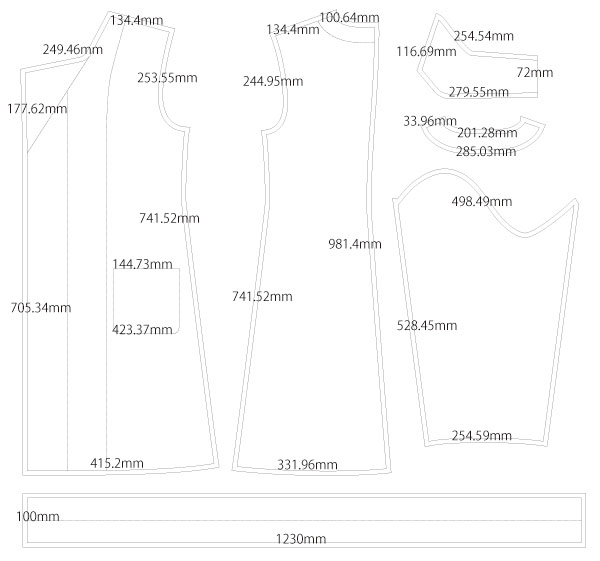
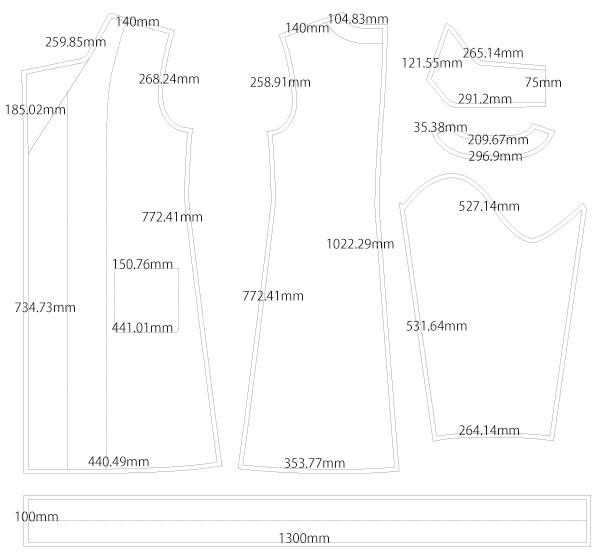
This free sewing pattern is for a trench coat with a slightly larger collar, giving it a stylish and modern look. The base design is kept simple without sleeve embellishments, allowing you to easily customize the pattern to suit your style—such as adding straps, buckles, or decorative buttons.
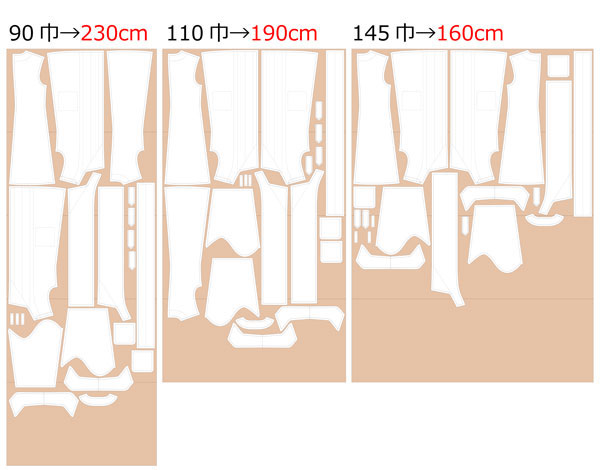
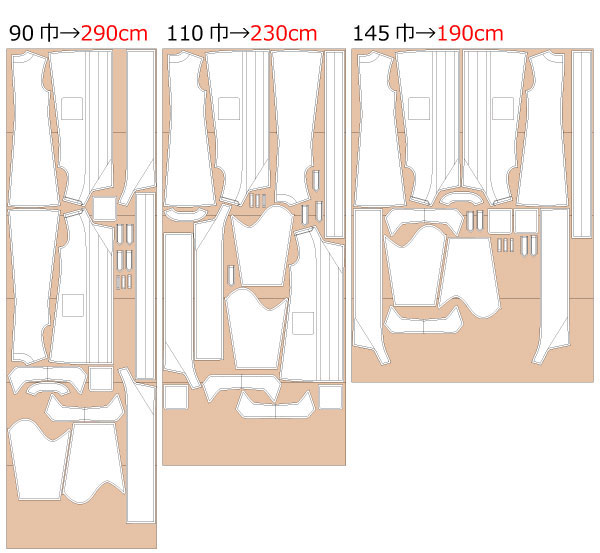
The coat is designed without a lining, making it perfect for transitional seasons like spring and autumn. If you prefer a lined version, the pattern includes facing guide lines on the bodice. Simply cut along those lines, add seam allowances, and use them to create your lining pieces.
Because this is a versatile base pattern, it can be adapted for various fashion styles, cosplay costumes, or stage outfits. You can experiment with different fabrics such as gabardine, cotton twill, or lightweight wool to achieve different looks and levels of warmth.
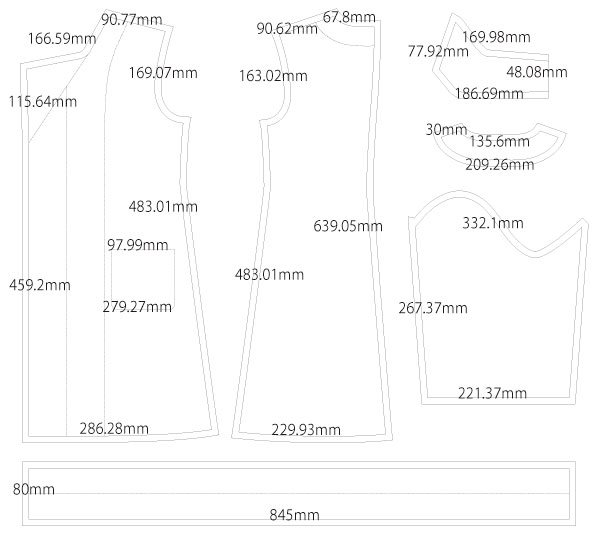
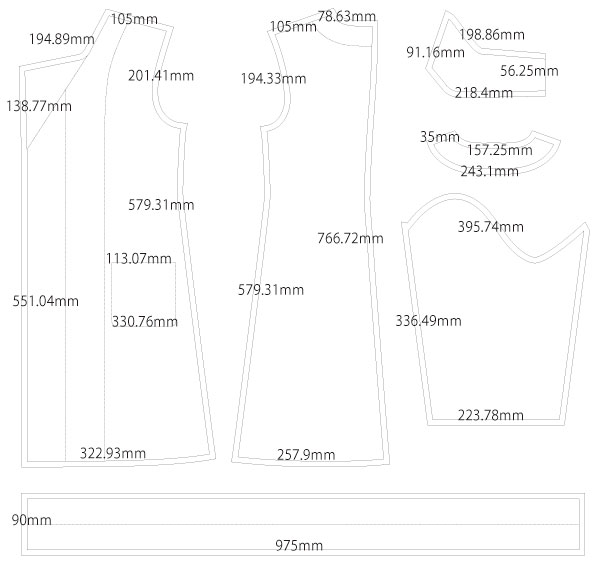
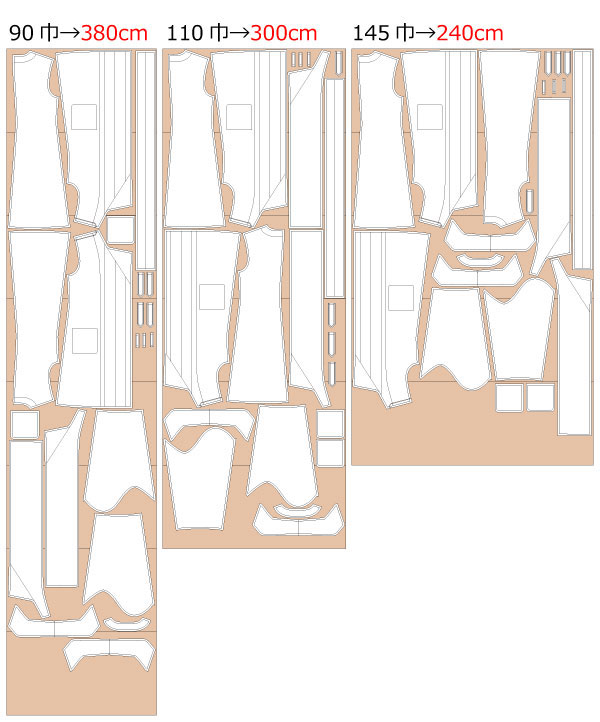
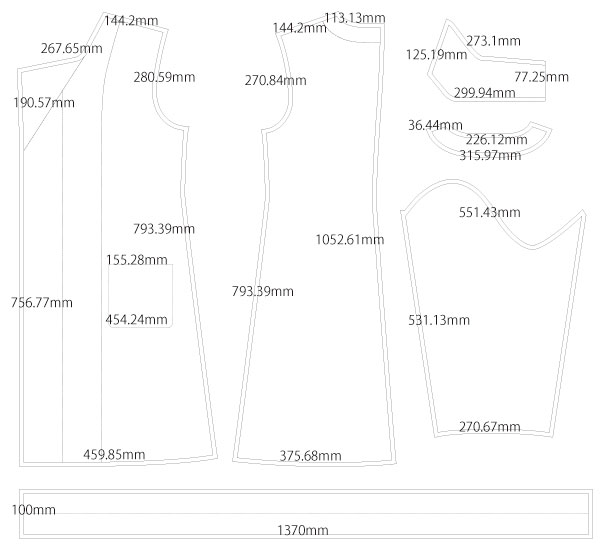
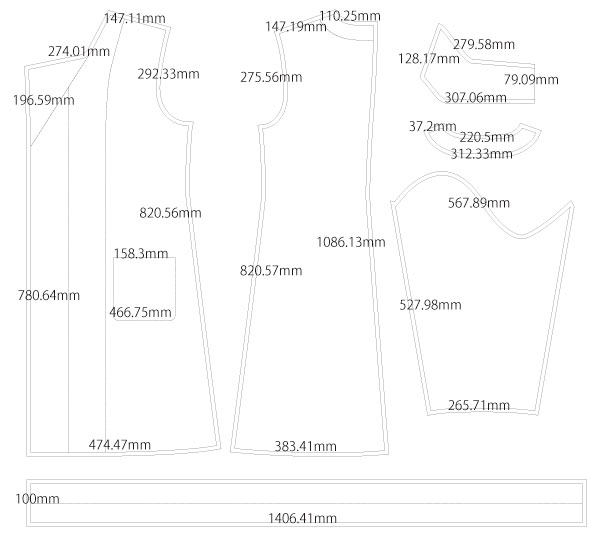
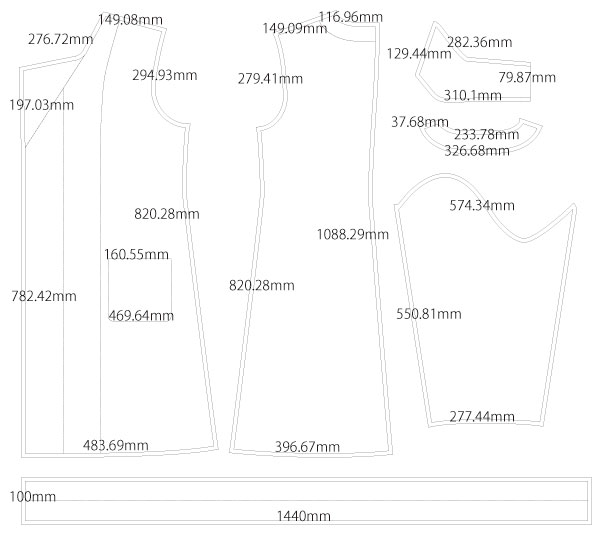
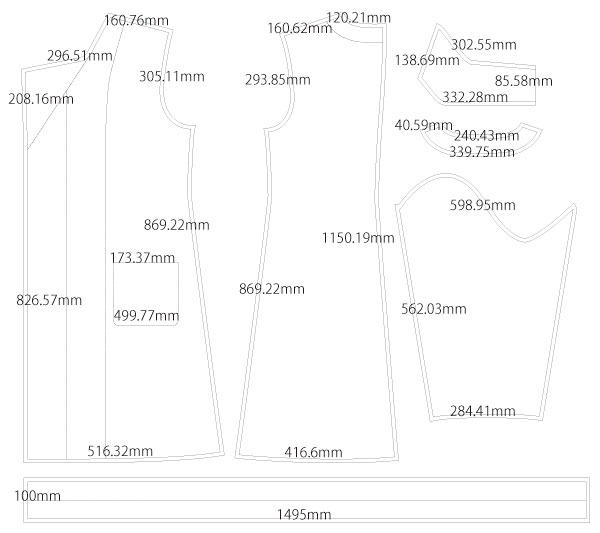
Seam allowances are already included, so you can cut and sew directly. After printing, align and tape the pages along the matching lines before cutting your fabric.


The production process is explained with translation software.
If you have any suggestions on how to write like this, please let us know at info@dr-cos.com
We operate this site with your cooperation.
(1) Make "pocket", "Shoulder loop", and "Belt threading" first.
* Make the button holes for "Shoulder loop" first.
(2) Serging the shoulders, sides, and back center of "Front Body" and "Back Body".
(3) Sew "pocket" on "Front Body".
(4) Iron fusible interlinings on the lapel, "Front body facing", "Back body facing" and "Collar" of the "Front Body".
(5) After sewing Facing together,Press seam allowances open with an iron,Serging the outside.
(6) After sewing the center of "Back Body",sew the "Belt threading".
(7) Sew the shoulders and sides of the "Body" together,Press seam allowances open with an iron,Sew the "Belt threading" and then sew the "Belt threading",Serging the hem of the "Body".
(8) Sew "Collar" to "Body" and "facing" respectively,Press seam allowances open with an iron,Stitch them together and turn inside out,Fold up the hem 0.5" and stitch.
* When sewing "facing" and "Body" together, it is better to sew the hem in an L-shape and turn it inside out.
(9) Serging the sides of "Sleeve", sew them together and press seam allowances open with an iron.
(10) After Serging the hem of "Sleeve",Fold up 0.5 inch and stitch.
(11) When sewing the "Sleeve" to the "Body", insert the "Shoulder loop" between the "Sleeve" and the "Body" and sew,Serging the armholes.
(12) Make buttonholes by sewing buttons at the button positions.
* The buttonholes will be on the right front for women, so make four buttonholes only on the right side facing the right front side.
(13) Finish by making a belt.
* Change the length of the belt according to the length you will use.
Shorten it for the metal fittings, lengthen it for tying, etc., according to your image.
![]()
Free Paper Patterns are possible because of your support.
If you use our patterns, please share them on social media and tell your friends.
Your support helps DRCOS continue to provide patterns in the future.
![]()
![]()
Children's-100
bust68.5cm waist65.5cm length64cm 14sheets of A4 size (or legal size)


Children's-4
B27in W25.8in length25.2in 14sheets of letter size

Children's-120
bust76cm waist72.5cm length76.5cm 19sheets of A4 size (or legal size)
Children's-8
B29.9in W28.5in length30.1in 19sheets of letter size
Children's-140
bust87cm waist83cm length89.5cm 23sheets of A4 size (or legal size)
Children's-10
B34.3in W32.7in length35.2in 23sheets of letter size
Ladies'-S
bust98cm waist93.5cm length98.5cm 31sheets of A4 size (or legal size)

Ladies'-S
B38.6in W36.8in length38.8in 31sheets of letter size
Ladies'-M
bust105cm waist100.5cm length102.5cm 31sheets of A4 size (or legal size)
Ladies'-M
B41.3in W39.6in length40.4in 31sheets of letter size
Ladies'-L
bust111cm waist107cm length105.5cm 32sheets of A4 size (or legal size)

Ladies'-L
B43.7in W42.1in length41.5in 32sheets of letter size
Ladies'-LL
bust115.5cm waist110.5cm length108.5cm 36sheets of A4 size (or legal size)
Ladies'-LL
B45.5in W43.5in length42.7in 36sheets of letter size
Men's-L
bust119cm waist114cm length109cm 36sheets of A4 size (or legal size)
Men's-L
B46.9in W44.9in length42.9in 36sheets of letter size
Men's-LL
bust125cm waist119.5cm length115cm 37sheets of A4 size (or legal size)
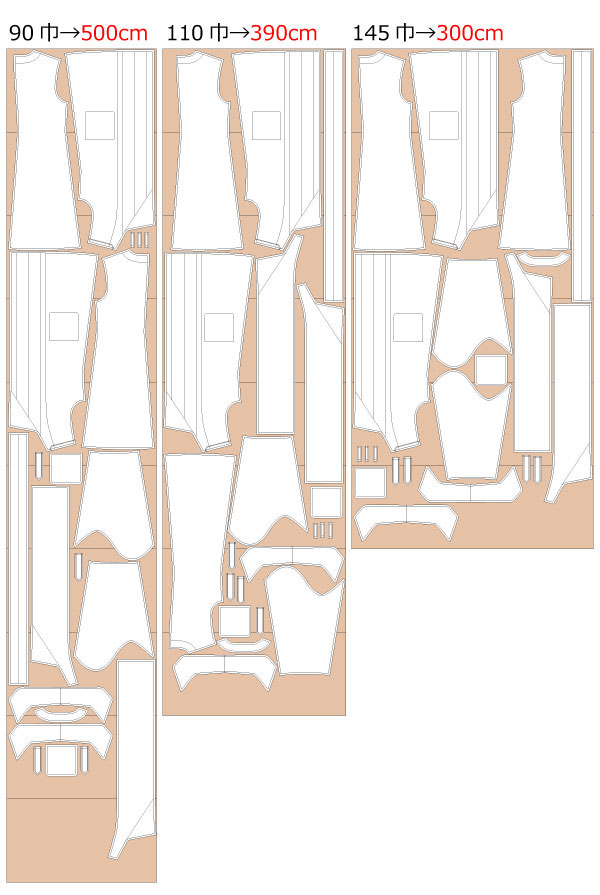
Men's-LL
B49.2in W47in length45.3in 37sheets of letter size


