


![]()
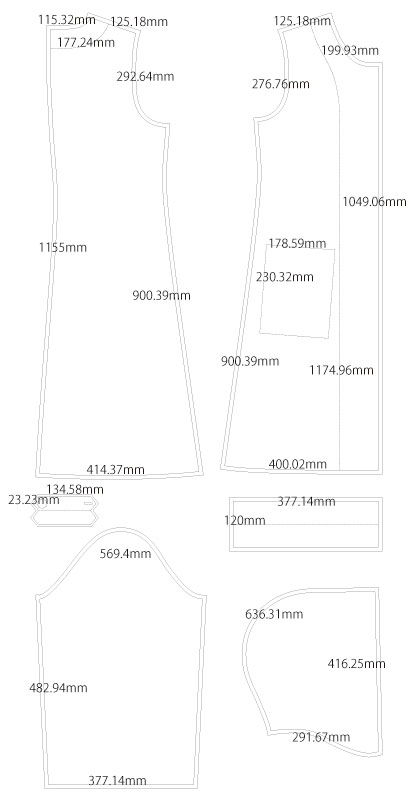
This is a free sewing pattern for a slim-fit duffle coat using toggle buttons.
Unlike the usual loose-fitting duffle coat, this design has a slightly shaped back and a gently tapered waist for a slimmer silhouette.
The armholes are made slightly smaller, making it ideal for light layering rather than heavy winter wear.
There is a back vent at the hem for ease of movement, and the toggle buttons are placed slightly higher than usual for better mobility.
While a full lining and welt pockets would enhance the design, this pattern uses simple patch pockets to keep it beginner-friendly. A facing line is included so you can draft your own lining pattern if desired.
This duffle coat is designed to be more streamlined and easier to move in than the traditional bulky style, making it suitable for everyday wear.
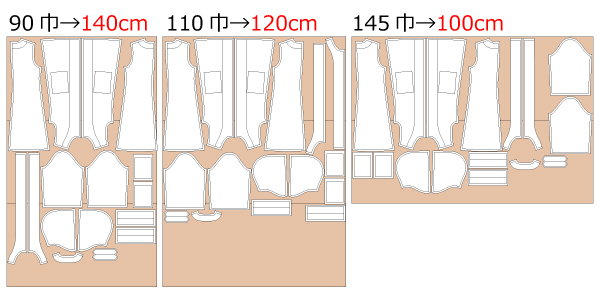
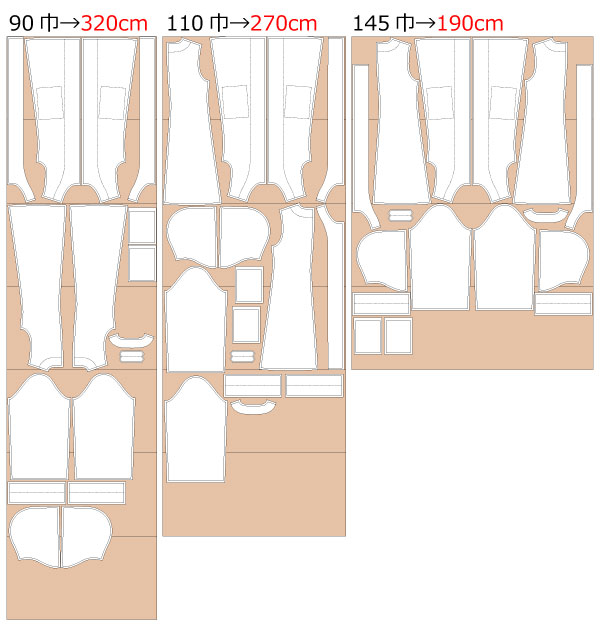
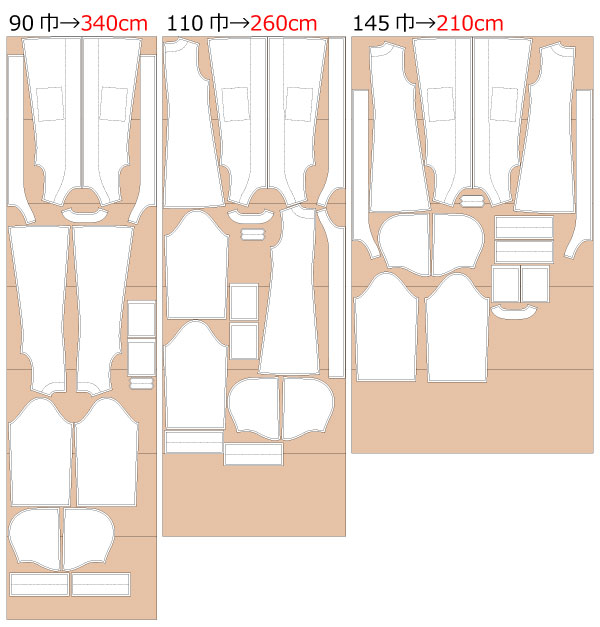
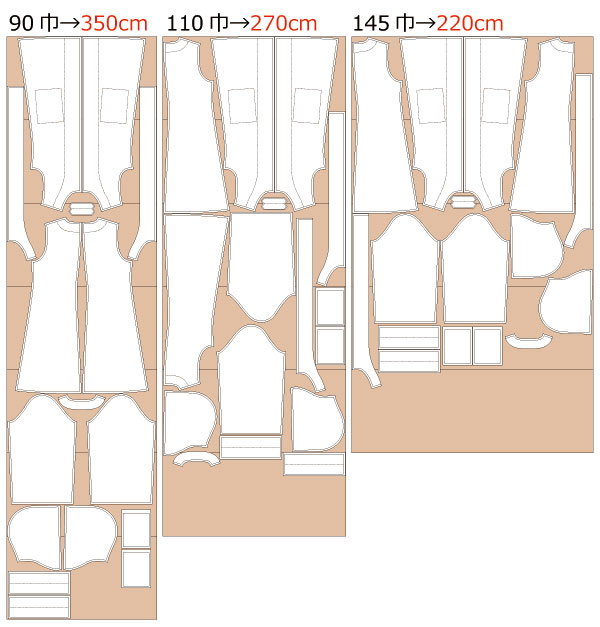
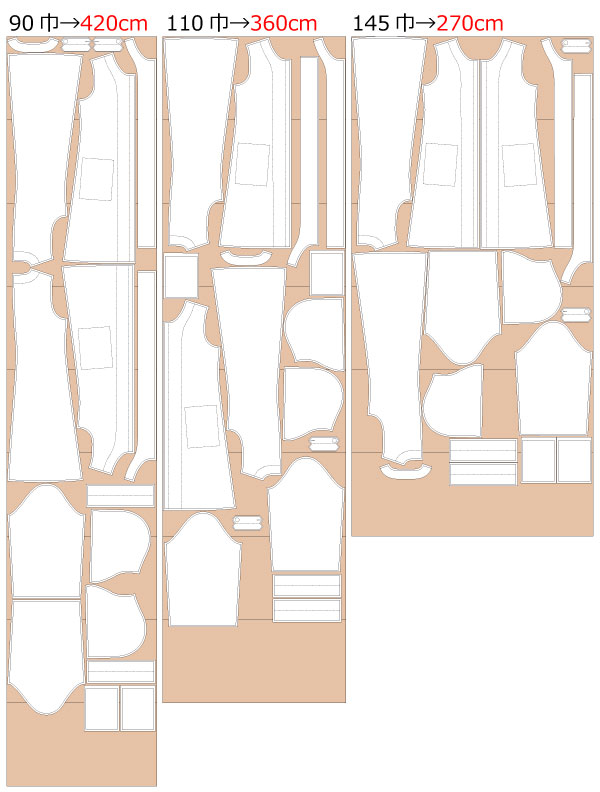
The PDF pattern includes seam allowances, so you can cut and sew it as is. After printing, align and join the pages along the guide lines before cutting out the pieces.


The production process is explained with translation software.
If you have any suggestions on how to write like this, please let us know at info@dr-cos.com
We operate this site with your cooperation.
* If it is difficult to iron on the shape, press seam allowances open and settle with stitching.
(1) Iron on fusible interlining to "Flap", "Facing" and "Cuff".
(2) Serging the mouth of the "Pocket", fold it in 1 inch, and settle it by stitching.
(3) Fold around the "Pocket" by 0.5 inches with an iron and sew it to the pocket position.
(4) Serging "Facing", press seam allowances open with an iron and Serging on the outside.
* When attaching a lining, use the facing line of the body to make a pattern for the lining.
(5) Serging the rear center of the "Hood", sew it together and press seam allowances open with an iron.
(6) Serging the front side of "Hood", fold inward 0.5" and settle with stitching.
(7) Serging the shoulders and sides of "Front Body", the shoulders, sides, and back center of "Back Body", and the sides of "Sleeve".
(8) Sew the center of "Back Body" up to the seam allowance, and press seam allowances open with an iron.
* Fold in the slit part at 0.5" and settle it with stitching.
(9) Sew the shoulders and sides of the "Front Body" and "Back Body" together and press seam allowances open.
(10) Serging the hem of "Body", fold up 0.5 inch and shape it.
(11) Sew "Facing" to "Body" while sandwiching "Hood" between "Facing".
(12) Turn "Facing" inside out, iron to settle, and stitch around the "Facing" including the hem.
* When turning "facing" over, adjust seam allowance by cutting or trimming corners and angles that are too tight.
(13) Turn "Flap" inside out, iron the shape, stitch it closed, and make buttonholes.
(14) Stitch "Flap" on the right front side of "Body" with a dummy button, and attach a button on the left front side of "Body" at the button position.
(15) Attach duffle buttons at the duffle button attachment positions.
* Adjust the duffle button attachment position according to the duffle button to be used.
(16) Sew "Sleeve" together and press seam allowances open with an iron.
(17) Sew the "Cuff" to the "Sleeve" so that it can be inserted between the "Sleeve" and the "Cuff".
(18) Sew the "Sleeve" to the "Body".
![]()
Free Paper Patterns are possible because of your support.
If you use our patterns, please share them on social media and tell your friends.
Your support helps DRCOS continue to provide patterns in the future.
![]()
![]()
Children's-100
bust64cm waist61cm length63.5cm 12sheets of A4 size (or legal size)

Children's-4
bust25.1in waist24in lenght25in 12sheets of letter size

Children's-120
bust71cm waist69cm length73.5cm 15sheets of A4 size (or legal size)
Children's-8
bust27.9in waist27.1in lenght28.9in 15sheets of letter size
Children's-140
bust81cm waist78.5cm length83cm 20sheets of A4 size (or legal size)


Children's-10
bust31.8in waist30.9in lenght32.6in 20sheets of letter size
Ladies'-S
bust91.5cm waist87cm length95.5cm 26sheets of A4 size (or legal size)
Ladies'-S
bust36in waist34.2in lenght37.5in 25sheets of letter size
Ladies'-M
bust98.5cm waist94.5cm length98cm 26sheets of A4 size (or legal size)
Ladies'-M
bust38.7in waist37.2in lenght38.5in 27sheets of letter size
Ladies'-L
bust107cm waist103cm length101cm 26sheets of A4 size (or legal size)
Ladies'-L
bust42.1in waist37.2in lenght40.6in 28sheets of letter size
Ladies'-LL
bust112cm waist107cm length108.5cm 29sheets of A4 size (or legal size)

Ladies'-LL
bust44.1in waist42.1in lenght42.7in 31sheets of letter size
Men's-L
bust116.5cm waist111cm length115.5cm 34sheets of A4 size (or legal size)
Men's-L
bust45.9in waist43.7in lenght45.5in 34sheets of letter size
Men's-LL
bust121cm waist115.5cm length123.5cm 35sheets of A4 size (or legal size)
Men's-LL
bust47.6in waist45.5in lenght48.6in 36sheets of letter size


