


![]()
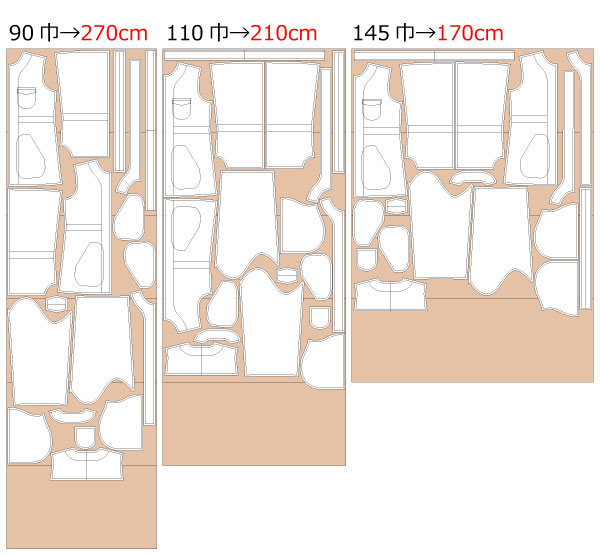
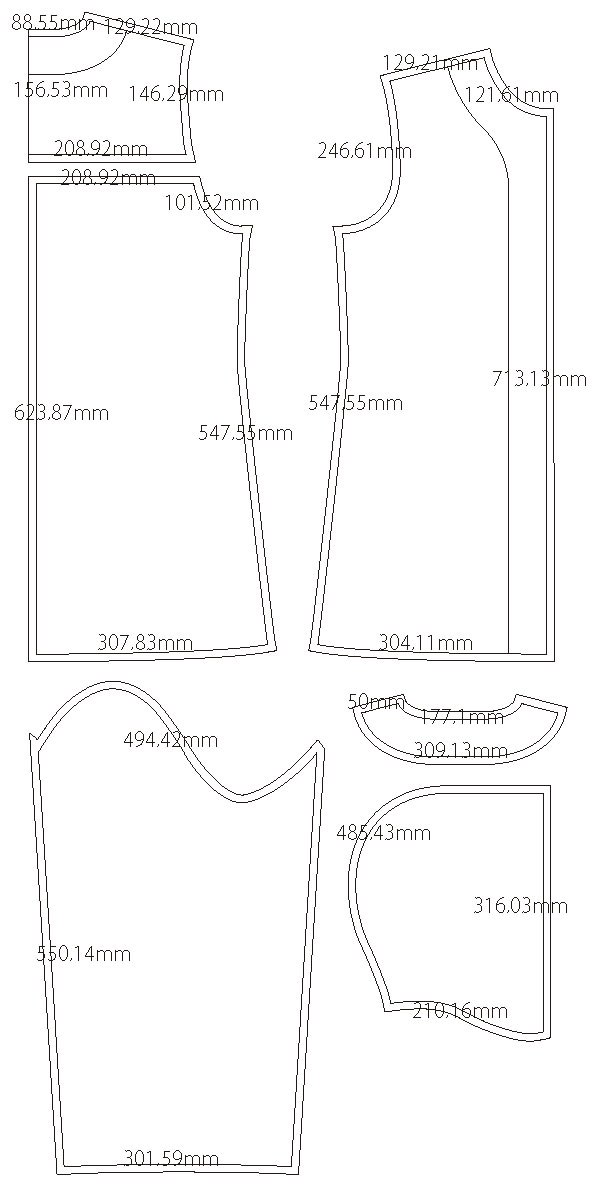
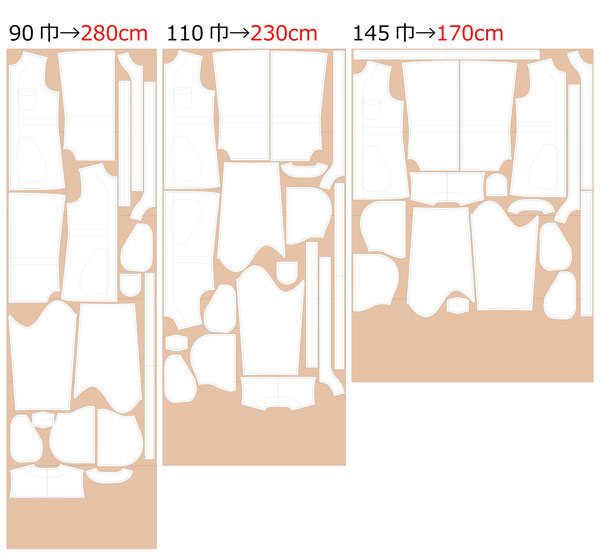
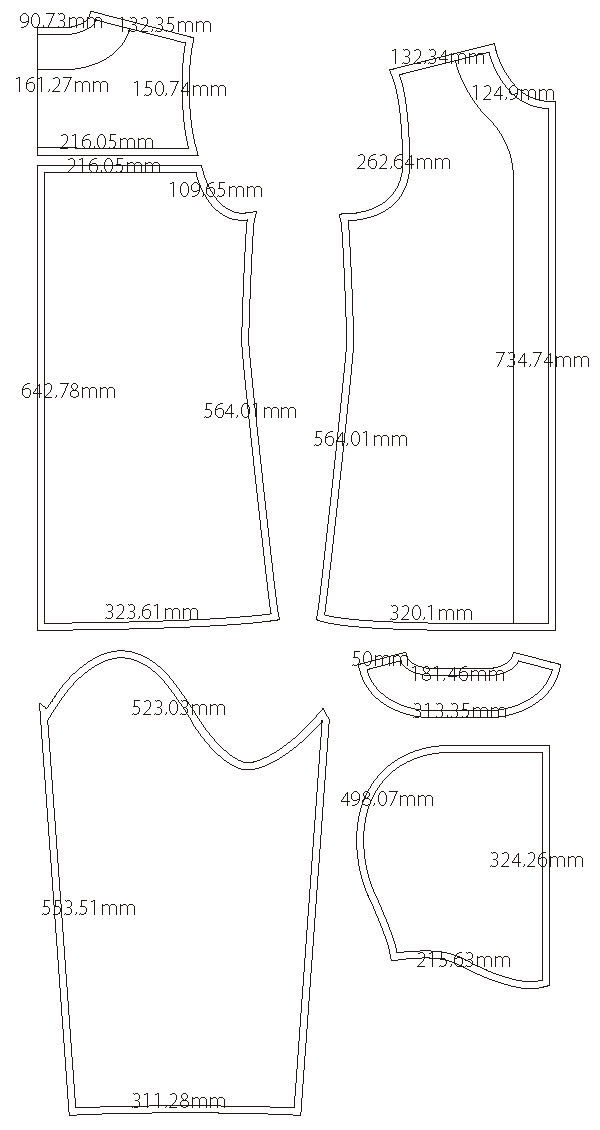
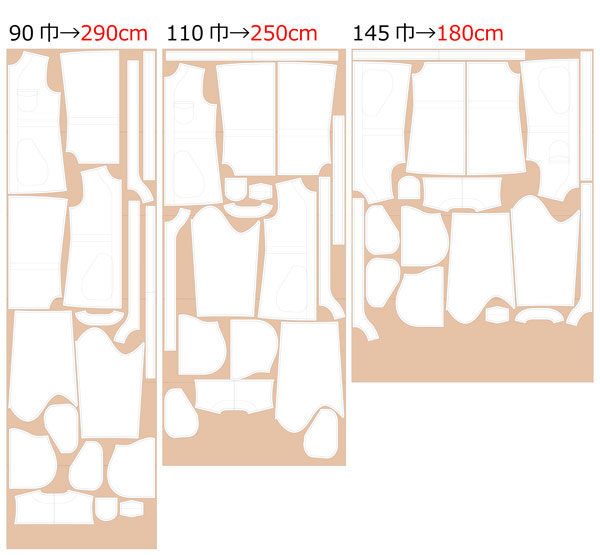
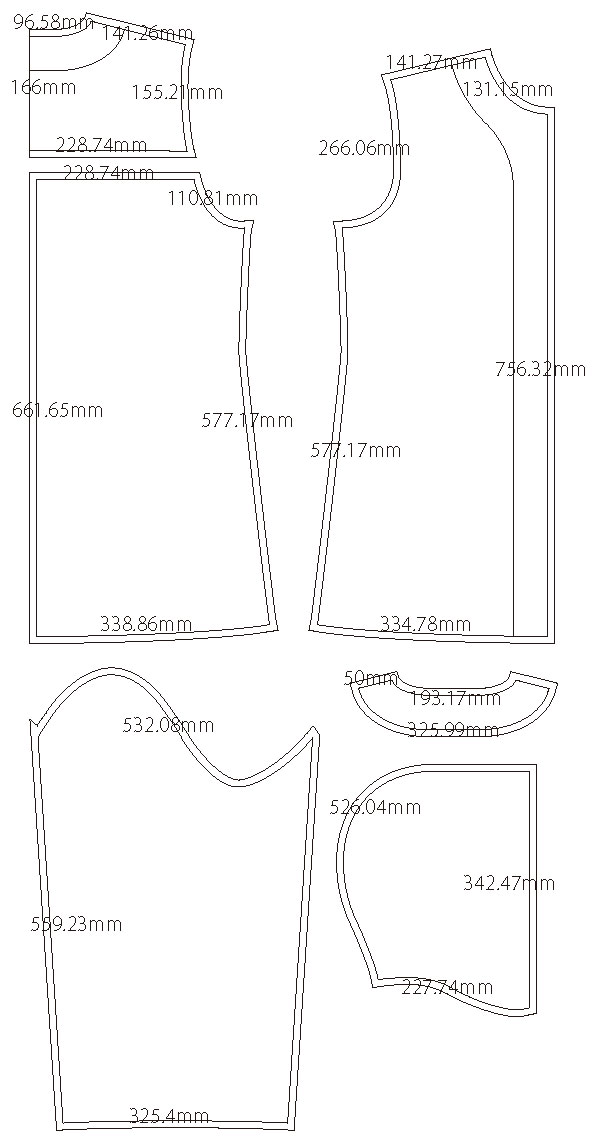
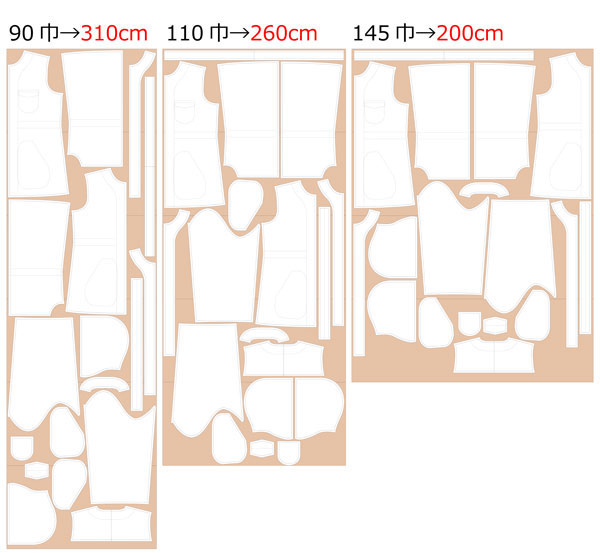
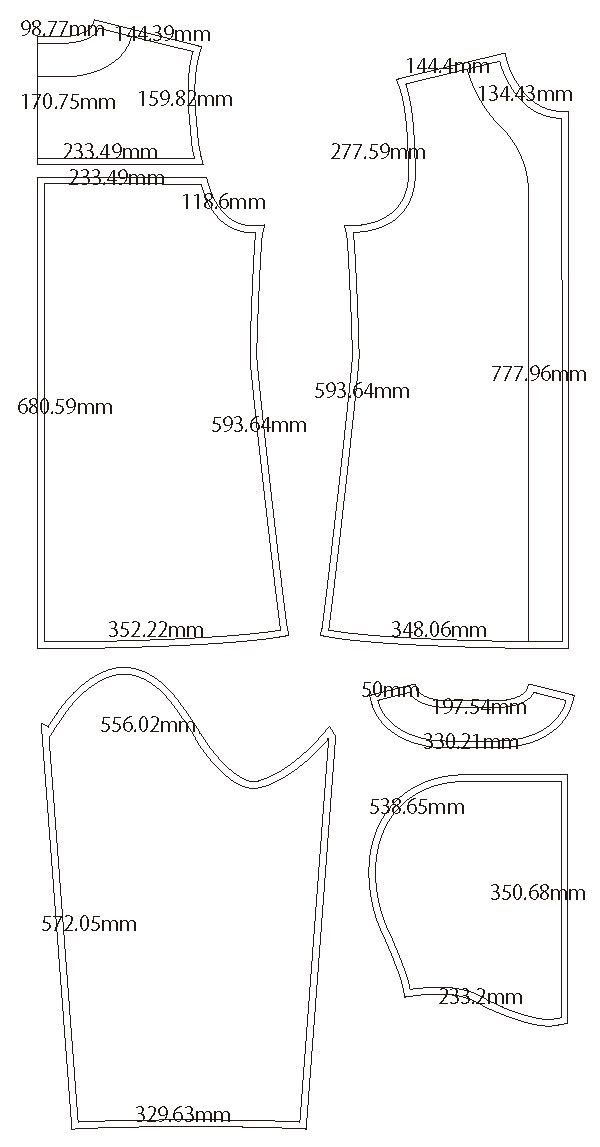
This is a free sewing pattern and tutorial for making a swagger coat (mod coat) with a drawstring waist. The back is designed with an upper and lower panel, creating a stylish layered look.
The hood can be made with or without fur trim, depending on your preference. Since the waist can be adjusted with the drawstring, there are no darts, and the silhouette remains relaxed and comfortable.
We recommend using lightweight cotton or fabrics that naturally wrinkle for a casual, textured finish. The pattern does not include a lining, but facing lines are marked so you can easily draft your own lining pieces if desired. Adding a lining will make it warmer for winter, while keeping it unlined makes it perfect for spring and autumn wear.
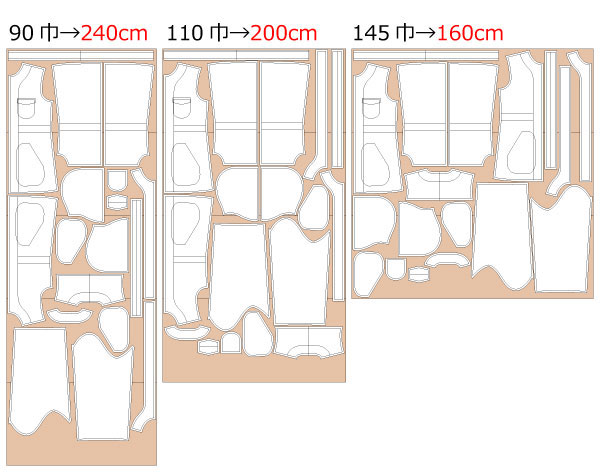
The design features a front placket with an open zipper, which may be a little challenging for beginners, but it results in a cute and functional coat. The pattern already includes seam allowances—just print, assemble, and cut to start sewing.


The production process is explained with translation software.
If you have any suggestions on how to write like this, please let us know at info@dr-cos.com
We operate this site with your cooperation.
(1) Paste fusible interlinings on "Front body facing" and "Back body facing",After sewing them together,Press seam allowances open with an iron,Serging on the outside.
(2) Serging the pocket opening,(2) Fold in the pocket opening and sew it closed with stitches,Fold the outside in at 0.5" to form a shape,Attach all the pockets in place.
(3) Bag stitch the "flap",Turn the "flap" over and stitch around the perimeter to settle it,Attach the "flap" to the attachment points.
(4) Attach eyelet (or buttonhole) in eyelet position.
(5) Serging the sides of the "Drawstring",Fold both sides 0.5" with an iron to make a shape.
(6) Serging the outside of the "hood" and sewing it together,Press seam allowances open with an iron,Serging the front side, iron folded and stitched.
(7) Serging the shoulders and sides of the "front body", the shoulders of the "back body top part" and the sides of the "back body lower part.
(8) Stitch "Back body lower part" at the back center,Serging at the rear center,Iron to one side.
(9) Stitch "Back body top part" and "Back body lower part" together,Serging,Iron the seam allowance downwards.
(10) Sew the shoulders and sides of the "Front Body" and "Back Body" together,Press seam allowances open with an iron,Attach the "Drawstring" at the position where it is to be attached.
(11) Fold in "facing" and "Body" front side (zipper part) first by 0.5 inch.
(12) With the front side of the "facing" and "body" folded in,Put the "hood" between the "facing" and the "Body",Sew around the neck and turn inside out.
(13) Attach the open zipper by sandwiching it between "facing" and "body" (sandwich "fly extention" together on the right front).
(14) Serging the hem, fold up 0.5" and tap it with a sewing machine.
(15) Serging the sides and hem of the "Sleeve",Sew the sides together,Press seam allowances open with an iron,Fold the hem of the "Sleeve" back 0.5 inch and stitch.
(16) Sew the "Sleeve" to the "Body",Serging the armhole part.
![]()
Free Paper Patterns are possible because of your support.
If you use our patterns, please share them on social media and tell your friends.
Your support helps DRCOS continue to provide patterns in the future.
![]()
![]()
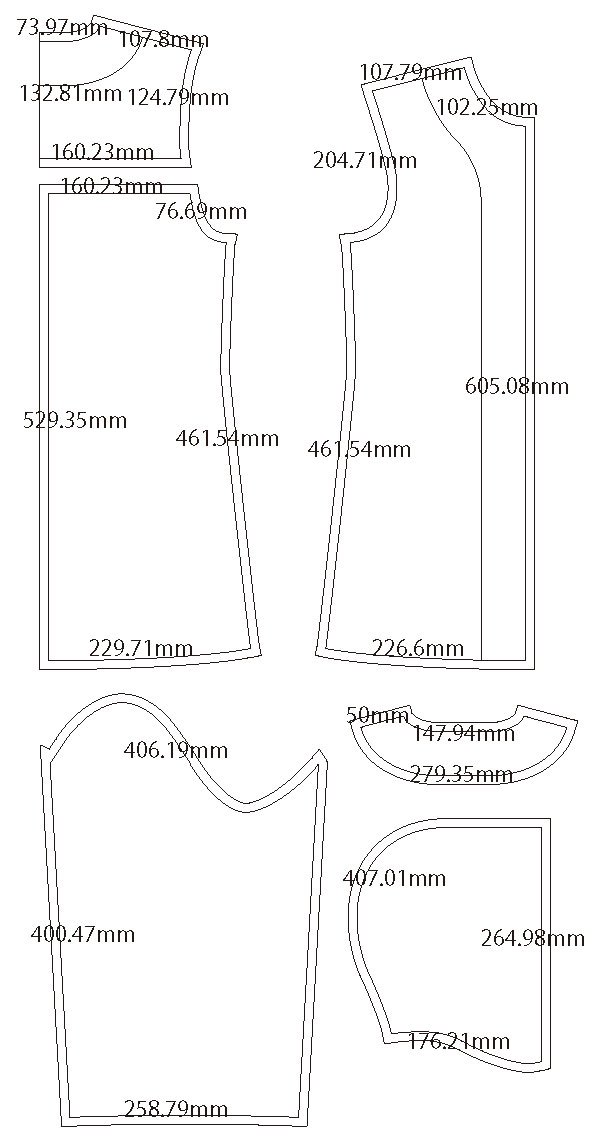
Children's-100
bust66cm length46.5cm 10sheets of A4 size (or legal size)


Children's-4
bust26in length18.3in 10sheets of letter size

Children's-120
bust75.5cm length56.5cm 13sheets of A4 size (or legal size)
Children's-8
bust29.7in length22.2in 13sheets of letter size
Children's-140
bust80cm length66cm 17sheets of A4 size (or legal size)
Children's-10
bust31.5in length26in 17sheets of letter size
Ladies'-S
bust93cm length73.5cm 20sheets of A4 size (or legal size)

Ladies'-S
bust36.6in length28.9in 20sheets of letter size
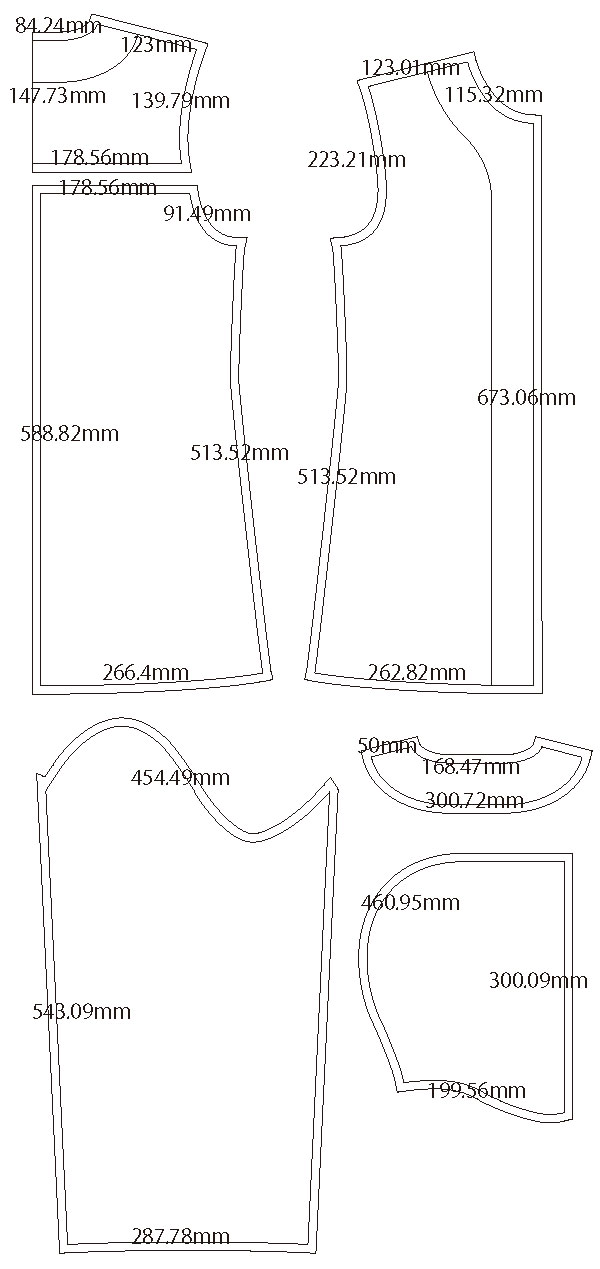
Ladies'-M
bust100cm 21sheets of A4 size (or legal size)
Ladies'-M
bust39.4in length29.7in 21sheets of letter size
Ladies'-L
bust109cm length78cm 23sheets of A4 size (or legal size)
Ladies'-L
bust42.9in length30.7in 23sheets of letter size
Ladies'-LL
bust115cm length80.5cm 24sheets of A4 size (or legal size)
Ladies'-LL
bust45.3in length31.7in 24sheets of letter size
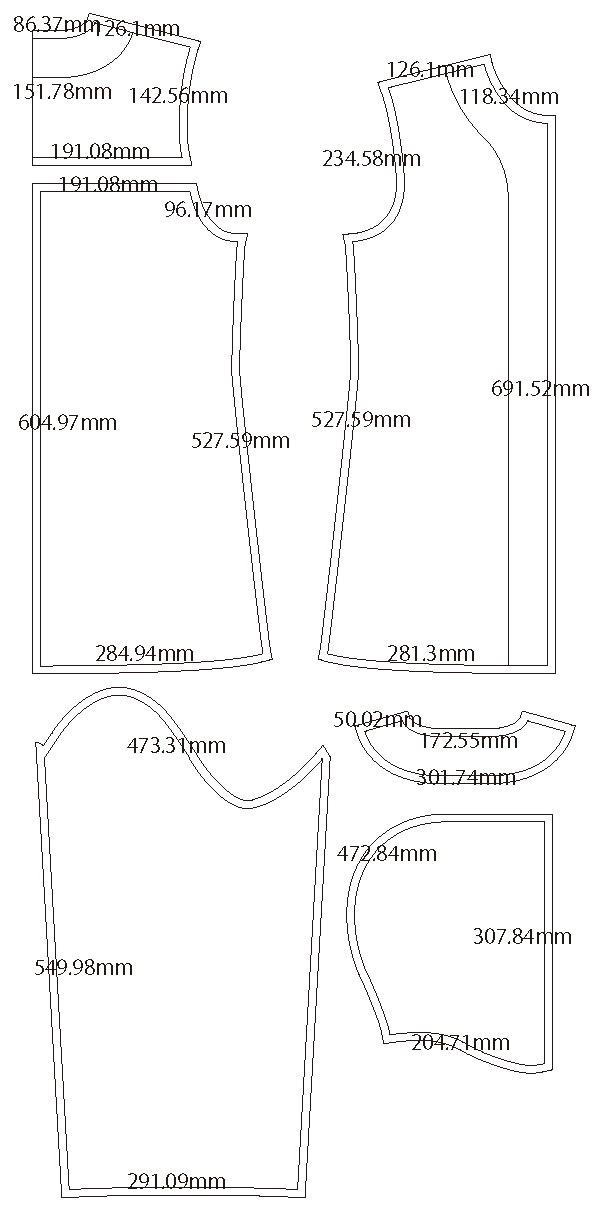
Men's-L
bust120cm length82.5cm 25sheets of A4 size (or legal size)
Men's-L
bust47.2in length32.5in 25sheets of letter size
Men's-LL
bust125cm length85cm 26sheets of A4 size (or legal size)
Men's-LL
bust49.2in length33.5in 26sheets of letter size


