


![]()
Simple instructions are included in the paper pattern.
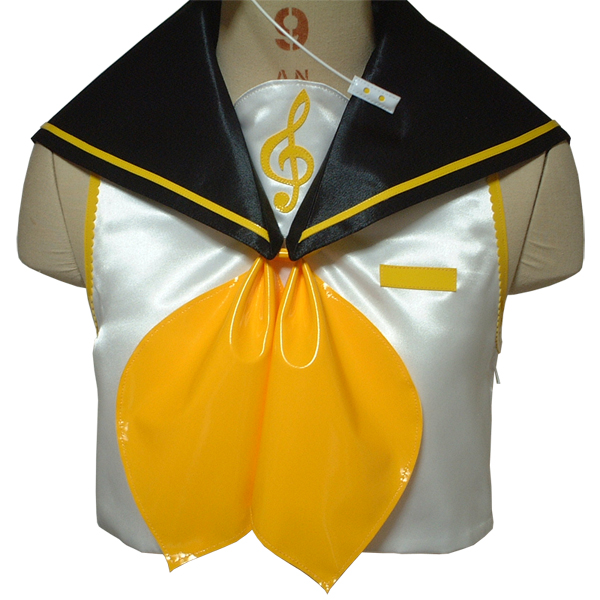
This is a short-length sailor blouse pattern with a flared silhouette toward the hem.
The garment is worn by opening and closing the open zipper at the left underarm.
The collar part of the pattern includes a stand collar, giving it a slightly three-dimensional shape.
This product includes only the chest panel and collar blouse pattern shown in the photo.
After printing, align the matching lines, tape them together, and cut out the pattern.
* Seam allowances are already included in the pattern, so you can use it as is.

(1) Fold the armhole and the left side seam of the "Front bodice" and "Back bodice" (for the open zipper) inward by 1 cm (0.5 in) in advance, and shape with an iron.
* Make small cuts (notches) at the armhole so the fabric lays flat.
* If finishing the armhole with bias tape, cut off 1 cm (0.5 in) of the seam allowance.
(2) Apply fusible interlining to the "Collar" and "Collar stand", and sew them together.
* Sew the "Collar" with interlining to the "Collar stand" without interlining.
* Sew the "Collar" without interlining to the "Collar stand" with interlining.
* Make small cuts (notches) at tight curves of the sewn part so the fabric lays flat.
(3) Layer the "Collar", sew around the edges, turn it right side out, and shape with an iron.
* Before turning, make small cuts (notches) at tight curves so the fabric lays flat.
* If the shape does not stay with an iron, use topstitching.
* It is easier if you sew the part that will be inserted into the "Body" in advance.
(4) Sew the shoulders and the right side of the "Body", and press the seam allowance open with an iron.
(5) Fold the neckline of the "Body" inward by 1 cm (0.5 in), insert the "Collar stand", and sew from the front side.
(6) Sew the hem, and shape with an iron.
(7) Align the armhole parts, and secure them with topstitching from the front side.
(8) Attach the open zipper to the lower part of the left side of the "Body".
(9) Sew the "Bib" with a bagged finish (leave a small opening), turn it right side out, and shape with an iron.
(10) Attach the snap button rings to the required positions.
If you cannot see the SHOP due to 403 error
Price: ¥700 (JPY)
Approx. USD — / EUR — (for reference)
![]()
![]()
Ladies' S size
Bust 80.5 cm length 36.5 cm A4 paper size 7 sheets


Ladies' S size
Bust 31.7 in length 14.4 in letter paper size 7 sheets

Ladies' M size
Bust 86.5 cm length 38.5 cm A4 paper size 7 sheets

Ladies' M size
Bust 34.1 in length 15.2 in letter paper size 7 sheets
Ladies' L size
Bust 93.5 cm length 41.5 cm A4 paper size 8 sheets

Ladies' L size
Bust 36.8 in length 16.3 in letter paper size 8 sheets


