


![]()
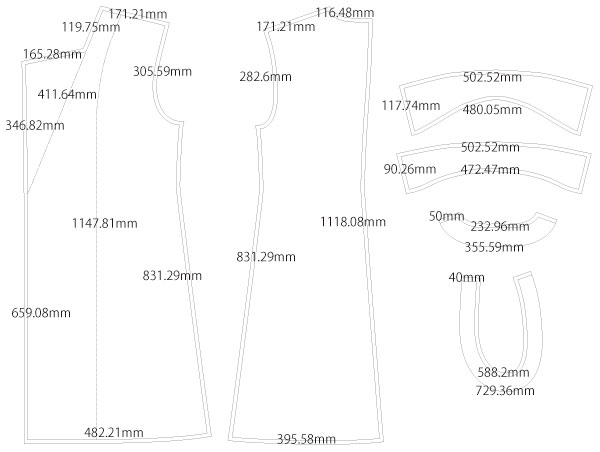
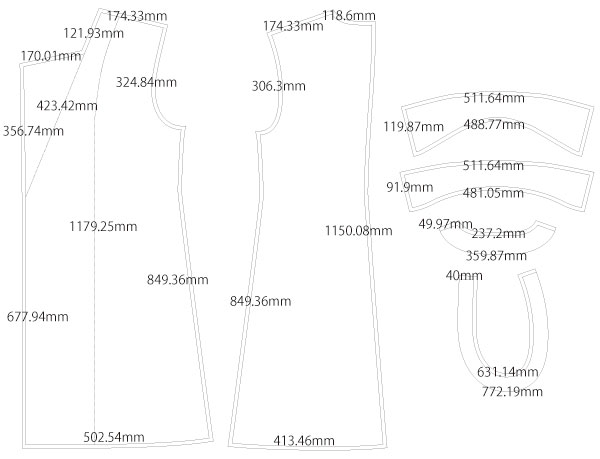
This is a free sewing pattern and tutorial for a sleeveless coat, with seam allowances (S/A) included for beginners.
Designed for spring and autumn wear, this coat features slightly extended shoulder width to balance the absence of sleeves. The armholes are slightly smaller than those of a standard coat for a neater fit.
The collar is made in two parts—a stand collar on the upper section and lapels on the lower section—secured with a simple facing construction, making it approachable even for beginners.
Note: In men's and women's versions, the front overlap is reversed, so the button placement, buttonhole position, and decorative button details will differ.
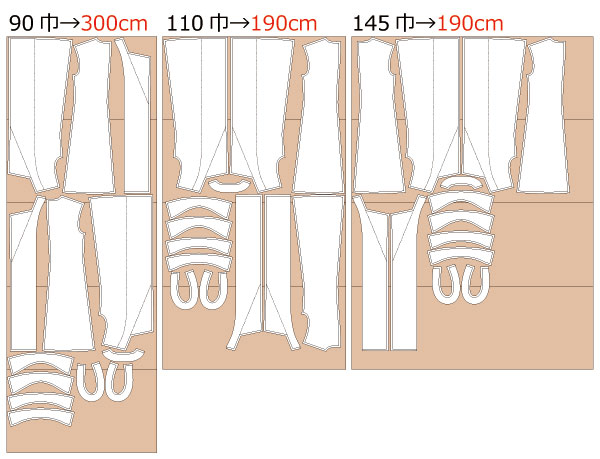
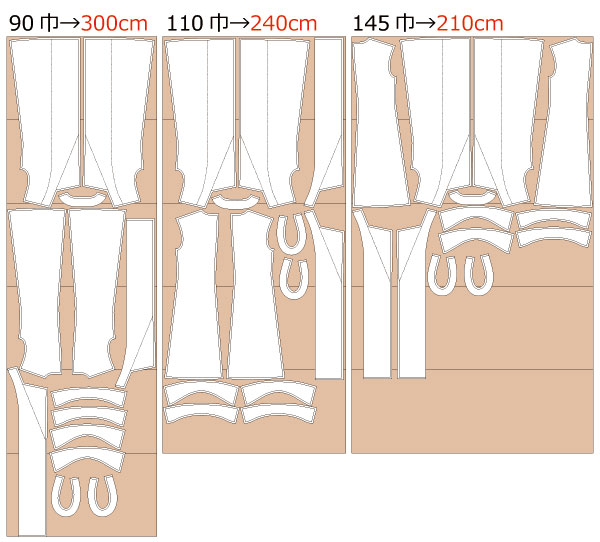
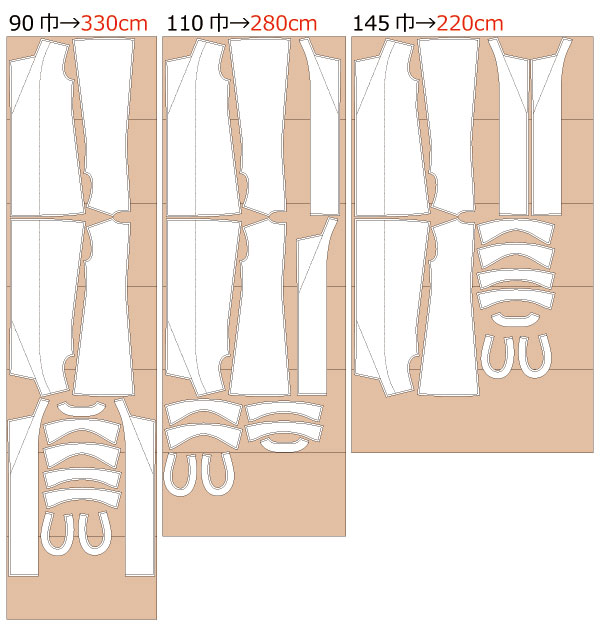
For best results, use a slightly lighter-weight fabric as recommended in the “Required Materials” section.
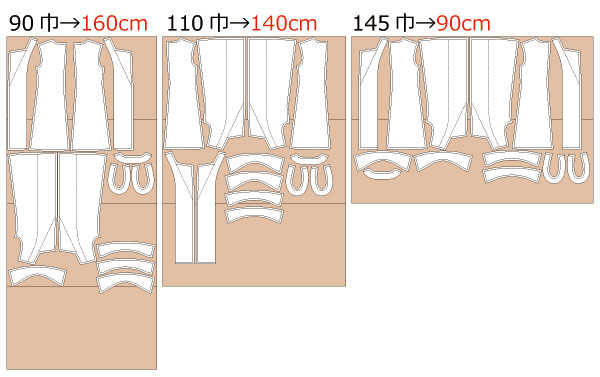
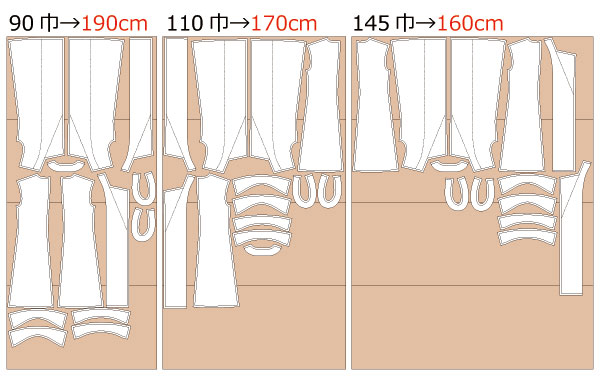
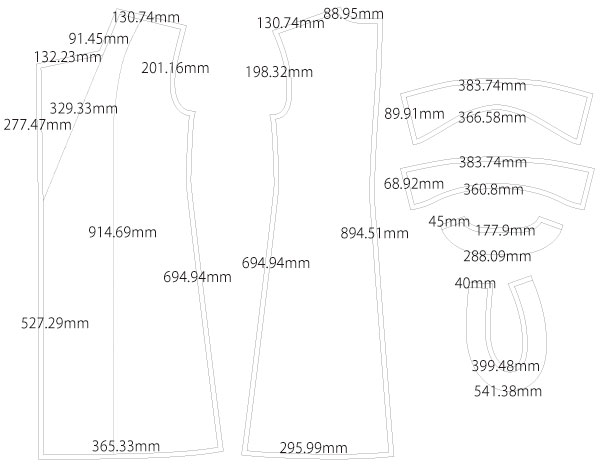
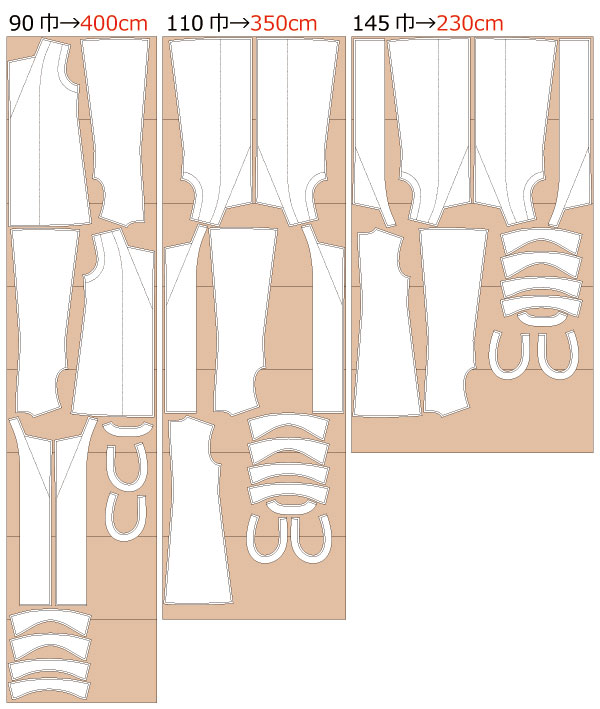
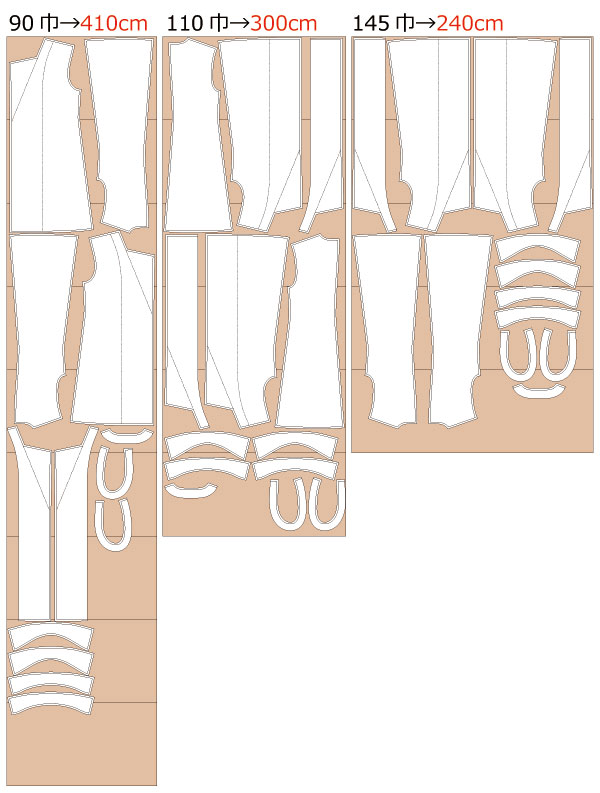
After printing, align the pages along the guide lines, cut along the edges, and the pattern is ready to use.

The production process is explained with translation software.
If you have any suggestions on how to write like this, please let us know at info@dr-cos.com
We operate this site with your cooperation.
* Pockets are not attached, please add them if necessary.
(1) Serging the shoulder, side and back center of "Front Body" and "Back Body".
(2) Make buttonholes.
* The button holes will be on the right front for women, so make three button holes only on the right side facing the right front side.
(3) Iron fusible interlining on the lapel of "Front Body", "Front body facing", "Back body facing", "Collar", "Collar stand" and "Armhole facing".
(4) Sew "Front body facing" and "Back body facing",Press seam allowances open with an iron,Serging on the outside.
(5) Sew "Armhole facing" in a loop,press seam allowances open with an iron,Serging on the outside.
(6) Sew the center of "Back Body" together and press seam allowances open with an iron.
(7) Sew the shoulders and sides of the "Front Body" and "Back Body" together,Press seam allowances open,Serging the hem.
(8) Sew "Collar" together,Turn "Collar" inside out and iron to shape.
* Trim the corners of the seam allowance for a clean look when turning the garment over.
(9) Sew both sides of the "Collar stand",Insert the "Collar" inside the "Collar stand" and sew it in place,Turn the "Collar stand" inside out and iron it into shape.
* Cut off the seam allowance where it will be thicker when turning inside out.
(10) Sew the "Collar stand" between "Body" and "facing",Fold up the hem and sew it with a sewing machine.
* When sewing "Body" and "facing" together, it is better to sew the hem in an L-shape and turn it inside out.
(11) Fold the lapel part with an iron to give it a shape.
(12) Sew "Armhole facing" on the armhole and iron it into shape.
(13) Sew the buttons at the button position and the button decoration position.
* Be careful not to mistake the position of the buttonholes and the decorative buttons, as they will be double-buttoned.
![]()
Free Paper Patterns are possible because of your support.
If you use our patterns, please share them on social media and tell your friends.
Your support helps DRCOS continue to provide patterns in the future.
![]()
![]()
Children's-100
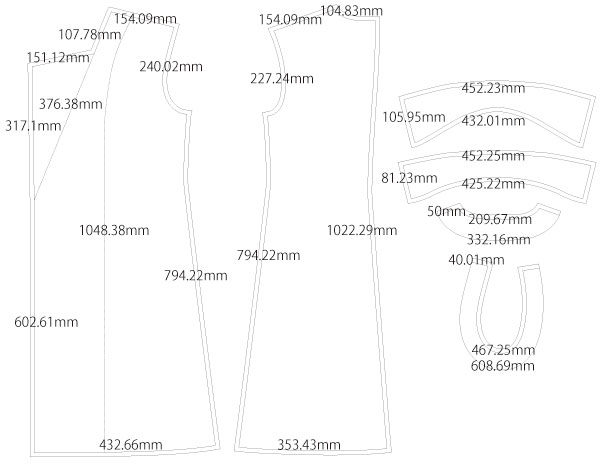
shoulder width32cm bust68cm length63cm 12sheets of A4 size (or legal size)

Children's-4
shoulder width12.3in bust26.8in length24.8in 12sheets of letter size

Children's-120
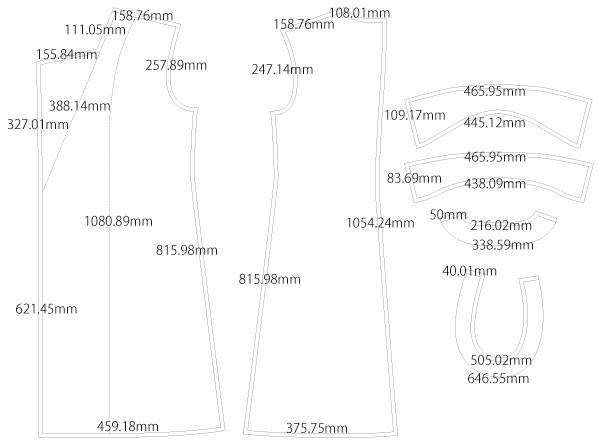
shoulder width37.5cm bust76cm length77cm 14sheets of A4 size (or legal size)
Children's-8
shoulder width14.8in bust29.9in length30.3in 16sheets of letter size
Children's-140
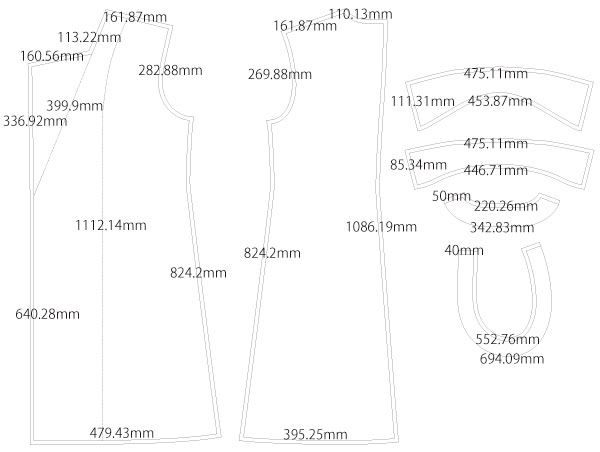
shoulder width42cm bust87cm length90cm 18sheets of A4 size (or legal size)
Children's-10
shoulder width16.5in bust34.3in length35.4in 19sheets of letter size
Ladies'-S
shoulder width48cm bust98cm length97.5cm 22sheets of A4 size (or legal size)

Ladies'-S
shoulder width18.9in bust38.6in length38.4in 23sheets of letter size
Ladies'-M
shoulder width49.5cm bust105.5cm length102.5cm 25sheets of A4 size (or legal size)
Ladies'-M
shoulder width19.5in bust41.5in length40.4in 26sheets of letter size
Ladies'-L
shoulder width51cm bust114cm length105.5cm 25sheets of A4 size (or legal size)

Ladies'-L
shoulder width20.1in bust44.9in length41.5in 26sheets of letter size
Ladies'-LL
shoulder width52cm bust120cm length109cm 29sheets of A4 size (or legal size)
Ladies'-LL
shoulder width20.5in bust47.2in length42.9in 28sheets of letter size
Men's-L
shoulder width55cm bust119cm length112cm 31sheets of A4 size (or legal size)
Men's-L
shoulder width21.7in bust46.9in length44.1in 29sheets of letter size
Men's-LL
shoulder width56cm bust125cm length115.5cm 31sheets of A4 size (or legal size)

Men's-LL
shoulder width22in bust49.2in length45.5in 31sheets of letter size


