


![]()
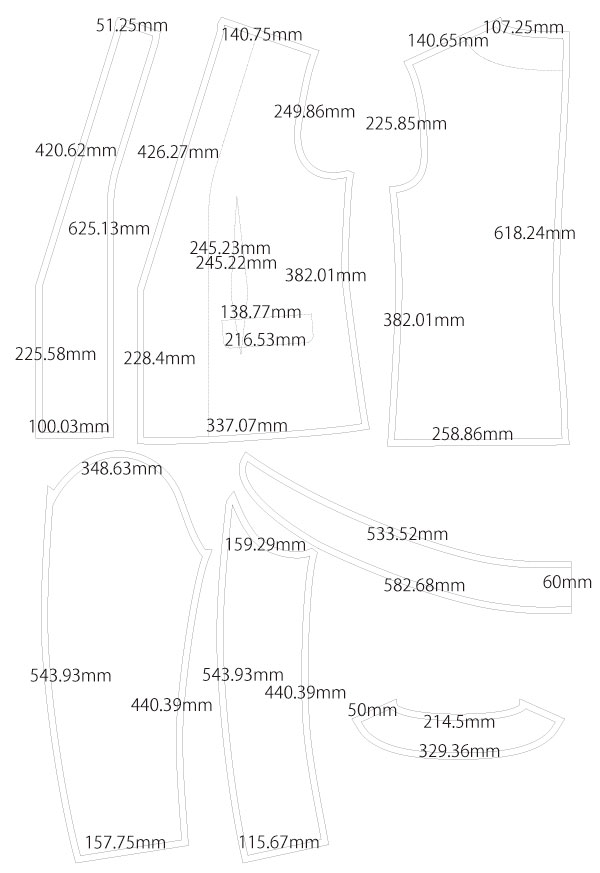
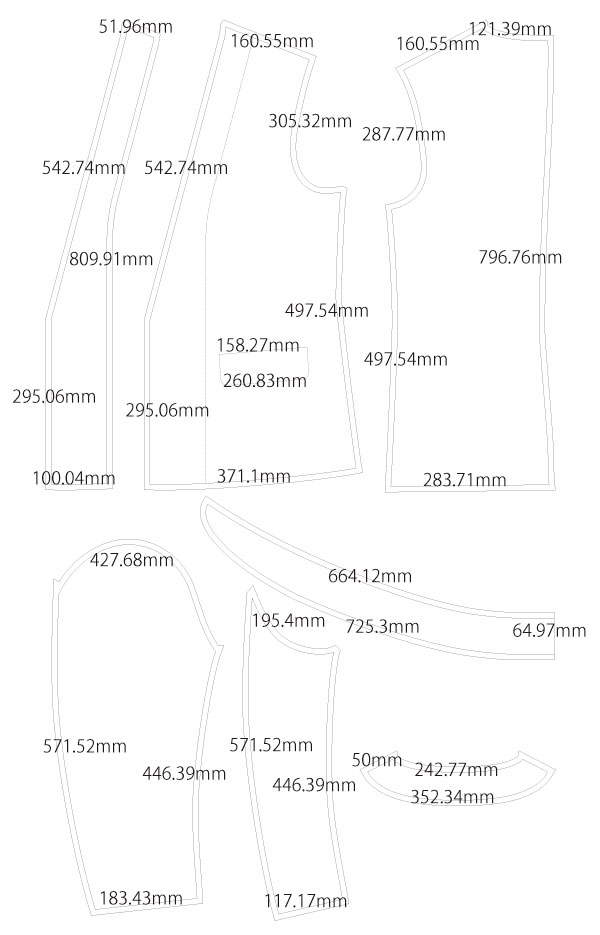
This is a sewing pattern for a shawl collar jacket with a simple construction, where the shawl collar is sewn into the facing.
Unlike a tailored collar, this design does not require advanced tailoring techniques, making it suitable for beginners.
The pattern uses a simplified structure with decorative dummy flap pockets and no lining.
If you want to add a lining, use the facing lines as a guide to create your own lining pattern.
For a looser and more relaxed fit, you can remove the front darts to change the silhouette.
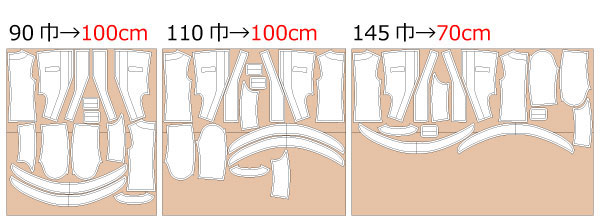
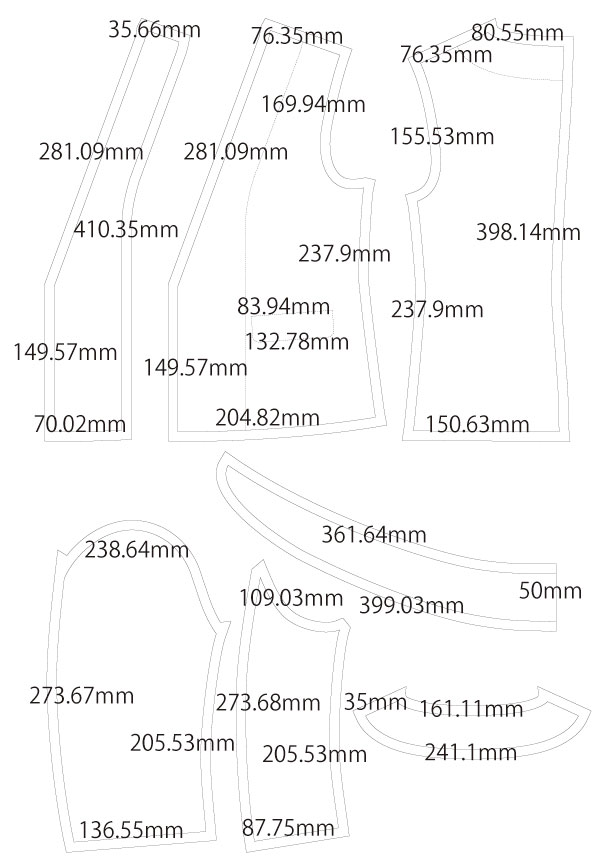
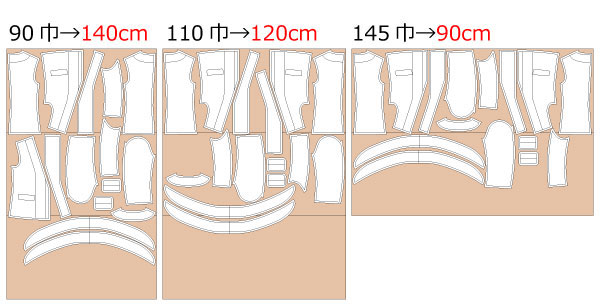
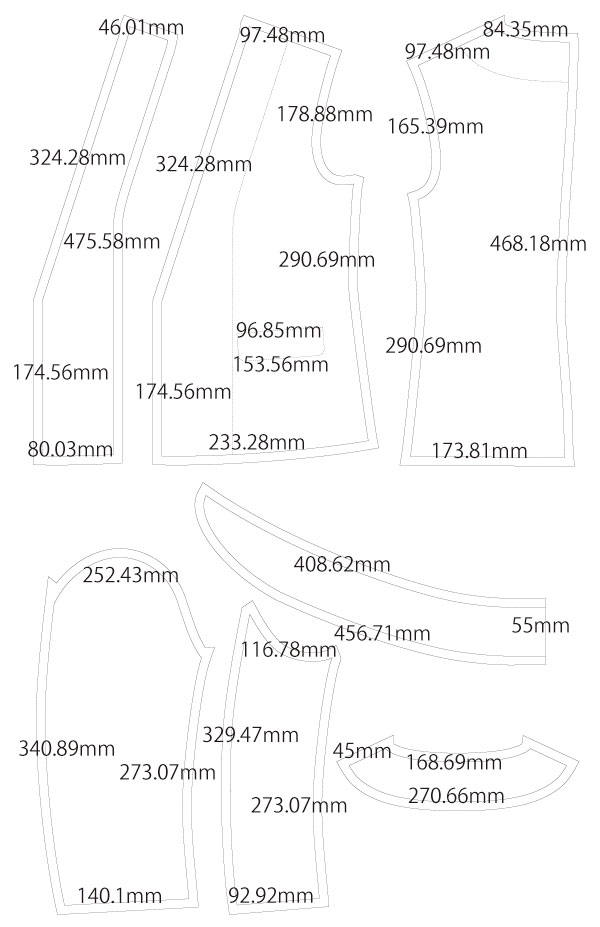
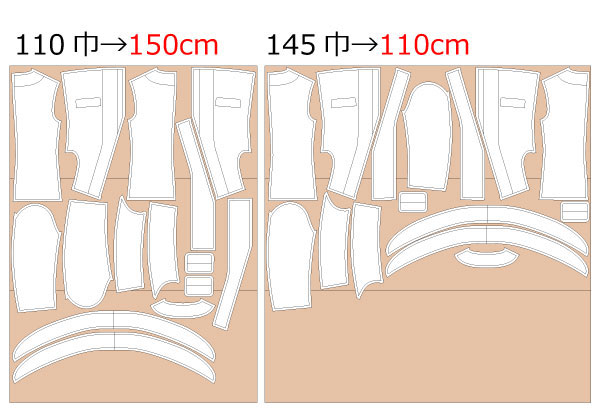
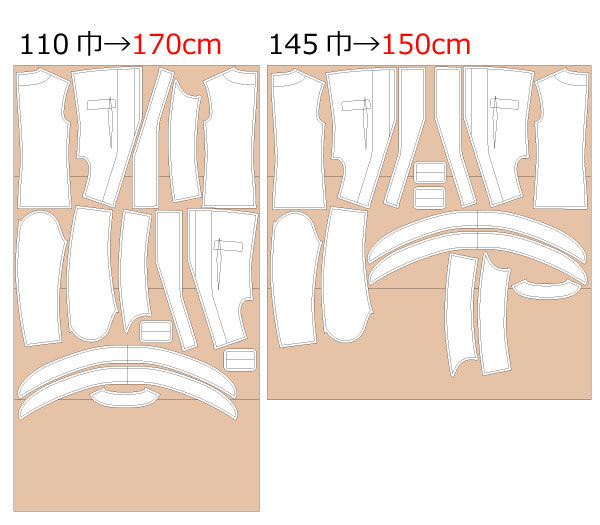
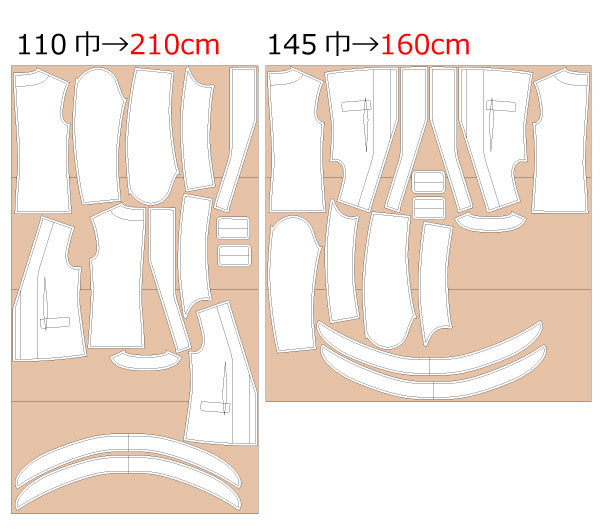
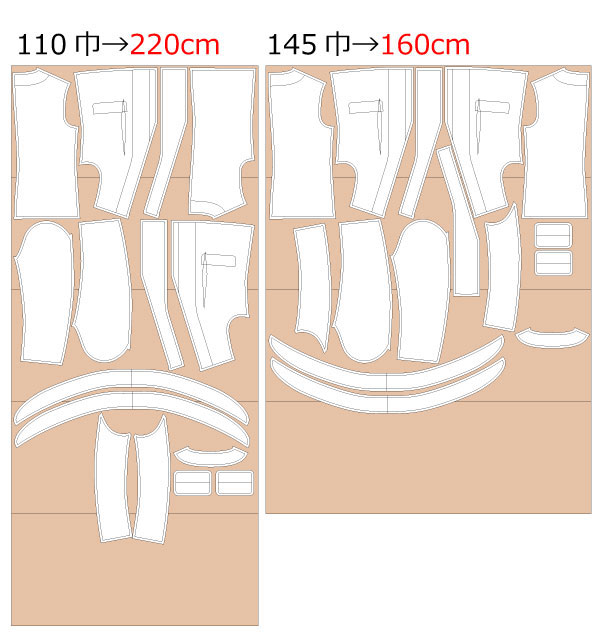
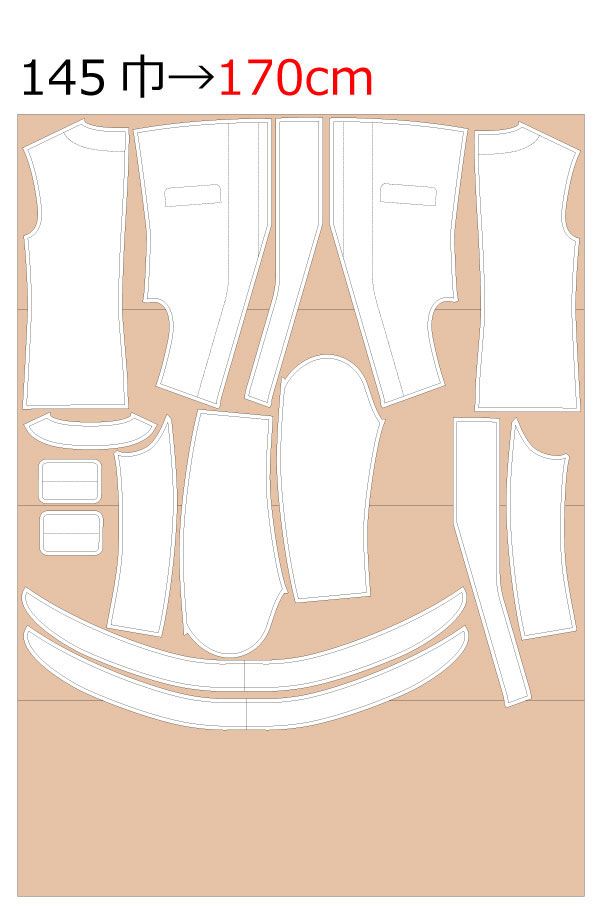
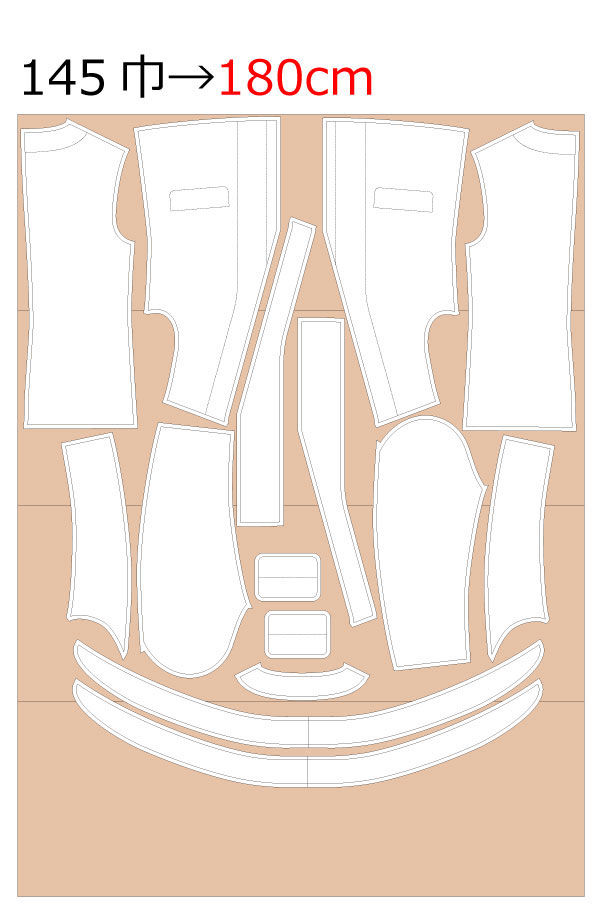
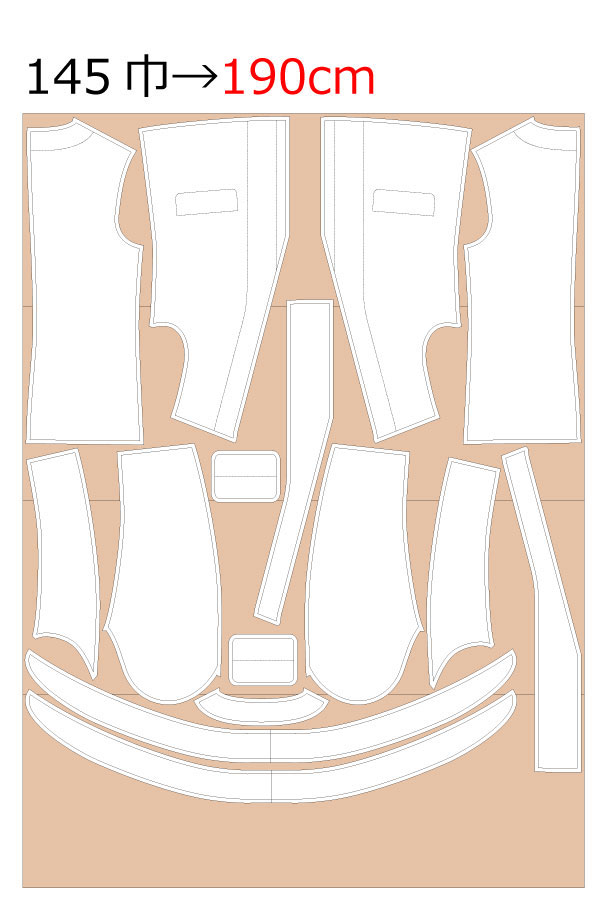
After printing, align the pages along the guide lines, tape them together, and cut out the pattern pieces. Seam allowances (S/A) are included, so the pattern is ready to use.
This shawl collar jacket pattern is suitable for casual wear, costumes, and lightweight jackets, and can be adapted to many different fabrics and styles.


(1) Apply fusible interfacing to each required part, sew the darts on the "Front Body", and press the darts down with an iron.
(2) Make the "Flap" and attach it to the "Front Body".
* If you are making pockets, construct and attach them at this stage.
(3) Sew the "Shawl Collar" pieces together in advance, turn inside out, and press with an iron to shape.
(4) Serge the shoulders, side seams, and back center of the "Front Body" and "Back Body". Sew them together with a sewing machine, then press the seam allowances open with an iron.
![]() How to Serge / Overlock (Sewing Machine & Overlock Sewing Machine)
How to Serge / Overlock (Sewing Machine & Overlock Sewing Machine)
(5) Sew the "Front Facing" and "Back Facing" together, press the seam allowances open with an iron, and serge the outer edges.
(6) After serging the hem of the "Body", sew the "Collar" to the "Body" while sandwiching it with the "Facing".
* Press the hem of the "Body" with an iron before sewing to make finishing easier.
(7) Fold up the hem of the "Body" by 1 cm (0.5 in) and sew it with a sewing machine.
(8) Serge the side seams and hems of the "Sleeves", sew them together with a sewing machine, and press the seam allowances open with an iron.
(9) Fold up the sleeve hems by 1 cm (0.5 in), press with an iron, and sew with a sewing machine.
(10) Attach the "Sleeves" to the "Body" and serge the armholes.
* Sleeve armholes require easing. Attach the sleeves using basting stitches to ease them in properly.
(11) Sew the buttons at the button positions and make the buttonholes.
![]()
Free Paper Patterns are possible because of your support.
If you use our patterns, please share them on social media and tell your friends.
Your support helps DRCOS continue to provide patterns in the future.
![]()
![]()
Children's-100
bust63cm waist59.5cm length39.5cm 8sheets of A4 size (or legal size)

Children's-4
bust24.8in waist23.4in length15.6in 8sheets of letter size

Children's-120
bust71.5cm waist67.5cm length46.5cm 10sheets of A4 size (or legal size)
Children's-8
bust28.1in waist26.5in length18.3in 10sheets of letter size
Children's-140
bust81.5cm waist76.5cm length55cm 13sheets of A4 size (or legal size)

Children's-10
bust32.1in waist30.1in length21.7in 13sheets of letter size
Ladies'-S
bust92.5cm waist84cm length59.5cm 15sheets of A4 size (or legal size)

Ladies'-S
bust36.4in waist33.1in length23.4in 16sheets of letter size
Ladies'-M
bust96cm waist88cm length61cm 15sheets of A4 size (or legal size)
Ladies'-M
bust37.7in waist34.6in length61in 17sheets of letter size
Ladies'-L
bust106.5cm waist97.5cm length61.5cm 16sheets of A4 size (or legal size)

Ladies'-L
bust41.9in waist38.4in length24.2in 18sheets of letter size
Ladies'-LL
bust112.5cm waist104.5cm length63.5cm 19sheets of A4 size (or legal size)
Ladies'-LL
bust44.3in waist41.1in length25in 18sheets of letter size
Men's-S
bust95cm waist90.5cm length65cm 18sheets of A4 size (or legal size)


Men's-S
bust37.4in waist35.6in length25.6in 17sheets of letter size
Men's-M
bust104cm waist99.5cm length69.5cm 21sheets of A4 size (or legal size)
Men's-M
bust40.9in waist39.2in length27.4in 19sheets of letter size
Men's-L
bust112.5cm waist107.5cm length74.5cm 23sheets of A4 size (or legal size)
Men's-L
bust44.3in waist42.3in length29.3in 21sheets of letter size
Men's-LL
bust117.5cm waist112cm length79.5cm 25sheets of A4 size (or legal size)
Men's-LL
bust46.3in waist44.1in length31.3in 23sheets of letter size


