


![]()
This is a sewing pattern and tutorial for a tailored collar jacket designed mainly for cosplay costumes, such as school uniforms and stage outfits.
This tailored jacket pattern has a simplified structure, with the lining and facings reduced compared to a standard jacket. Although it is easier than a full tailored jacket, it still requires intermediate sewing skills.
Because this pattern is simplified for costume use, we recommend modifying the lining and internal structure if you plan to make a jacket for everyday wear.
The pattern is based on a basic jacket shape, so you can adjust the pattern lines to suit your preferred style and silhouette.
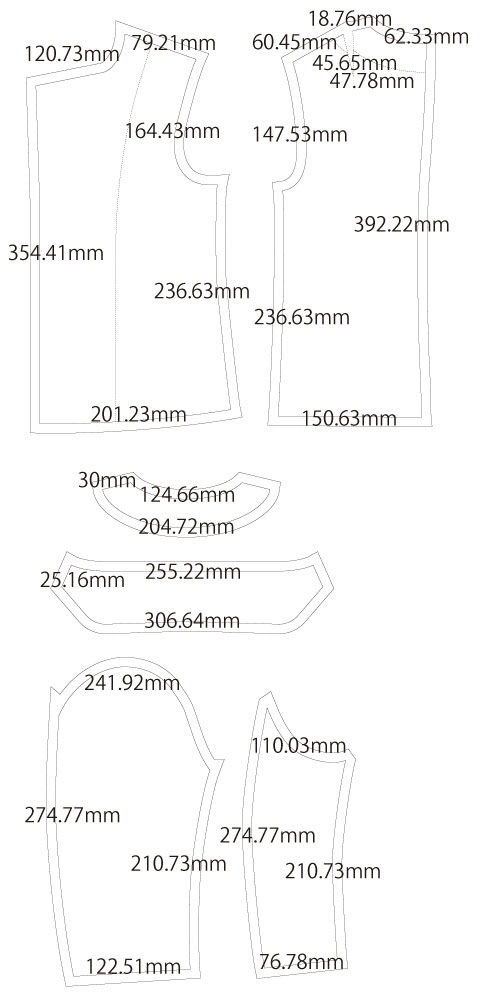
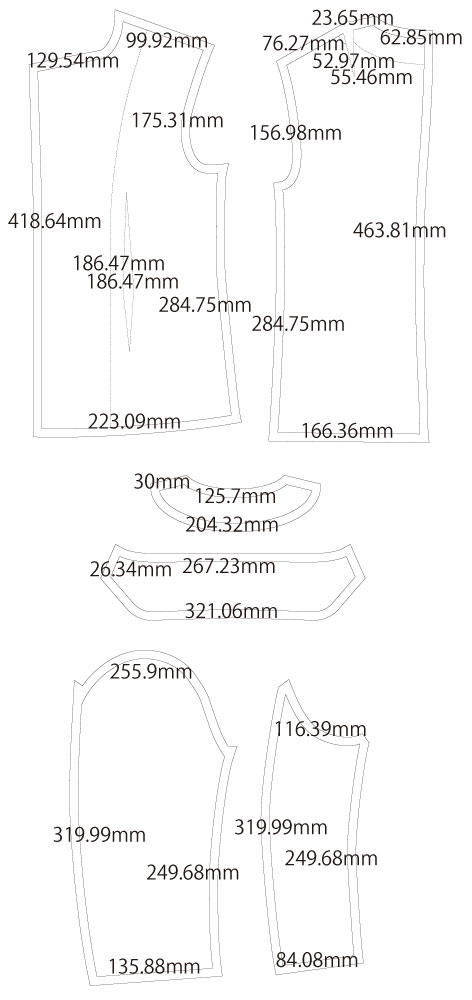
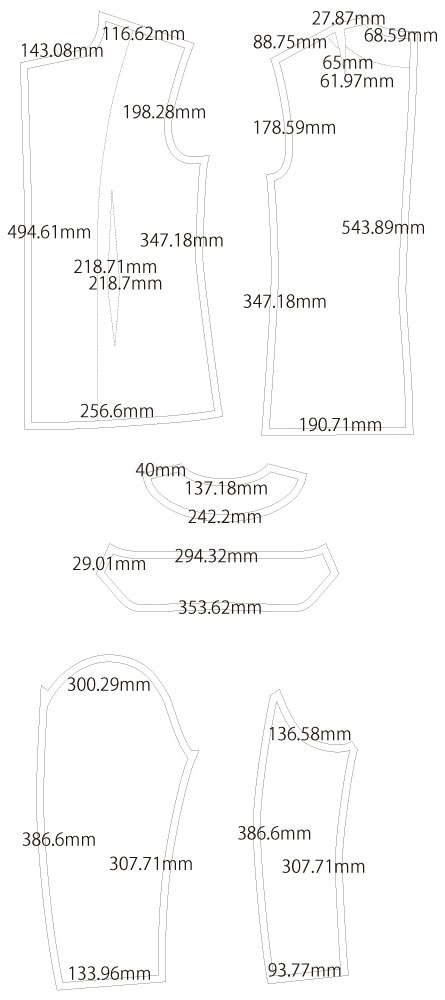
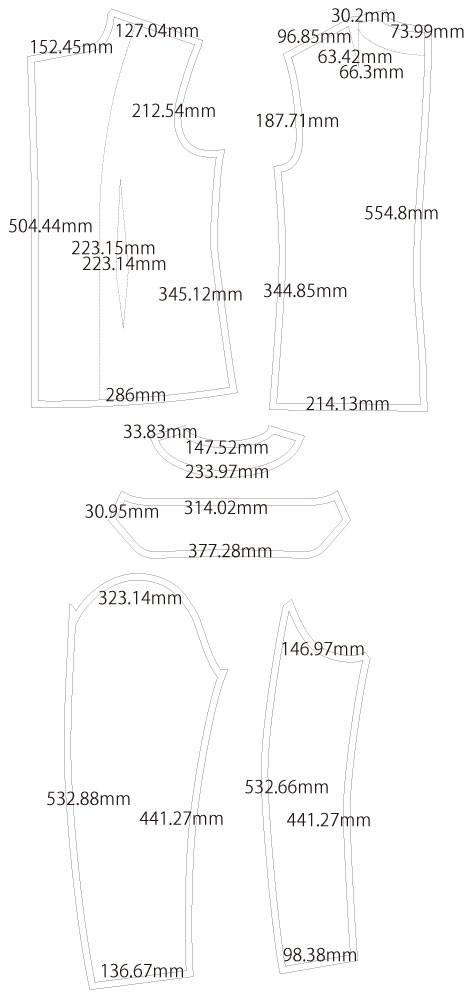
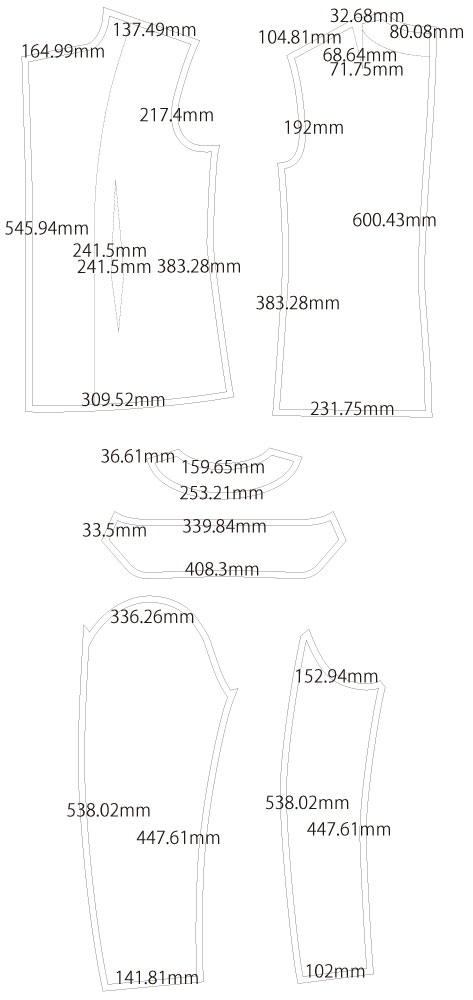
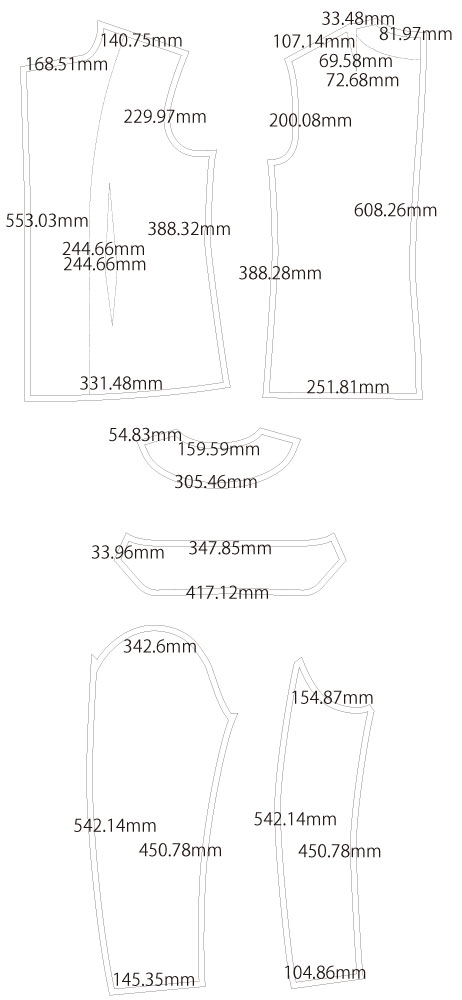
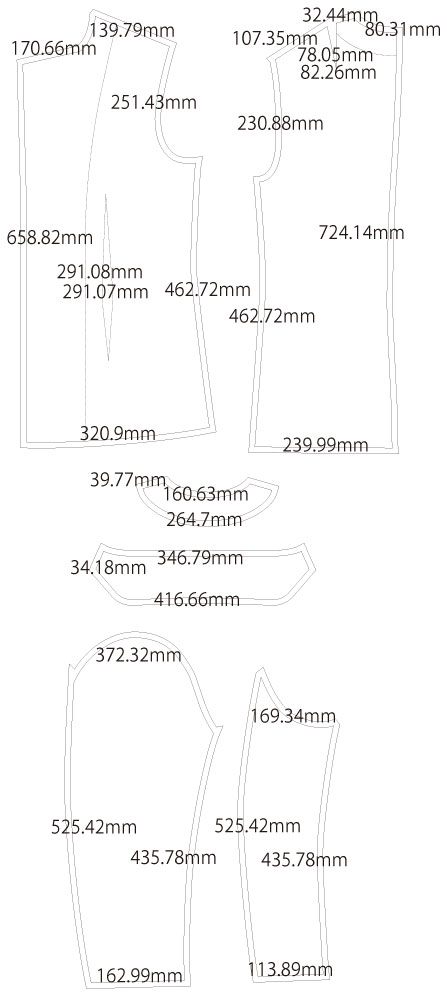
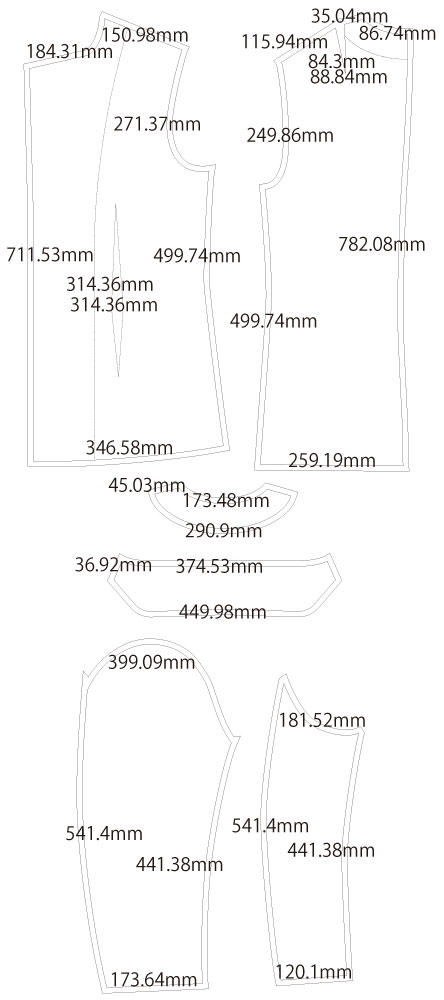
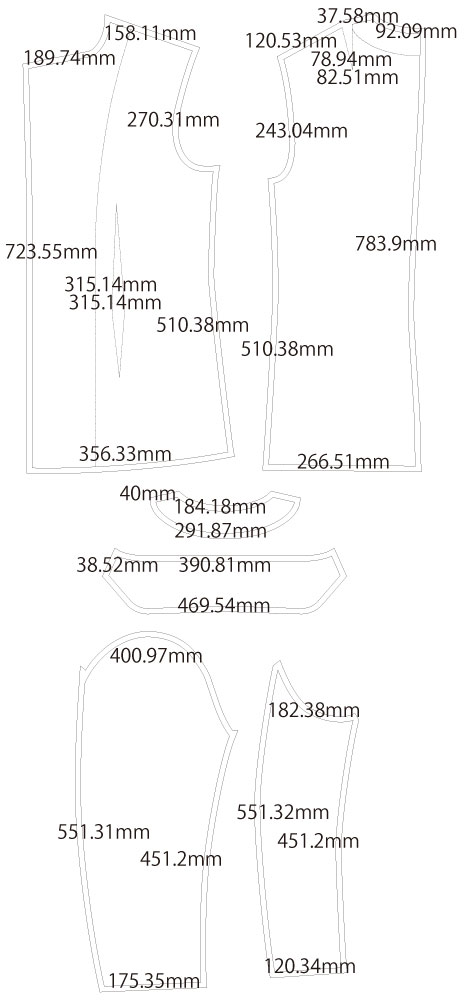
The sleeves are authentic two-piece tailored sleeves with curved seams. A small amount of easing is used to create a rounded sleeve shape, making this step slightly challenging.
Please note that the dart placement differs from standard jacket patterns, so be sure to follow the pattern markings carefully.
The men’s size pattern has a longer body length compared to the women’s size.
The overall design has a slightly relaxed fit. You may adjust the pattern to achieve a slimmer or more tailored look if desired.
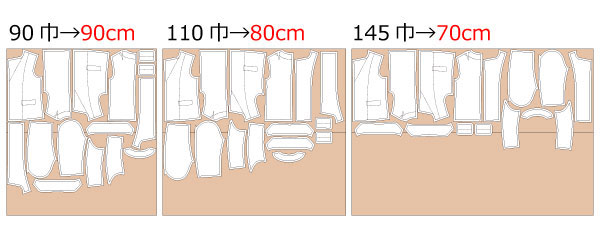
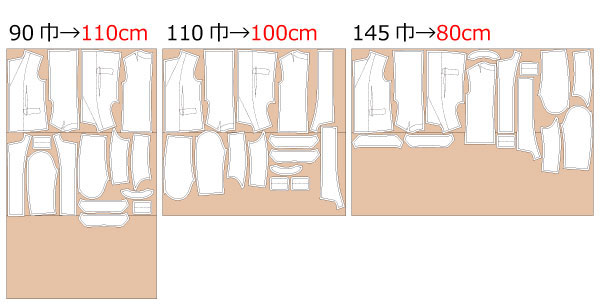
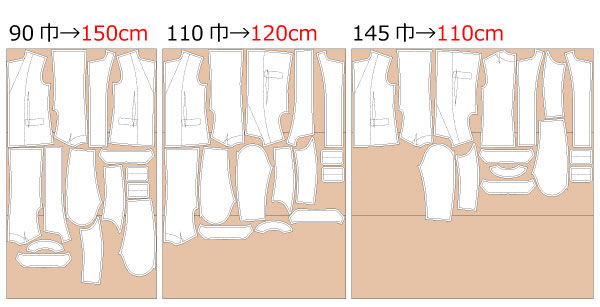
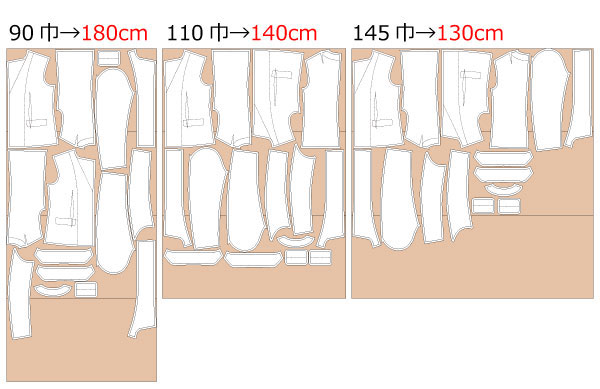
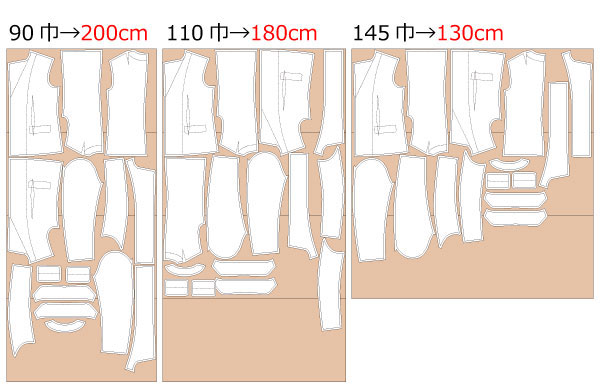
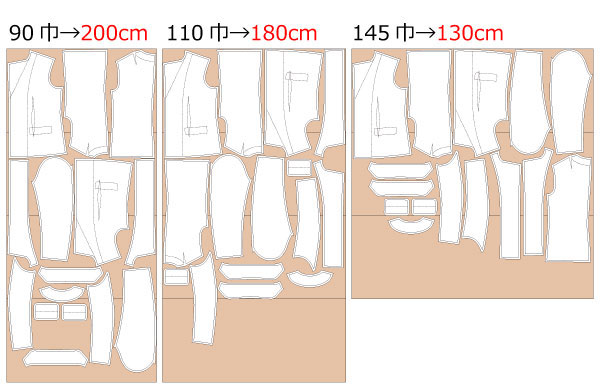
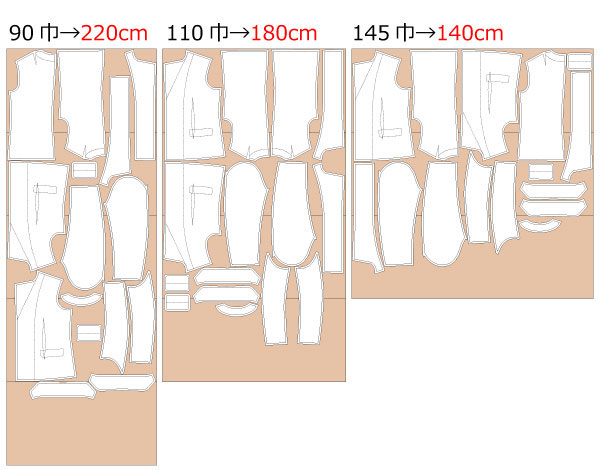
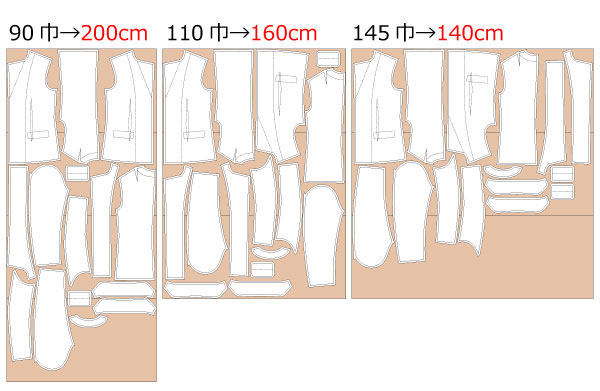
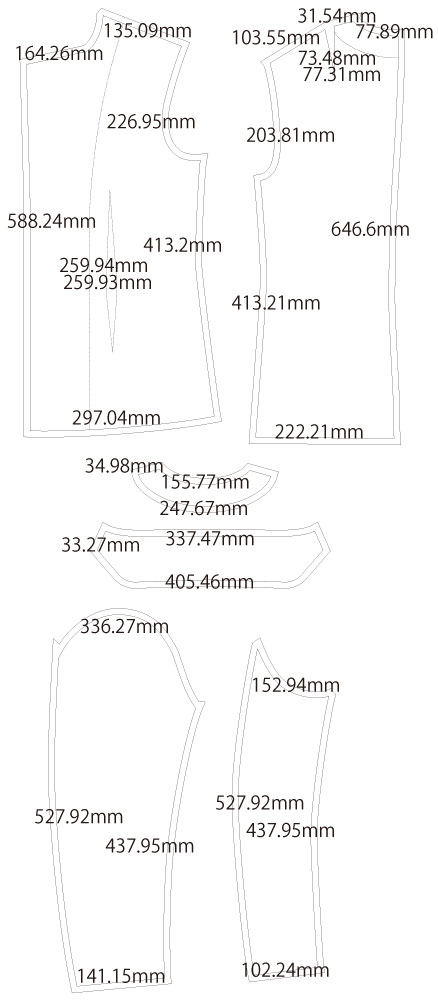
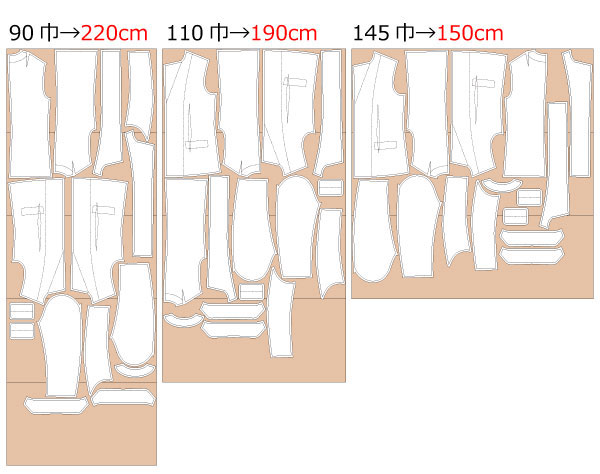
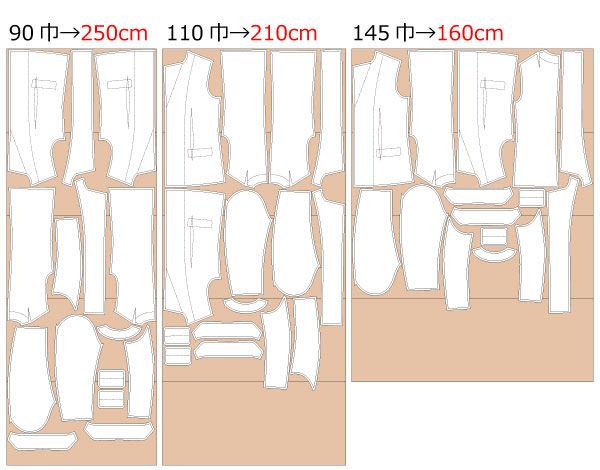
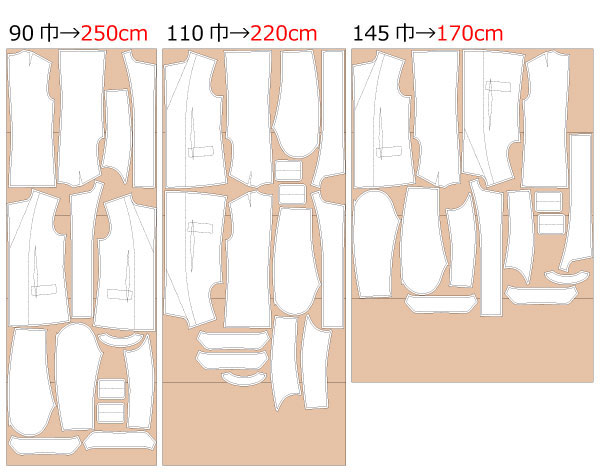
After printing, align the pages along the guide lines, paste them together, and cut out the pattern pieces. Seam allowances are included, so the pattern can be used as-is.


(1) Apply fusible interfacing to all required parts, then sew all darts and press them in the correct direction with an iron.
(2) Attach the flap to the designated flap position.
*If you plan to make functional pockets instead of dummy pockets, prepare and sew the pocket pieces at this stage.
(3) Sew the outer fabric, facing, and lining together to form the basic structure, then attach the collar pieces to each section.
*Make small clips at tight curved areas around the collar and lining seams to allow the fabric to turn smoothly.
(4) Sew all sections together except for the hem, then turn the garment right side out.
*Pre-press the hem line with an iron to make the finishing process easier.
(5) Attach the sleeves to the body.
*Sleeve easing is required. The sleeves cannot be attached correctly without easing stitches.
(6) Finish the hem by hand-stitching to close it.
*Areas that tend to shift during sewing can be temporarily secured with basting stitches to achieve a cleaner finished line.
![]()
Free Paper Patterns are possible because of your support.
If you use our patterns, please share them on social media and tell your friends.
Your support helps DRCOS continue to provide patterns in the future.
![]()
![]()
Children's-100
bust62.5cm waist62cm length39cm 11sheets of A4 size (or legal size)

Children's-4
bust24.6in waist24.4in length15.4in 11sheets of letter size

Children's-120
bust68.5cm waist65.5cm length46.5cm 12sheets of A4 size (or legal size)
Children's-8
bust27in waist25.8in length18.3in 13sheets of letter size
Children's-140
bust79cm waist75cm length54.5cm 16sheets of A4 size (or legal size)
Children's-10
bust31.1in waist29.5in length21.5in 17sheets of letter size
Ladies'-S
bust89cm waist84.5cm length55.5cm 20sheets of A4 size (or legal size)
Ladies'-S
bust35in waist33.3in length21.9in 20sheets of letter size
Ladies'-M
bust96cm waist91.5cm length60cm 21sheets of A4 size (or legal size)
Ladies'-M
bust37.8in waist36in length23.6in 23sheets of letter size
Ladies'-L
bust104cm waist99.5cm length60.5cm 22sheets of A4 size (or legal size)
Ladies'-L
bust40.9in waist39.2in length23.8in 24sheets of letter size
Ladies'-LL
bust110cm waist105.5cm length62.5cm 25sheets of A4 size (or legal size)

Ladies'-LL
bust43.3in waist41.5in length24.6in 25sheets of letter size
Men's-S
bust92cm waist87.5cm length64.5cm 22sheets of A4 size (or legal size)
Men's-S
bust36.2in waist34.4in length25.4in 22sheets of letter size
Men's-M
bust100cm waist95cm length72.5cm 25sheets of A4 size (or legal size)
Men's-M
bust39.4in waist37.4in length28.5in 25sheets of letter size
Men's-L
bust107.5cm waist102.5cm length78cm 28sheets of A4 size (or legal size)
Men's-L
bust42.3in waist40.4in length30.7in 30sheets of letter size
Men's-LL
bust110.5cm waist105cm length78.5cm 29sheets of A4 size (or legal size)
Men's-LL
bust43.5in waist41.3in length30.9in 31sheets of letter size


