


![]()
This is a free sewing pattern and tutorial for a Santa Claus costume.
The Santa hat is not included in this pattern. Please download the required size from the Santa Hat pattern page.
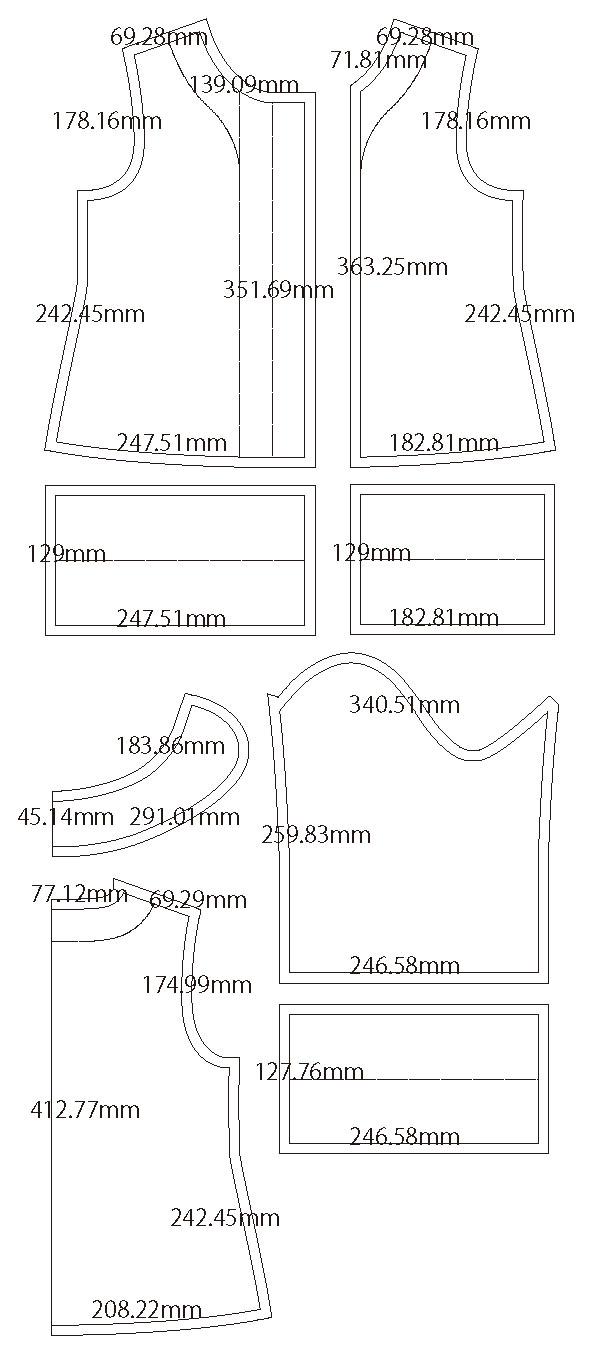
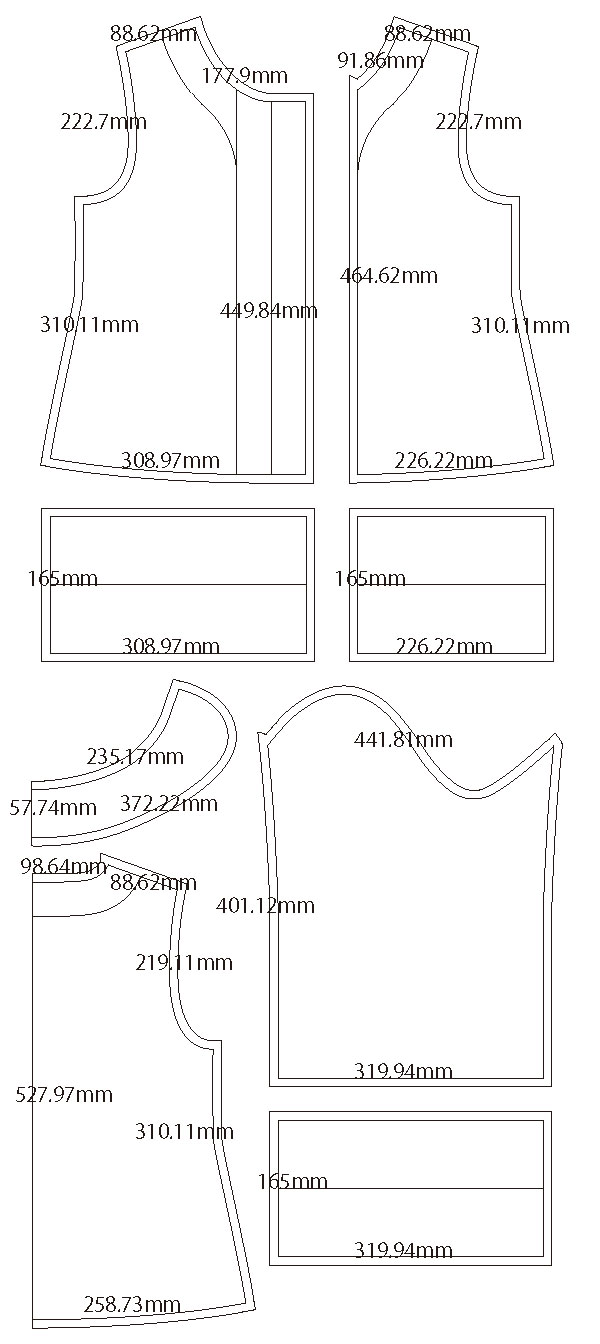
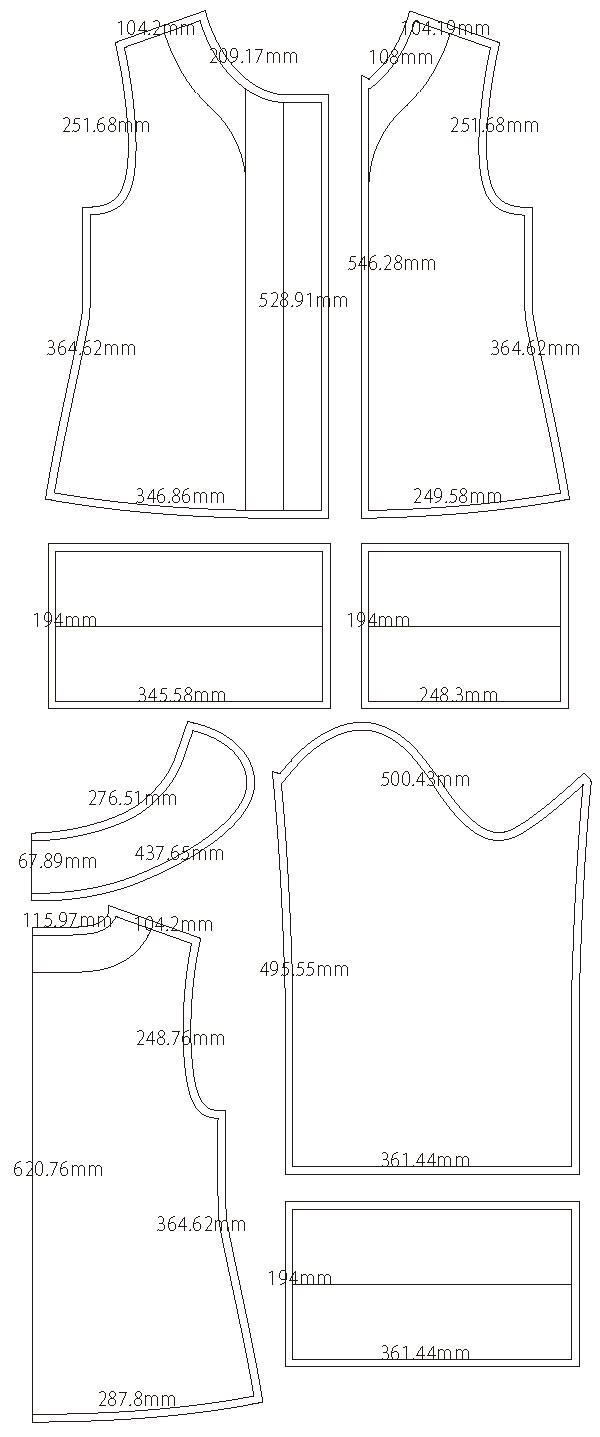
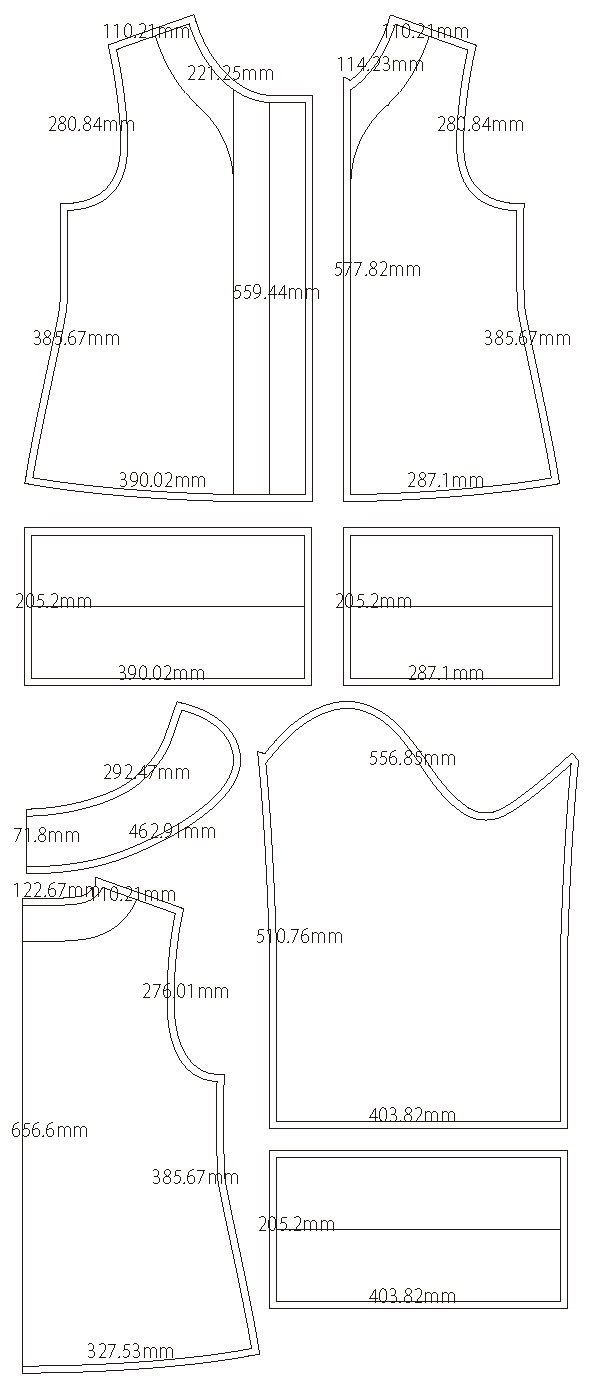
The design features a wider and fluffier white faux fur trim for a cute and festive look. The size of each fur trim piece varies depending on the garment section, and the left and right front bodice pieces are different, so the pattern has more pieces than a simple costume. However, the result is an adorable Santa suit with bold trim.
The fur trim can be hand-stitched as designed, or machine-stitched with the seam allowance turned to the inside for easier construction. The main fastenings are hook-and-loop tape and snap buttons, but the pattern difficulty is rated slightly higher because thick fabrics like faux fur can be tricky to handle.
For easier sewing, choose short-pile faux fur instead of long-pile varieties. Using higher-quality fabrics will make the costume look more polished compared to many store-bought versions.
The pants are simple elastic-waist trousers. The black belt pattern is not included.
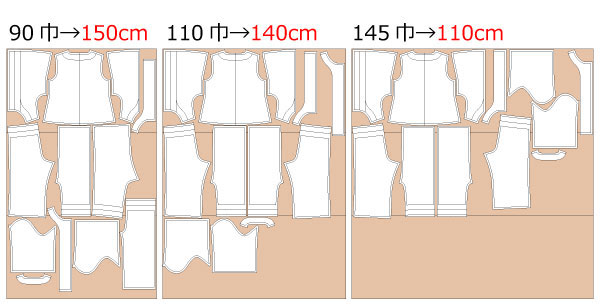
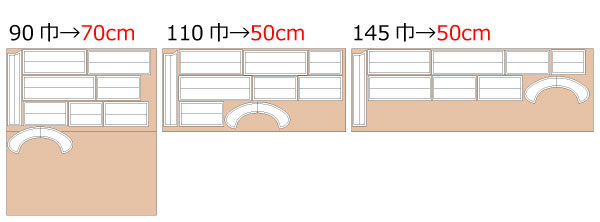
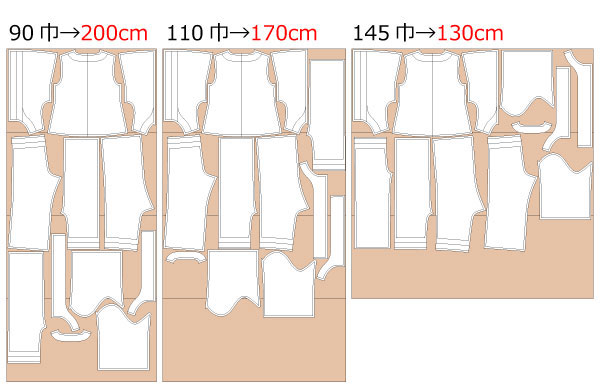
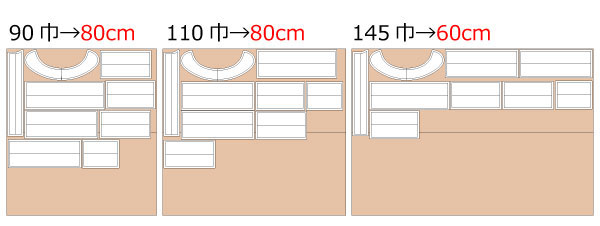
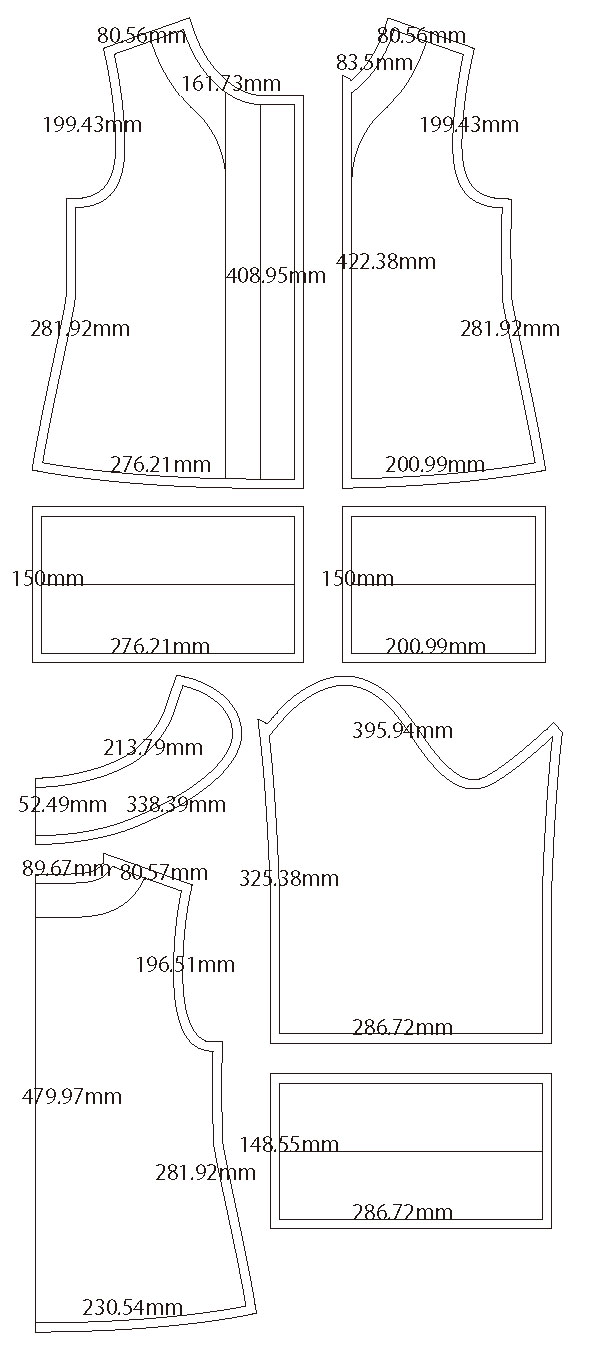
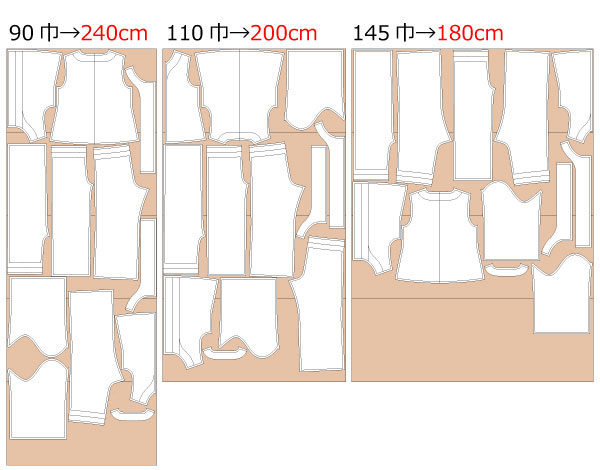
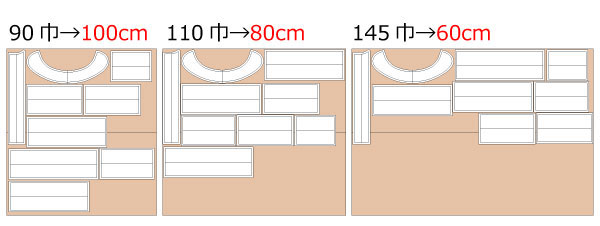
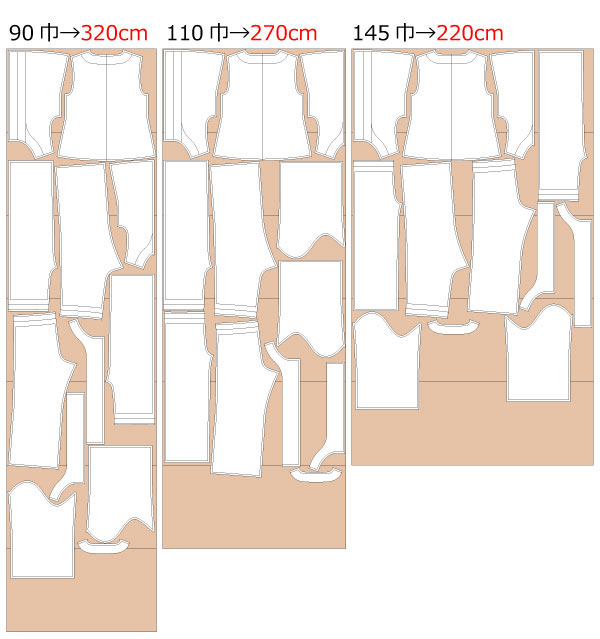
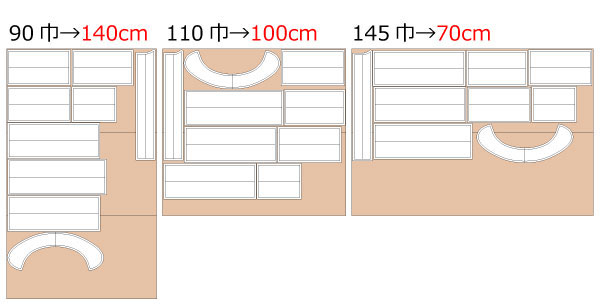
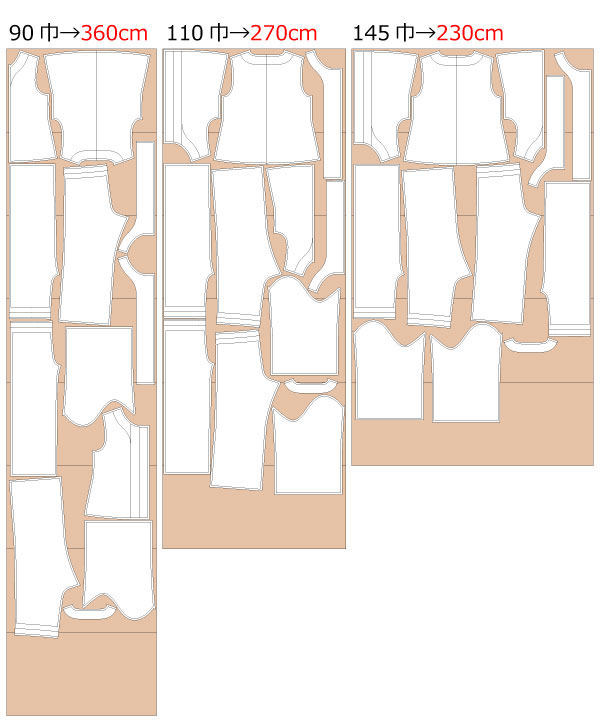
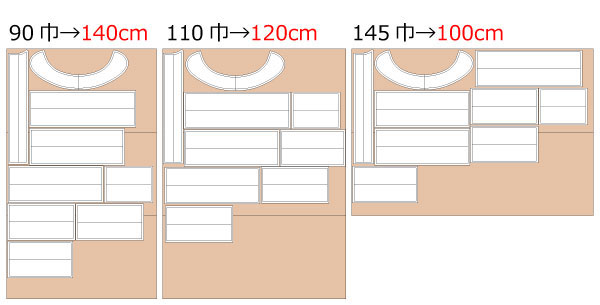
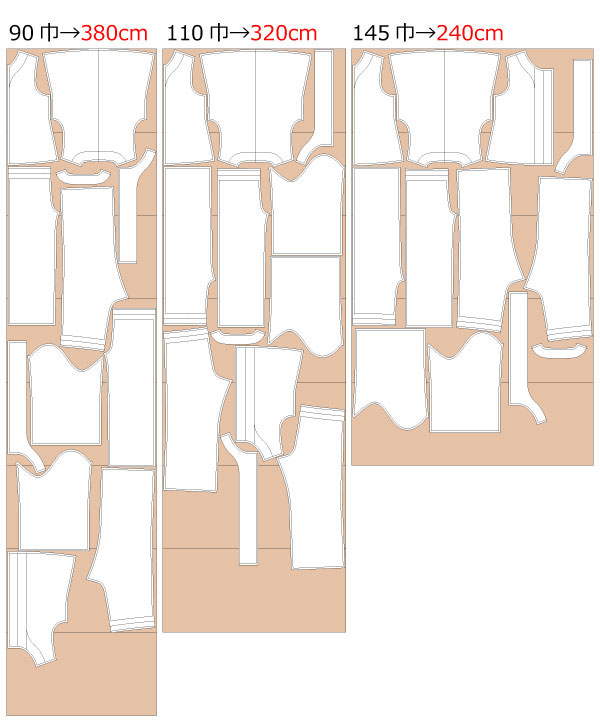
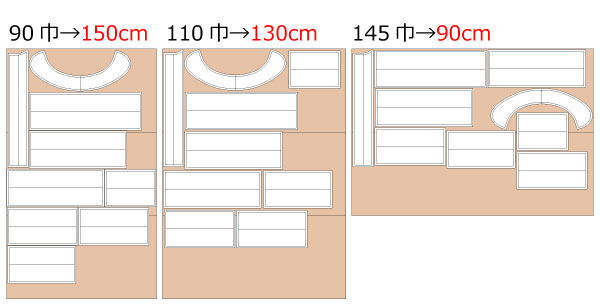
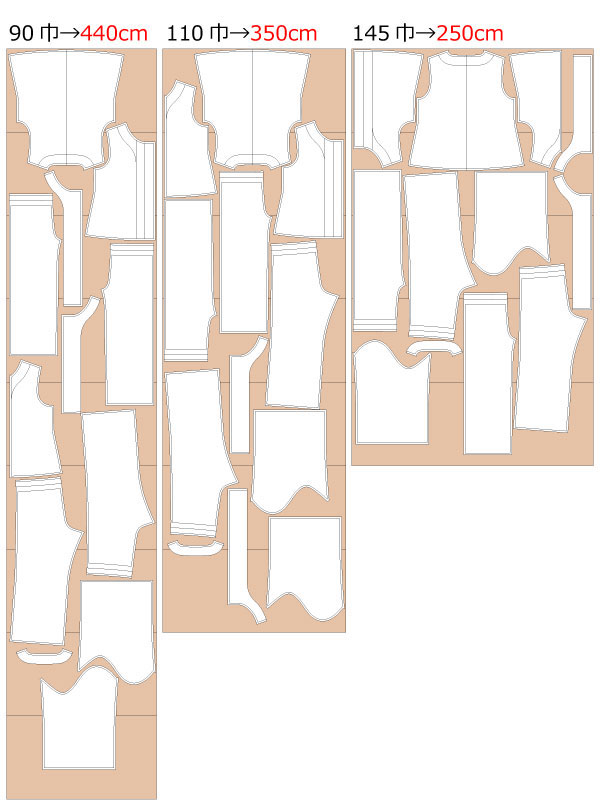
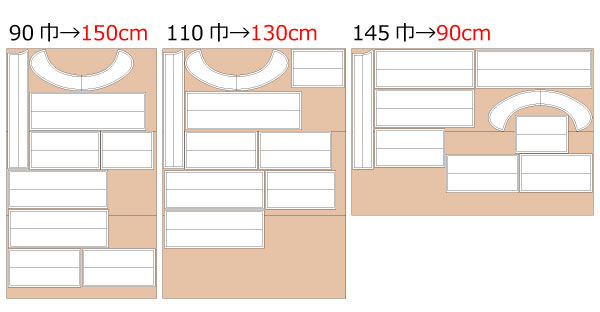
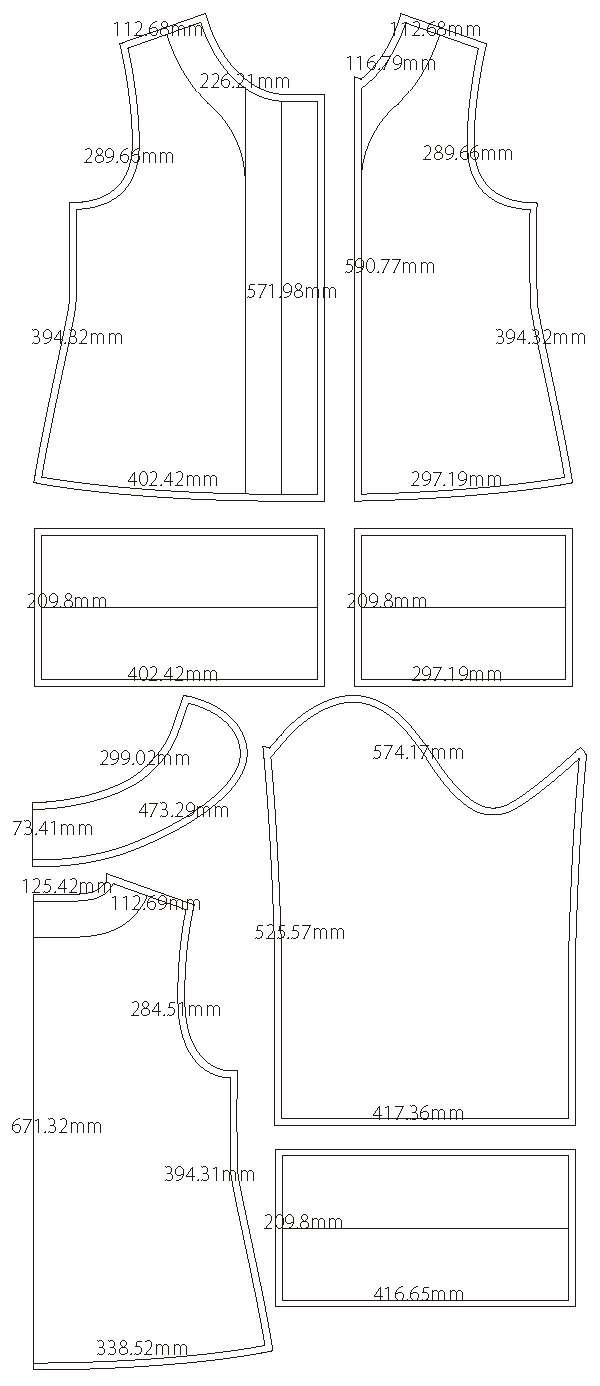
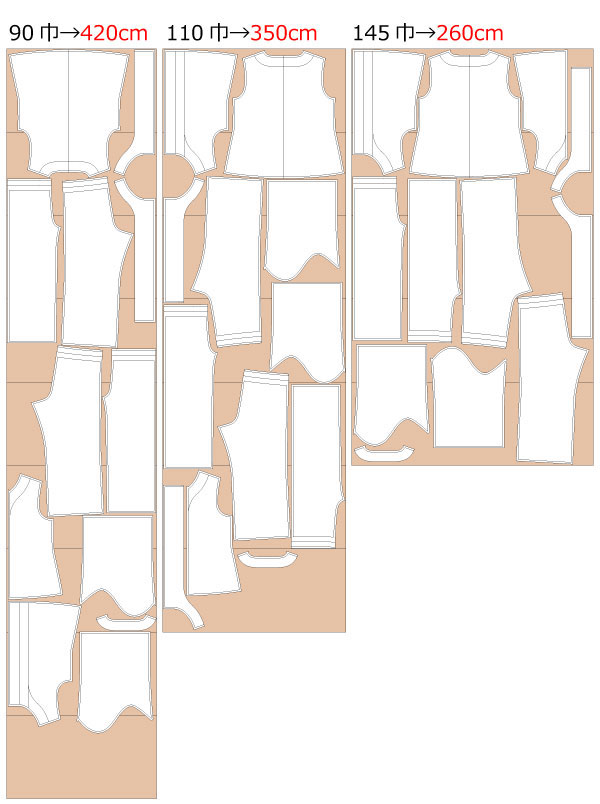
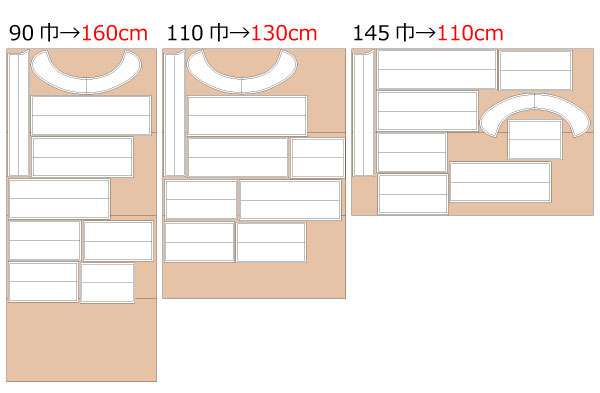
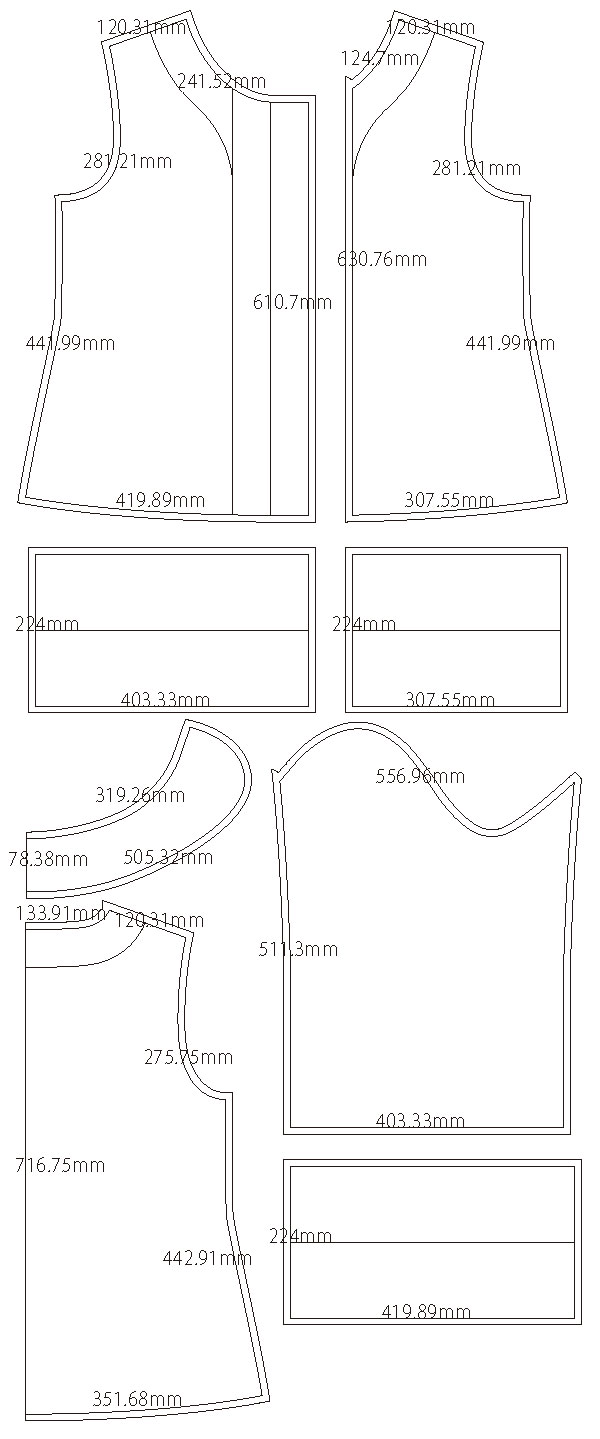
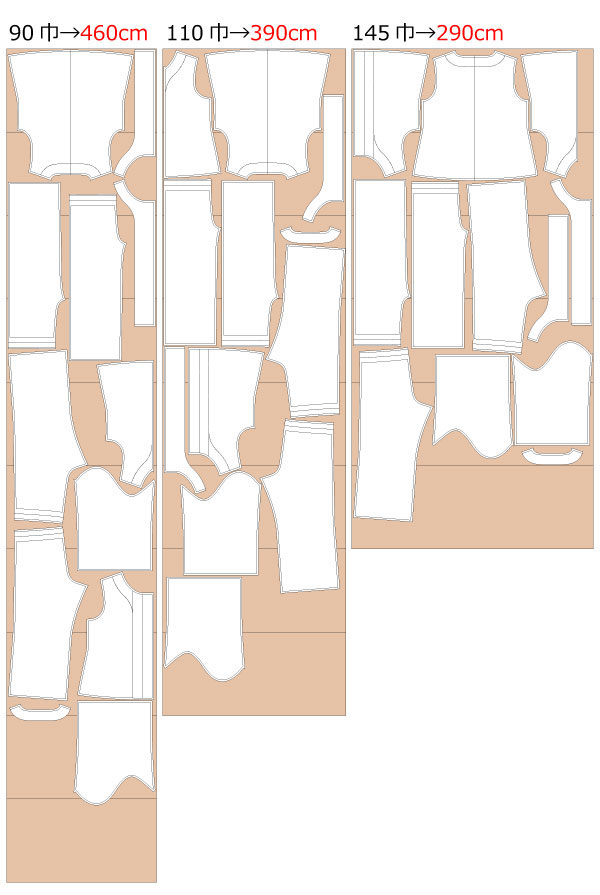
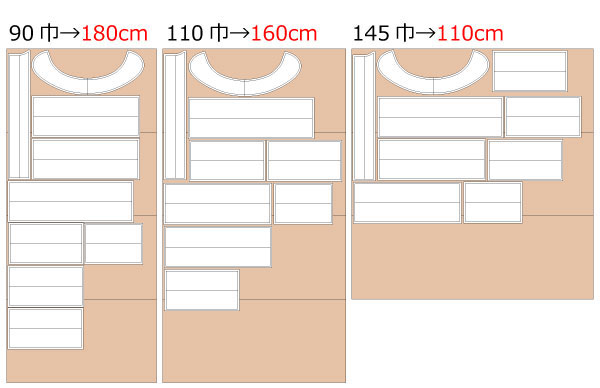
Once printed, cut along the join lines. The pattern already includes seam allowances, so it is ready to use immediately.


The production process is explained with translation software.
If you have any suggestions on how to write like this, please let us know at info@dr-cos.com
We operate this site with your cooperation.
Jacket sewing process
(1) Apply fusible interlining to the lining of all "facing" and "collar" and sew Velcro to the Velcro position of the "facing" for the left front.
(2) Open the body side of "Collar", sew the fabrics right side together, cut a seam allowance, turn inside out, and iron the shape so that it can be tucked in.
(3) Sew "Placket Front(left)" to "Front Body(left)" up to the seam allowance, press seam allowances open with an iron.
* Serge/overlock if the body side is made of a fabric that tends to fray easily.
(4) Sew "facing" together, iron the seam allowance, and serge/overlock the outer edge.
(5) Sew the shoulder and side of "Body" together, serge/overlock the seam allowance, and iron it to the back side.
(6) Align "Collar" with "Body" at the stop position, sew "facing" to "Body" while pinching it with "facing", turn inside out, and iron to settle.
* Cut or cut the seam allowance so that the fabric does not stick when turning the garment over.
(7) Connect all the hem pieces and hand sew them together while tucking them into the "Body".
* If the boa fabric is difficult to sew in by hand, fold it in half and sew it together, even if there is a seam allowance on the reverse side.
(8) Sew the open part of the "Placket Front(left)" and the hem decoration together by hand.
(9) Attach Velcro tape to "Front Body(right)" and snap buttons.
(10) Serge/overlock the sides of "Sleeve", sew them together, and press seam allowances open with an iron.
(11) Sew the "Cuff" boa fabric into a loop, and sew it to the "Sleeve" by hand while inserting it into the "Sleeve".
* If it is difficult to sew by hand, you can use a sewing machine to sew the cuffs with the seam allowance on the inside.
(12) Sew the "Sleeve" to the "Body" and serge/overlock the armholes.
Pants sewing process
(1) Sew Inseam of "Pants Front Body" and "Pants Back Body" and Serge/overlock
(2) Sew the sides together and Serge/overlock
(3) Sew the crotch together and Serge/overlock
* Sew the crotch twice to make it stronger.
(4) Fold the belt part 0.5 inch (&asympasy;1cm) with an iron, then fold another 1 inch and sew with a sewing machine.
* Make one hole for the elastic.
(5) Sew the hem ornaments into a loop, and sew it to the hem while pinching it by hand.
(6) Thread the elastic
![]()
Free Paper Patterns are possible because of your support.
If you use our patterns, please share them on social media and tell your friends.
Your support helps DRCOS continue to provide patterns in the future.
![]()
![]()
Children's-100
bust72cm waist72cm length41cm 22sheets of A4 size (or legal size)

Children's-4
bust28.3in waist28.3in length16.1in pants length19.4in 23sheets of letter size

Children's-120
bust79cm waist79cm length48cm 31sheets of A4 size (or legal size)
Children's-8
bust31.1in waist31.1in length18.8in pants length26.1in 31sheets of letter size
Children's-140
waist35in bust89cm waist89cm length52.5cm 35sheets of A4 size (or legal size)
Children's-10
bust35in waist35in length20.6in pants length32in 36sheets of letter size
Ladies'-S
bust97.5cm waist97.5cm length62cm 48sheets of A4 size (or legal size)
Ladies'-S
bust38.3in waist38.3in length24.4in pants length37.4in 48sheets of letter size
Ladies'-M
bust106cm waist106cm length64cm 50sheets of A4 size (or legal size)
Ladies'-M
bust41.7in waist41.7in length25.1in pants length38.5in 53sheets of letter size
Ladies'-L
bust113.5cm waist113.5cm length65.5cm 55sheets of A4 size (or legal size)
Ladies'-L
bust44.6in waist44.6in length26.3in pants length39.3in 56sheets of letter size
Ladies'-LL
bust117cm waist117cm length67cm 56sheets of A4 size (or legal size)
Ladies'-LL
bust46in waist46in length26.3in pants length40.3in 58sheets of letter size
Men's-L
bust121cm waist121cm length71.5cm 58sheets of A4 size (or legal size)
Men's-L
bust47.6in waist47.6in length28.1in pants length41.1in 60sheets of letter size
Men's-LL
bust127cm waist127cm length73cm 62sheets of A4 size (or legal size)
Men's-LL
bust50in waist50in length28.7in pants length41.7in 63sheets of letter size


