


![]()
Simple construction steps are included in the paper pattern.
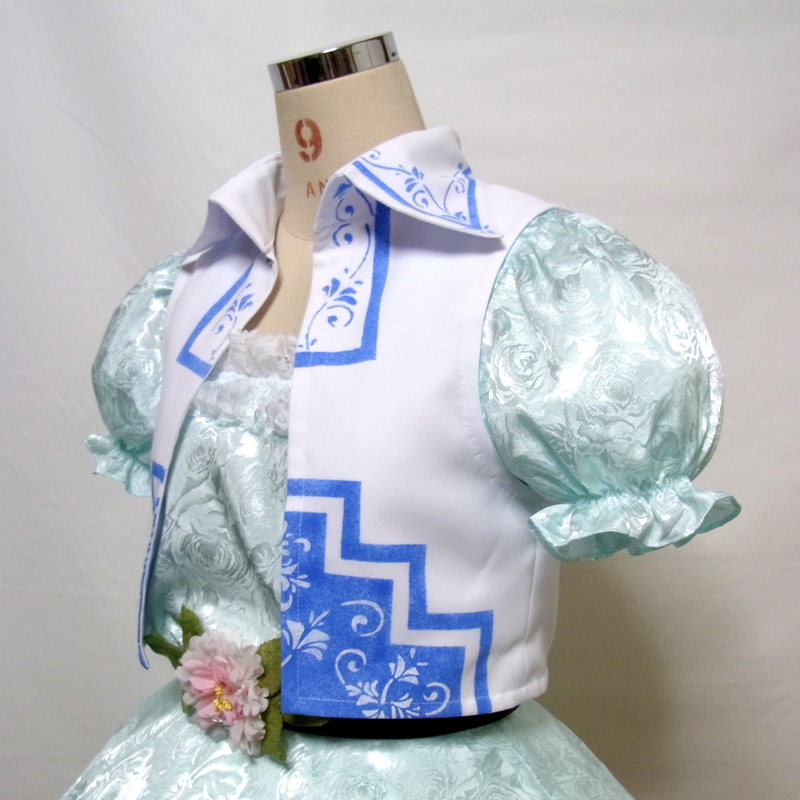
This is a bolero pattern with a stand collar.
The simple design makes it suitable as a base pattern for modifying the silhouette, even for beginners.
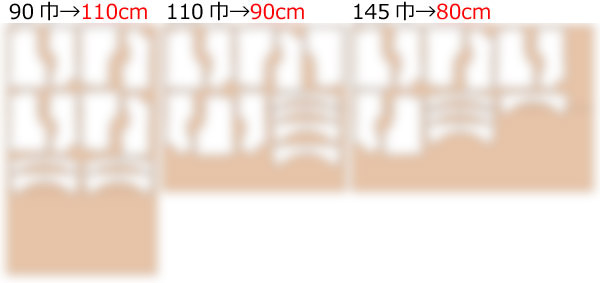
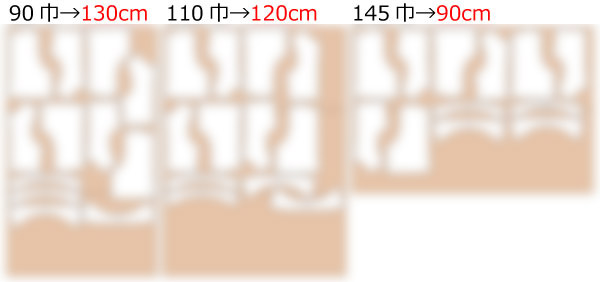
After printing, align the joining lines, tape the sheets together, and cut out the pattern.
Seam allowances are already included, so you can use the pattern as it is.

(1) Apply fusible interlining to the lining of the "Collar" and "Collar stand."
(2) Sew the shoulders and sides of the "Front bodice" and "Back bodice" together, then press the seam allowances open with an iron.
(3) Sew the center back of the "Back bodice," then press the seam allowances open with an iron.
*Apply steps (2) and (3) to the lining in the same way.
*If it is difficult to shape with an iron, secure with topstitching.
(4) Place the "Body" and lining right sides together, sew from the front edge to the hem and continue to the opposite front edge. Turn right side out and press with an iron.
*If it is difficult to shape with an iron, secure with topstitching.
(5) Pull out the armhole area and sew the armholes of the "Body" and lining together. Make small cuts (notches) in the seam allowance, then press with an iron.
*Sew the front half of the armhole first. Then pull out the opposite side and sew the remaining half.
*If the armhole is difficult to sew, fold the seam allowance with an iron in advance and sew with topstitching.
(6) Fold the lower edge of the "Collar stand" (the side that will be attached to the "Body") inward by 1 cm in advance to make it easier to insert later.
(7) Place the "Collar" and lining right sides together. Leave the upper edge (the side to be inserted into the "Collar stand") open, sew in a U-shape, then turn right side out and press with an iron.
*Make small cuts (notches) where the fabric does not lie flat.
*If it is difficult to shape with an iron, secure with topstitching.
(8) Sew the side edges of the "Collar stand." Then insert the "Collar" between the layers and sew the upper edge. Turn right side out and press with an iron.
*When inserting the "Collar," check the facing sides carefully (match lining to outer fabric, and outer fabric to lining). When folded, the "Collar" will show the correct side.
(9) Attach the "Collar stand" to the "Body," inserting it between the layers.
If you cannot see the SHOP due to 403 error
Price: ¥500 (JPY)
Approx. USD — / EUR — (for reference)
![]()
![]()
Ladies' S size
A4 paper size 5 sheets

Ladies' S size
letter paper size 5 sheets

Ladies' M size
A4 paper size 5 sheets

Ladies' M size
letter paper size 5 sheets
Ladies' L size
A4 paper size 5 sheets
Ladies' L size
letter paper size 6 sheets


