


![]()
Comments are made using translation software.
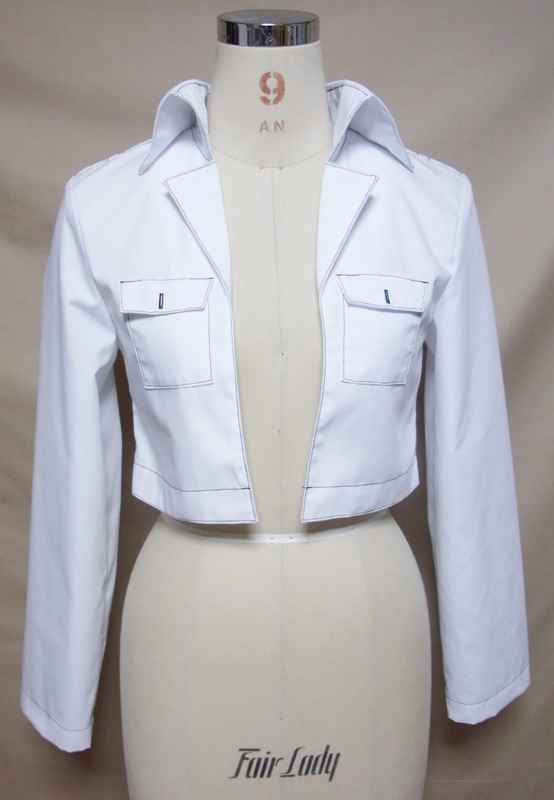
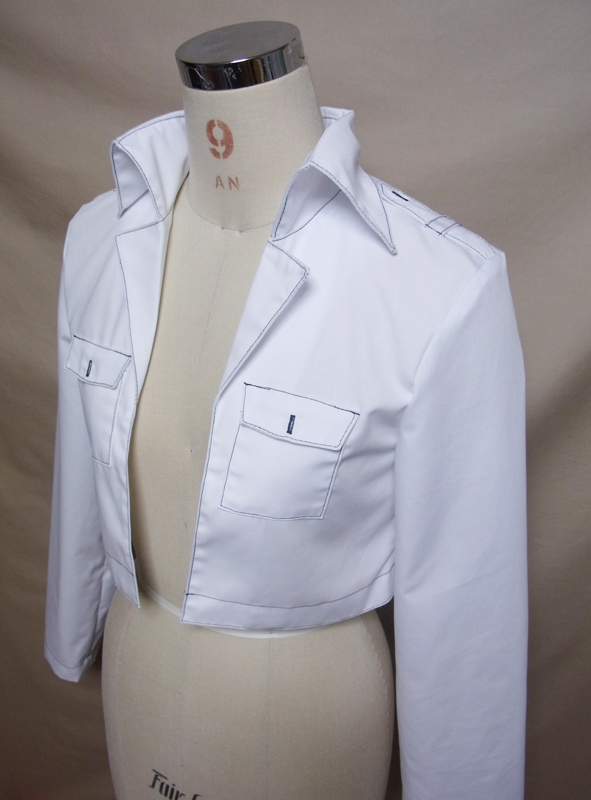
This is a pattern and instructions for a short jacket with distinctive collar details.
In the reference photo, the garment is sewn with black thread on white fabric to make the shape clearer.
After printing, paste it according to the pasting line,Cut and use.
The pattern has a seam allowance, so it can be used as is.


I'm not so good at English.
So all explanations/instructions were translated using AI.
This is not always perfect and I apologise for any parts that are difficult to follow.
(1) Fold the top of the "pocket" at 0.5 inch ≈1cm, sew it, fold the seam allowance at 0.5 inch ≈1cm, and sew it to the pocket attachment position.
(2) After french seaming the "Flap", turn it inside out and iron it into shape, then make buttonholes and sew them to the flap attachment points.
* After the flap is turned inside out,Sew the open part with stitches,or use adhesive tape, etc. to fasten it.
(3) Make "epaulet" and "epaulet band" first, shape them, and make buttonholes.
(4) After applying fusible interlining to "facing",Sew "front facing" and "back facing" together,Press seam allowances open with an iron,Serge/overlock the outside.
(5) Apply fusible interlining to the "Collar", open the part to be inserted into the "Collar stand" and sew around it, then turn it inside out and iron it into shape.
* Cut off the corners of the seam allowance for a clean look.
(6) Attach the fusible interlining to the "Collar stand",Sew both sides,Insert the "Collar" inside and sew,Turn inside out and iron to shape.
(7) Serge/overlock the sides, shoulders and hem of the "Front bodice" and the sides, shoulders, hem and back center of the "Back bodice".
![]() How to Serge/overlock (sewing machine & overlock sewing machine)
How to Serge/overlock (sewing machine & overlock sewing machine)
(8) Sew the center of "Back bodice" and body shoulders together and press seam allowances open with an iron.
(9) Sew the "epaulette band" in place.
(10) Sew the "collar stand" between the "bodice" and "facing".
* Sew the "facing" in an L-shape with the hem 1 inch (3 cm) above the "Bodice".
(11) Sew the sides of the "bodice" together and press seam allowances open with an iron.
(12) Serge/overlock the hem, fold up 1" (3cm), turn the "facing" over as well, and iron to settle.
* cut into the seam allowance of the curved section.
(13) Fold the Lapel part with an iron.
(14) Serge/overlock the "Sleeve" sides and hem, sew the "Sleeve" sides together, press seam allowances open with an iron, iron up the hem 1 inch (3cm), and sew with a sewing machine.
(15) Sew the "Sleeve" with the "Bodice" shoulder epaulet in place and serge/overlock the armholes after sewing the "Sleeve".
(16) Sew a button at the button attachment position.
If you cannot see the SHOP due to 403 error
Price: ¥800 (JPY)
Approx. USD — / EUR — (for reference)
![]()
![]()
Children's 120 size
Shoulder width 30.5cm A4 paper size 7 sheets
Shrink sleeve parts 36 sizes to 97%

Children's 8 size
Shoulder width12in letter paper size 8 sheets
Shrink sleeve parts 36 sizes to 97%

Children's 140 size
Shoulder width 33.5cm A4 paper size 10 sheets
Sleeve parts 42 size
Children's 10 size
Shoulder width13.2in letter paper size 10 sheets
Sleeve parts 42 size
Ladies' S size
Shoulder width 38cm A4 paper size 12 sheets
Sleeve parts 44 size
Ladies' S size
Shoulder width15in letter paper size 11 sheets
Sleeve parts 44 size
Ladies' M size
Shoulder width 40cm A4 paper size 14 sheets
Sleeve parts 46 size
Ladies' M size
Shoulder width15.7in letter paper size 13 sheets
Sleeve parts 46 size
Ladies' L size
Shoulder width 42cm A4 paper size 14 sheets
Sleeve parts 49 size
Ladies' L size
Shoulder width16.5in letter paper size 14 sheets
Sleeve parts 49 size
Ladies' LL size
Shoulder width 44cm A4 paper size 14 sheets
Sleeve parts 50 size
Ladies' LL size
Shoulder width17.3in letter paper size 15 sheets
Sleeve parts 50 size
Men's L size
Shoulder width 46cm A4 paper size 14 sheets
Sleeve parts 51 size
Men's L size
Shoulder width18.1in letter paper size 15 sheets
Sleeve parts 51 size
Men's LL size
Shoulder width 48cm A4 paper size 16 sheets
Sleeve parts 53 size
Men's LL size
Shoulder width18.9in letter paper size 16 sheets
Sleeve parts 53 size


