


![]()
This is a free sewing pattern and step-by-step tutorial for a party-style bolero jacket. This short, open-front bolero is ideal for parties, cosplay costumes, stage outfits, and special events. Seam allowances (S/A) are included, so the pattern can be used immediately after printing, assembling, and cutting along the join lines.
A bolero is a type of cropped jacket that sits above the waistline and features an open front with no closures such as plackets, zippers, or buttons. The design is inspired by traditional garments worn by matadors and dancers. In this pattern, the sleeve openings are intentionally made wider, and the silhouette is slightly shaped to create a more elegant and refined look.
For a party-ready finish, decorating the edges with gathered lace or decorative trims is highly recommended. Sheer fabrics can be used without lining for a light and delicate appearance, or the entire body can be made from lace fabric to achieve a romantic and sophisticated style.
The construction process is beginner-friendly, as there are no complicated steps such as installing zippers or sewing buttonholes. At the same time, carefully applied lace decorations can elevate the final result, allowing the garment to look polished and high-end, making this pattern suitable for both beginners and experienced sewists.
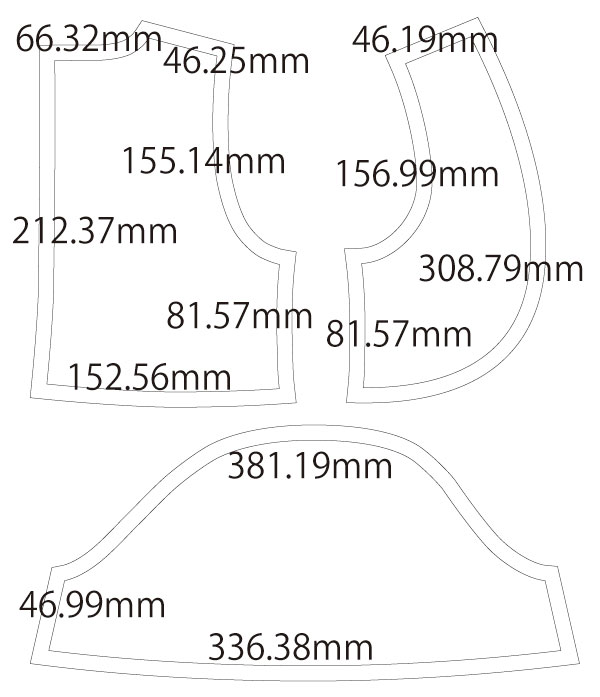
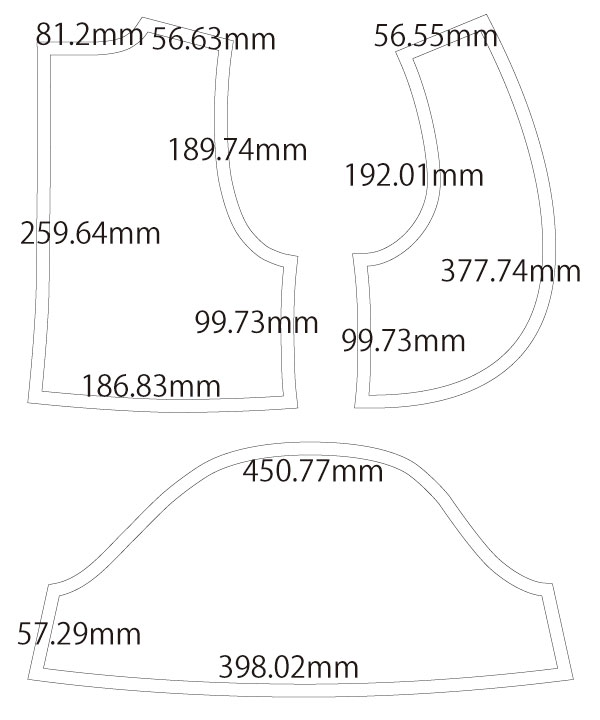
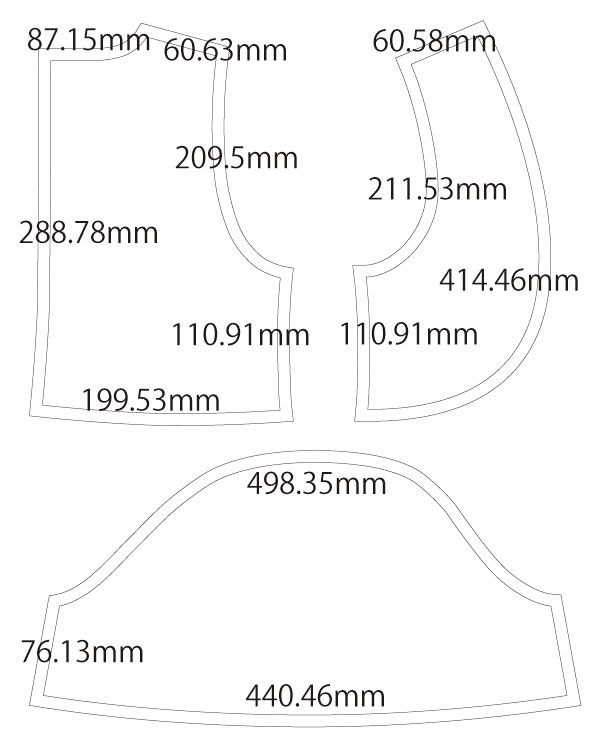
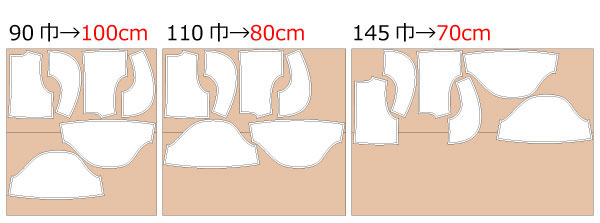
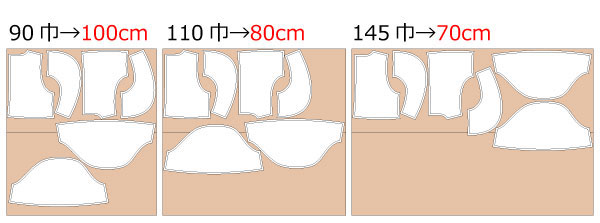
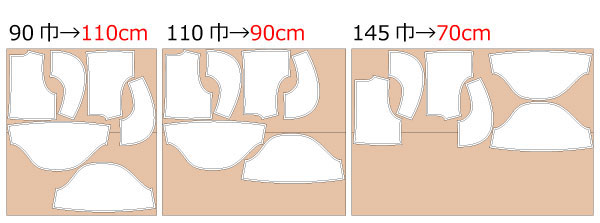
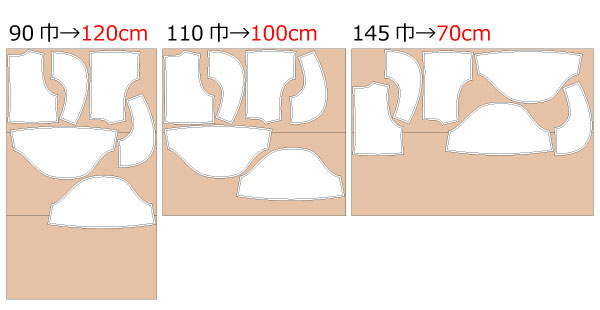
After printing, align the pages along the join lines, tape or glue them together, and cut out the pattern pieces. Seam allowances are already included, so the pattern is ready to use as is.

* If the garment is made without lining, be sure to finish all raw edges properly.
(1) Sew the shoulders and side seams of the outer fabric and lining together, then press the seam allowances open with an iron.
(2) Place the outer fabric and lining with right sides together. Sew around the entire perimeter, leaving about an 8 cm (3 inch) opening at the hem of the back body for turning.
(3) Turn the garment right side out through the opening at the back hem.
* Pull the fabric out through the armhole area and close the opening neatly by stitching.
* Before turning, trim seam allowances and make small clips where necessary to reduce bulk.
(4) Press the entire garment into shape with an iron, then sew gathered lace or frill trim around the perimeter.
* For areas with tight curves, slightly ease the lace as you sew for a clean finish.
![]() How to finish raw edges / serging
How to finish raw edges / serging
(5) Create gathers at the gathering section of the "Sleeve".
![]() How to make gathers with a sewing machine
How to make gathers with a sewing machine
(6) Finish the sleeve side seams, sew them together with a sewing machine, and press the seam allowances open with an iron.
(7) Finish the sleeve hems according to your design preference, such as a narrow hem, rolled hem, serging, or by attaching gathered lace.
(8) Attach the "Sleeve" to the "Body" and finish the armholes.
* Pre-folding the armhole seam allowance and sandwiching the sleeve in place will result in a cleaner finish.
![]()
Free Paper Patterns are possible because of your support.
If you use our patterns, please share them on social media and tell your friends.
Your support helps DRCOS continue to provide patterns in the future.
![]()
![]()
Children's-100
3 sheets of A4 size(or legal size)


Children's-4
3sheets of letter size

Children's-120
4 sheets of A4 size(or legal size)
Children's-8
4sheets of letter size
Children's-140
5 sheets of A4 size(or legal size)
Children's-10
5sheets of letter size
Ladies'-S
6 sheets of A4 size(or legal size)
Ladies'-S
6sheets of letter size
Ladies'-M
6 sheets of A4 size(or legal size)

Ladies'-M
7sheets of letter size
Ladies'-L
7 sheets of A4 size(or legal size)
Ladies'-L
8sheets of letter size
Ladies'-LL
8 sheets of A4 size(or legal size)
Ladies'-LL
8sheets of letter size
Men's-L
8 sheets of A4 size(or legal size)
Men's-L
8sheets of letter size
Men's-LL
8 sheets of A4 size(or legal size)
Men's-LL
9sheets of letter size


