


![]()
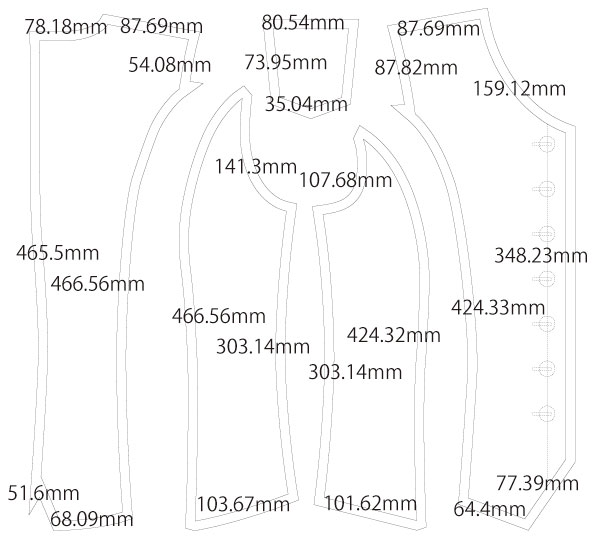
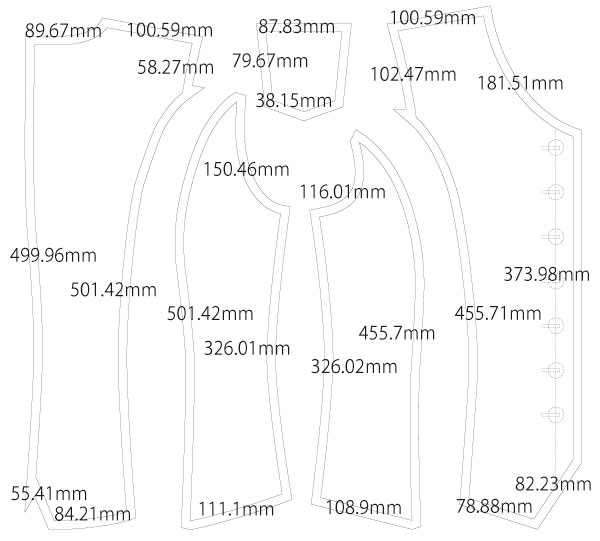
This is a sewing pattern for a classic retro vest with a timeless design.
Unlike a standard vest, this design has a wider shoulder width and a higher neckline with less opening.
It is recommended as a base pattern when you want to create a slightly vintage-style vest.
This vest can also be used as a stylish fashion item to enhance your outfit.
It is especially suitable as an inner vest for winter, and the multiple buttons add both function and design appeal.
For the best result, we recommend adding topstitching around the edges to create clean lines and improve the overall appearance.
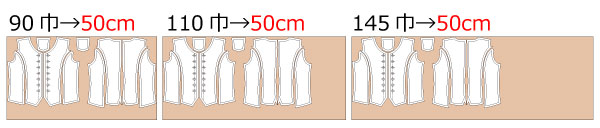
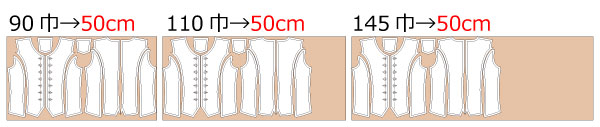
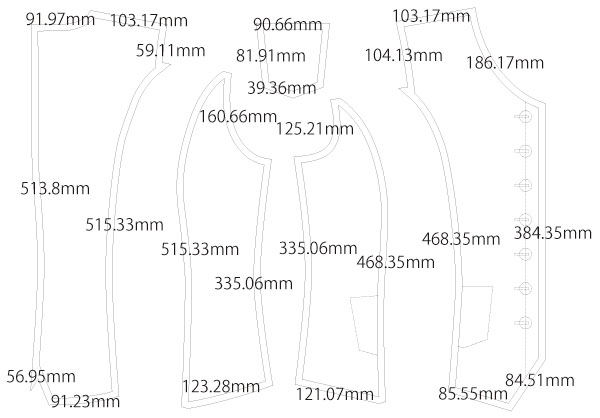
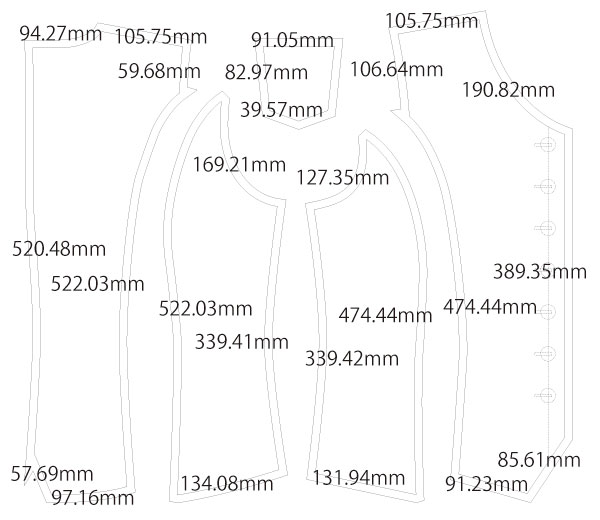
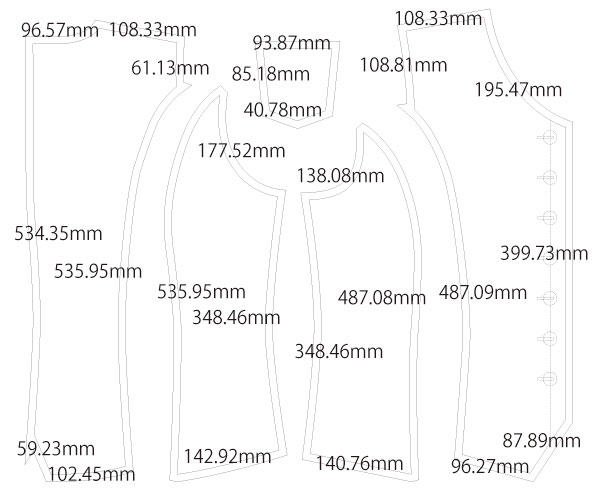
The men's size pattern has a gentler chest curve and less waist shaping compared to the women's size pattern.
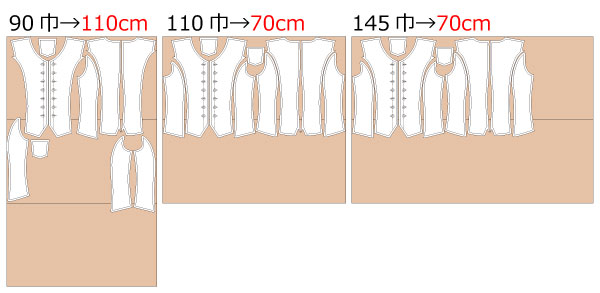
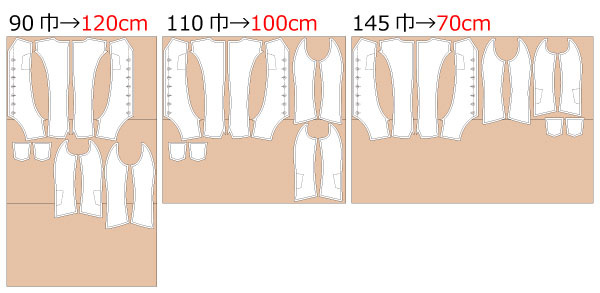
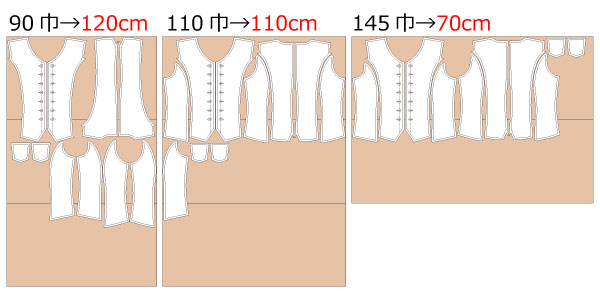
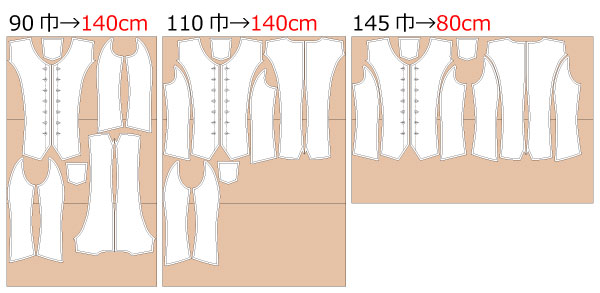
After printing, align the pages along the guide lines, tape them together, and cut out the pattern pieces before use.
The seam allowance is already included in the pattern, so you can use it as it is.

(1) Sew the "Front body" and "Front side body" together, then press the seam allowances open with an iron. Attach the pockets.
* Press the seam allowances open and add topstitching to create clean lines for a better finish.
(2) Sew the "Back body center" → "Back side body" → sides → shoulders in this order, then press the seam allowances open to shape the garment.
* Press the seam allowances open and add topstitching to create clean lines for a better finish.
(3) Make the lining in the same way, and press the seam allowances open with an iron.
(4) Fold 1 cm of the armhole edges on both the outer fabric and lining in advance.
(5) Place the outer fabric and lining right sides together, and sew around the edges.
* Leave an opening of about 15 cm for turning when sewing around.
* Pre-fold 1 cm at the opening with an iron to prepare the shape.
* It is recommended to place the opening along the straight button area.
(6) Trim bulky or tight seam areas to reduce tension, then turn the garment right side out and press with an iron.
(7) Apply topstitching around the entire edge, including the opening area.
(8) Close the armhole edges with topstitching.
(9) Attach buttonholes and buttons at the marked positions.
![]()
Free Paper Patterns are possible because of your support.
If you use our patterns, please share them on social media and tell your friends.
Your support helps DRCOS continue to provide patterns in the future.
![]()
![]()
Children's-100
bust63cm waist53.5cm 4sheets of A4 size (or legal size)

Children's-4
bust24.8in waist21.1in 4sheets of letter size

Children's-120
bust67.5cm waist56cm 5sheets of A4 size (or legal size)
Children's-8
bust26.6in waist22in 6sheets of letter size
Children's-140
bust77cm waist64cm 6sheets of A4 size (or legal size)

Children's-10
bust30.3in waist25.2in 6sheets of letter size
Ladies'-S
bust87cm waist70.5cm 7sheets of A4 size (or legal size)
Ladies'-S
bust34.3in waist27.8in 8sheets of letter size
Ladies'-M
bust94cm waist78cm 8sheets of A4 size (or legal size)
Ladies'-M
bust37in waist30.7in 8sheets of letter size
Ladies'-L
bust101cm waist85cm 8sheets of A4 size (or legal size)
Ladies'-L
bust39.8in waist33.5in 8sheets of letter size
Ladies'-LL
bust108cm waist91cm 10sheets of A4 size (or legal size)

Ladies'-LL
bust42.5in waist35.8in 10sheets of letter size
Men's-L
bust112cm waist92.5cm 10sheets of A4 size (or legal size)

Men's-L
bust44.1in waist36.4in 12sheets of letter size
Men's-LL
bust116.5cm waist94.5cm 12sheets of A4 size (or legal size)

Men's-LL
bust45.9in waist37.2in 12sheets of letter size


