


![]()
Comments are made using translation software.
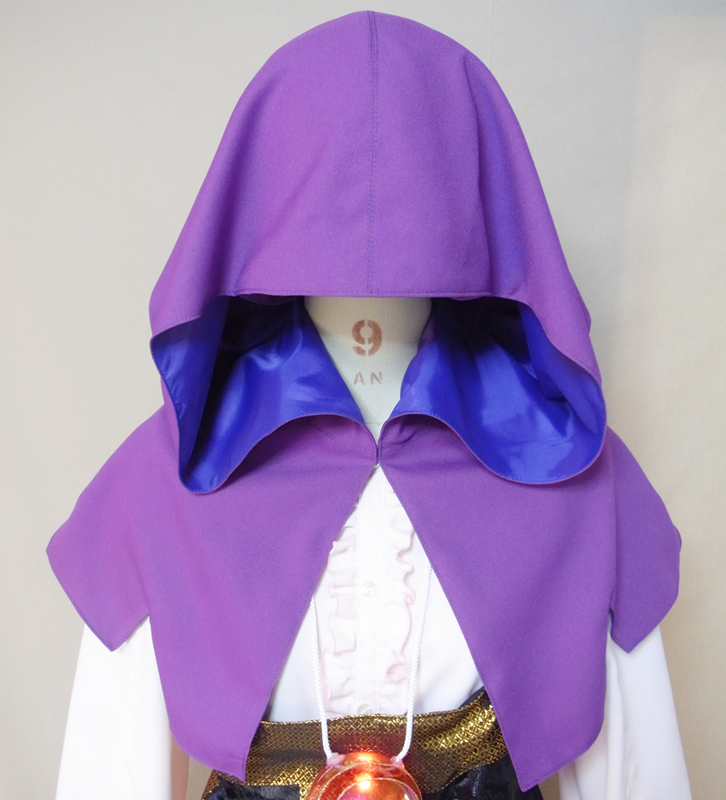
This is a pattern for a nun hood that combines a very large hood and shawl.
Used in Japanese period dramas for the hoods of women in kimono.
After printing, paste it according to the pasting line,Cut and use.
The pattern has a seam allowance, so it can be used as is.

I'm not so good at English.
So all explanations/instructions were translated using AI.
This is not always perfect and I apologise for any parts that are difficult to follow.
(1) Create the band to wrap around the head.
* This pattern uses a 64 cm bias strip to make the band.
* For a simpler band construction, you can use a 1 cm wide ribbon or similar.
* The band is necessary to secure it around the head.
* Adjust the band to your head size and make it fastenable with Velcro or snaps.
(2) After sewing the outer side of the “Hood,” press the seam allowances open with an iron.
* Create the same “Lining(Hood)” as in (2).
(3) Attach the Band to the “Lining(Hood)” at the Band sewing attachment position.
(4) After sewing the neckline of the “Hood” and “Shawl” together, press the seam allowances open with an iron.
* If the fabric pulls in the seam allowance area when turned, trim and handle it.
(5) After sewing the neckline of the “Lining(Hood)” and “Lining(Shawl)” together, press the seam allowances open with an iron.
* If the fabric pulls in the seam allowance area when turned, trim and handle it.
(6) Sew all edges of the outer and lining pieces, leaving “Leave this part open on one side.” Then, turn it inside out and press it to shape.
* Pre-fold the part that will remain open with an iron before turning it.
* Before turning, make sure to trim and notch the seam allowances.
(7) Topstitch around the entire piece to secure it.
* When topstitching, also sew closed the opening left from the turning.
If you cannot see the SHOP due to 403 error
Price: ¥600 (JPY)
Approx. USD — / EUR — (for reference)
![]()
![]()
Ladies' S size
12sheets of A4 size

Ladies' S size
14sheets of letter size

Ladies' M size
15sheets of A4 size
Ladies' M size
15sheets of letter size
Ladies' L size
17sheets of A4 size
Ladies' L size
17sheets of letter size


