


![]()
Free sewing pattern and tutorial for a simplified yukata, designed for cosplay but also suitable for casual wear when made with appropriate fabrics.
The PDF pattern includes seam allowance, so you can cut the fabric directly without adding margins. While simplified, the only major difference from a traditional yukata is the absence of shoulder reinforcement fabric, meaning it can still be used as a standard yukata pattern.
For an authentic yukata, seam finishes and sewing methods should follow traditional techniques, so consulting a specialist sewing book is recommended. This pattern features a 49 cm sleeve length, similar to ready-made yukata, and uses a narrower collar width (棒衿 1寸5分) instead of a wide collar (広衿 2寸). The design includes an ohashori (excess fabric fold) for a proper fit and traditional appearance.
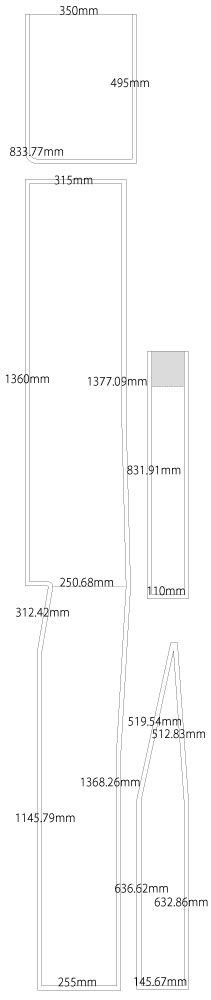
Men’s and women’s patterns differ in drafting. The men’s version does not include an ohashori and has sleeve lengths adjusted by size rather than the fixed 49 cm. For both versions, check the length by matching the back body piece to the wearer before cutting the fabric to ensure proper fit and balance.
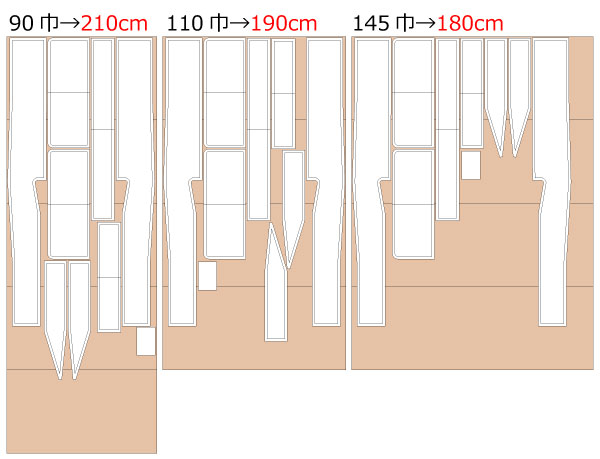
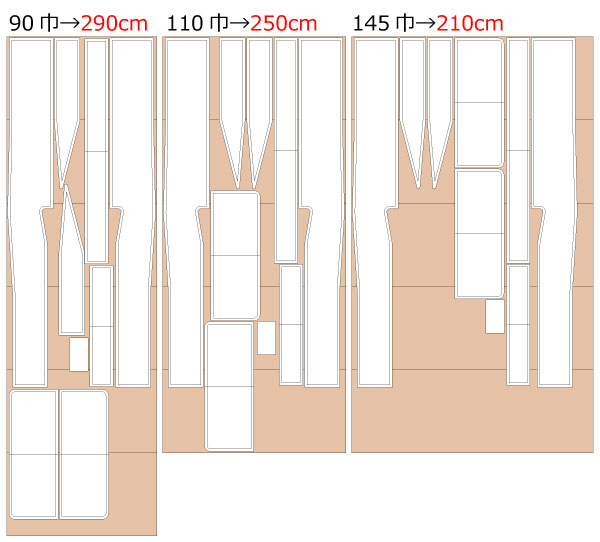
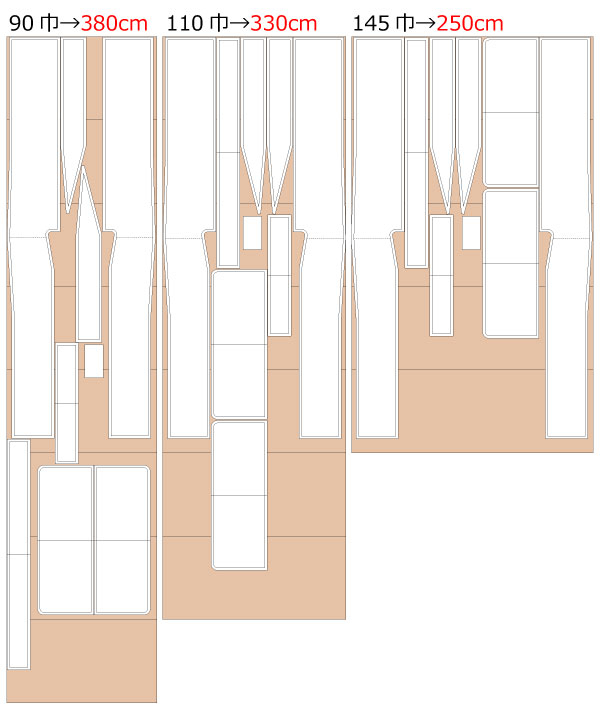
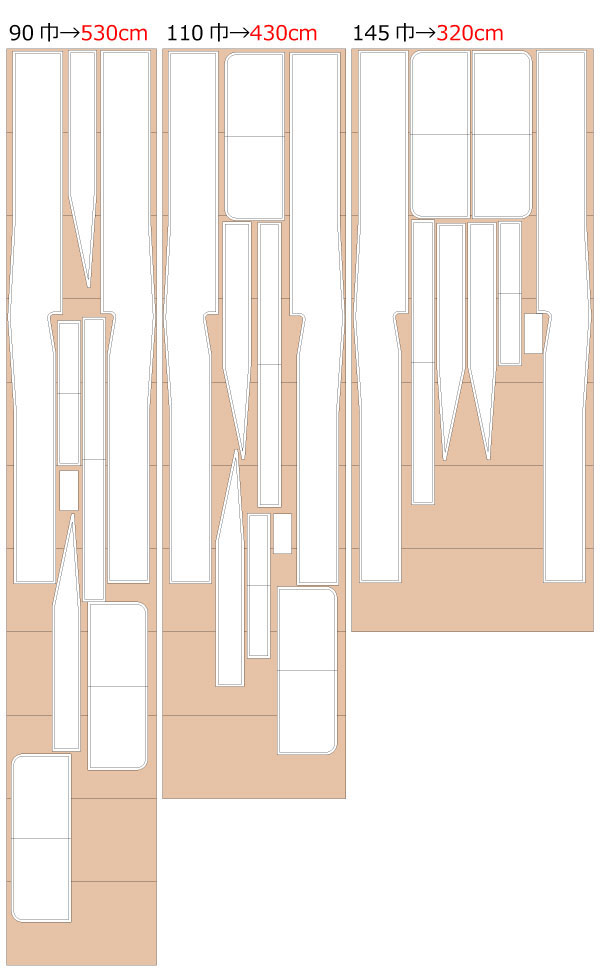
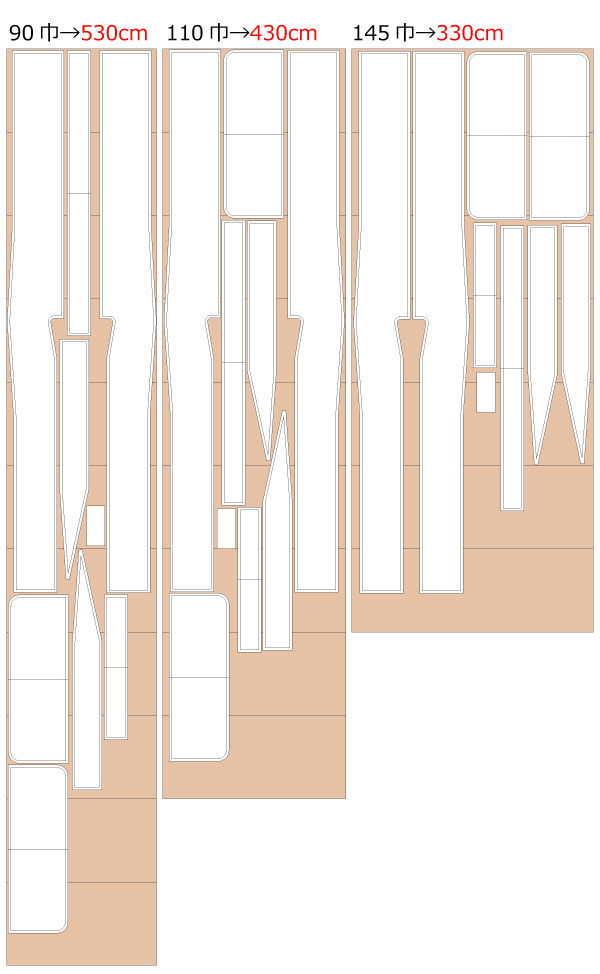
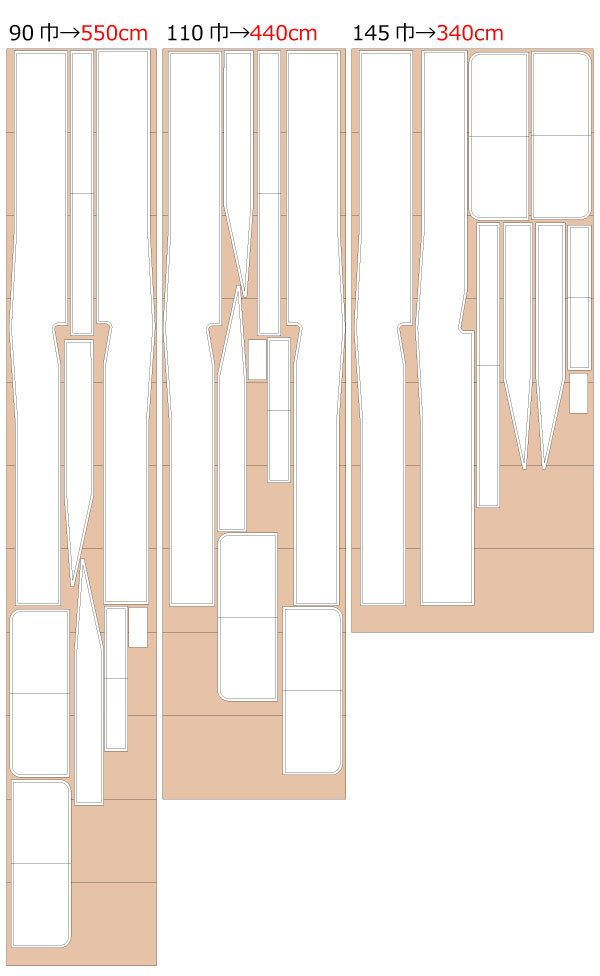
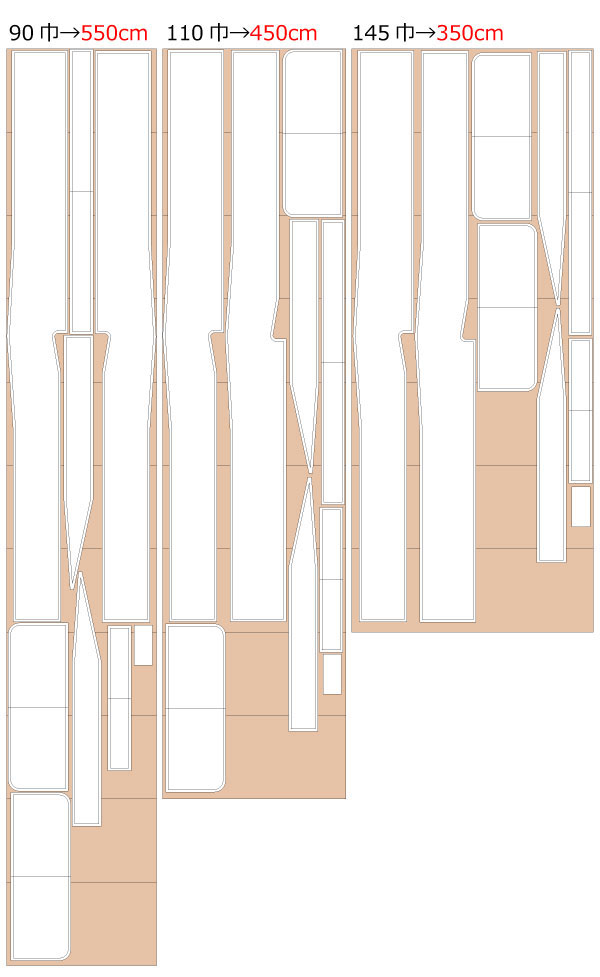
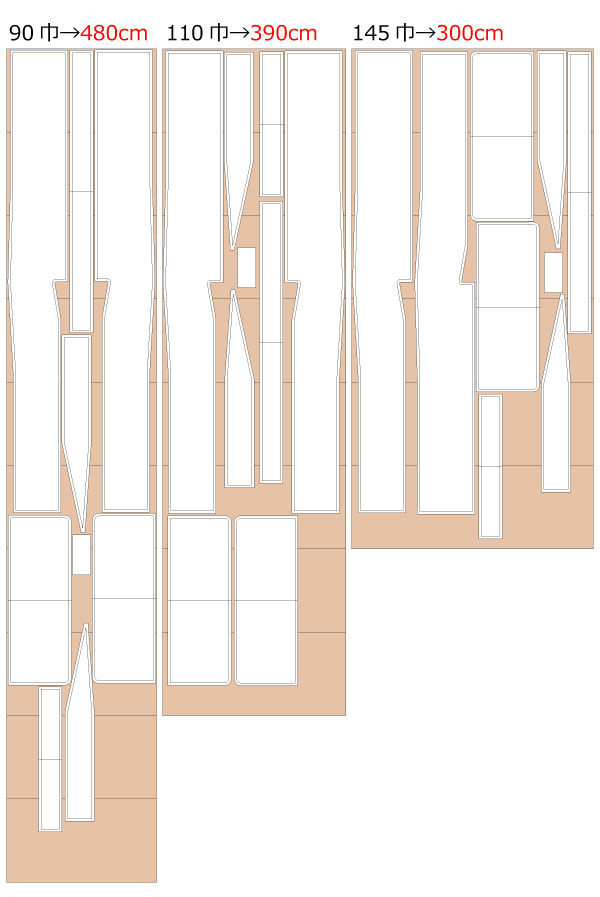
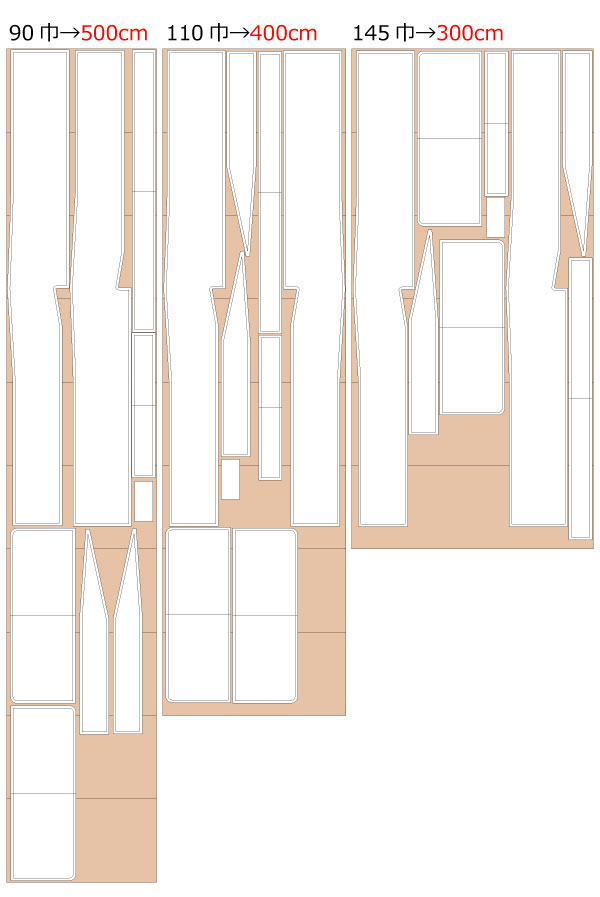
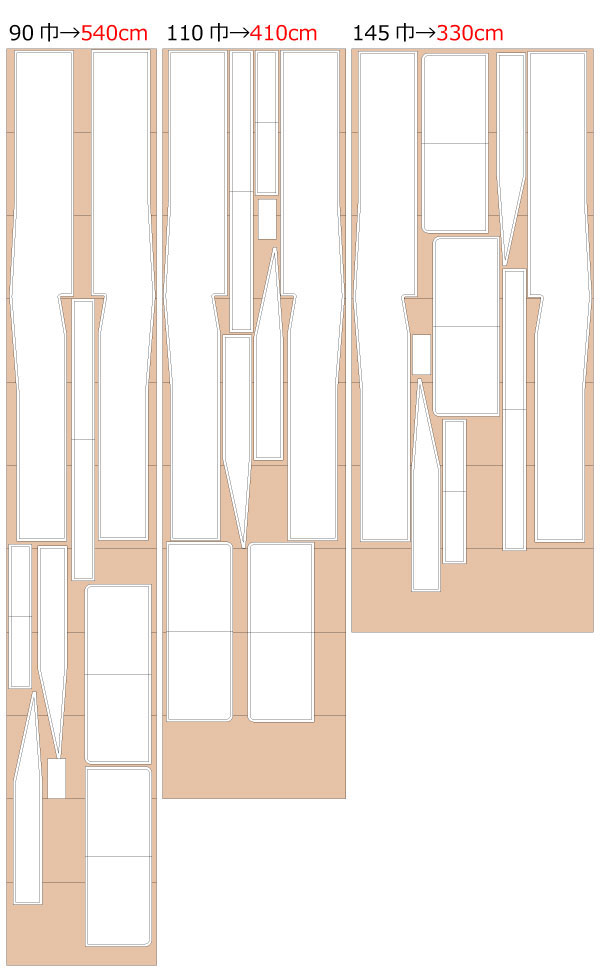
Due to the large size of the pattern, printing requires many sheets, so it’s best to check the page count before printing. After printing, align the joining lines, tape the sheets together, and cut out the pieces to start sewing immediately.
Whether you are searching for a free yukata sewing pattern, a cosplay kimono base, or a simplified traditional garment project, this pattern offers a versatile starting point for your creation.

The production process is explained with translation software.
If you have any suggestions on how to write like this, please let us know at info@dr-cos.com
We operate this site with your cooperation.
* The paper pattern is only a drawing of a simple Yukata for cosplay costumes.
* Please refer to a Japanese sewing book if you want to make a full-fledged Yukata.
* Also, since this is a simplified version, it is not lined.
(1) After sewing the back center of "Body",Serging,Iron the seam allowance to one side.
(2) After sewing "Okumi",Serging,Iron the seam allowance to one side.
(3) After Serging "Body",Sew them together,Press seam allowances open with an iron.
(4) Serging around the hem from the bottom of the collar position of "Okumi",Fold 0.5 inches with an iron and sew.
(5) After attaching "Collar interlining cloth" to "Collar", sew "Top layer collar" to "Collar" first, fold both sides by 0.5 inch, fold at the center first, and then sew it to "Body" while inserting it with "Collar". Sew it to the "Body" while clipping it between the "Collar".
(6) After sewing the Sewing stop position under the cuff of "Sleeve", sew "Sleeve" to "Body".
![]()
Free Paper Patterns are possible because of your support.
If you use our patterns, please share them on social media and tell your friends.
Your support helps DRCOS continue to provide patterns in the future.
![]()
![]()
Children's-100
about height 100cm 16sheets of A4 size

Children's-4
about height 39.4in 17sheets of letter size

Children's-120
about height 120cm 21sheets of A4 size
Children's-8
about height 47.2in 24sheets of letter size
Children's-140
about height 140cm 27sheets of A4 size
Children's-10
about height 55.1in 29sheets of letter size
Ladies'-S
hip90cm 38sheets of A4 size (or legal size)

Ladies'-S
about height 61in 41sheets of letter size
Ladies'-M
hip92cm 39sheets of A4 size (or legal size)

Ladies'-M
about height 63in 41sheets of letter size
Ladies'-L
hip96cm 39sheets of A4 size (or legal size)

Ladies'-L
about height 65in 42sheets of letter size
Ladies'-LL
hip101cm 40sheets of A4 size (or legal size)

Ladies'-LL
about height 66.9in 42sheets of letter size
Men's-S
about height 160cm 34sheets of A4 size
Men's-S
about height 63in 36sheets of letter size
Men's-M
about height 165cm 35sheets of A4 size
Men's-M
about height 65in 36sheets of letter size
Men's-L
about height 170cm 36sheets of A4 size
Men's-L
about height 66.9in 38sheets of letter size
Men's-LL
about height 178cm 39sheets of A4 size

Men's-LL
about height 70.1in 40sheets of letter size


