


![]()
Comments are made using translation software.
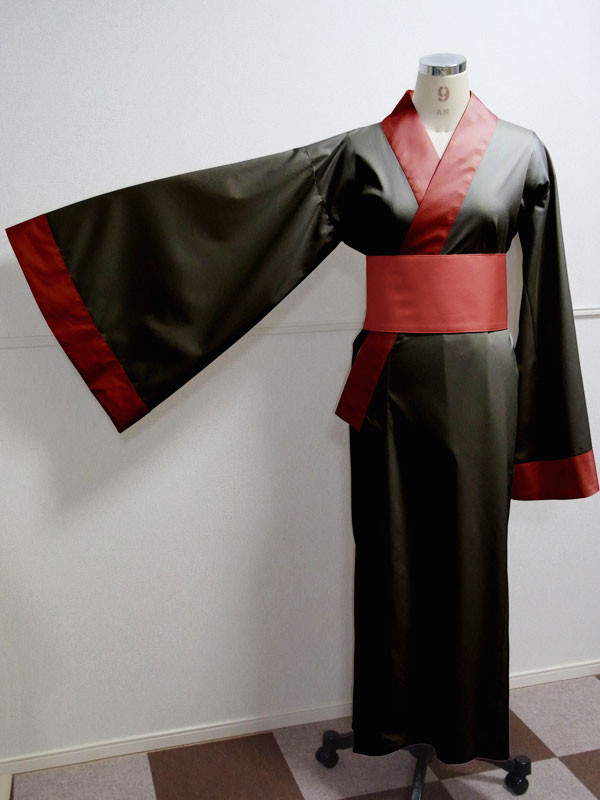
This is the pattern and instructions for creating a kimono with bell sleeves (flared sleeves).
Unlike traditional kimonos, there are no OKUMI (separated parts), and the body is made from a single piece.
It's a design that combines elements of both Western and Japanese clothing.
The collar width is also different from usual, slightly wider to emphasize the design.
The obi pattern is simplified to be fastened with Velcro.
It's significantly simplified, making it easier to make than a yukata and allowing for a sewing experience more akin to making Western clothing.
After printing, paste it according to the pasting line,Cut and use.
The pattern has a seam allowance, so it can be used as is.

I'm not so good at English.
So all explanations/instructions were translated using AI.
This is not always perfect and I apologise for any parts that are difficult to follow.
* This pattern is intended for cosplay costumes.
* For making authentic kimono, please refer to specialized Japanese sewing books.
(1) After sewing the “Center line of the back bodice side,” serge/overlock and press the seam allowance flat.
![]() How to Serge/overlock (sewing machine & overlock sewing machine)
How to Serge/overlock (sewing machine & overlock sewing machine)
(2) After serging/overlocking the side seams of the “Bodice,” sew them together and press the seam allowances open.
(3) After sewing the “Decorative fabric” onto the left front bodice, serge/overlock from the left front bodice to the hem and the right front bodice.
(4) Fold the seam allowances of the “Bodice” from the left front bodice to the hem and the right front bodice with an iron, then sew them with a sewing machine.
(5) After attaching the “Collar fusible interfacing” to the “Collar,” fold the Fold line with an iron, then fold along the Fold line (Centerline) so that it is ready to be pressed.
* When folding along the Fold line (Centerline), shift one side by about 1-2 mm to make sewing the underside easier.
(6) After shaping the “Collar,” turn it inside out, sew the side seam, turn it right side out, and press into shape.
(7) Attach the “Collar” to the “Bodice.”
* For sharp angles at the neckline, cutting will make it easier to sew.
(8) After sewing the “Sleeves Decorative fabric” onto the “Sleeve,” serge/overlock from the sleeve side seam to the hem.
* If the fabric pulls when pressing the “Sleeves Decorative fabric,” trim the seam allowance.
(9) After sewing the side seam of the “Sleeve,” press the seam allowance open, fold the seam allowance of the sleeve hem upward, and sew it with a sewing machine.
(10) After attaching the “Sleeve” to the “Bodice,” serge/overlock the seam allowances.
(11) After attaching the “Obi Fusible interlining” to the “Obi,” leave an opening for turning and finish with a French seam.
(12) After turning inside out and pressing the shape, sew the surrounding edges to secure it, then sew the velcro at the “Position to sew the hook-and-loop tape (Velcro).”
If you cannot see the SHOP due to 403 error
Price: ¥900 (JPY)
Approx. USD — / EUR — (for reference)
![]()
![]()
Children's 140 size
hip ~75cm length 115cm A4 paper size 39 sheets

Children's 10 size
hip ~29.5in length 45.3in letter paper size 38 sheets

Ladies' S size
hip ~90cm length 131cm A4 paper size 49 sheets
Ladies' S size
hip ~35.4in length 51.6in letter paper size 46 sheets
Ladies' M size
hip ~93cm length 136cm A4 paper size 51 sheets
Ladies' M size
hip ~36.6in length 53.5in letter paper size 50 sheets
Ladies' L size
hip ~96cm length 141cm A4 paper size 53 sheets
Ladies' L size
hip ~37.8in length 55.5in letter paper size 50 sheets
Ladies' LL size
hip ~101cm length 145cm A4 paper size 55 sheets
Ladies' LL size
hip ~39.8in length 57.1in letter paper size 56 sheets
Men's L size
hip ~105cm length 148cm A4 paper size 59 sheets
Men's L size
hip ~41.3in length 58.3in letter paper size 57 sheets
Men's LL size
hip ~110cm length 152cm A4 paper size 63 sheets
Men's LL size
hip ~43.3in length 59.8in letter paper size 60 sheets


