


![]()
This is a sewing pattern and tutorial for a Western hat.
In Japan, it is often called a “ten-gallon hat,” but that term is not technically correct.
It is better to use slightly firm fabric to create a beautiful silhouette. However, if the fabric is too thick, you will need a sewing machine with enough power, so beginners should start with medium-weight fabric.
Some steps in the process may be a little challenging. For a professional-level finish, you may want to refer to specialized books. Still, this pattern is practical enough for daily fashion or handmade cosplay costumes.
You can also make it stylish by using faux leather or unique fabrics. It looks cool when you use eyelets properly and thread a cord through them.
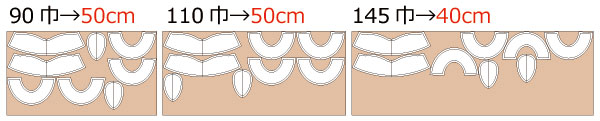
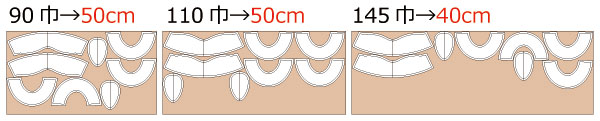
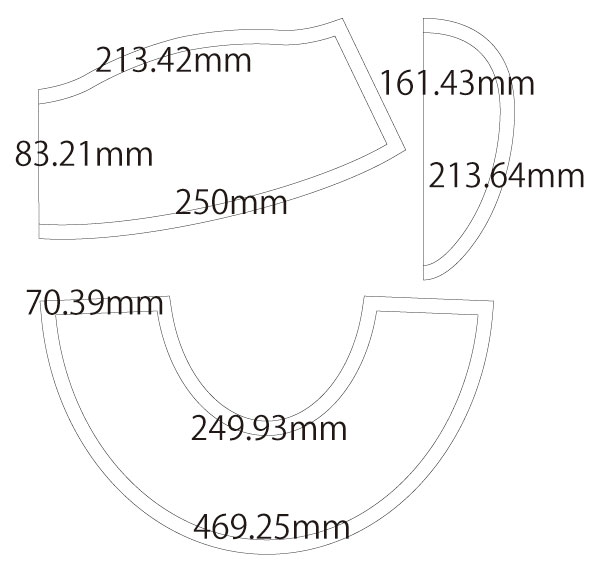
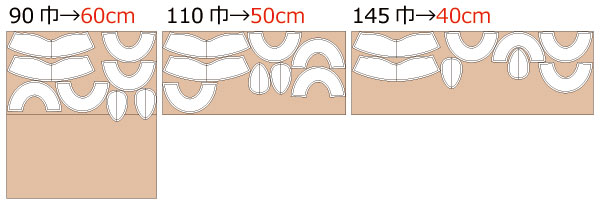
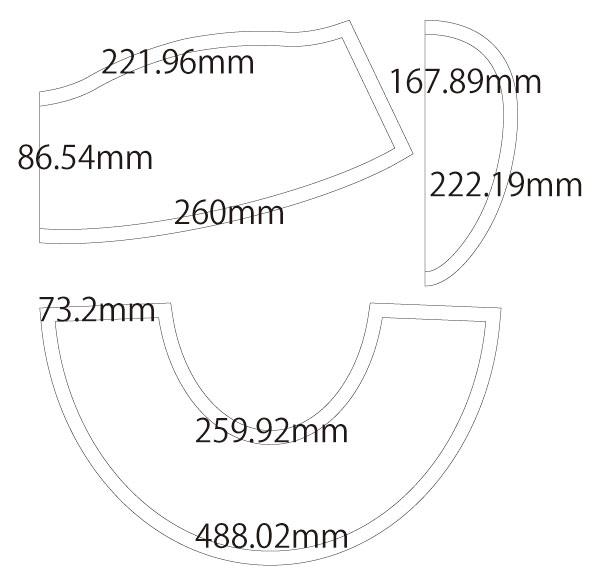
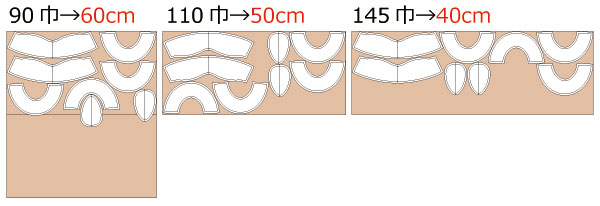
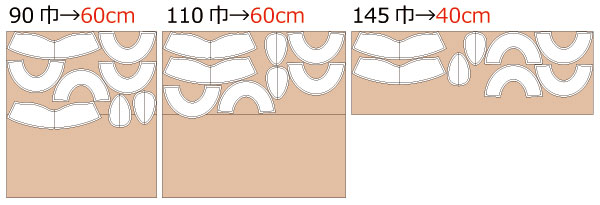
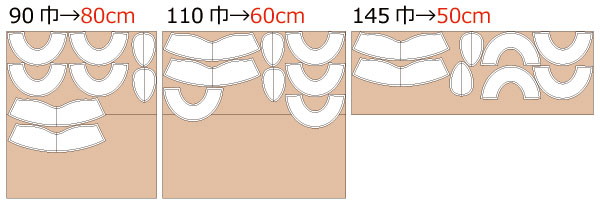
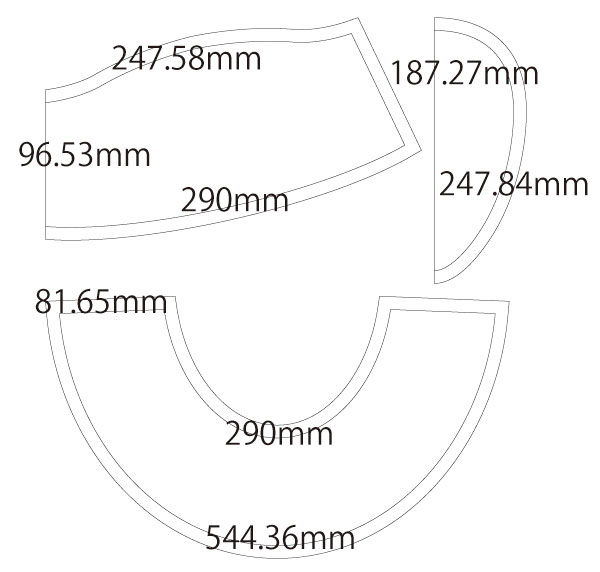
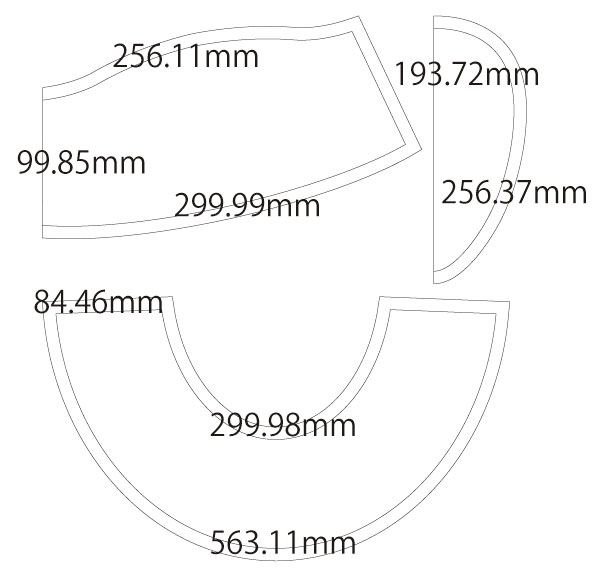
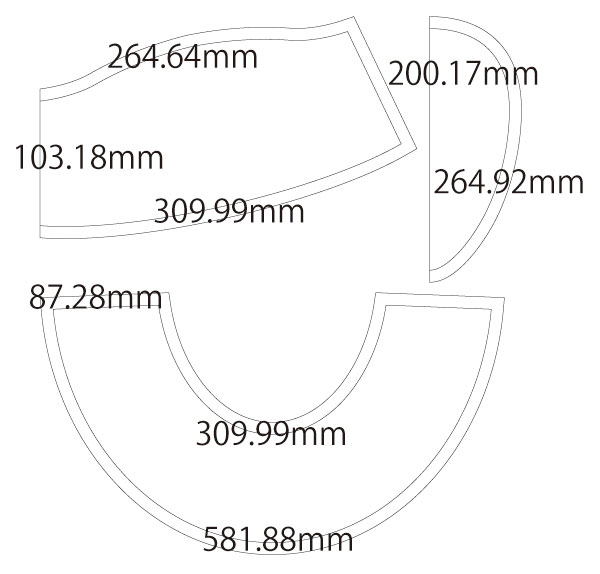
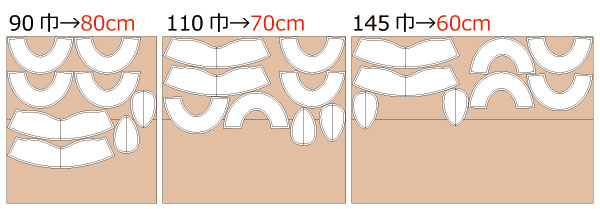
After printing, align and paste the pages along the matching lines, then cut along the outline. Seam allowances are already included, so you can use the pattern as it is.

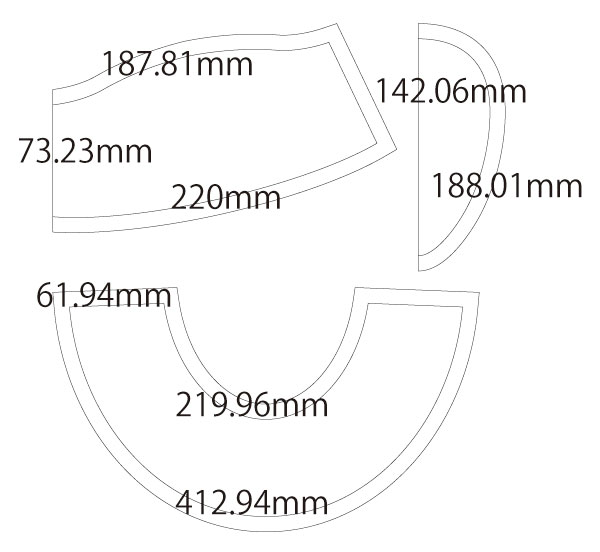
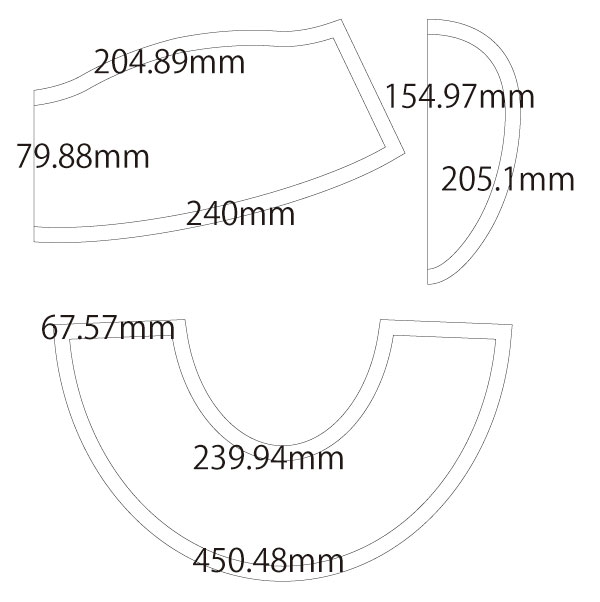
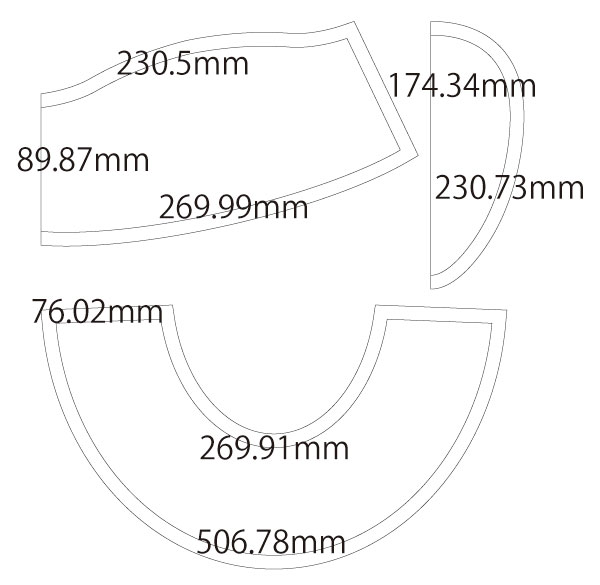
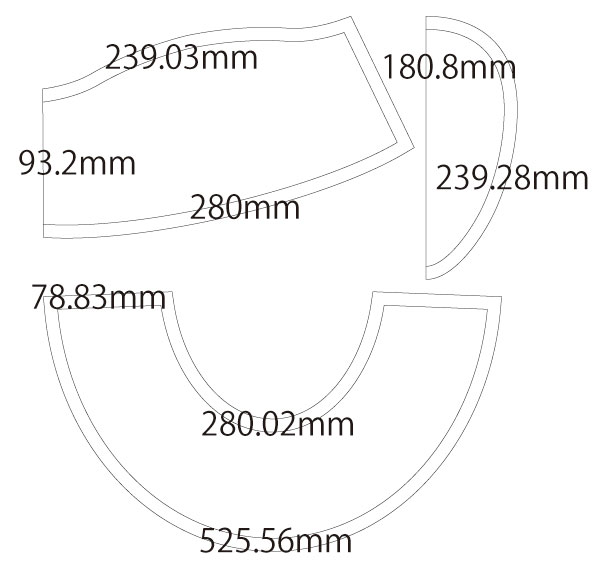
(1) Apply fusible interfacing to the "Top", "Side", and "Brim" pieces. Use the "top interfacing (heavy weight)", "side interfacing (heavy weight)", and "brim interfacing (heavy weight)".
(2) Sew the "Side" pieces together. Press the seam open with an iron and topstitch along the seam.
* Trim the seam allowance if necessary.
(3) Sew the "Top" and "Side" together. Press the seam open and topstitch.
* Trim the seam allowance if necessary. Do the same for both outer and lining.
(4) Sew the "Brim" pieces into a loop. Press the seam open and topstitch along the seam.
* Trim the seam allowance if necessary. Do the same for both outer and lining.
(5) Sew the two "Brim" pieces together along the dotted stitching line.
(6) Insert wire along the bias position of the "Brim" and cover it with bias tape.
* It is better to tack the wire onto the seam allowance to keep it fixed in place.
(7) Sew the "Brim" and "Side" together.
(8) Attach eyelets at the marked positions.
(9) Thread the cord through the eyelets and attach the loop end to complete.
![]()
Free Paper Patterns are possible because of your support.
If you use our patterns, please share them on social media and tell your friends.
Your support helps DRCOS continue to provide patterns in the future.
![]()
![]()
44cm
head size 44cm 3 sheets of A4 size


5 1/2(17.3in)
head size 17.3in 4sheets of letter size

46cm
head size 46cm 4 sheets of A4 size

5 3/4(18.1in)
head size 18.1in 4sheets of letter size
48cm
head size 48cm 4 sheets of A4 size
6(18.9in)
head size 18.9in 4sheets of letter size
50cm
head size 50cm 4 sheets of A4 size

6 1/4(19.6in)
head size 19.6in 4sheets of letter size
52cm
head size 52cm 4 sheets of A4 size
6 1/2(20.4in)
head size 20.4in 4sheets of letter size
54cm
head size 54cm 5 sheets of A4 size
6 3/4(21.2in)
head size 21.2in 5sheets of letter size
56cm
head size 56cm 6 sheets of A4 size
7(22in)
head size 22in 5sheets of letter size
58cm
head size 58cm 6 sheets of A4 size
7 1/4(22.8in)
head size 22.8in 5sheets of letter size
60cm
head size 60cm 6 sheets of A4 size

7 1/2(23.5in)
head size 23.5in 5sheets of letter size
62cm
head size 62cm 6 sheets of A4 size

7 3/4(24.3in)
head size 24.3in 6sheets of letter size
64cm
head size 64cm 6 sheets of A4 size

8(25.1in)
head size 25.1in 6sheets of letter size


