


![]()
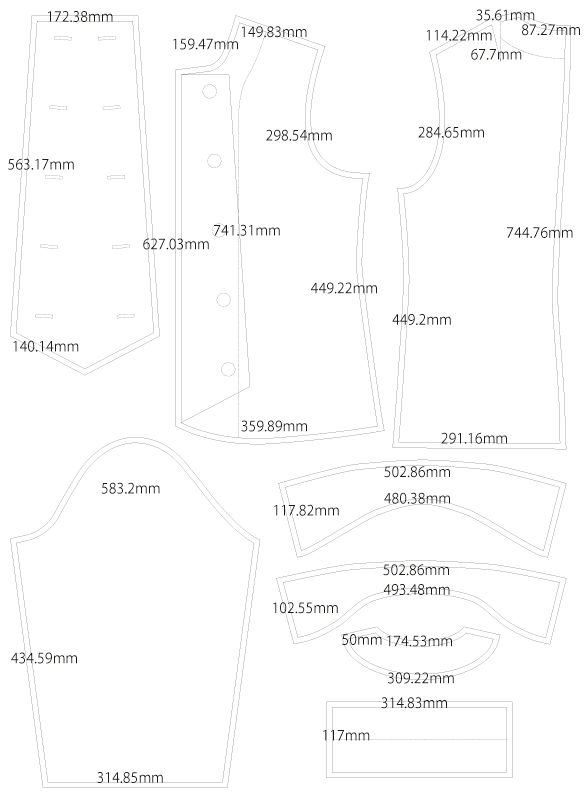
This is the Napoleon Jacket II sewing pattern with a front flap closure, created based on customer requests. The front flap can also be attached to the body to change the design into an open-front style.
The pattern is easy to modify to match your image, so it can be used as a base pattern for your project. If you would like to add lining, facing lines are included, so you can use them to draft your own lining pattern.
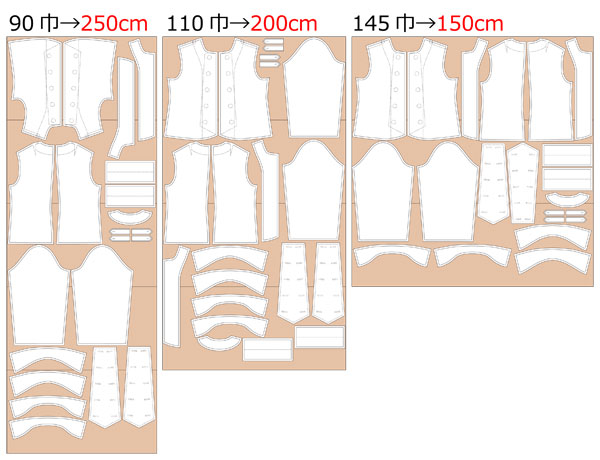
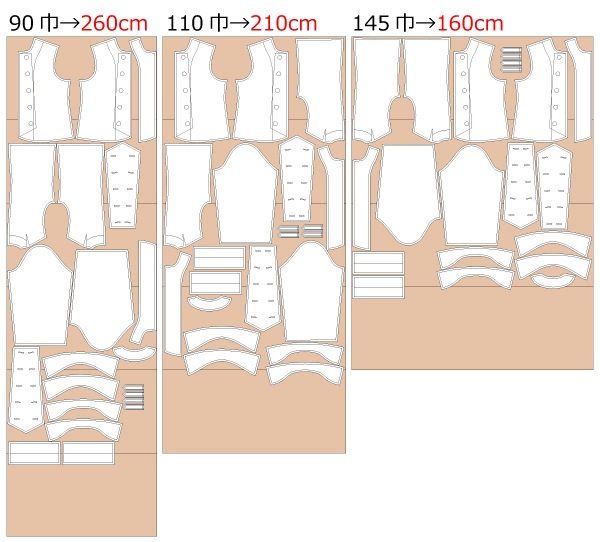
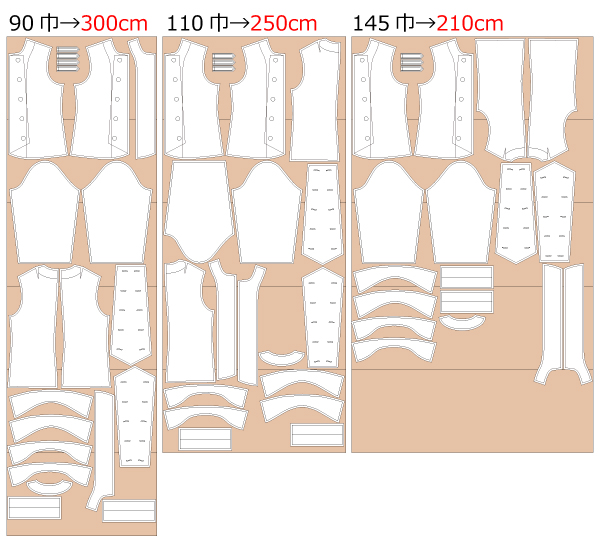
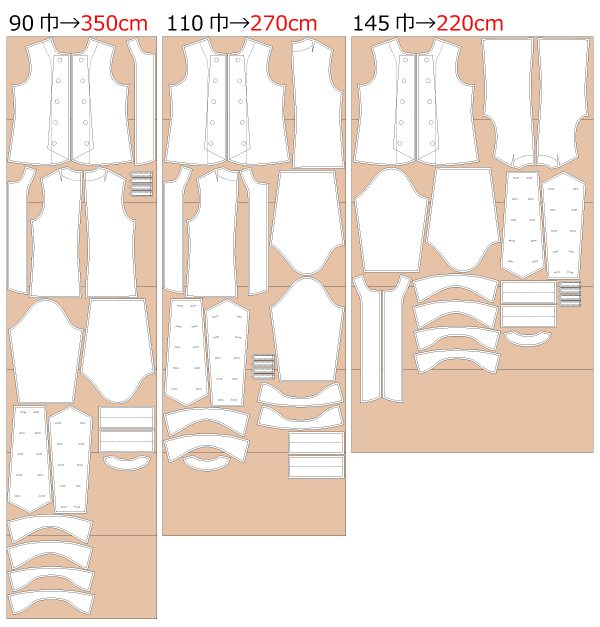
After printing, align and tape the pages together along the assembly lines, then cut out the pattern pieces. Seam allowances are already included, so you can use the pattern as it is.


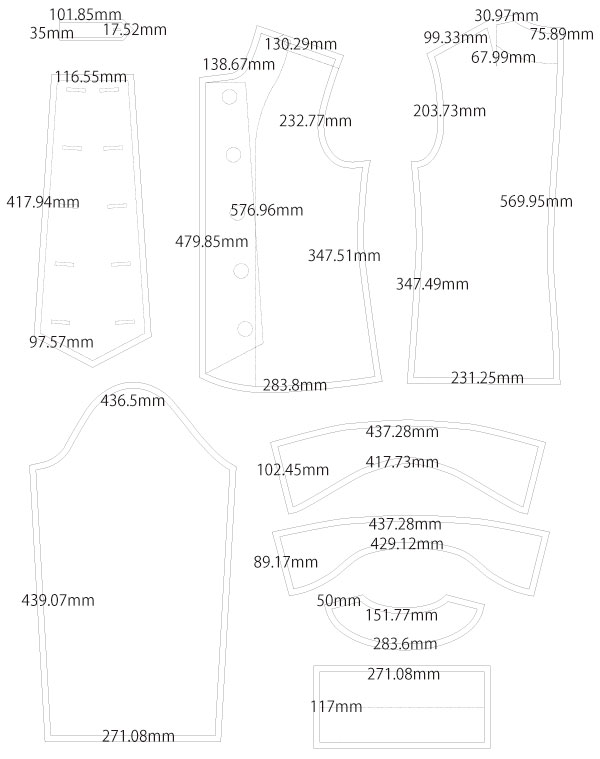
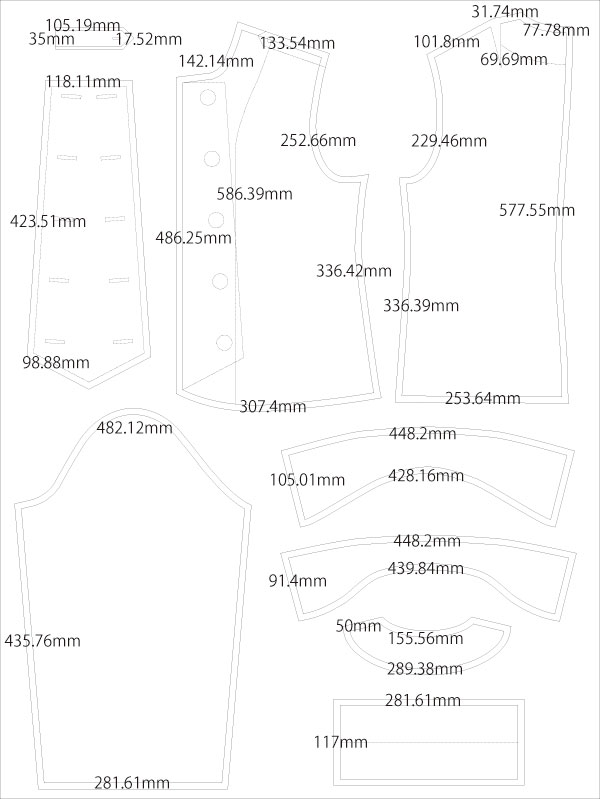
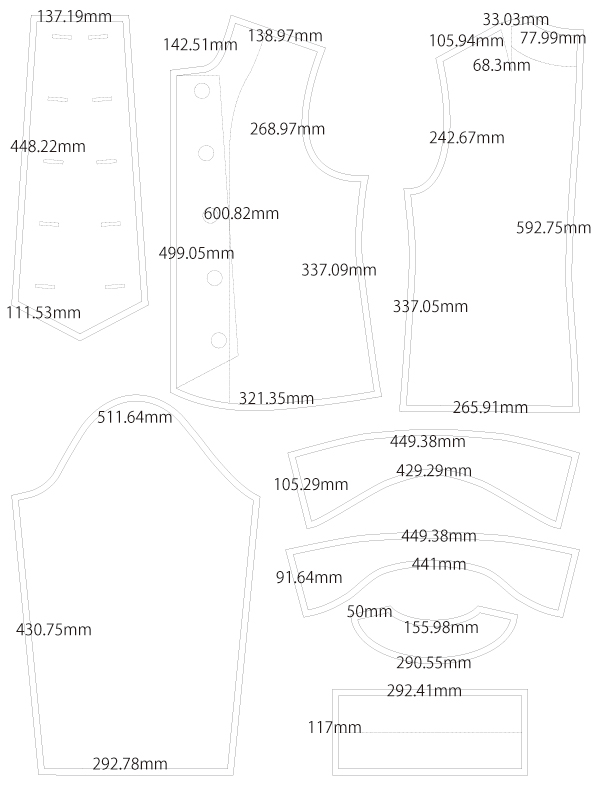
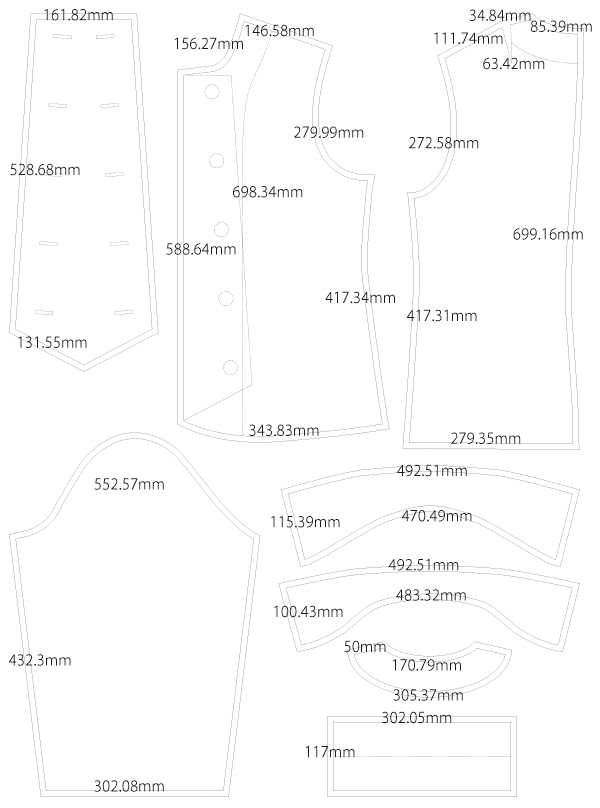
(1) Apply fusible interfacing with an iron to the "Collar", "Collar Stand", "Cuffs", "Front and Back Facing", and one piece of "Front Panel".
(2) Sew the "Epaulette", turn it right side out, shape it with topstitching, and make buttonholes so it can be inserted between the seams.
(3) Sew the "Collar", turn it right side out, shape it with an iron, and secure the shape with topstitching.
* When turning right side out, clip the seam allowance where the fabric pulls. Trim sharp corners, leaving 1–2 mm of seam allowance.
(4) Fold the seam allowance of the "Collar Stand" inward by 1 cm in advance and press with an iron. Sew the sides, turn right side out, insert the "Collar", sew in place, and topstitch.
(5) Sew the "Facing" pieces together, press the seam allowances open with an iron, and finish the raw edges.
(6) Finish the raw edges of the underarm seams of the "Sleeves", sew them together, and press the seam allowances open.
(7) Press the folding line on the "Cuffs" in advance to make them easier to attach. Sew the sides, turn right side out, and attach them to the sleeves.
(8) Sew the darts on the "Back Body" and press the seam allowances inward.
(9) Finish the raw edges of the shoulder and side seams of the "Front and Back Body", and also the side seams of the side body pieces.
(10) Sew the side seams of the body and connect all body pieces with topstitching. Finally, sew the shoulders and topstitch.
(11) Align the "Collar" at the collar attachment point on the body, and attach the "Facing" to the body while sandwiching the collar between them.
(12) Turn the "Facing" to the inside and topstitch around the entire edge to shape the garment.
* When turning right side out, clip the seam allowance where the fabric pulls.
(13) Attach the buttons at the marked button positions.
(14) Attach the sleeves while sandwiching the shoulder strap between the seams, and finish the armholes.
(15) Attach the spring hook at the marked position.
(16) Place the two "Front Panel" pieces together, baste around the edges, then finish the edges with bias binding.
(17) Make buttonholes at each marked buttonhole position.
![]()
Free Paper Patterns are possible because of your support.
If you use our patterns, please share them on social media and tell your friends.
Your support helps DRCOS continue to provide patterns in the future.
![]()
![]()
Children's-100
bust61.5cm waist58cm length38cm 10sheets of A4 size (or legal size)

Children's-4
bust 24.2in waist 22.8in length 15.0in 10 sheets of letter size

Children's-120
bust68cm waist65cm length44cm 12sheets of A4 size (or legal size)
Children's-8
bust 26.8in waist 25.6in length 17.3in 12 sheets of letter size
Children's-140
bust78.5cm waist74cm length51.5cm 13sheets of A4 size (or legal size)
Children's-10
bust 30.9in waist 29.1in length 20.3in 14 sheets of letter size
Ladies'-S
bust89cm waist84.5cm length55cm 17sheets of A4 size (or legal size)

Ladies'-S
bust 35.0in waist 33.3in length 21.7in 17 sheets of letter size
Ladies'-M
bust96cm waist91cm length56.5cm 18sheets of A4 size(or legal size)
Ladies'-M
bust 37.8in waist 35.8in length 22.2in 18 sheets of letter size
Ladies'-L
bust105cm waist100cm length57.5cm 19sheets of A4 size (or legal size)
Ladies'-L
bust 41.3in waist 39.4in length 22.6in 20 sheets of letter size
Ladies'-LL
bust109.5cm waist105cm length59.5cm 20sheets of A4 size (or legal size)
Ladies'-LL
bust 43.1in waist 41.3in length 23.4in 21 sheets of letter size
Men's-L
bust115.5cm waist110cm length69.5cm 26sheets of A4 size (or legal size)
Men's-L
bust 45.5in waist 43.3in length 27.4in 25 sheets of letter size
Men's-LL
bust120.5cm waist115cm length74cm 26sheets of A4 size (or legal size)
Men's-LL
bust 47.4in waist 45.3in length 29.1in 27 sheets of letter size


