


![]()
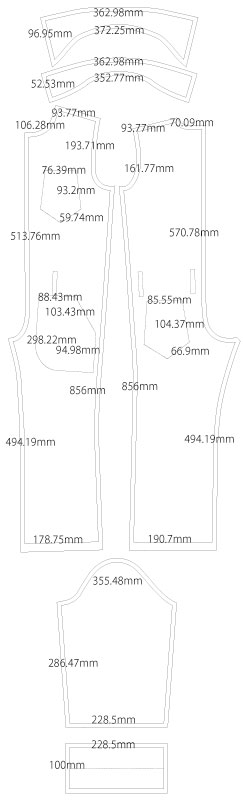
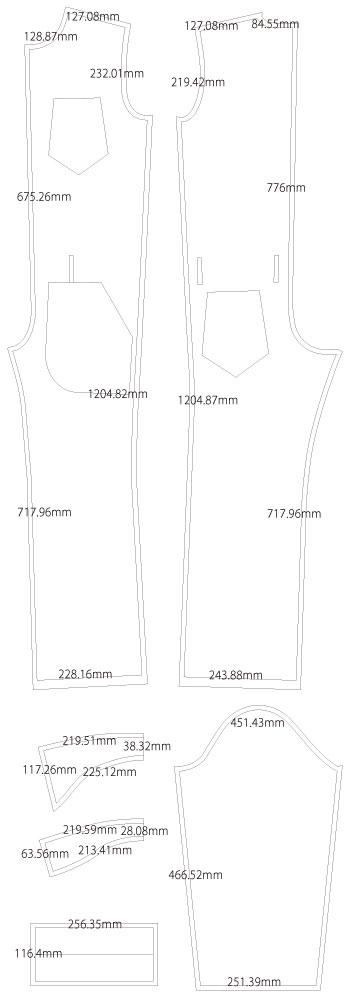
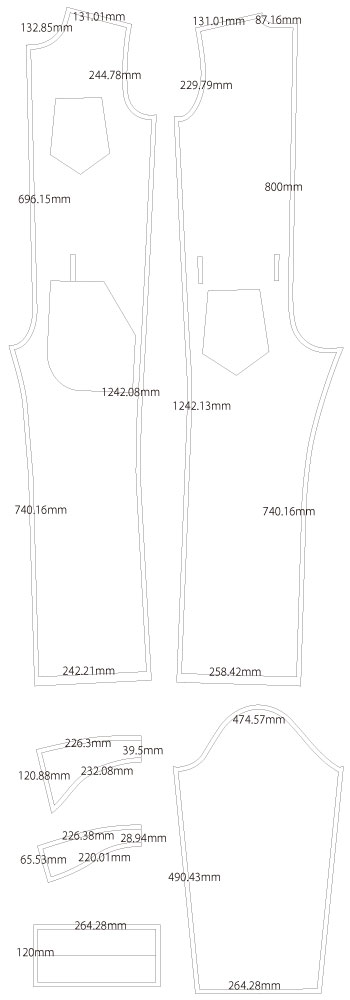
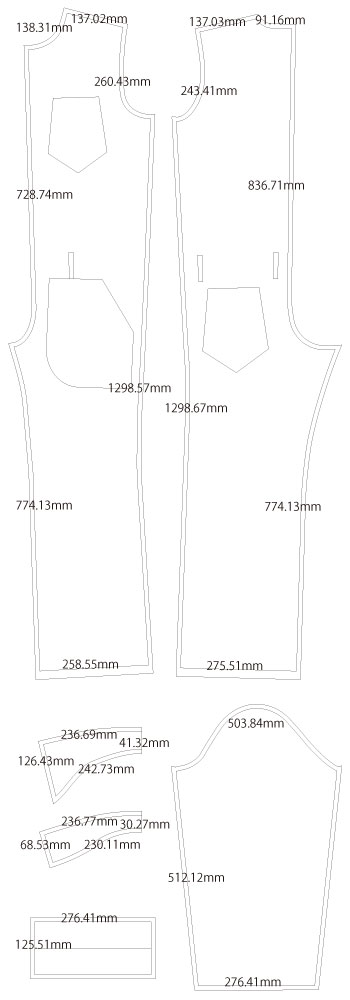
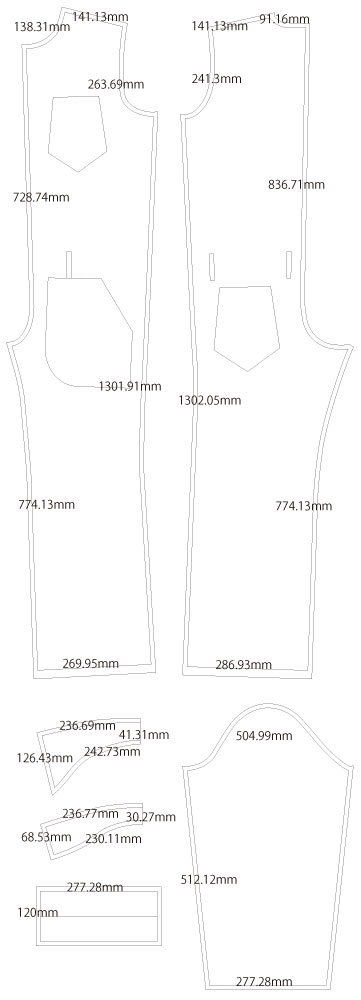
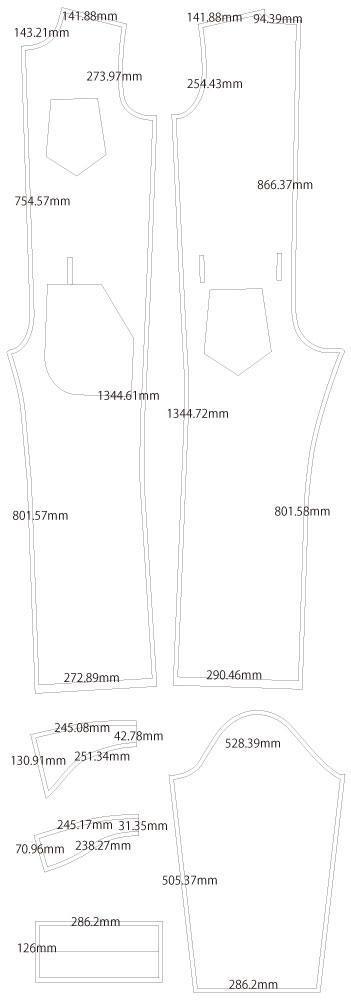
This is a free sewing pattern for a full-body jumpsuit (all-in-one), designed with seam allowances included for beginners. Despite its appearance, it is surprisingly easy to make.
A jumpsuit is a garment where the top and bottom are connected, commonly used as workwear or protective clothing. While most store-bought jumpsuits are loose-fitting, this pattern is drafted with a slightly slimmer silhouette for a more stylish look.
Originally made as loungewear, it can also be adapted for costumes or other uses. The collar is designed slightly larger with a collar stand, and the belt strap position is shifted toward the hips. The pockets are also uniquely shaped and placed toward the front for a distinctive style.
For loungewear, stretchy fabrics are recommended for comfort. For men’s versions, using a double-slider zipper is convenient for restroom use.
Because jumpsuits can feel tight and restrict movement if the inseam or seat height is not correct, it is safer to try the paper pattern on your body after printing and make small adjustments as needed.
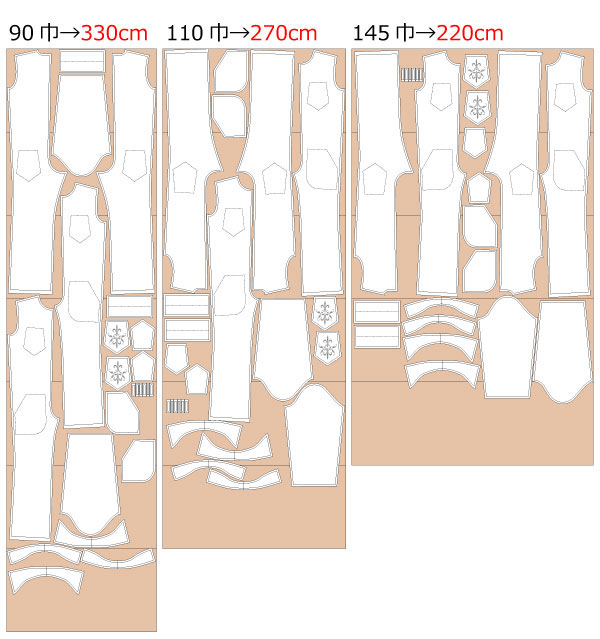
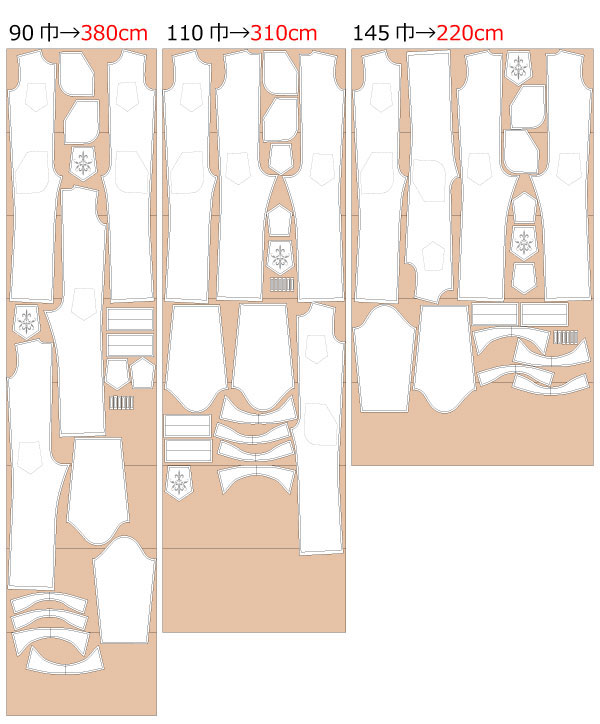
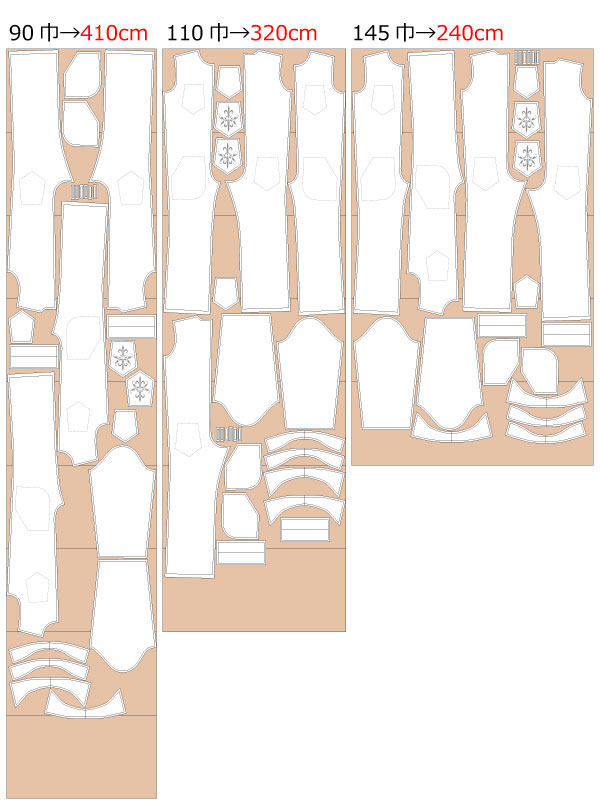
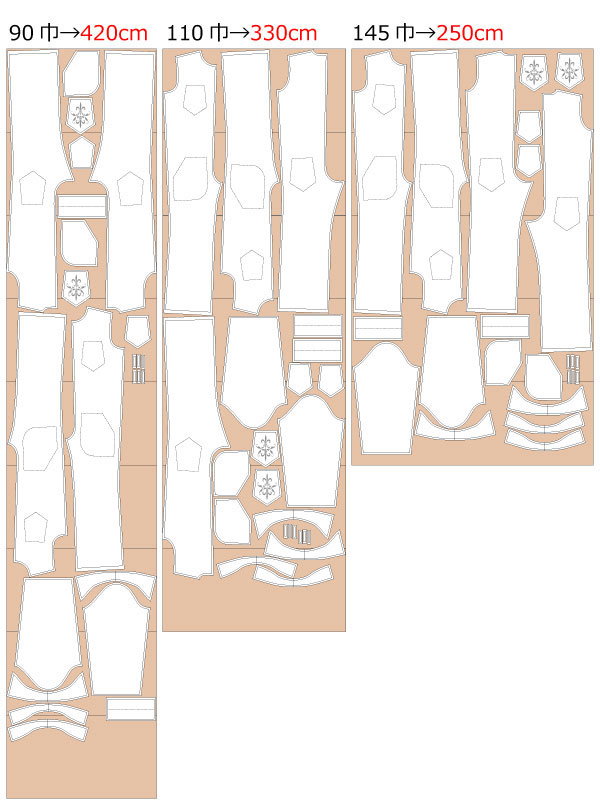
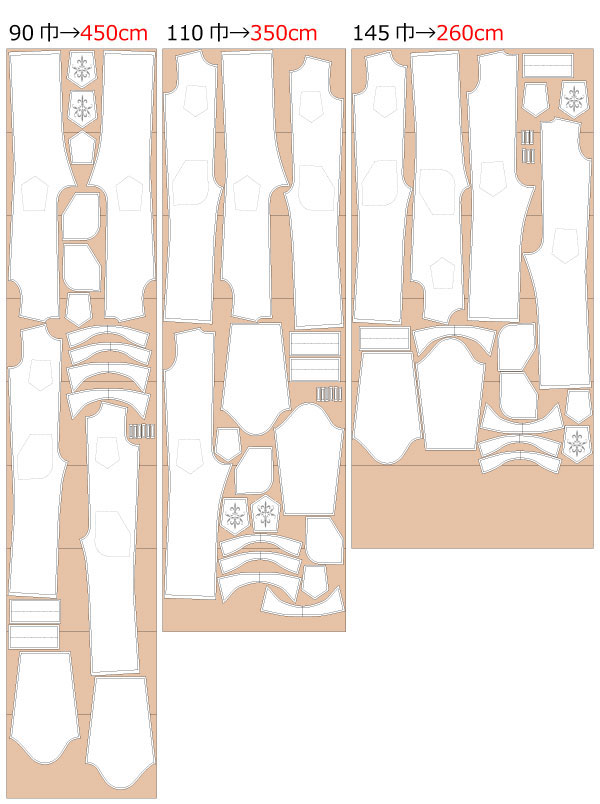
After printing, align the pages along the join lines, cut, and use the pattern directly since the seam allowances are already included.

I'm not so good at English.
So all explanations/instructions were translated using AI.
This is not always perfect and I apologise for any parts that are difficult to follow.
If you have any suggestions on how to write like this, please let us know at info@dr-cos.com
We operate this site with your cooperation.
(1) Sew a pocket to the pocket position and a belt strap to the belt strap position.
* When attaching embroidery or other decorations to the pockets, please do so first.
(2) Serge/overlock the center of "Front bodice" and "Back bodice", inseam, armpit, shoulder and sleeve armpit.
![]() How to Serge/overlock (sewing machine & overlock sewing machine)
How to Serge/overlock (sewing machine & overlock sewing machine)
(3) Sew the inseam, armpits, and shoulders of the "Body" and press seam allowances open with an iron.
(4) Serge/overlock the hem, fold up 2cm, and sew with a sewing machine.
(5) Sew from the back center of the "Body" to the zipper position.
* If possible, sew the inseam area in double layers to increase the strength.
(6) Stick a stay tape at the zipper position and sew the zipper.
(7) Apply fusible interlining to the collar, sew it together, turn it inside out, and iron it into shape.
(8) Attach fusible interlining to the "Collar stand", sew the sides together, insert the "Collar" inside, sew it together, and turn it inside out.
(9) Stitch the "Body" between the "Collar stand" and the "Body" interlining.
* It is recommended to fold the "Body" side 1cm in advance with an iron to make it easier to work with.
(10) Make a "Sleeve" hem "Cuff" and sew it.
![]() How to sew sleeves and sleeve cuffs
How to sew sleeves and sleeve cuffs
(11) Sew the "Sleeve" to the "Body" and serge/overlock the armhole.
![]()
Free Paper Patterns are possible because of your support.
If you use our patterns, please share them on social media and tell your friends.
Your support helps DRCOS continue to provide patterns in the future.
![]()
![]()
Children's 120 size
length100.5cm 17sheets of A4 size (or legal size) size 17 sheets


Children's 8 size
Coming soon?
Women's S size
length 145cm A4 paper size 26 sheets
Women's S size
Coming soon?
Women's M size
length 148cm A4 paper size 29 sheets
Women's M size
Coming soon?
Women's L size
length 154.5cm A4 paper size 32 sheets
Women's L size
Coming soon?
Women's LL size
length 154.5cm A4 paper size 32 sheets
Women's LL size
Coming soon?
Men's L size
length 160cm A4 paper size 34 sheets
Men's L size
Coming soon?
Men's LL size
length 160cm A4 paper size 34 sheets
Men's LL size
Coming soon?


