![]()
Comments are made using translation software.
Instructions on how to make and the puzzle-like arrangement of ICHIMATSU-HAORI are described in the pattern.
A pattern for HAORI, where you can piece together the requested fabric like a puzzle to create the ICHIMATSU-HAORI, has been provided due to popular demand.
The lining pattern is also included, but it's simplified to an easy construction where you stitch the perimeter together.
As there is no collar attached, if you wish to have a collar, please measure from the neckline to the hem, and attach one that is 5cm in width.
Creating a HAORI by piecing together fabric like a puzzle can be challenging in terms of balance. However, we've provided stitching instructions to enable even beginners to make it.
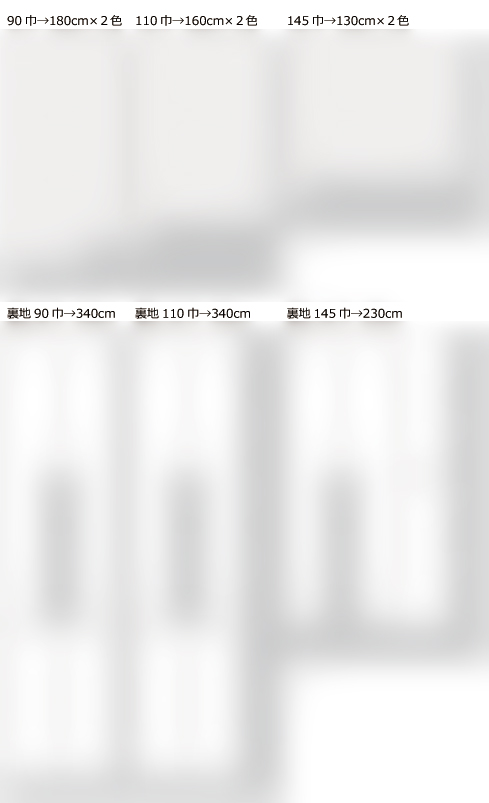
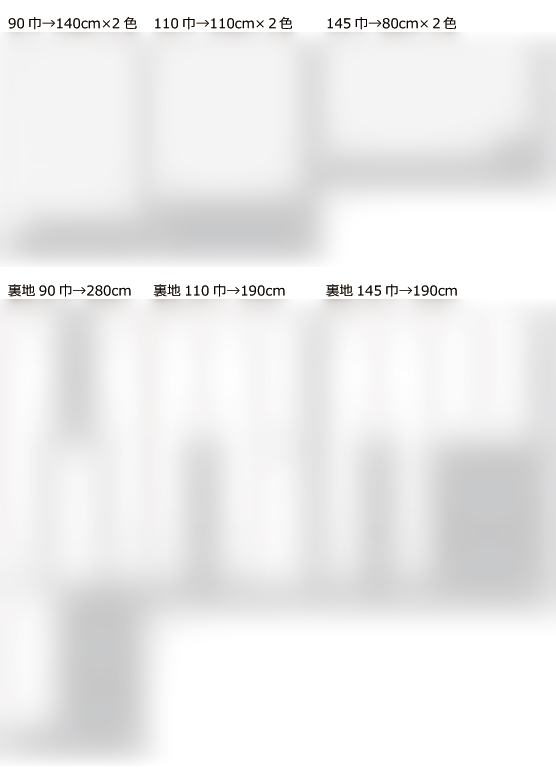
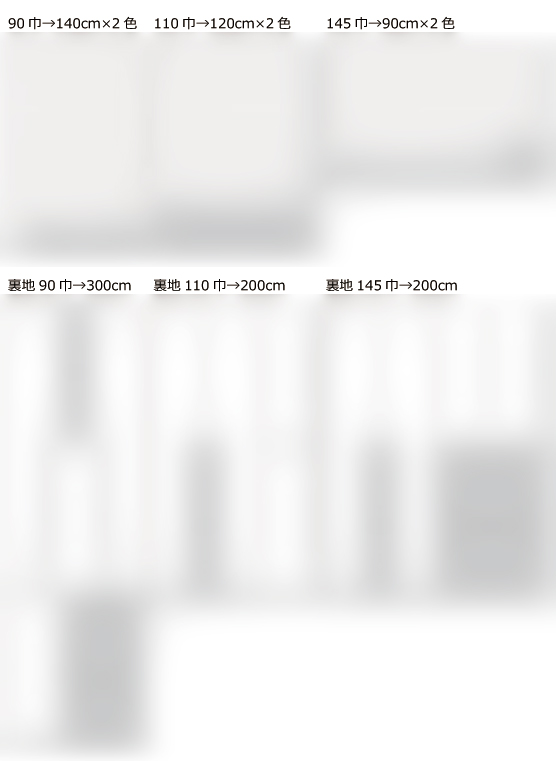
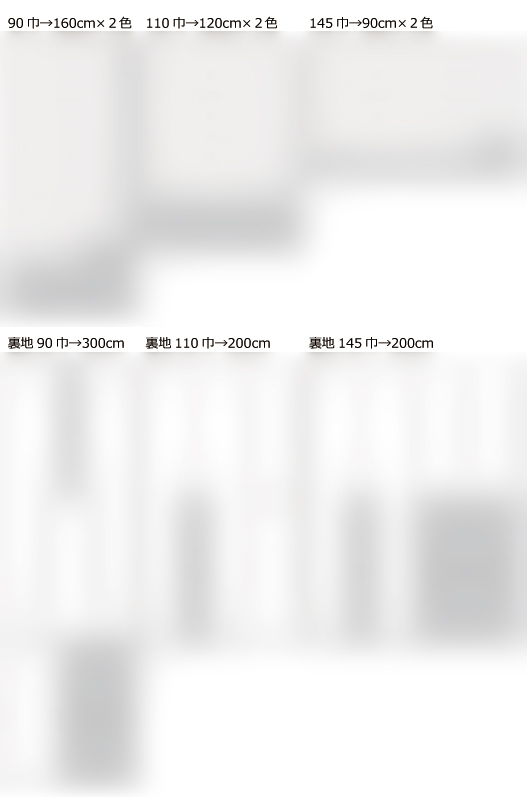
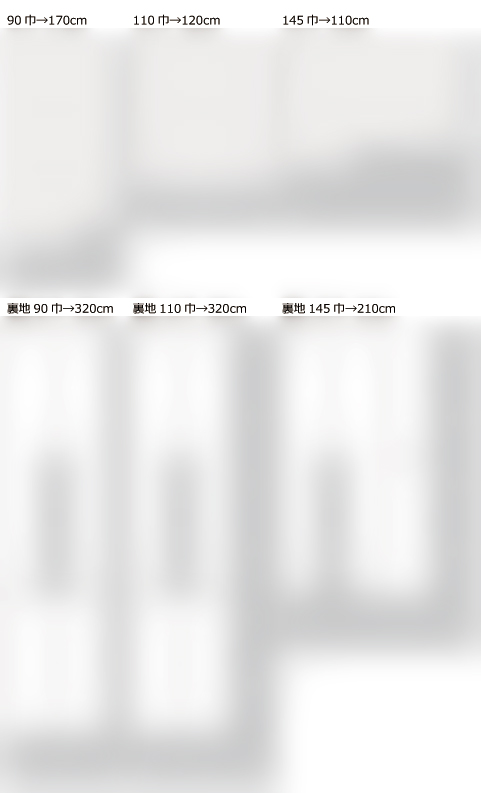
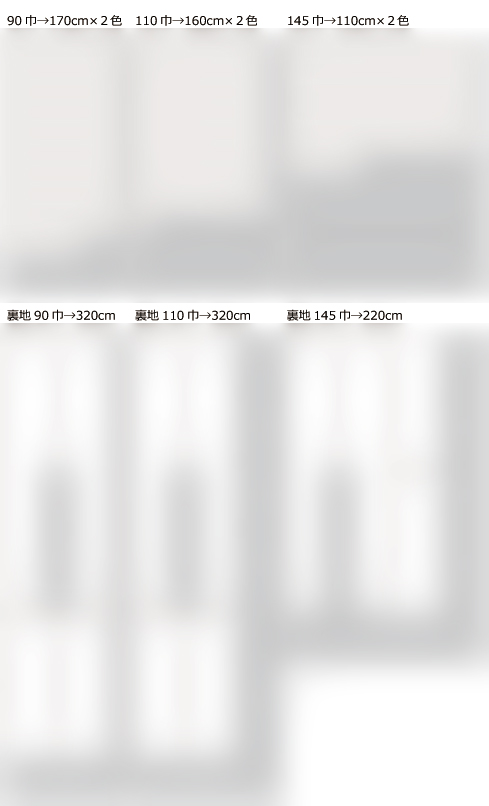
Measuring the required meters of fabric for the outer fabric and lining can be difficult. Therefore, we've attached the required meterage at the end of the pattern. If not needed, please refrain from printing the last page.
Since the fabric is essentially pieced together like a puzzle, it's also possible to create the HAORI by combining various leftover fabrics.
For the material of the fabric used, it's recommended to use cotton or similar materials rather than polyester. This ensures that the iron adheres firmly, making it easier to create the ICHIMATSU-HAORI.
Additionally, you can also use it as a pattern for the body section, allowing you to make regular HAORI rather than specifically ICHIMATSU-HAORI.
After printing, paste it according to the pasting line,Cut and use.
The pattern has a seam allowance, so it can be used as is.

I'm not so good at English.
So all explanations/instructions were translated using AI.
This is not always perfect and I apologise for any parts that are difficult to follow.
* This pattern is specifically for making a patched haori with a checkerboard pattern for cosplay costumes.
For making a full-fledged haori, please refer to a specialized Japanese tailoring book. There is no "Collar" design included.
Instructions are provided to make sewing easier, such as topstitching around the Lower sleeve edge and "Body".
* As the right side forms a square shape, please mark the fabric before cutting so that the grain is visible.
(1) Connect right side(1)(2) alternately to make six pieces, and press seam allowance (S/A) flat with an iron.
* Even if the fabrics are of the same type, when flipped, the sequence becomes alternating, so the order of colors doesn't matter.
(2) Connect right side(1)(2) alternately to make four pieces, and press seam allowance (S/A) flat with an iron.
(3) Connect right side(3) to alternating right side(1)(2) to make one piece, and press seam allowance (S/A) flat with an iron.
(4) Connect right side(4) to alternating right side(2)(1) to make one piece, and press seam allowance (S/A) flat with an iron.
(5) Stitch the "Back bodice" part of the lining together and press seam allowances open with an iron.
(6) Stitch right side "Body" to right side "Sleeve", and lining "Body" to lining "Sleeve", then press seam allowances open with an iron.
(7) Stitch the sides of both right side and lining "Body" together, and press open the seam allowance with an iron.
(8) Stitch the lower part of both right side and lining "Sleeve" together, and press open the seam allowance with an iron.
(9) Fold and iron all seam allowances from Around the neck to the hem on both right side and lining.
(10) Fold and iron the seam allowance of Lower sleeve edge on both right side and lining.
(11) Topstitch all the way from Around the neck to the hem on both right side and lining.
(12) Topstitch the Lower sleeve edge on both right side and lining.
* When dealing with slippery or prone-to-shifting fabrics, stitch and secure the "Back bodice" and shoulder parts to prevent shifting.
If you cannot see the SHOP due to 403 error
Price: ¥700 (JPY)
Approx. USD — / EUR — (for reference)
![]()

length35.4in yukitake24.2in 14sheets of A4 size(or legal size)
length37.4in yukitake25.6in 19sheets of A4 size(or legal size)
length38.2in yukitake26.2in 20sheets of A4 size(or legal size)
length39.4in yukitake27in 21sheets of A4 size(or legal size)

length40.2in yukitake27.4in 21sheets of A4 size(or legal size)
length41.3in yukitake28.1in 23sheets of A4 size(or legal size)
length43.3in yukitake29.5in 23sheets of A4 size(or legal size)