


![]()
Comments are made using translation software.
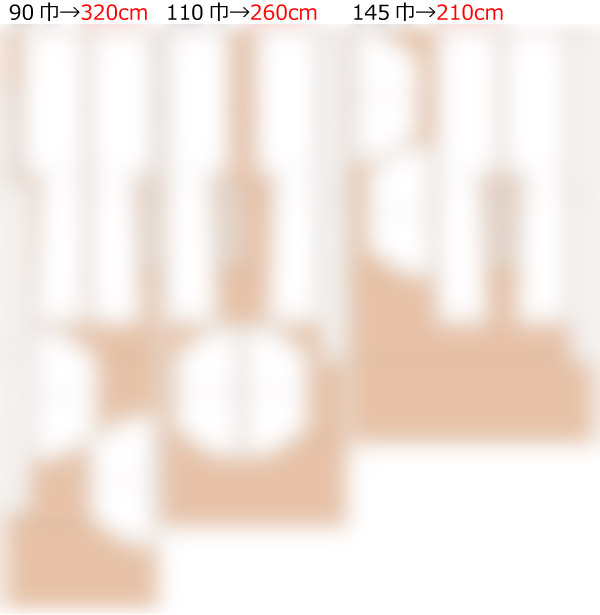
Here is a simplified pattern and instructions for making a Hanten.
The pattern is simplified, so it's designed to be made in one layer.
If you're making a DENCHIKO or thick version, please make it with a two-layer structure and use cotton or quilt batting as padding.
Since it's a simplified pattern, the instructions are straightforward. However, if you need something more authentic, please refer to specialized books on Japanese tailoring for guidance.
After printing, paste it according to the pasting line,Cut and use.
The pattern has a seam allowance, so it can be used as is.

I'm not so good at English.
So all explanations/instructions were translated using AI.
This is not always perfect and I apologise for any parts that are difficult to follow.
* This pattern is intended solely for cosplay costumes and is designed as a simplified Hanten.
For making an authentic Hanten, please refer to specialized books on traditional Japanese tailoring.
Additionally, this simplified version does not include a lining.
If you are making a Hanten with padding, please create a double-layer structure.
(1) Sew the center back of the "Bodice", serge/overlock it, and press the seam allowance (S/A) to one side with an iron.
![]() How to Serge/overlock (sewing machine & overlock sewing machine)
How to Serge/overlock (sewing machine & overlock sewing machine)
(2) Serge/overlock around the "Sleeve" and all edges of the "Bodice" except for the neckline.
(3) Sew the "Sleeve" to the "Bodice" and press the seam allowance open with an iron.
(4) Sew the sides of the "Bodice" and press the seam allowance open with an iron.
(5) Sew the sides of the "Sleeve" and press the seam allowance open with an iron.
(6) Fold the sleeve cuffs 15mm (or 0.5in) and sew with a sewing machine.
(7) Fold both sides of the "Collar" 15mm (or 0.5in), press the fold in the center, and then sew the "Collar" to the "Bodice" while enclosing the edges with the "Collar".
* If the fabric of the "Collar" is thin or lacks stiffness, apply fusible interlining.
(8) Sew the "waist band" and attach it to the "Collar" on the inside of the "Bodice".
If you cannot see the SHOP due to 403 error
Price: ¥600 (JPY)
Approx. USD — / EUR — (for reference)
![]()
![]()
Children's 140 size
length 70cm yukitake 65cm A4 paper size 16 sheets

Children's 10 size
length 27.6in yukitake 25.6in letter paper size 16 sheets

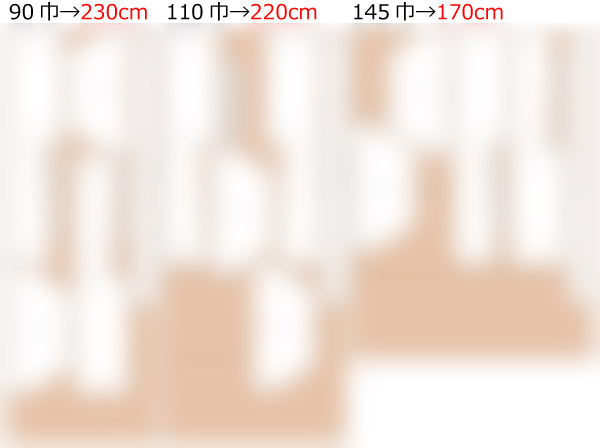
Ladies' S size
length 77.5cm yukitake 67cm A4 paper size 19 sheets
Ladies' S size
length 30.5in yukitake 26.4in letter paper size 20 sheets
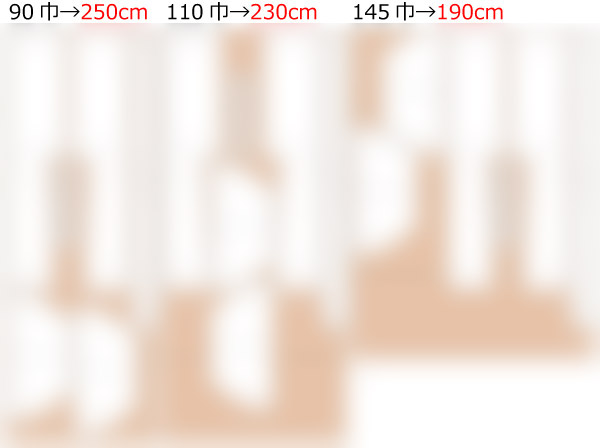
Ladies' M size
length 80cm yukitake 69cm A4 paper size 19 sheets
Ladies' M size
length 31.5in yukitake 27.2in letter paper size 21 sheets
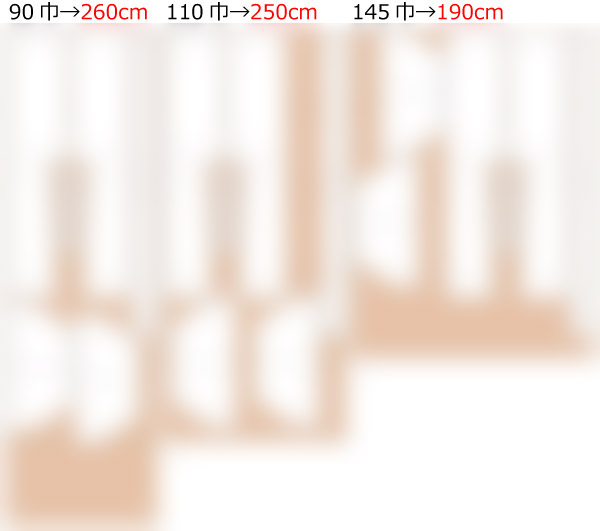
Ladies' L size
length 82.5cm yukitake 70cm A4 paper size 20 sheets

Ladies' L size
length 32.5in yukitake 27.6in letter paper size 21 sheets
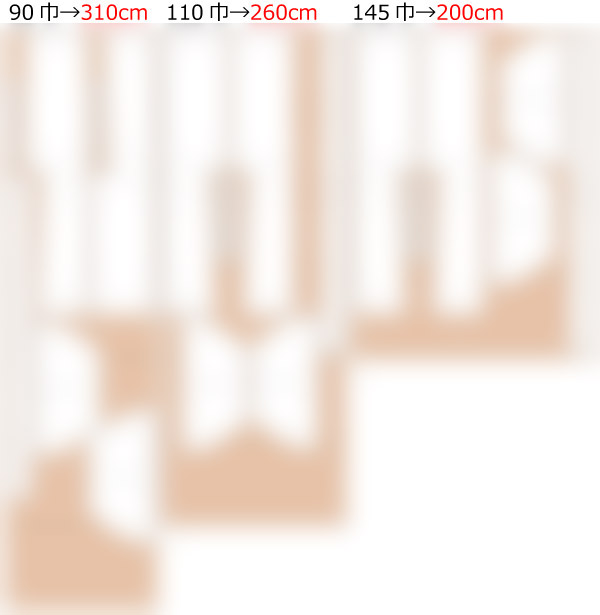
Ladies' LL size
length 85cm yukitake 72cm A4 paper size 20 sheets
Ladies' LL size
length 33.5in yukitake 28.3in letter paper size 21 sheets
Men's L size
length 87.5cm yukitake 73cm A4 paper size 20 sheets
Men's L size
length 34.4in yukitake 28.7in letter paper size 21 sheets


