


![]()
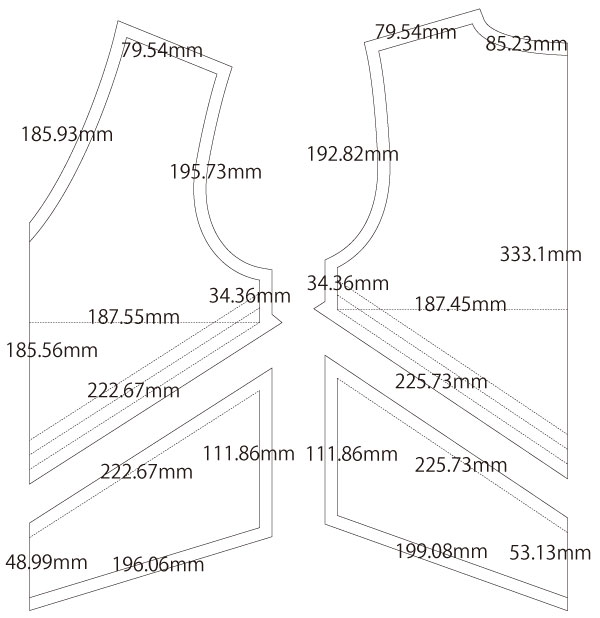
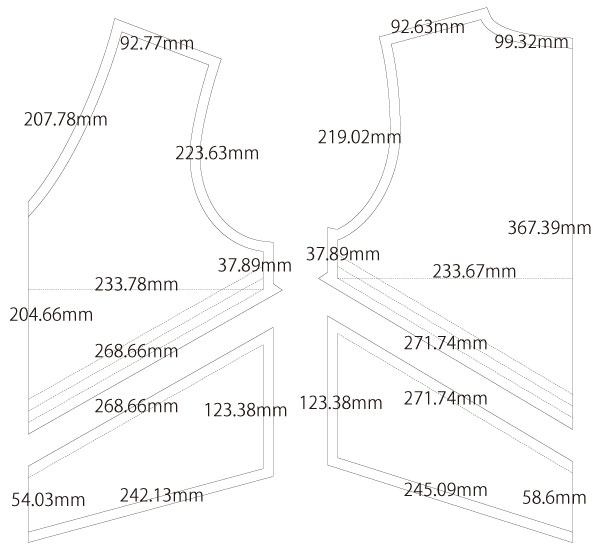
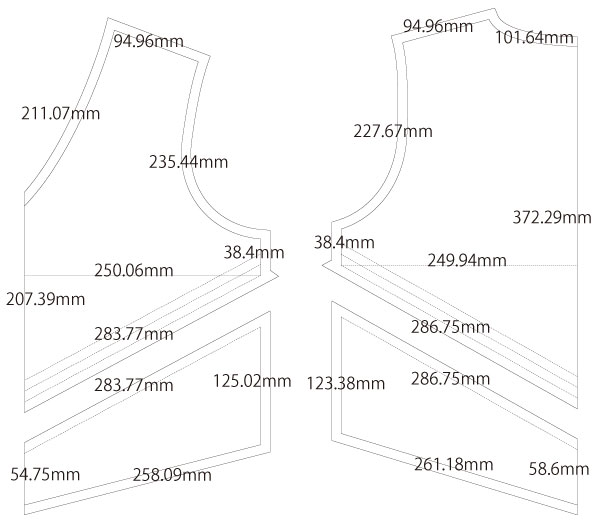
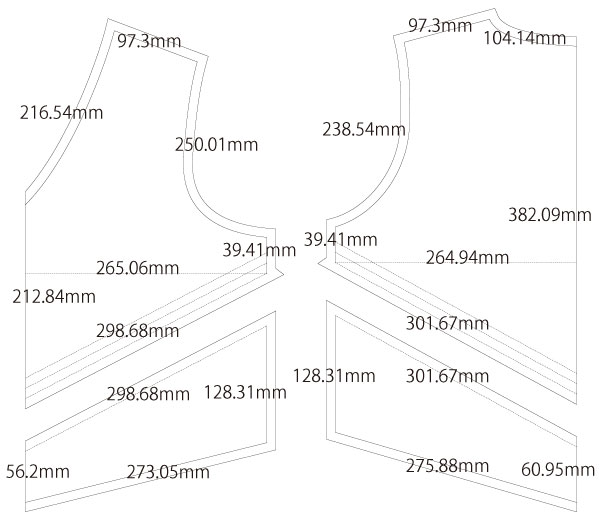
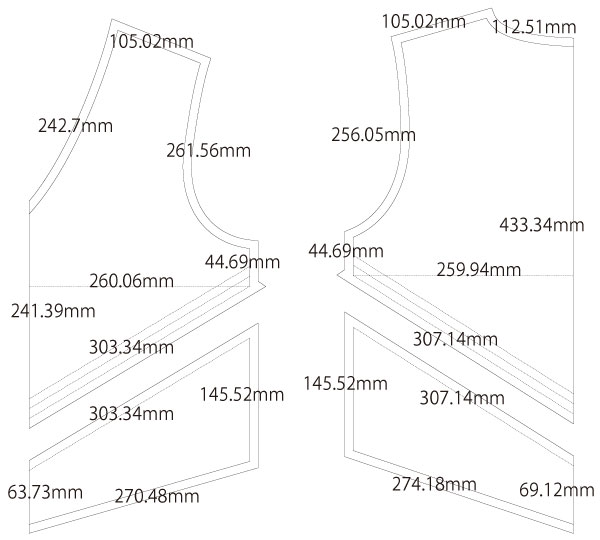
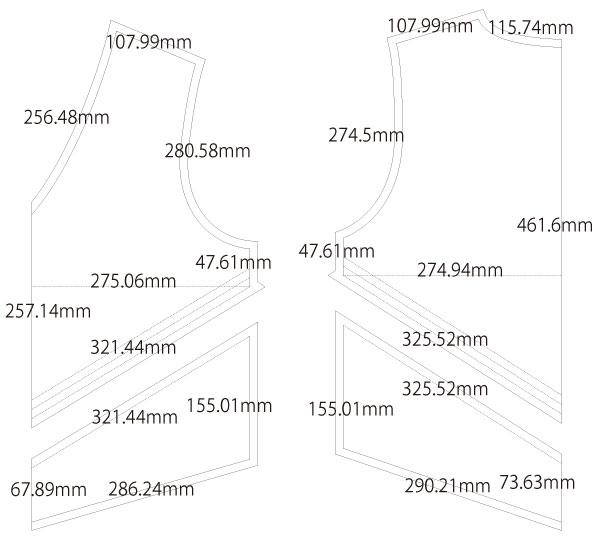
This is a free sewing pattern for a cheerleader top with a two-tone design.
Only the top pattern is included. For the skirt, please use our Short Box Pleated Skirt sewing pattern .
The facing is made slightly longer to help prevent see-through. For white designs, we recommend using thicker fabric for both the outer layer and the lining to ensure opacity.
You can customize the look by changing the color combination and lettering to match your team or character image.
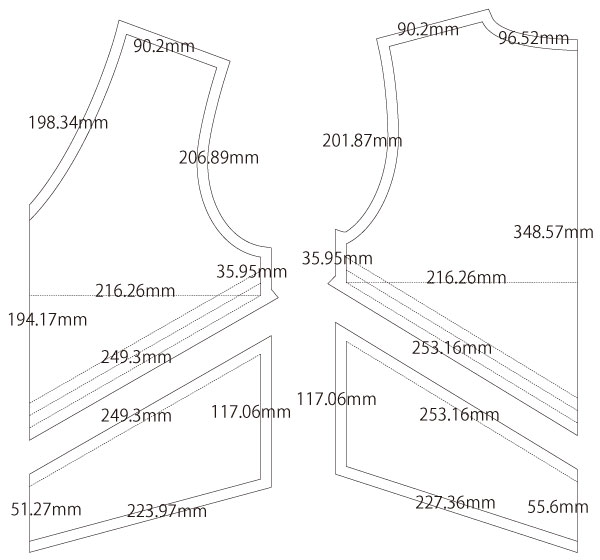
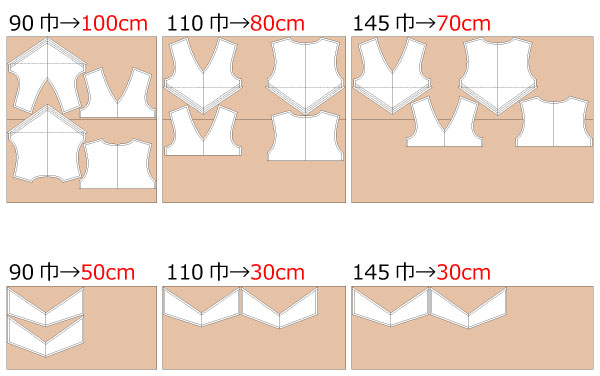
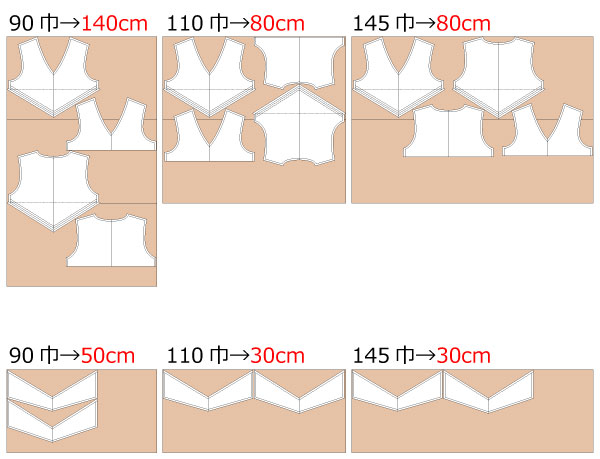
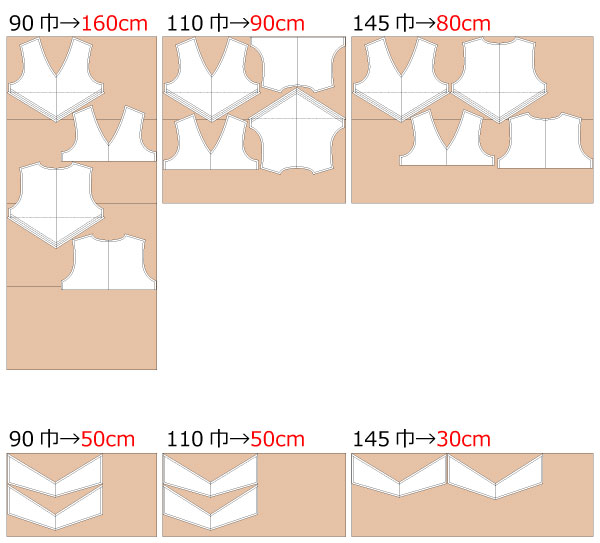
After printing, align and paste the pages along the matching lines, then cut along the pattern. Seam allowances are already included, so you can start sewing immediately.
This cheerleader top pattern is beginner-friendly, ideal for school events, cosplay costumes, sports team uniforms, and stage performances.

The production process is explained with translation software.
If you have any suggestions on how to write like this, please let us know at info@dr-cos.com
We operate this site with your cooperation.
(1) Sew the bias to the bias decoration position at the top of the "Front bodice" and "Back bodice".
* Iron print the lettering on the chest first using iron-on paper, larissa, or synthetic leather cutouts.
(2) Serge/overlock the hem side of the upper part of the "Front bodice" and "Back bodice" and the upper part of the "Front bodice lower part" and "Back bodice lower part".
(3) Fold in the rearward fold line at the top of the "Front bodice" and "Back bodice" with an iron and sew along the overlapping line of the "Front bodice lower part" and "Back bodice lower part" with stitches.
(4) Serge/overlock the sides of the "Front bodice" and "Back bodice" and press seam allowances open by ironing the shoulders and sides together.
(5) Serge/overlock the hem of "Body", fold in 0.5 inch (≈1cm) and sew with a sewing machine.
(6) Sew the shoulders and sides of "Front Facing" and "Back Facing" together, and press seam allowances open with an iron.
(7) Serge/overlock the hem of "facing".
(8) Fold in the armholes of "Body" and "facing" by 0.5 inch (≈1cm) by ironing first.
* Cut in the angled part and leave it to settle.
(9) After sewing the neck of "Body" and "facing" together, press seam allowances open with an iron, turn inside out, and settle with stitching.
* Cut a seam allowance in the seam where the fabric will be pulled when turning over to settle it.
(10) Stitch the armhole part
![]()
Free Paper Patterns are possible because of your support.
If you use our patterns, please share them on social media and tell your friends.
Your support helps DRCOS continue to provide patterns in the future.
![]()
![]()
Children's 100 size
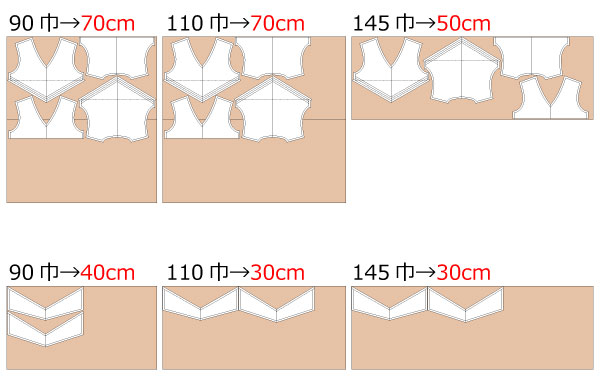
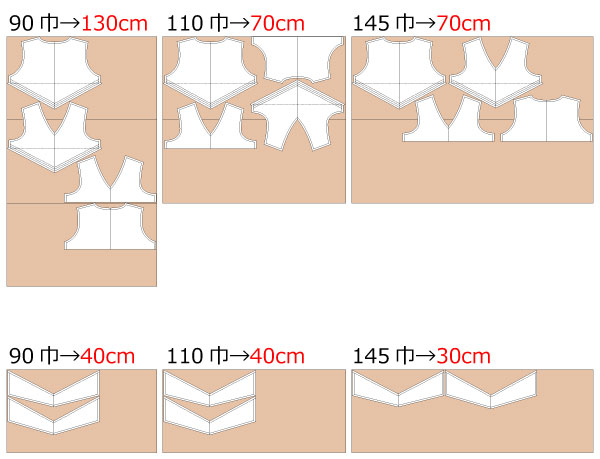
bust58cm 4sheets of A4 size (or legal size)

Children's 4 size
bust 22.8in — 4 sheets of letter size

Children's 120 size
bust65cm 5sheets of A4 size (or legal size)

Children's 8 size
bust 25.6in — 5 sheets of letter size
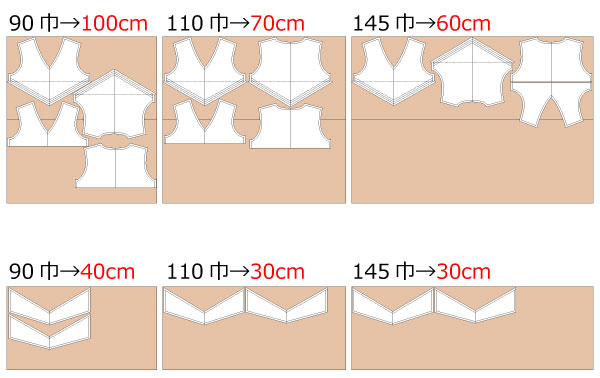
Children's 140 size
bust75cm 7sheets of A4 size (or legal size)
Children's 10 size
bust 29.5in — 7 sheets of letter size
Ladies' S size
bust 86.5 cm — 7 sheets of A4 size (or legal size)
Ladies' S size
bust 34in — 8 sheets of letter size
Ladies' M size
bust 93.5 cm — 7 sheets of A4 size (or legal size)
Ladies' M size
bust 36.8in — 8 sheets of letter size
Ladies' L size
bust 100 cm — 8 sheets of A4 size (or legal size)

Ladies' L size
bust 39.4in — 8 sheets of letter size
Ladies' LL size
bust 106 cm — 9 sheets of A4 size (or legal size)
Ladies' LL size
bust 41.7in — 9 sheets of letter size
Men's S size
bust 88 cm — 9 sheets of A4 size (or legal size)
Men's S size
bust 34.6in — 9 sheets of letter size
Men's M size
bust 96 cm — 9 sheets of A4 size (or legal size)

Men's M size
bust 37.8in — 9 sheets of letter size
Men's L size
bust 104 cm — 10 sheets of A4 size (or legal size)
Men's L size
bust 40.9in — 11 sheets of letter size
Men's LL size
bust 110 cm — 10 sheets of A4 size (or legal size)
Men's LL size
bust 43.3in — 12 sheets of letter size


