


![]()
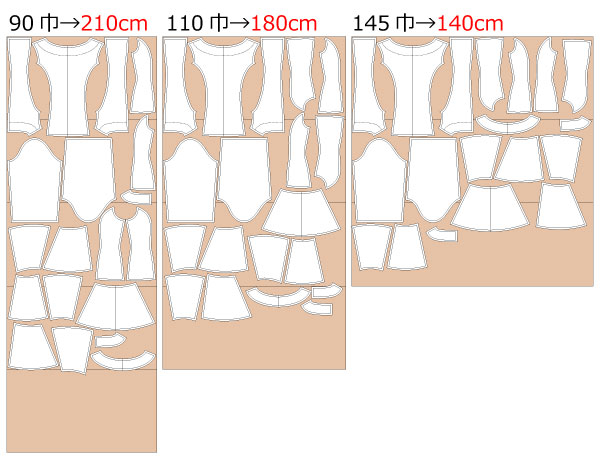
This is a free sewing pattern for a fitted dress with a hem panel that flares into a gentle A-line around the hip area. The design follows a princess line, and the seam lines continue through the lower panel for a smooth and elegant silhouette.
The sleeves are slightly shorter than standard, and the overall fit is tailored, making this pattern ideal as a base for an elegant dress, formal wear, or cosplay costume. You can customize it with various fabrics, such as cotton for casual styles or satin and crepe for more formal looks.
The pattern includes a built-in seam allowance (S/A), so it can be used immediately after printing. Simply align the joining lines, cut out the pieces, and you are ready to sew. This design is suitable for both beginner and intermediate sewists who want to create a refined dress with a flattering fit.


The production process is explained with translation software.
If you have any suggestions on how to write like this, please let us know at info@dr-cos.com
We operate this site with your cooperation.
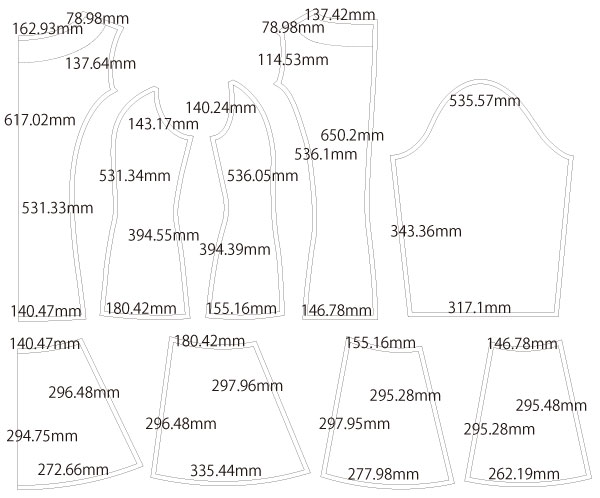
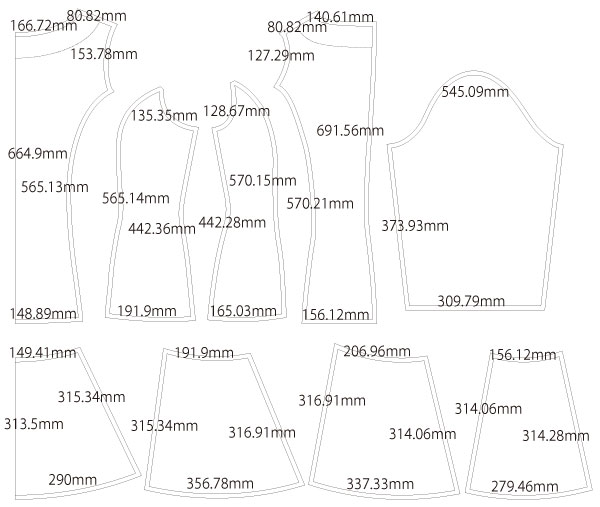
(1) Shoulders and sides of "Front body", "Front body side", "Back body", "Backt body side", "Front body hem", "Front body side hem", "Back body hem", "Back body side hem" - " Serging the sides of the "Sleeve".
(2) Sew "Front body", "Front body side", "Back body", "Back body side", and "Sleeve" sides together and press seam allowances open with an iron.
(3) Stick the stay tape in the center of "Back body".
(4) Sew the sides of "Front body hem", "Front body side hem", "Back body hem", and "Back body side hem" into a loop and press seam allowances open with an iron.
(5) Serging the hem of "body hem" and the hem of "Sleeve", fold back 0.5 inch and sew with a sewing machine.
(6) Sew to the center seam allowance of the "back body" and press seam allowances open with an iron.
(7) Sew on the invisible zip.
* Use a 56cm invisible zip.
(8) Sew "Front Facing" and "Back Facing" together with fusible interlining, press seam allowances open with an iron, and Serging on the outside only.
(9) Sew "Facing" to "Body".
(10) Attach "body hem" to "body", Serging the seam allowance, ironing the seam allowance down and settling it with stitches.
(11) Sew the "Sleeve" to the "body" and then Serging the armholes.
![]()
Free Paper Patterns are possible because of your support.
If you use our patterns, please share them on social media and tell your friends.
Your support helps DRCOS continue to provide patterns in the future.
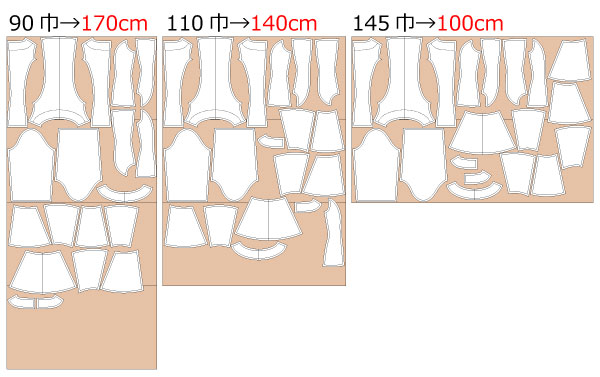
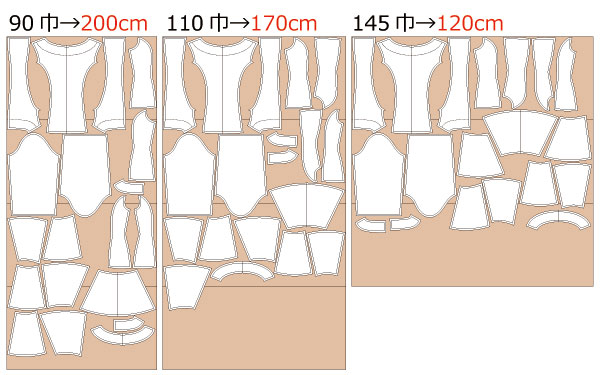
![]()
![]()
Children's-100
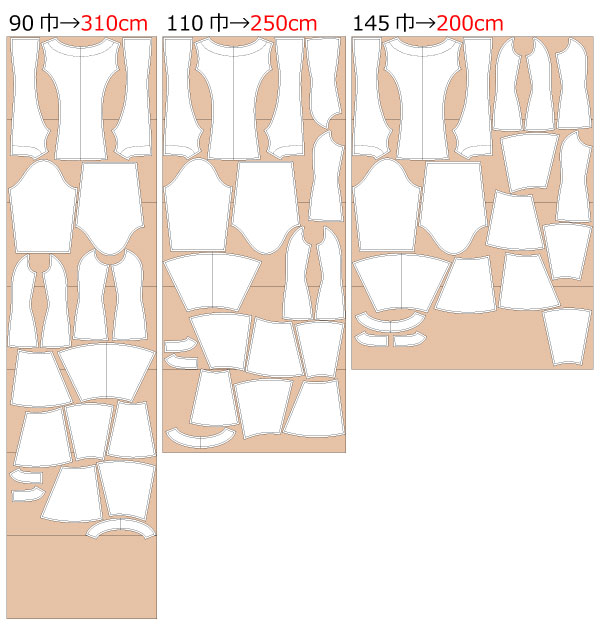
bust60cm waist49cm length53.5cm 8sheets of A4 size (or legal size)

Children's-4
bust23.6in waist19.3in length21.1in 9sheets of letter size

Children's-120
bust67cm waist53cm length62cm 10sheets of A4 size (or legal size)
Children's-8
bust26.4in waist20.9in length24.4in 11sheets of letter size
Children's-140
bust77cm waist60.5cm length72.5cm 12sheets of A4 size (or legal size)
Children's-10
bust30.3in waist23.8in length28.5in 14sheets of letter size
Ladies'-S
bust87cm waist68.5cm length78cm 15sheets of A4 size (or legal size)
Ladies'-S
bust34.3in waist27in length30.7in 16sheets of letter size
Ladies'-M
bust94cm waist75cm length80cm 17sheets of A4 size (or legal size)
Ladies'-M
bust37in waist29.5in length31.5in 18sheets of letter size
Ladies'-L
bust100cm waist81cm length81cm 17sheets of A4 size (or legal size)

Ladies'-L
bust39.4in waist31.9in length31.9in 19sheets of letter size
Ladies'-LL
bust106cm waist86.5cm length83cm 17sheets of A4 size (or legal size)

Ladies'-LL
bust41.7in waist34.1in length32.7in 19sheets of letter size
Men's-L
bust110cm waist88cm length94cm 22sheets of A4 size (or legal size)

Men's-L
bust43.3in waist34.6in length37in 23sheets of letter size
Men's-LL
bust115cm waist93.5cm length100cm 23sheets of A4 size (or legal size)
Men's-LL
bust45.3in waist36.8in length39.4in 25sheets of letter size


