


![]()
Simple instructions are included in the paper pattern.
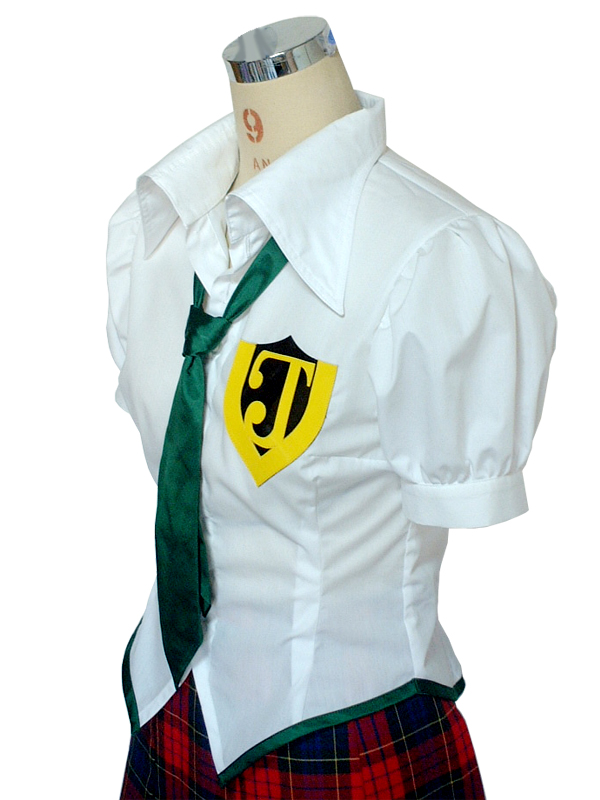
This is a shirt pattern with a design that emphasizes the bust and waist lines, and features puff sleeves for added volume.
Unlike a standard shirt, the collar in this pattern is extra large for a bold look.
The length is designed to be short, so please adjust the length as needed.
After printing, align the matching lines, tape them together, and cut out the pattern.
* Seam allowances are already included in the pattern, so you can use it as is.


* Before cutting, fit the pattern to your body to check the length.
* This design does not include a hem at the original length.
* If you want to make it shorter, adjust the cutting lines before cutting.
(1) Stitch the darts on the "Front bodice" and "Back bodice". Press the seam toward the center.
(2) Attach the "Pocket" to the pocket position.
* You can attach the "Pocket" on one side or both sides.
(3) Finish the shoulders and sides of the "Front bodice" and "Back bodice". Stitch them together and press the seam open.
![]() How to Serge/overlock (sewing machine & overlock sewing machine)
How to Serge/overlock (sewing machine & overlock sewing machine)
(4) Apply fusible interlining to the "Collar" and "Collar stand".
(5) Place the "Collar" right sides together. Stitch, turn inside out, and press.
* Before turning, trim the seam allowance to about 2 mm.
(6) Place the "Collar stand" right sides together and sandwich the "Collar". Stitch, turn inside out, and topstitch.
* Fold the seam allowance of the "Body" side by 1 cm (0.5 in) before sewing. This makes it easier.
(7) Fold the fold lines of the "Front bodice" twice and topstitch.
* You can fold them to the front or back.
(8) Make a three-fold at the fold lines of the "Front bodice" and topstitch.
(9) Sandwich the "Body" with the "Collar stand" and stitch.
(10) Finish the sides of the "Sleeve". Stitch and press the seam open. Add gathers at the gathering positions.
(11) Apply fusible interlining to the sleeve hem. Stitch the sides. Fold the seam allowance inward by 1 cm (0.5 in) to prepare for attaching.
(12) Attach the sleeve hem to the "Sleeve".
(13) Attach the "Sleeve" to the "Body" and finish the armhole.
(14) Finish the hem of the "Body" with bias tape or overlock. Fold it up by 1 cm (0.5 in) and stitch.
(15) Make buttonholes and sew on buttons.
If you cannot see the SHOP due to 403 error
Price: ¥700 (JPY)
Approx. USD — / EUR — (for reference)
![]()
![]()
Children's 140 size
bust 77cm waist 64cm A4 paper size 8 sheets
Sleeve parts 43 size

Children's 10 size
bust 30.3in waist 25.2in letter paper size 11 sheets
Sleeve parts 43 size

Ladies' S size
bust 87.5cm waist 69.5cm A4 paper size 11 sheets
Sleeve parts 46 size

Ladies' S size
bust 34.4in waist 27.4in letter paper size 11 sheets
Sleeve parts 46 size
Ladies' M size
bust 94cm waist 75cm A4 paper size 11 sheets
Sleeve parts 49 size
Ladies' M size
bust 37in waist 29.5in letter paper size 11 sheets
Sleeve parts 49 size
Ladies' L size
bust 101cm waist 80.5cm A4 paper size 12 sheets
Sleeve parts 51 size

Ladies' L size
bust 39.8in waist 31.7in letter paper size 12 sheets
Sleeve parts 51 size
Ladies' LL size
bust 108cm waist 87.5cm A4 paper size 12 sheets
Sleeve parts 54 size
Ladies' LL size
bust 42.5in waist 34.4in letter paper size 13 sheets
Sleeve parts 54 size
Men's L size
bust 112cm waist 90.5cm A4 paper size 13 sheets
Sleeve parts 56 size
Men's L size
bust 44.1in waist 35.6in letter paper size 15 sheets
Sleeve parts 56 size
Men's LL size
bust 117cm waist 95cm A4 paper size 13 sheets
Expanded sleeve parts 56 sizes to 104.6%
Men's LL size
bust 46.1in waist 37.4in letter paper size 15 sheets
Expanded sleeve parts 56 sizes to 104.6%


