


![]()
This is a basic and simple sewing pattern for a classic pintuck shirt.
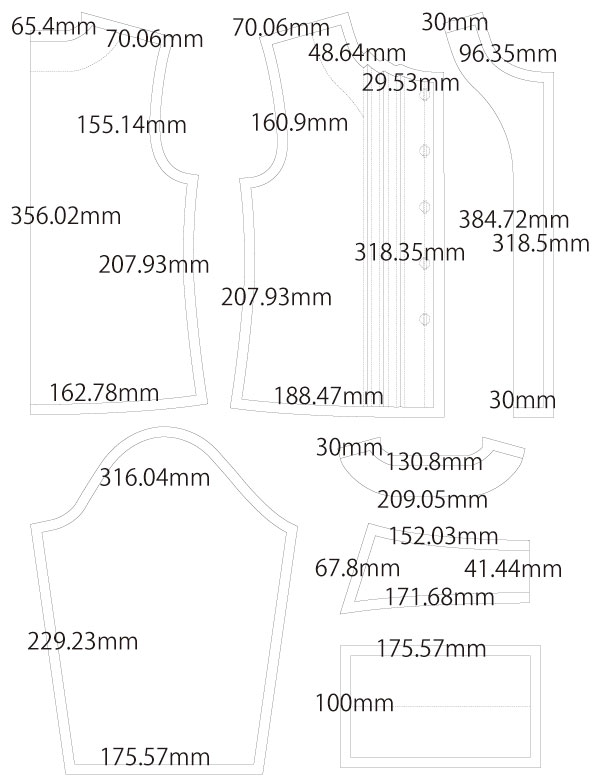
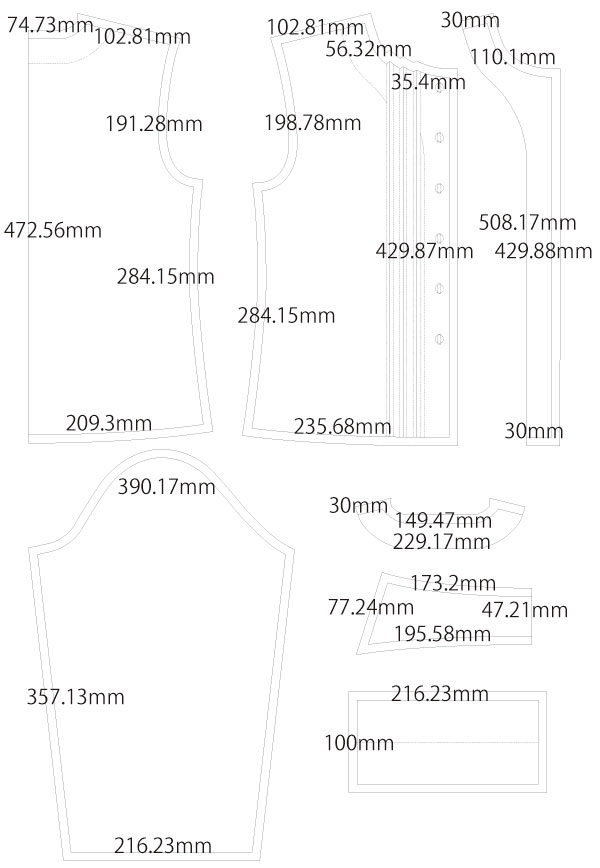
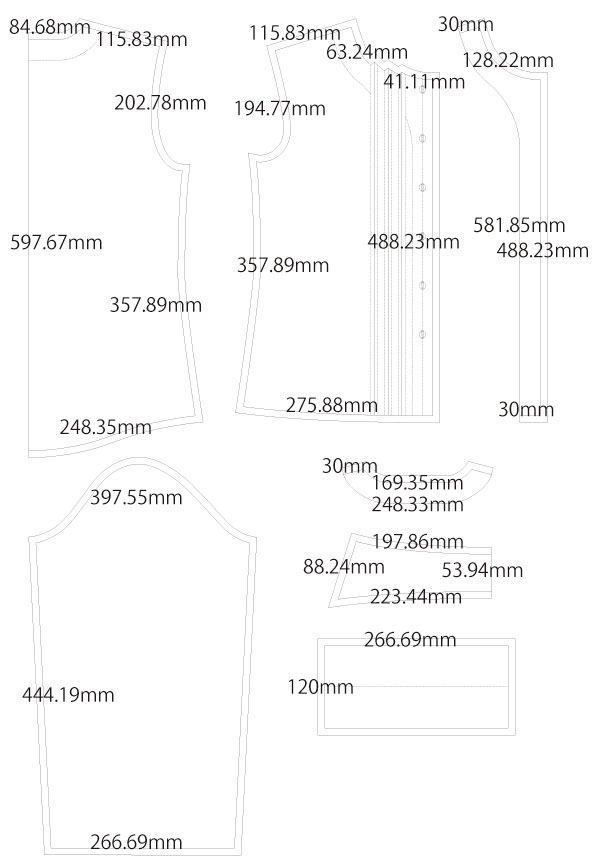
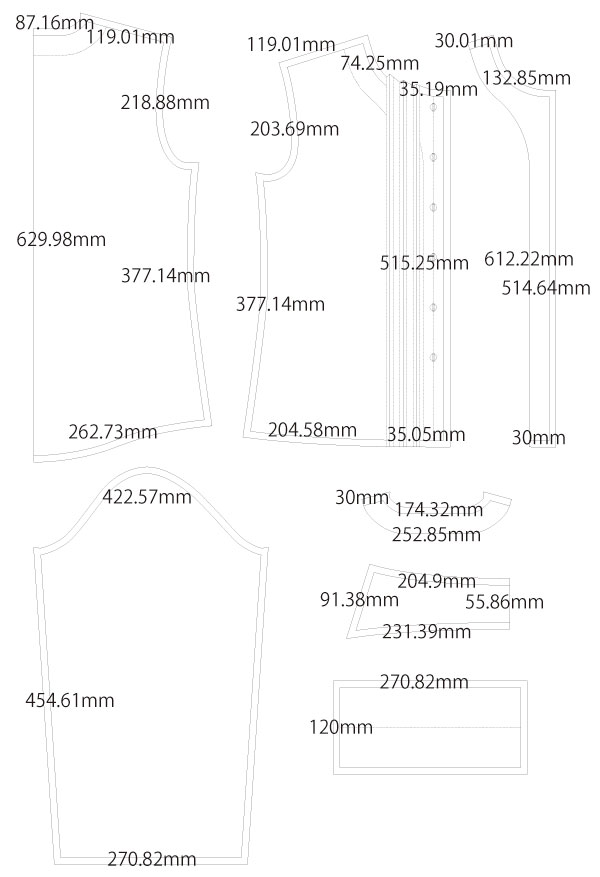
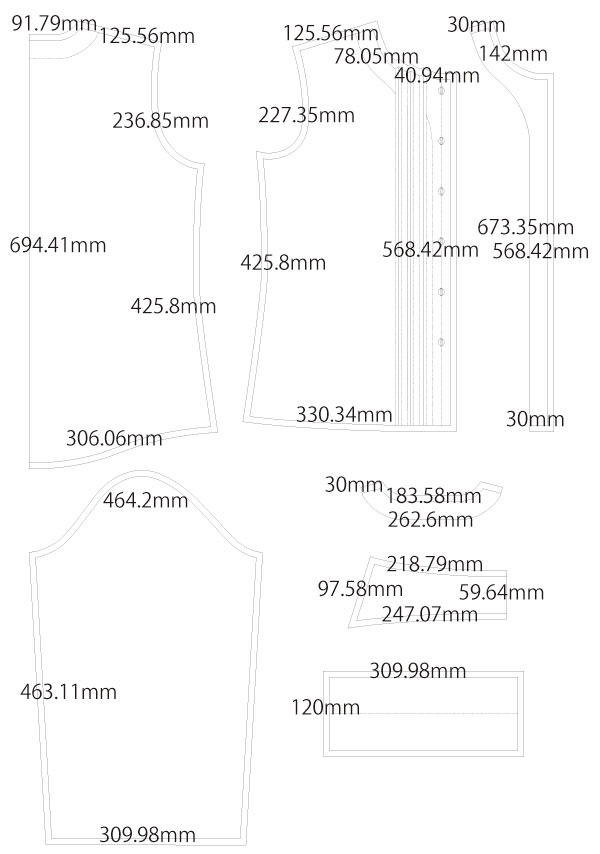
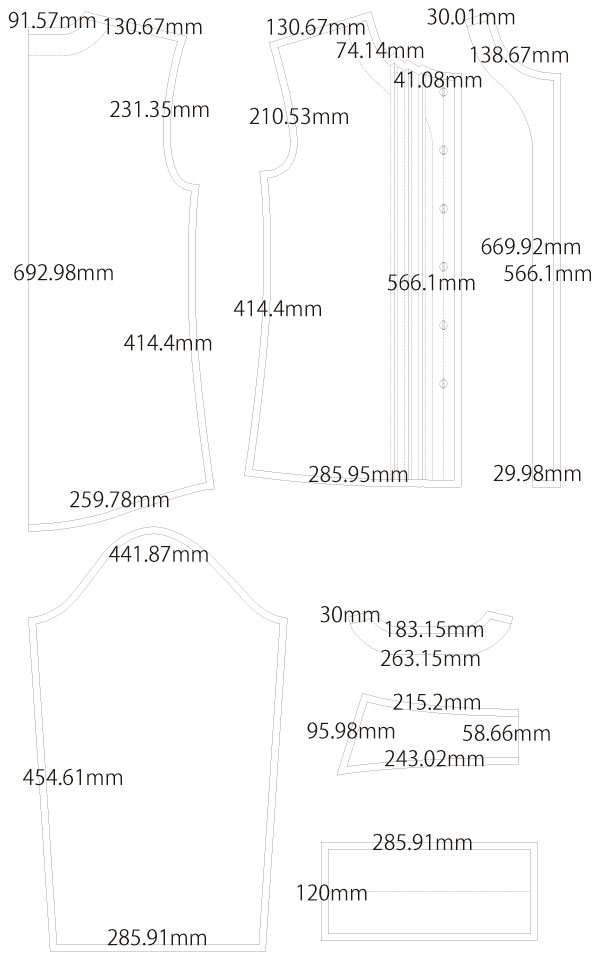
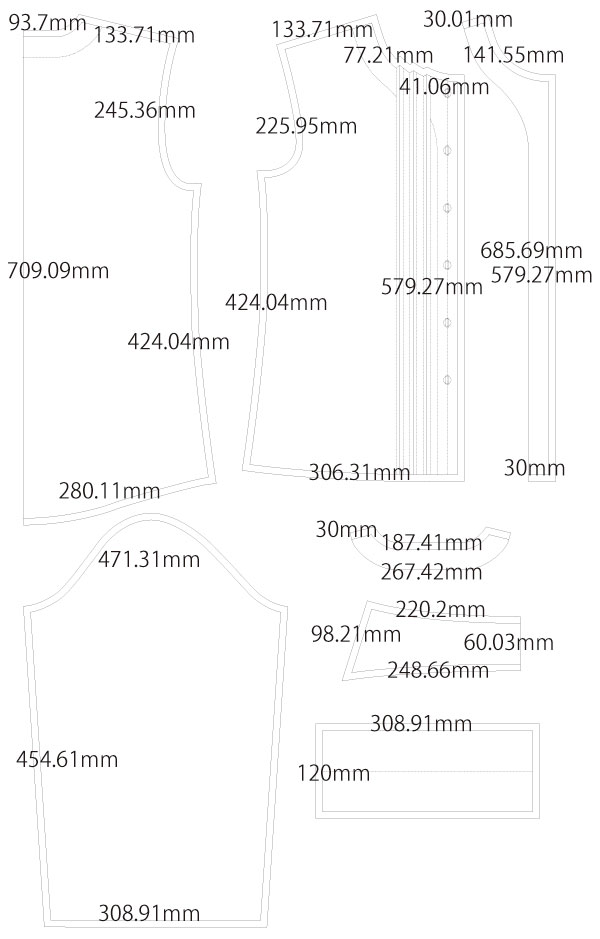
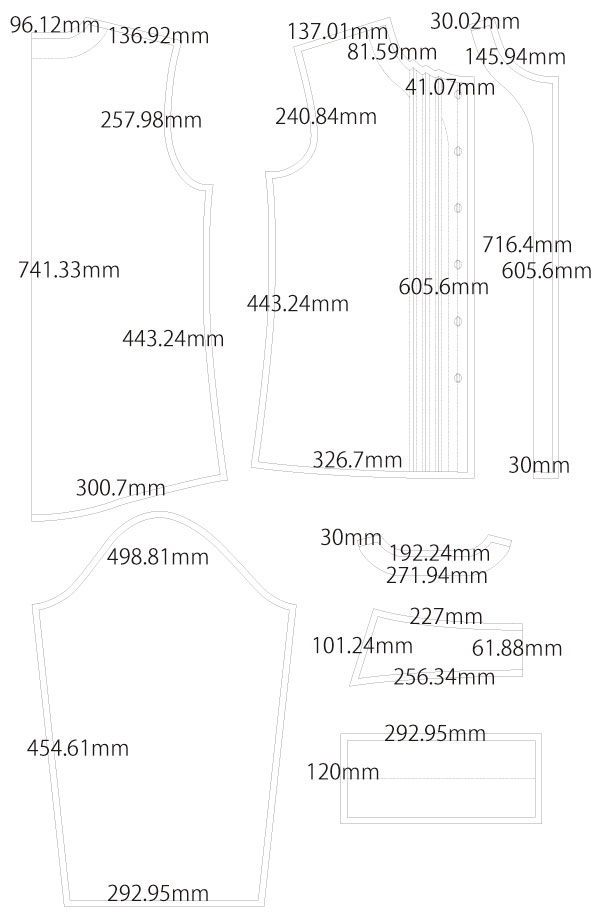
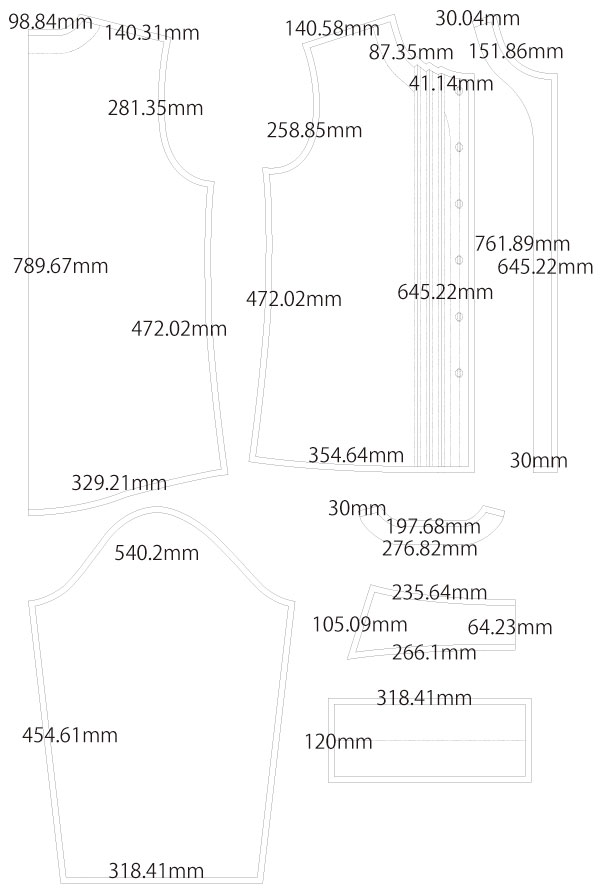
The shirt front has three narrow pintucks on each side, left and right. Each pintuck is 5 mm wide, giving the design a clean and classic look.
You may also stop the pintucks partway down instead of sewing them all the way to the hem. This creates a different design effect.
This pattern is versatile and can be used for everyday wear, costumes, or original fashion designs.
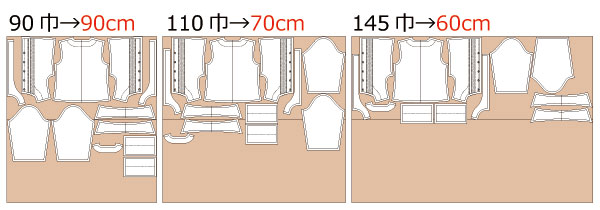
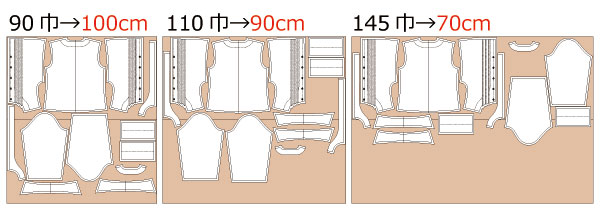
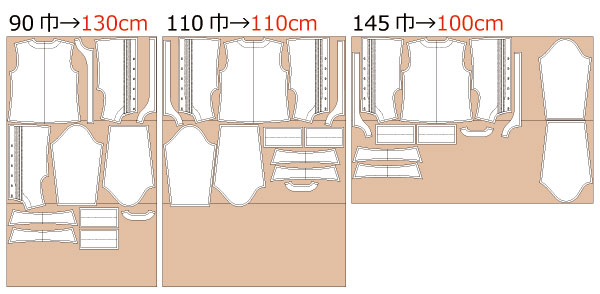
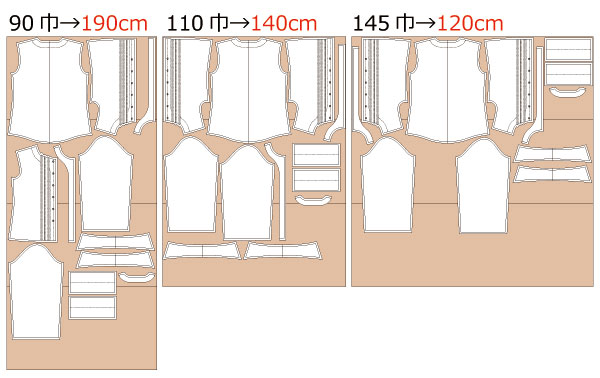
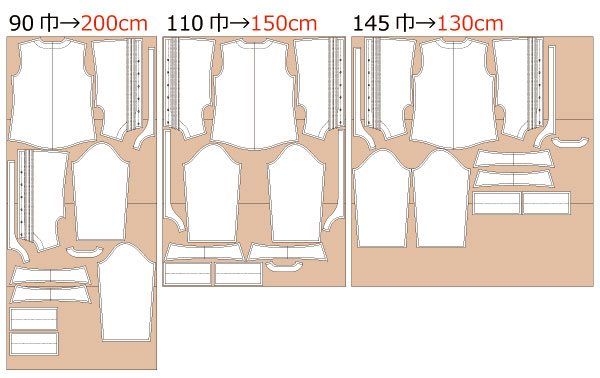
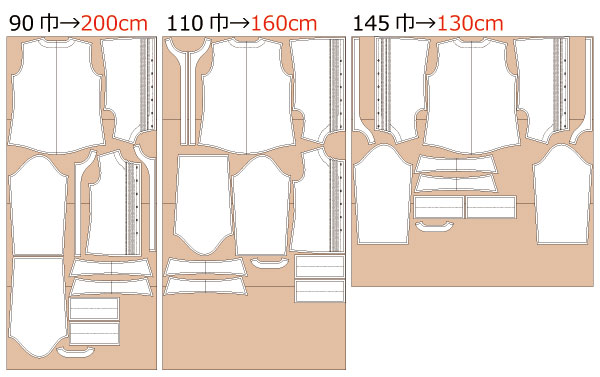
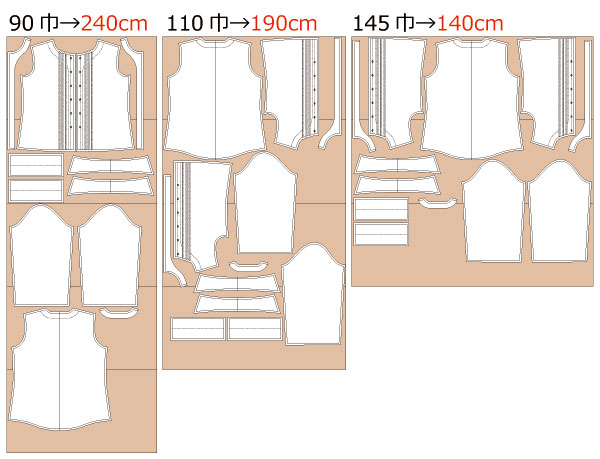
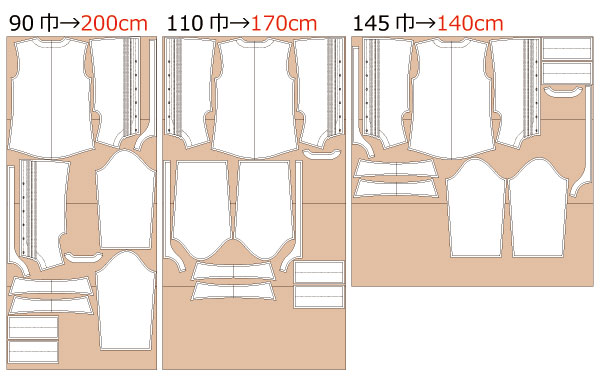
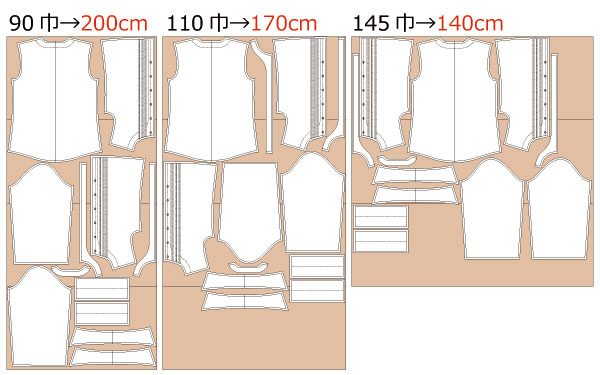
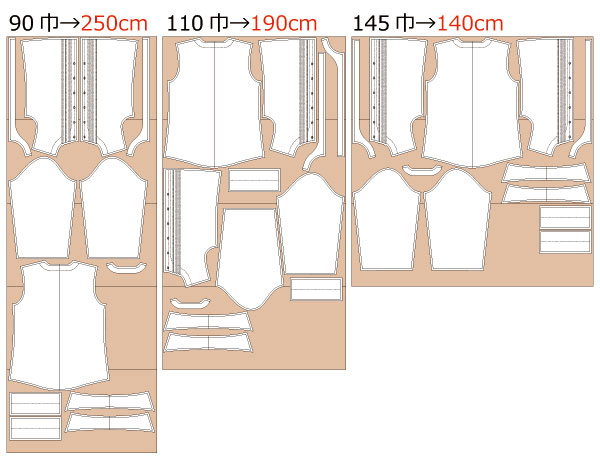
After printing, align the join lines, tape the pattern pieces together, and cut them out. Seam allowances are already included, so the pattern is ready to use as is.


(1) Fold the pintuck folds of the "Front Body" and "Back Body" with an iron, sew the pintucks, and press them outward with an iron.
(2) Serge the shoulders and side seams of the "Front Body" and "Back Body", sew them together with a sewing machine, and press the seam allowances open with an iron.
(3) Apply fusible interfacing to the "Collar", "Front Facing", "Back Facing", and "Cuffs".
(4) Sew the "Collar" pieces together, turn inside out, and press with an iron to shape.
(5) Sew the "Front Facing" and "Back Facing" together, press the seam allowances open with an iron, and serge the outer edges.
(6) Sandwich the "Collar" between the "Facing" and the "Body", then sew them together.
* When turning the garment right side out, clip the seam allowance at the curved areas.
(7) Serge the side seams of the "Sleeves", sew them together, and press the seam allowances open with an iron.
(8) Sew the side seams of the "Cuffs" together, press the seam allowances open, and form them into loops.
(9) Fold the seam allowance of the "Cuffs" inward by 1 cm (0.5 in). Then fold along the center line with an iron to shape the cuffs so they can be inserted into the sleeves.
(10) Insert the "Cuffs" into the sleeve hems and sew with a sewing machine.
![]() How to Sew Sleeves and Sleeve Cuffs
How to Sew Sleeves and Sleeve Cuffs
(11) Attach the "Sleeves" to the "Body" and serge the armholes.
(12) Serge the hem of the "Body", fold it up by 1 cm (0.5 in), and sew with a sewing machine.
(13) Make buttonholes and sew on the buttons.
![]()
Free Paper Patterns are possible because of your support.
If you use our patterns, please share them on social media and tell your friends.
Your support helps DRCOS continue to provide patterns in the future.
![]()
![]()
Children's-100
shoulder width26cm bust60cm 6sheets of A4 size (or legal size)

Children's-4
shoulder width10.2in bust23.6in 8sheets of letter size

Children's-120
shoulder width30cm bust67cm 9sheets of A4 size (or legal size)

Children's-8
shoulder width11.8in bust26.4in 9sheets of letter size
Children's-140
shoulder width34cm bust77cm 11sheets of A4 size (or legal size)
Children's-10
shoulder width13.4in bust30.3in 11sheets of letter size
Ladies'-S
bust87cm length60cm 12sheets of A4 size (or legal size)
Ladies'-S
bust34.3in length23.6in 15sheets of letter size
Ladies'-M
bust92cm length63cm 14sheets of A4 size (or legal size)
Ladies'-M
bust36.2in length24.8in 15sheets of letter size
Ladies'-L
bust102cm length66cm 15sheets of A4 size (or legal size)

Ladies'-L
bust40.2in length26in 16sheets of letter size
Ladies'-LL
bust108cm length69.5cm 16sheets of A4 size (or legal size)
Ladies'-LL
bust42.5in length27.4in 17sheets of letter size
Men's-S
bust90cm length69cm 15sheets of A4 size (or legal size)
Men's-S
bust35.4in length27.2in 16sheets of letter size
Men's-M
bust98cm length71cm 16sheets of A4 size (or legal size)
Men's-M
bust38.6in length28in 18sheets of letter size
Men's-L
bust106cm length74cm 18sheets of A4 size (or legal size)
Men's-L
bust41.7in length29.1in 18sheets of letter size
Men's-LL
bust117cm length76cm 18sheets of A4 size (or legal size)

Men's-LL
bust46.1in length29.9in 20sheets of letter size


