


![]()
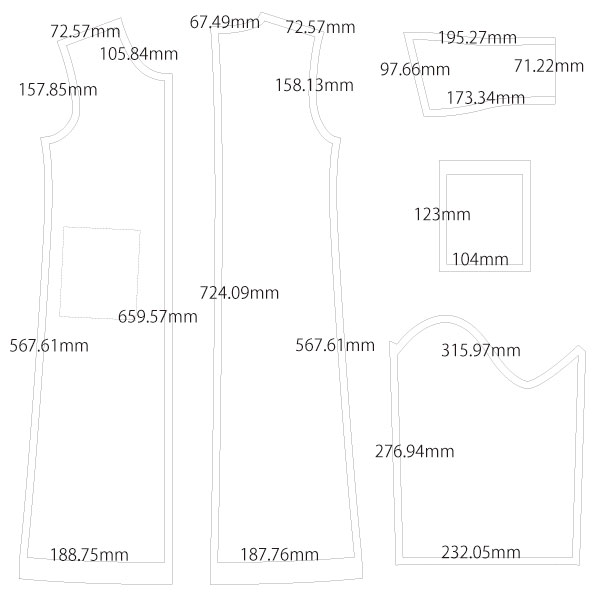
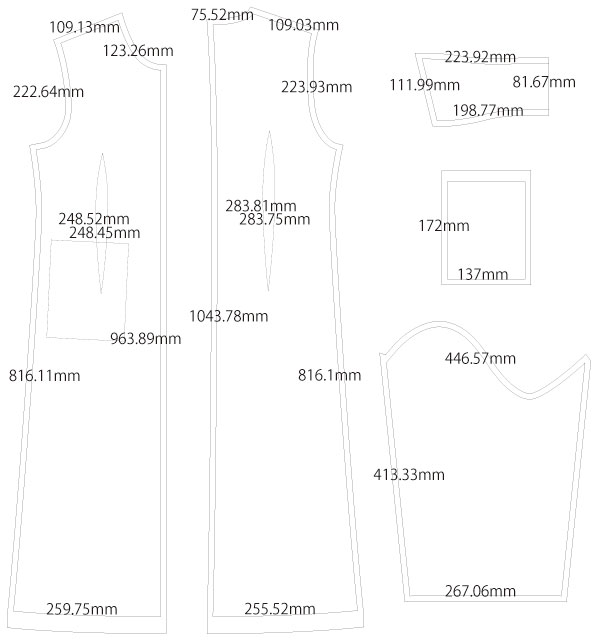
This is a free sewing pattern for an extra-long coat with a slightly oversized flat collar, designed with seam allowances included so it can be used as is.
The pattern is intended for cosplay costumes, so it does not include facings or detailed finishing drafts. However, it works perfectly as a base pattern for creating various coat styles.
If you prefer a tighter fit, consider making one size smaller. You can customize the pattern by changing the collar shape, adding an open-end zipper to the front, or applying other design modifications.
For everyday wear, draft additional facing and lining patterns based on this base design. Remember that coats should allow extra room for layering clothes underneath, so do not rely solely on body measurements when selecting a size.
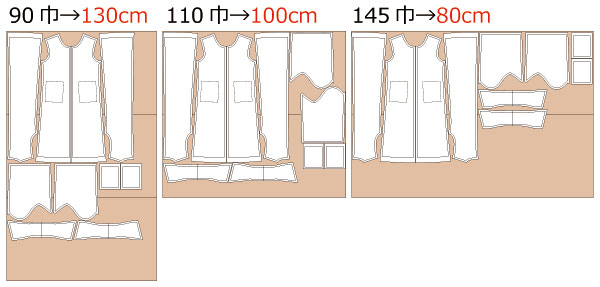
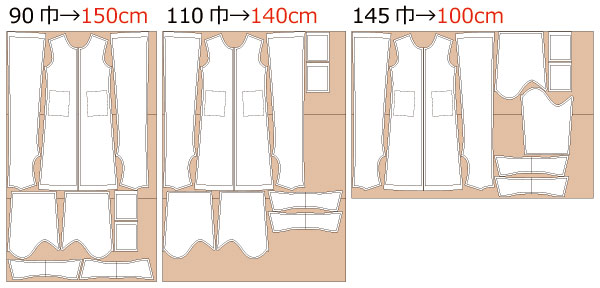
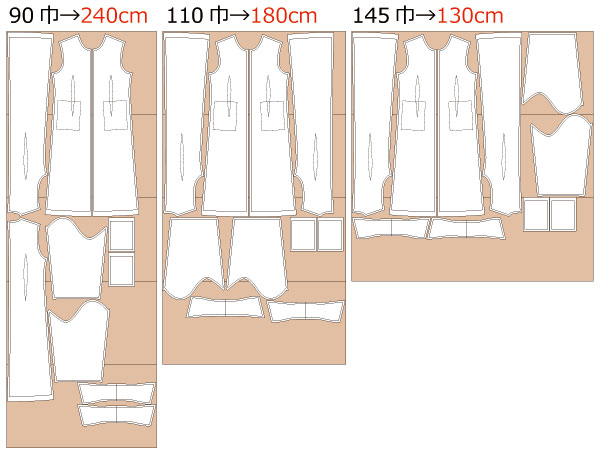
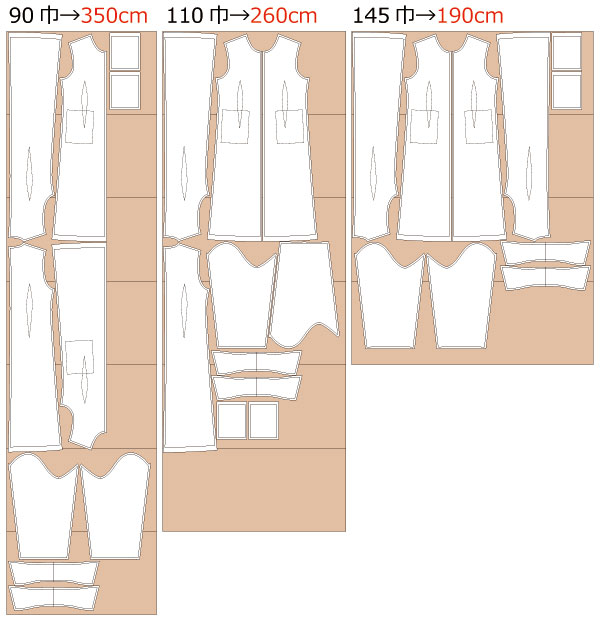
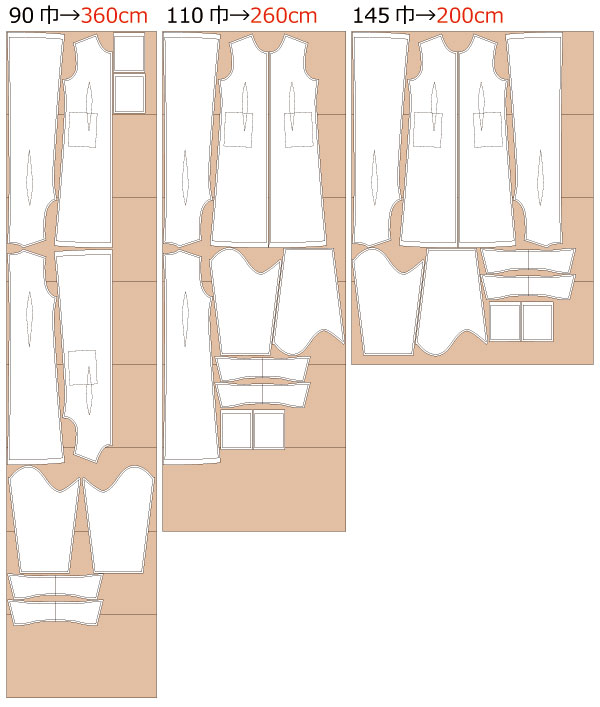
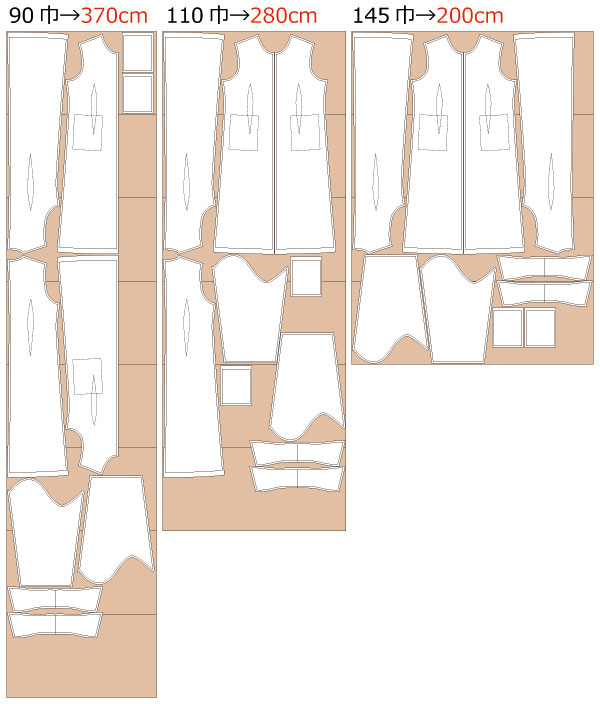
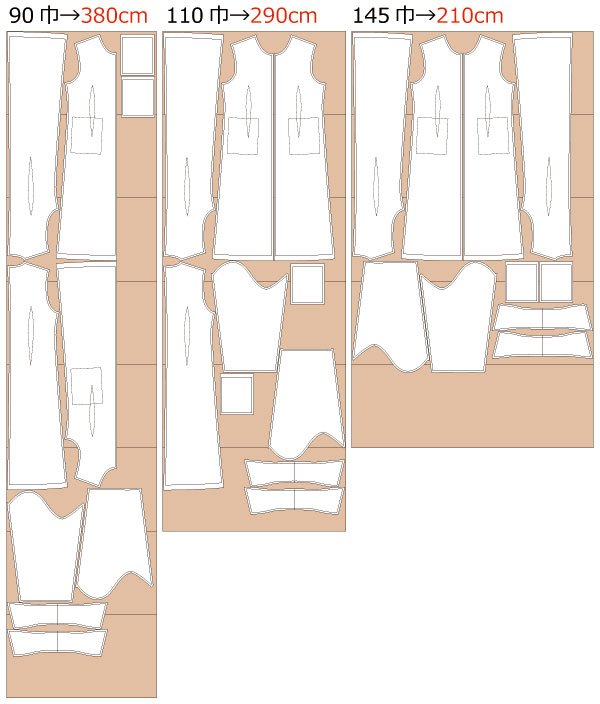
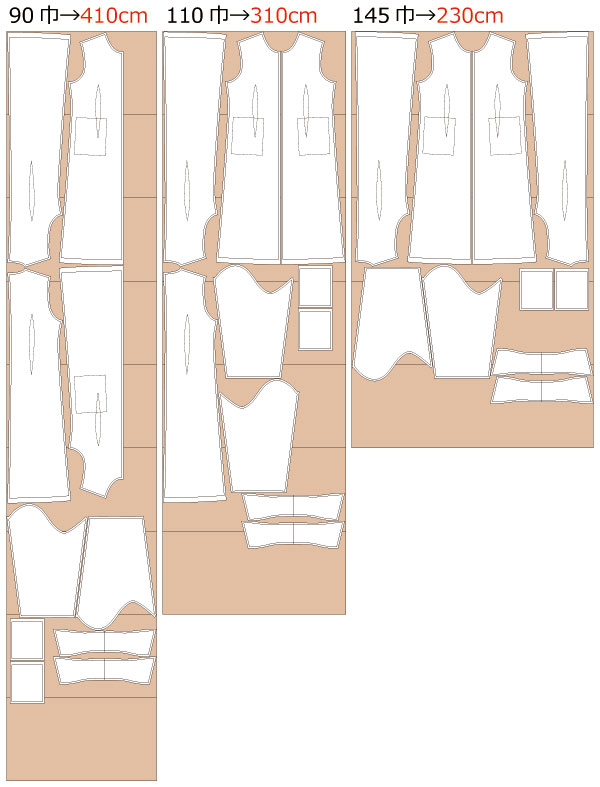
After printing, align the pages along the join lines, cut, and use the pattern directly since the seam allowances are already included.


The production process is explained with translation software.
If you have any suggestions on how to write like this, please let us know at info@dr-cos.com
We operate this site with your cooperation.
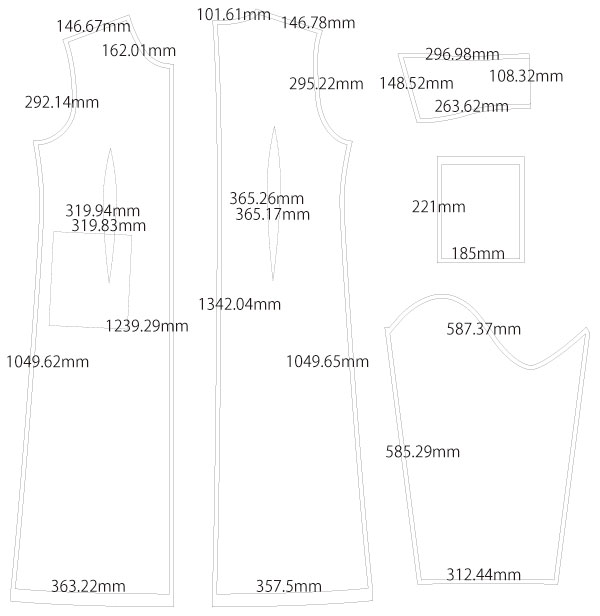
(1) Sew and iron down the darts on "Body".
(2) Sew "Pocket" to the Pocket position on the "Body".
* The "Pocket" is the simplest one, but you can omit it if you do not need it.
(3) Serging the center of "Back Body" and sewing to the sewing end.
* Cut a slit at the hem, but you can omit the slit if you wish.
(4) Fold the slit part of the "Back Body" 0.5 inches with an iron and sew it with a sewing machine.
(5) Serging the sides and shoulders of the "Front Body" and "Back Body" and the sides of the "Sleeve", sew them together with a sewing machine, and press seam allowances open with an iron.
(6) Serging the hem of the "Body" and the hem of the "Sleeve", ironing them up, and sewing them with a sewing machine.
(7) Apply fusible interlining to the "Collar", sew together and turn inside out.
* Cut off 0.4" seam allowance before turning inside out (cut off the seam allowance except for the part to be attached to the "Body").
* Fold the "Collar" at 0.5" where it is to be attached to the "Body" and sew it so that it is tucked into the "Body" for a clean finish.
(8) Sew the "Collar" to the "Body".
* If "Collar" is not inserted, Serging the seam allowance.
(9) Serging armholes after sewing "Sleeve" on "Body".
![]()
Free Paper Patterns are possible because of your support.
If you use our patterns, please share them on social media and tell your friends.
Your support helps DRCOS continue to provide patterns in the future.
![]()
![]()
Children's-100
bust62cm waist60cm length72.5cm 10sheets of A4 size (or legal size)

Children's-4
bust24.4in waist23.6in length28.5in 10sheets of letter size

Children's-120
bust70cm waist66cm length89cm 14sheets of A4 size (or legal size)

Children's-8
bust27.6in waist26in length35in 14sheets of letter size
Children's-140
bust83.5cm waist73cm length104.5cm 18sheets of A4 size (or legal size)
Children's-10
bust32.9in waist28.7in length41.1in 18sheets of letter size
Ladies'-S
bust91cm waist75.5cm length112cm 20sheets of A4 size (or legal size)

Ladies'-S
bust35.8in waist29.7in length44in 21sheets of letter size
Ladies'-M
bust98cm waist82.5cm length119cm 22sheets of A4 size (or legal size)
Ladies'-M
bust38.6in waist32.5in length46.9in 25sheets of letter size
Ladies'-L
bust105.5cm waist90cm length123cm 26sheets of A4 size (or legal size)
Ladies'-L
bust41.5in waist35.4in length48.4in 27sheets of letter size
Ladies'-LL
bust113.5cm waist97cm length126.5cm 26sheets of A4 size (or legal size)
Ladies'-LL
bust44.7in waist38.2in length49.8in 29sheets of letter size
Men's-L
bust111cm waist95.5cm length130.5cm 27sheets of A4 size (or legal size)

Men's-L
bust43.7in waist37.6in length51.4in 29sheets of letter size
Men's-LL
bust118cm waist102.5cm length134cm 28sheets of A4 size (or legal size)
Men's-LL
bust46.5in waist40.4in length52.8in 32sheets of letter size


