


![]()
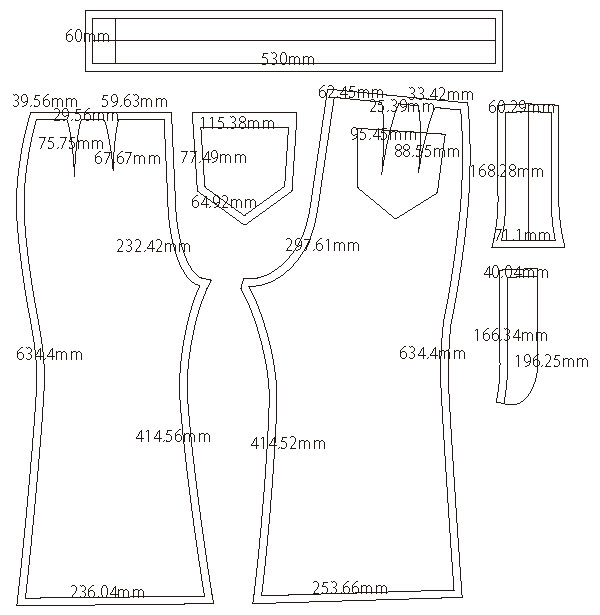
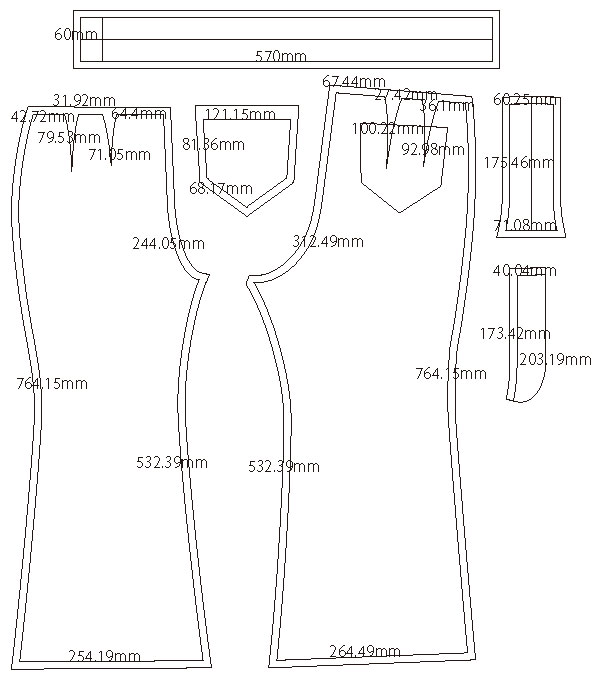
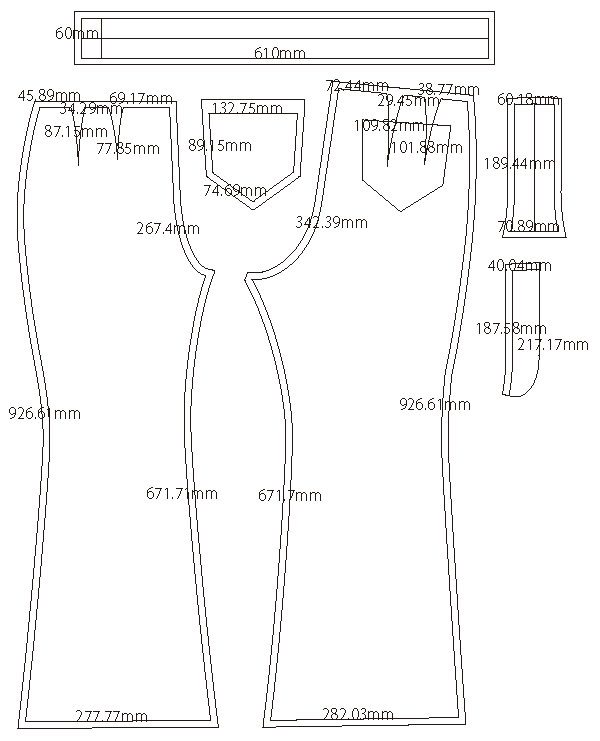
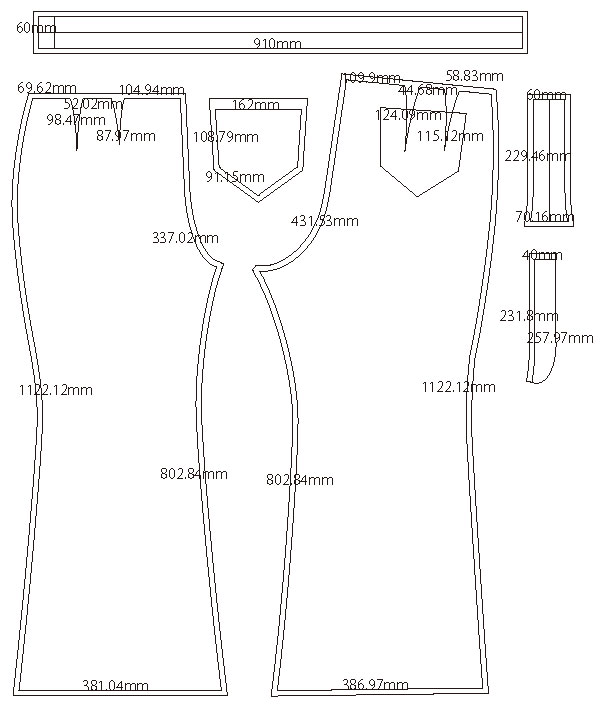
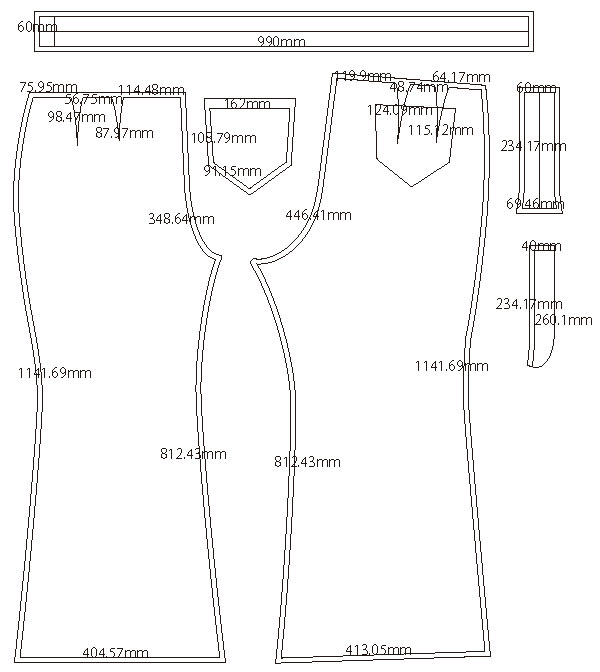
Free sewing pattern and instructions for making bell-bottom pants.
The design features decorative back pockets.
This is a basic front-zipper style.
The pattern is slightly loose-fitting, so if you are making tight-fitting cosplay costumes, adjust the pattern lines to match your desired fit.
Sewing pants can be a bit challenging. For beginners, it is recommended to refer to a sewing textbook or detailed guide.
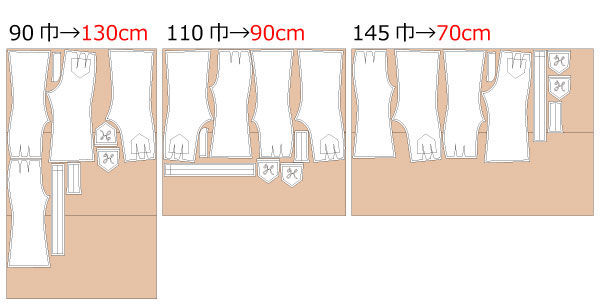
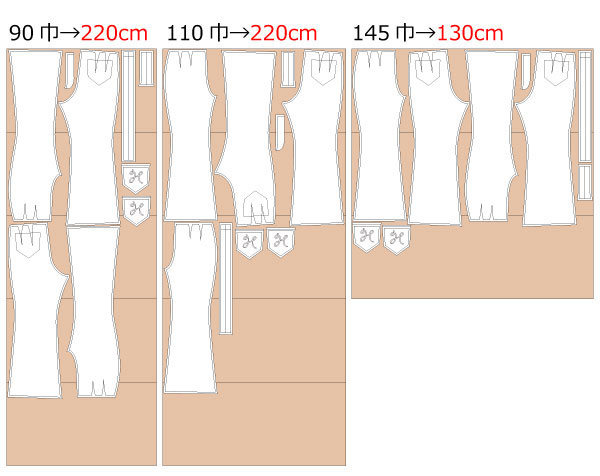
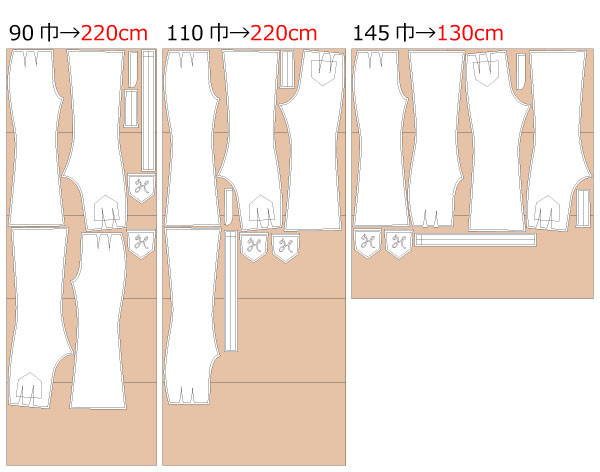
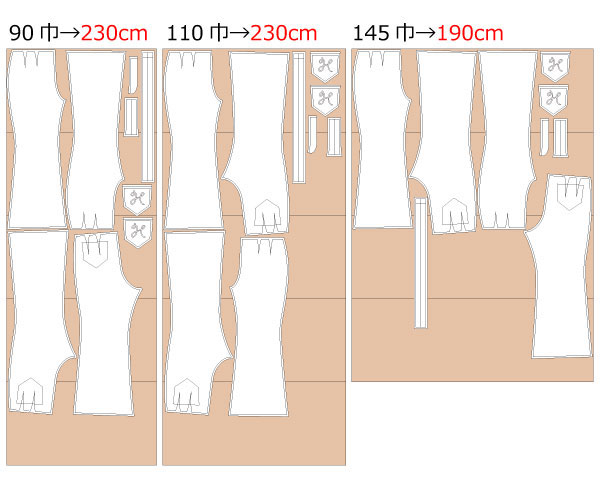
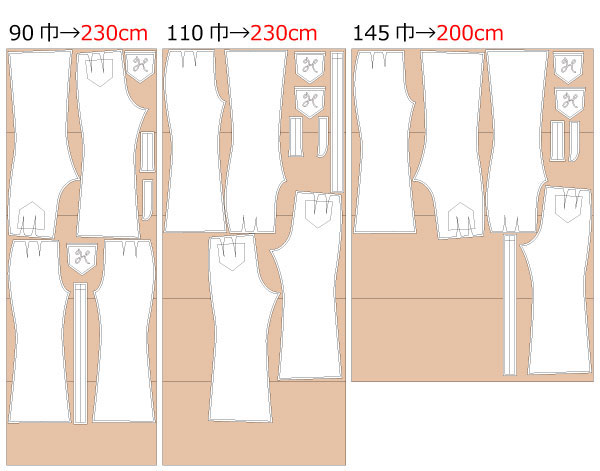
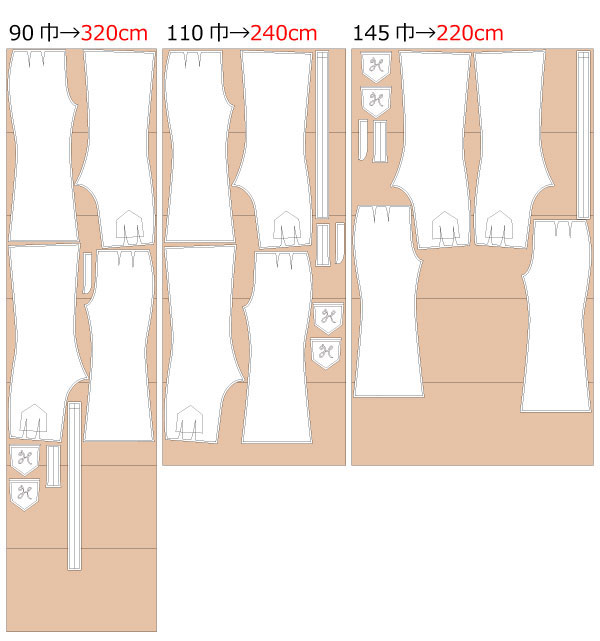
After printing, align the sheets along the dotted lines, paste them together, and cut along the outline.
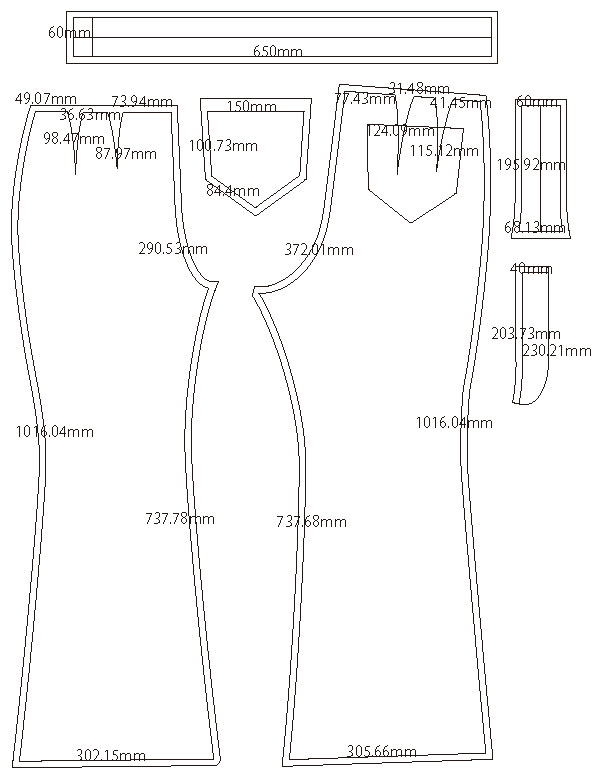
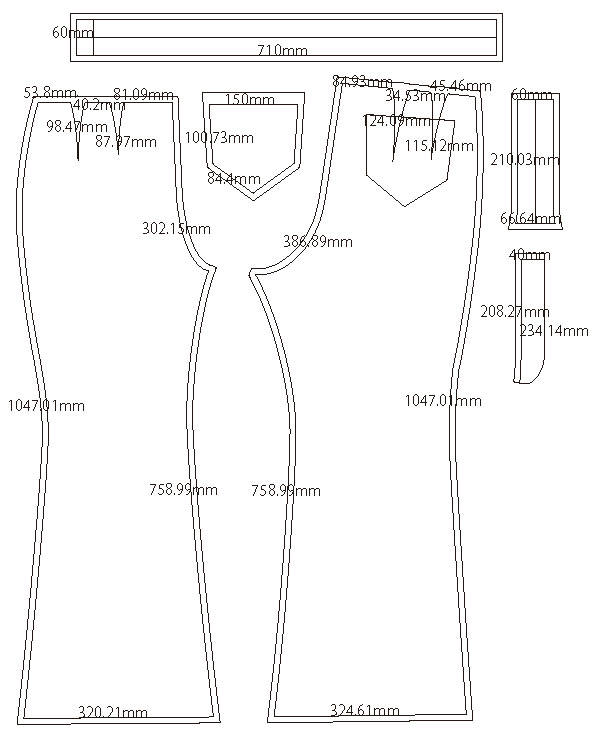
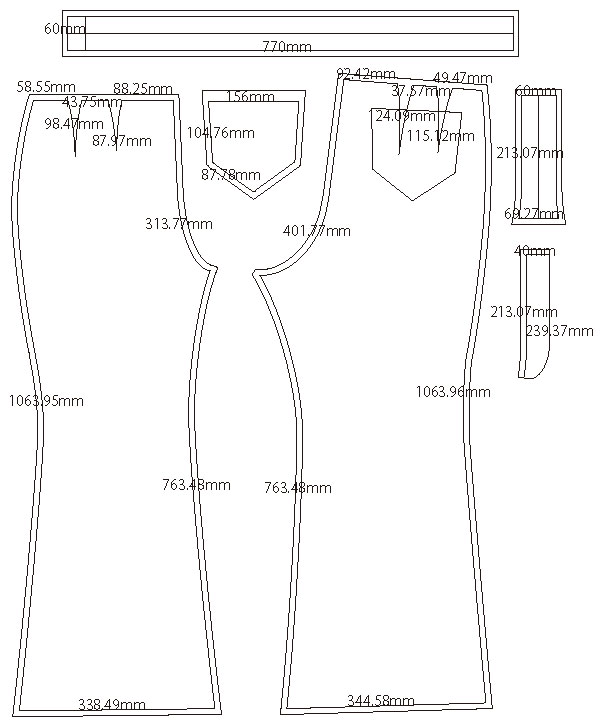
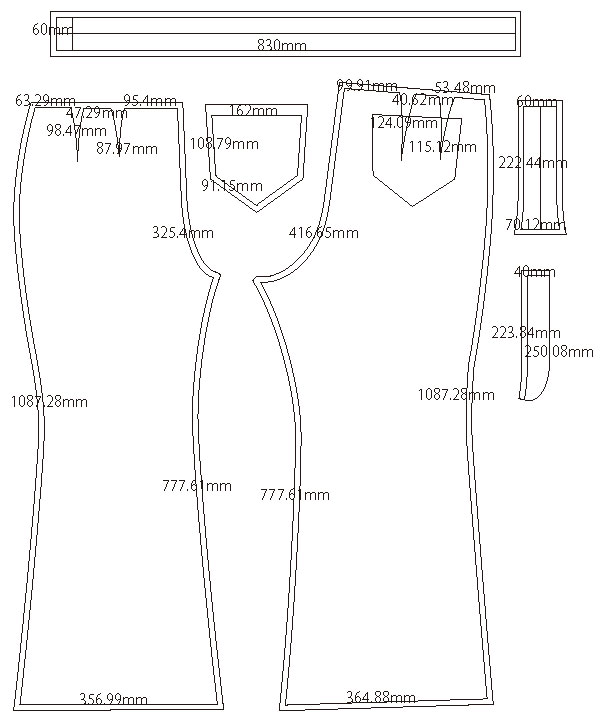
The paper pattern already includes a seam allowance (S/A), so it can be used without adding extra margins.

I'm not so good at English.
So all explanations/instructions were translated using AI.
This is not always perfect and I apologise for any parts that are difficult to follow.
If you have any suggestions on how to write like this, please let us know at info@dr-cos.com
We operate this site with your cooperation.
(1) Serging the sides of the "Front Body" and "Back Body",Stitch them together,Press seam allowances open with an iron.
![]() How to Serge/overlock (sewing machine & overlock sewing machine)
How to Serge/overlock (sewing machine & overlock sewing machine)
(2) After sewing the crotch from "Zip ends" to the crotch,Serging.
* Sew the crotch in two layers to make it stronger.
(3) Attach fusible interlining to "Extension parts", Sew one side of the zipper to the "Extension parts", Sew it to the body.
(4) Attach fusible interlining to "Facing",Serging the outside.
(5) Attach "Facing" to "Body" and attach the zipper on the other side.
(6) Serging the hem and sewing with a folding machine.
(7) Attach the fusible interlining to the "Belt",Fold it in with an iron,Sew the belt to the "Body".
(8) Make a buttonhole at the button position and sew a button.
*When attaching a belt thread, please sew it at the timing of the belt or sew it at the end.
![]()
Free Paper Patterns are possible because of your support.
If you use our patterns, please share them on social media and tell your friends.
Your support helps DRCOS continue to provide patterns in the future.
![]()
![]()
Children's 100 size
waist50cm length64cm A4 paper size 9 sheets (or legal size)

Children's 4 size
waist19.7in length25.2in letter paper size 10 sheets

Children's 120 size
waist54cm length77cm A4 paper size 11 sheets (or legal size)

Children's 8 size
waist21.3in length30.3in letter paper size 12 sheets
Children's 140 size
waist58cm length93.5cm A4 paper size 15 sheets (or legal size)

Children's 10 size
waist22.8in length36.8in letter paper size 15 sheets
Women's S size
waist62cm hip98cm length102.5cm Inseam74.5cm A4 paper size 16 sheets (or legal size)
Women's S size
waist24.4in hip38.5in length40.3in inseam29.3in letter paper size 18 sheets
Women's M size
waist68cm hip103.5cm length102.5m Inseam74.5cm A4 paper size 19 sheets (or legal size)
Women's M size
waist26.7in hip40.7in length40.3in inseam29.3in letter paper size 18 sheets
Women's L size
waist74cm hip110cm length105.5cm Inseam75cm A4 paper size 19 sheets (or legal size)
Women's L size
waist29.1in hip43.3in length41.5in inseam29.5in letter paper size 20 sheets
Women's LL size
waist80cm hip115.5cm length107.5cm Inseam76.5cm A4 paper size 22 sheets (or legal size)
Women's LL size
waist31.4in hip45.4in length42.3in inseam30.1in letter paper size 21 sheets
Men's L size
waist88cm hip124.5cm length111.5cm Inseam79cm A4 paper size 24 sheets (or legal size)

Men's L size
waist34.6in hip49in length43.8in inseam31.1in letter paper size 24 sheets
Men's LL size
waist96cm hip132.5cm length113.5cm Inseam80cm A4 paper size 26 sheets (or legal size)
Men's LL size
waist37.7in hip52.1in length44.6in inseam31.4in letter paper size 24 sheets


