


![]()
This is a sewing pattern and construction guide for a slightly long, four-button jacket design commonly used in cosplay costumes. The waistline is gently shaped to create a clean and well-defined silhouette.
The pattern can be arranged for different styles, such as lowering the collar to create a blazer suitable for school uniform designs. It is a flexible base pattern that allows easy customization depending on your project.
The lining and facings are simplified compared to standard jackets, making the construction easier. However, this pattern is still considered advanced, and basic to intermediate sewing skills are required.
As this pattern is simplified specifically for cosplay costumes, we recommend adjusting the lining structure if you plan to make a jacket for everyday wear. Modifying the pattern lines will result in a more refined finish.
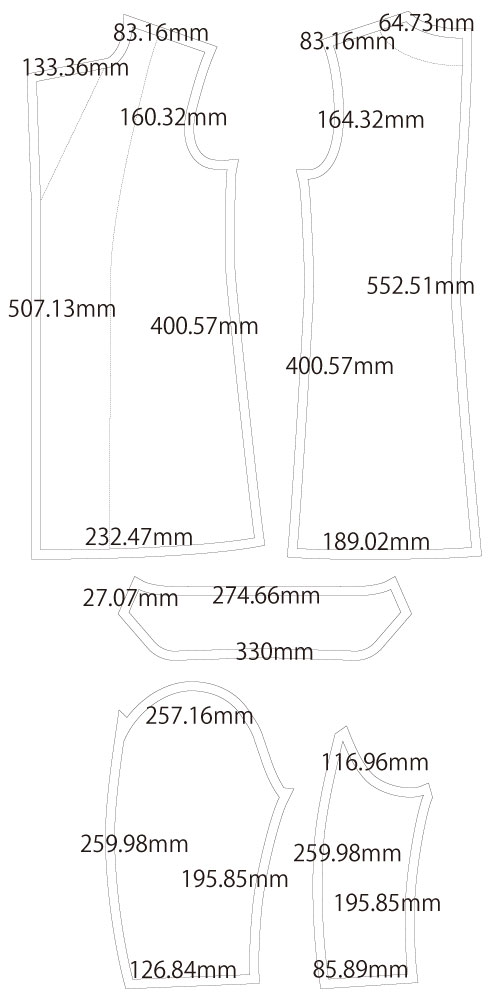
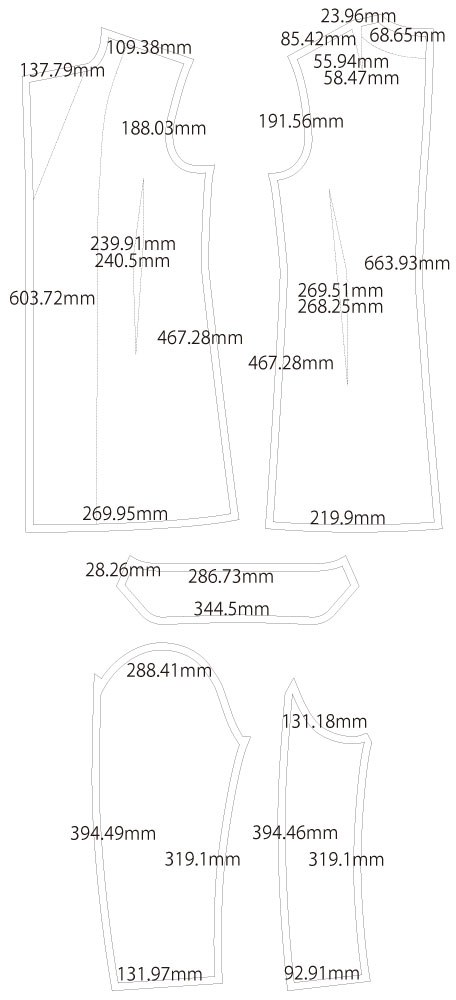
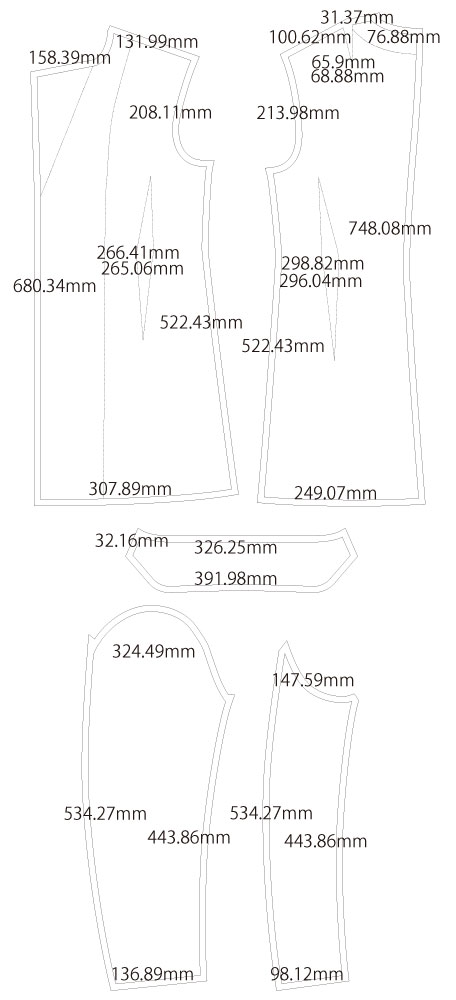
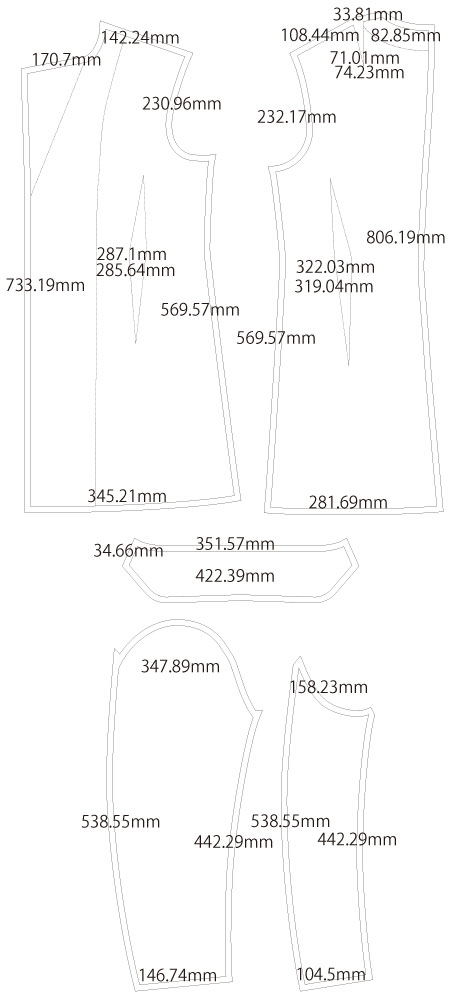
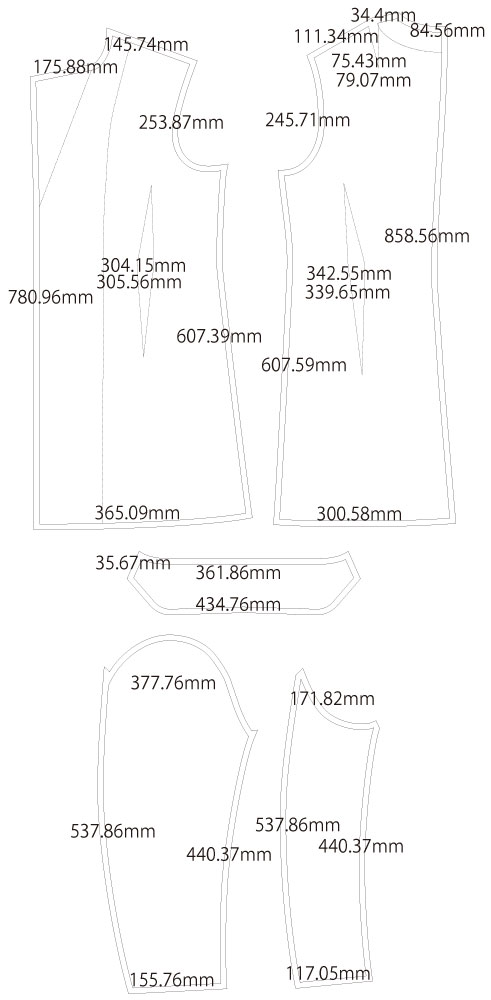
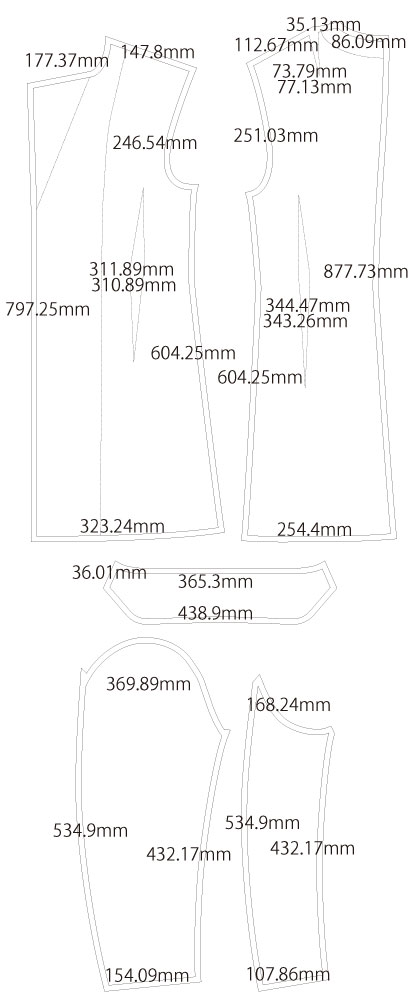
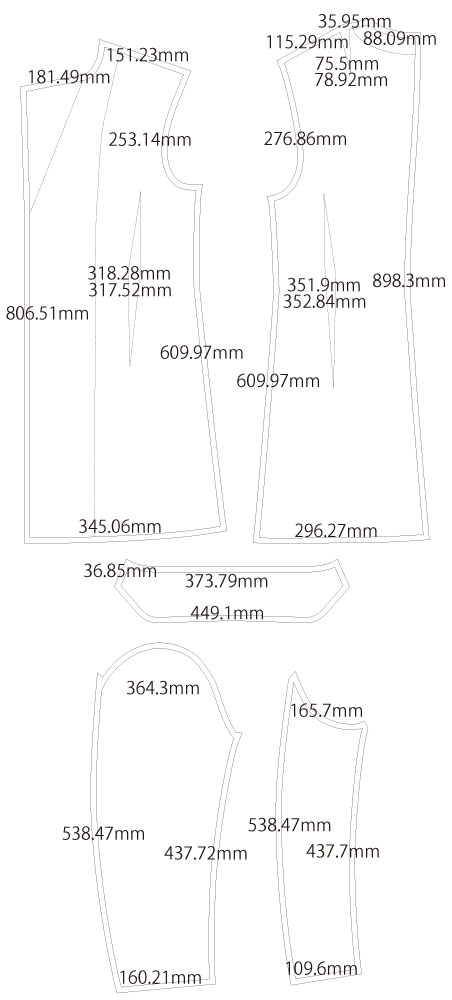
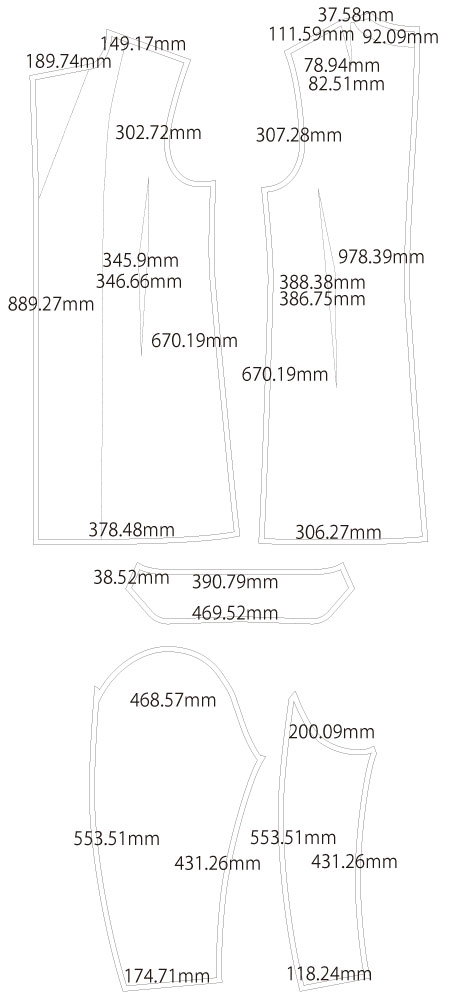
The sleeves are fully structured two-piece tailored sleeves with curved seams. Easing is used to create a natural rounded shape, which requires careful sewing. Please note that dart placements differ from standard jacket patterns.
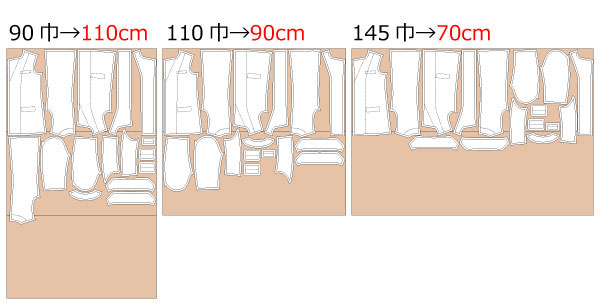
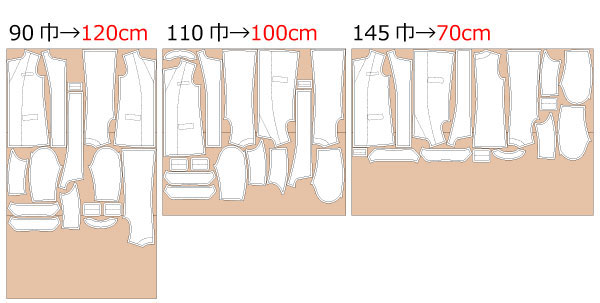
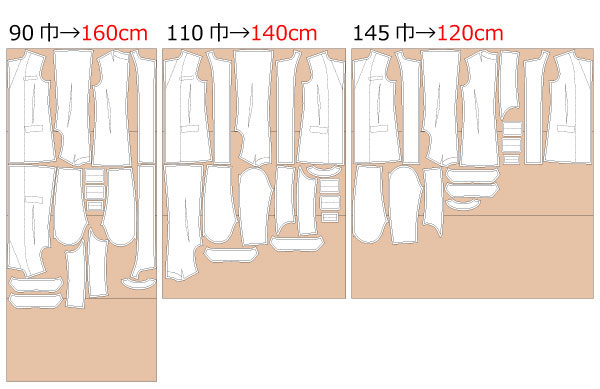
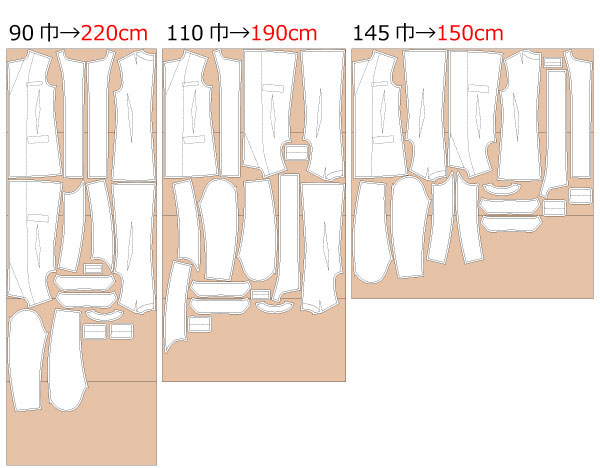
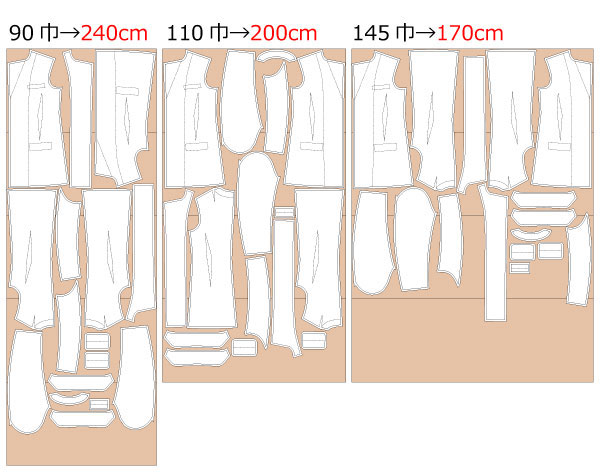
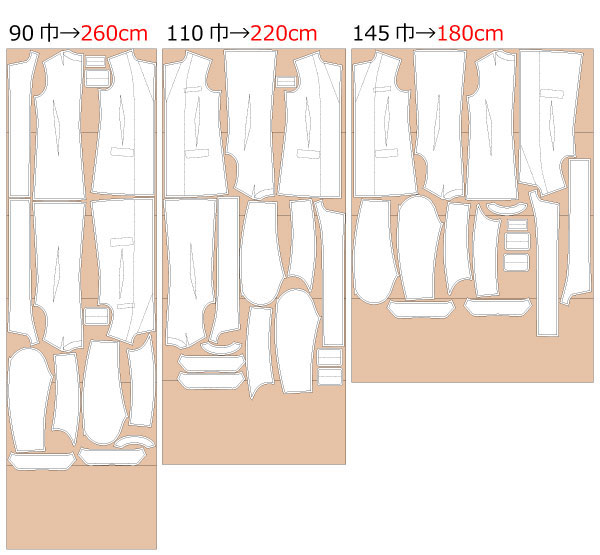
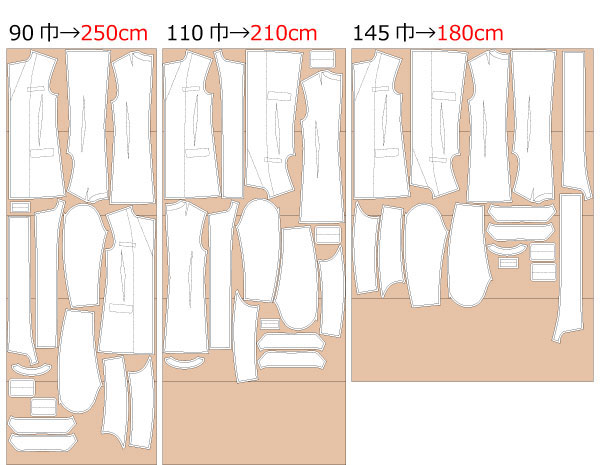
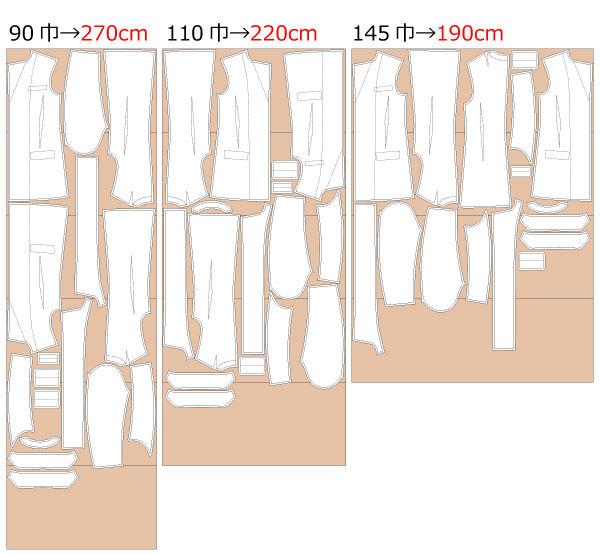
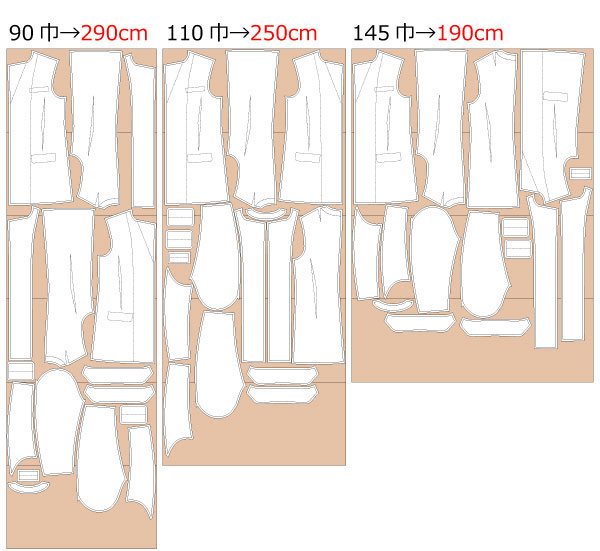
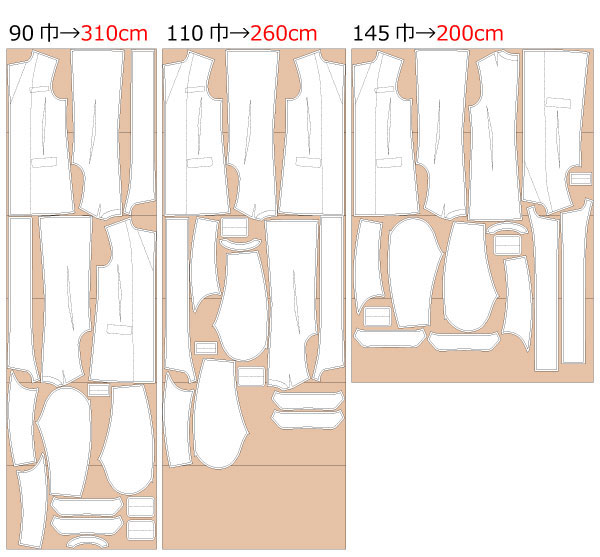
After printing, align the indicated joining lines, assemble the sheets, and cut out the pattern pieces. Seam allowances are included, so the pattern can be used as-is.


(1) Apply interfacing to all required parts, then sew all darts and press them toward the correct direction with an iron.
(2) Attach the dummy pocket and flap to the designated position on the front body.
*If you plan to make a functional pocket, prepare and sew the pocket at this stage.
(3) Sew the outer fabric, facing, and lining together to form the body shape, then attach the collar pieces to each part.
*Make small notches in tight curves around the collar and lining to allow smooth turning.
(4) Sew all sections except the hem, then turn the garment right side out.
*Lightly press the hem in advance to make the final finishing easier.
(5) Sew the sleeves and attach them to the body.
*Sleeve caps must be eased in using hand basting; skipping this step will prevent proper sleeve attachment.
(6) Finish the hem by hand-stitching to close the opening.
*Areas that tend to shift during sewing should be temporarily secured with hand basting to achieve clean and smooth lines.
![]()
Free Paper Patterns are possible because of your support.
If you use Paper pattern, please post it on social networking sites and tell your friends about it!
Please help spread the word about DRCOS for future operations!
![]()
![]()
Children's-100
bust64cm waist61.5cm length49cm 12sheets of A4 size (or legal size)


Children's-4
bust25.2in waist24.2in length19.3in 12sheets of letter size

Children's-120
bust69cm waist66cm length55.5cm 14sheets of A4 size (or legal size)
Children's-8
bust27.1in waist26in length21.8in 14sheets of letter size
Children's-140
bust81.5cm waist71cm length66.5cm 19sheets of A4 size (or legal size)
Children's-10
bust32.1in waist27.9in length26.2in 19sheets of letter size
Ladies'-S
bust92cm waist75.5cm length75cm 24sheets of A4 size (or legal size)
Ladies'-S
bust36.2in waist29.7in length29.5in 24sheets of letter size
Ladies'-M
bust98.5cm waist82cm length78cm 27sheets of A4 size (or legal size)


Ladies'-M
bust38.8in waist32.3in length30.7in 27sheets of letter size
Ladies'-L
bust104.5cm waist87cm length80.5cm 28sheets of A4 size (or legal size)
Ladies'-L
bust41.1in waist34.2in length31.7in 28sheets of letter size
Ladies'-LL
bust112cm waist94.5cm length86cm 32sheets of A4 size (or legal size)
Ladies'-LL
bust44.1in waist37.2in length33.8in 32sheets of letter size
Men's-S
bust93.5cm waist79.5cm length88cm 29sheets of A4 size (or legal size)
Men's-S
bust36.8in waist31.3in length34.6in 29sheets of letter size
Men's-M
bust102.5cm waist90.5cm length90cm 30sheets of A4 size (or legal size)
Men's-M
bust40.3in waist35.6in length35.4in 30sheets of letter size
Men's-L
bust112.5cm waist101cm length91cm 32sheets of A4 size (or legal size)

Men's-L
bust44.3in waist39.8in length35.8in 32sheets of letter size
Men's-LL
bust115cm waist103.5cm length98cm 35sheets of A4 size (or legal size)
Men's-LL
bust45.3in waist40.7in length38.6in 35sheets of letter size


