How to Sew on snap
I think many people are not good at sewing on snaps, even if they can sew on buttons.
It may seem difficult, but once you get used to it, you can use it in many places, and it is very useful, so please learn it!
It can be used as a button that is not visible on the surface, and can be easily detached with a single touch! And the price is reasonable! The best!
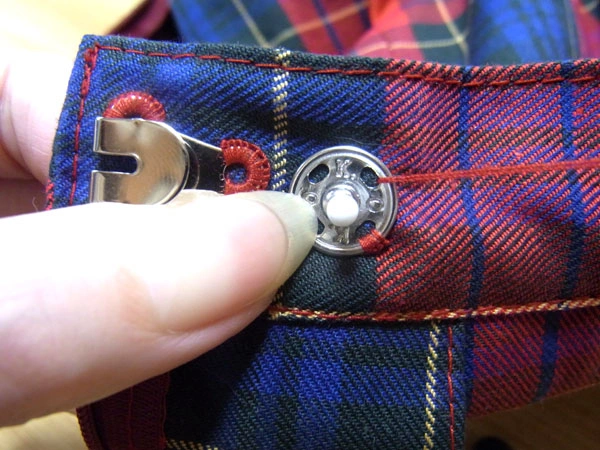
First, let's prepare Sew on snap.
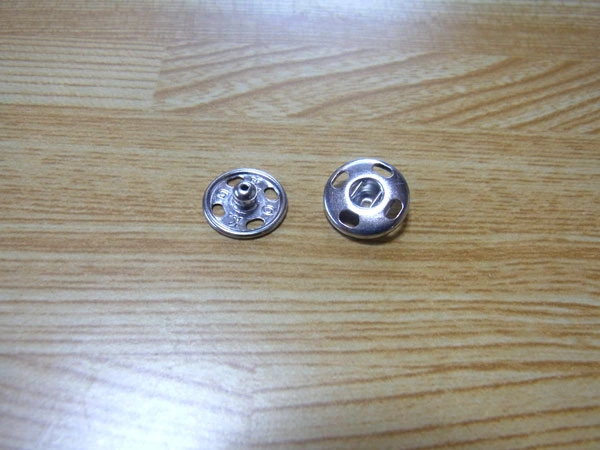
The left photo shows the "Male Snap Part" and the right photo shows the "Female Snap Part".
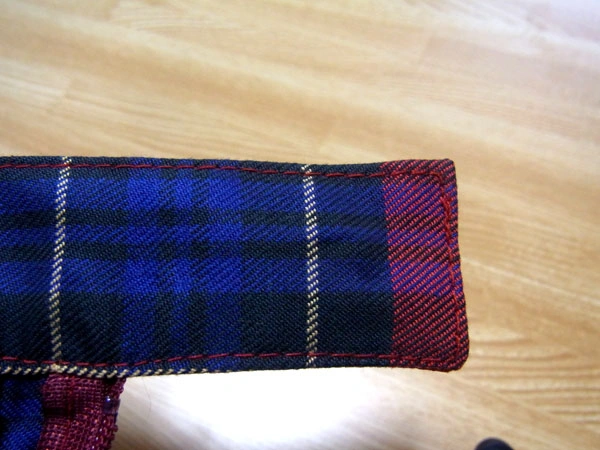
The part used in this explanation is the part that is sewn inside the "Extension parts" of the skirt to hold the belt in place. The size is 12mm.
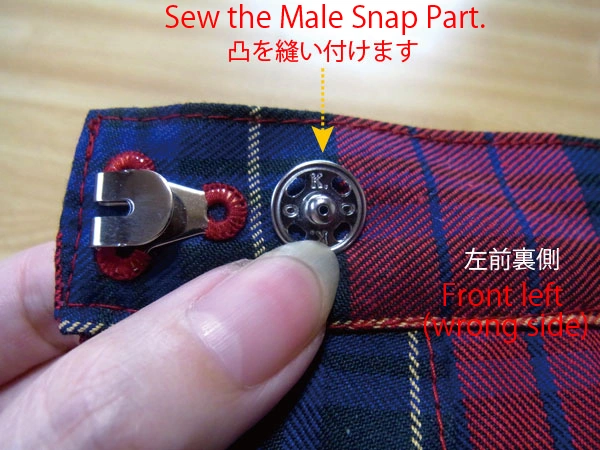
First, start with the "Male Snap Part" and sew it on.
When sewing the Sew on snap to the skirt, be sure to sew the hooks on first! If the hooks are not already attached, sew the hooks on first.
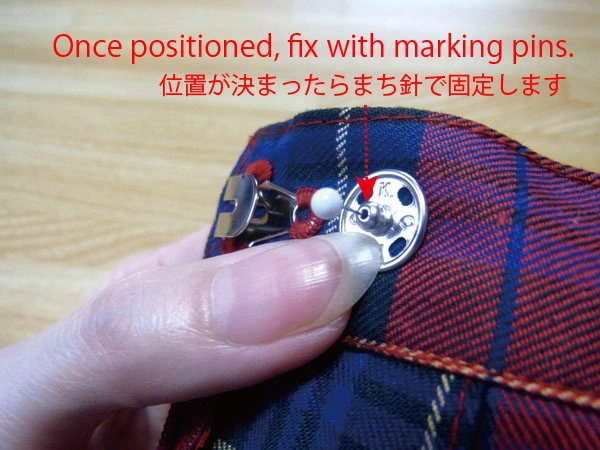
Once positioned, stick the marking pin in to secure it in place. There is a hole in the center of the Male Snap Part, so use that to secure it in place.
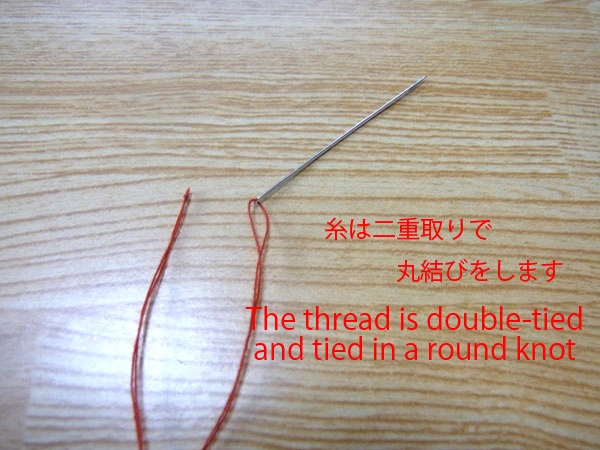
Next, prepare a needle and thread. Originally, it is often written that buttons and hooks should be made with a thicker count "buttoning thread" or the like! I use sewing machine thread.
However, the sewing machine thread is of a fine count, so the thread is taken in two strands.
When using thicker count yarns, such as buttoning thread, a single strand is sufficient.
Be sure to tie a round knot.
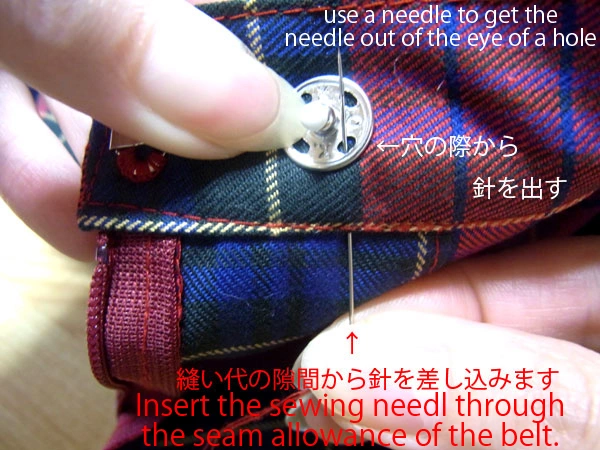
Insert the needle through the sewn gap in the belt cloth, through the belt cloth so as not to scoop the cloth, and bring the needle tip out at the hole where the first sewing is to be done.
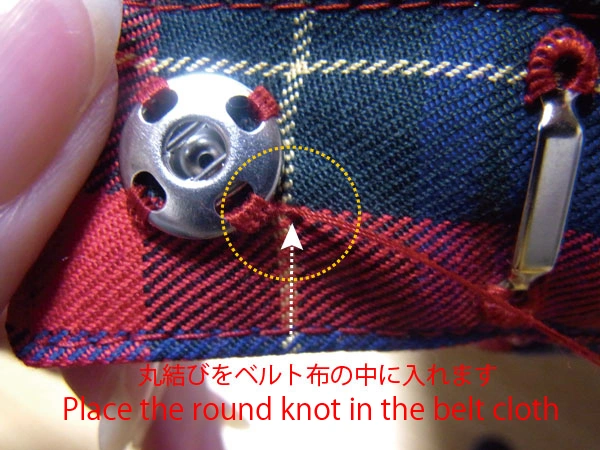
Inserting the needle without scooping the fabric through the gap allows the circular knot to enter neatly into the belt fabric.
This way, the round knot is hidden on the back side.
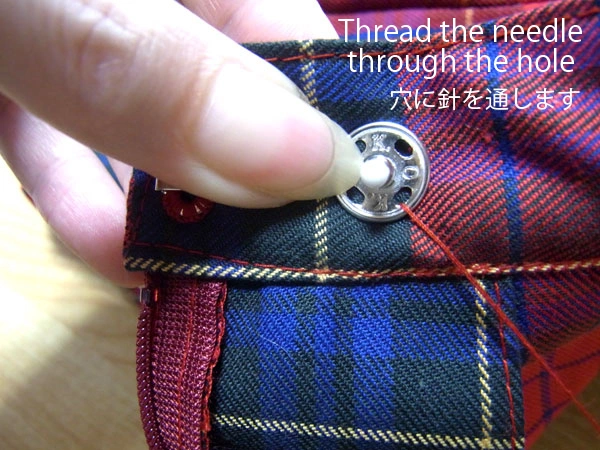
When the needle goes through the hole, sew it on.
This time we will sew 3 stitches, but please sew more times depending on the size of the snap you are using.
The sewing method is the same as for the hook part, so please refer to the "How to sew the hook" section.
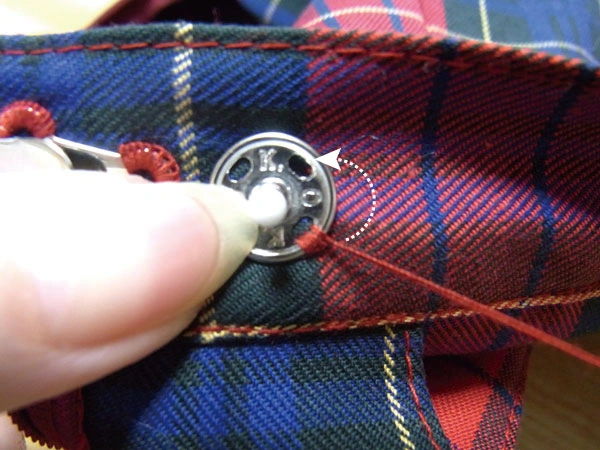
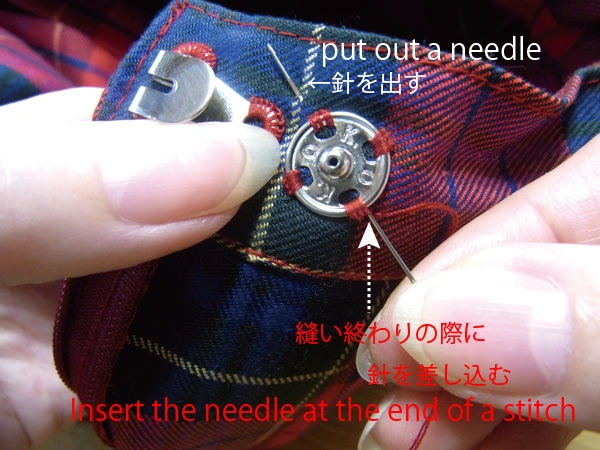
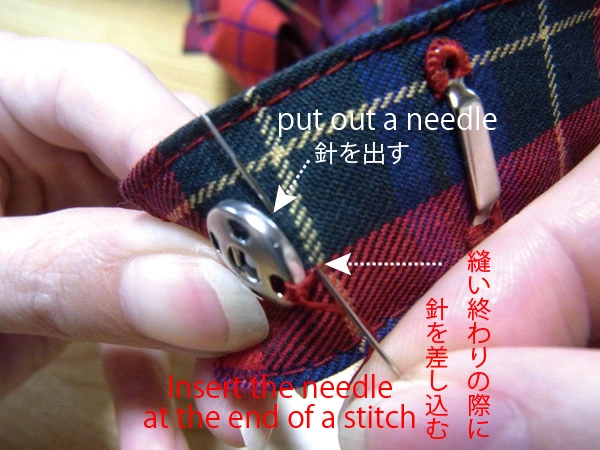
Three stitches have been completed. Next, move the needle to the top hole.
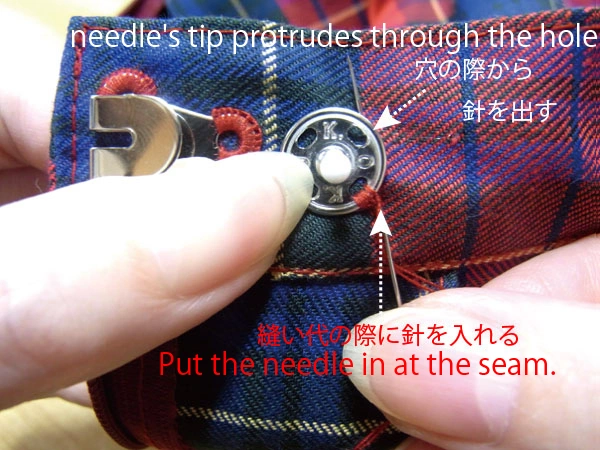
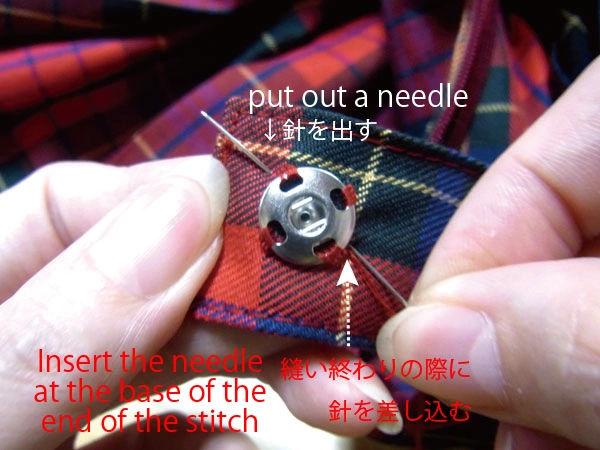
Insert the needle at the end of the stitch and bring the needle tip out through the top hole.
The needle has passed through the hole. Repeat the above to sew the remaining three holes.
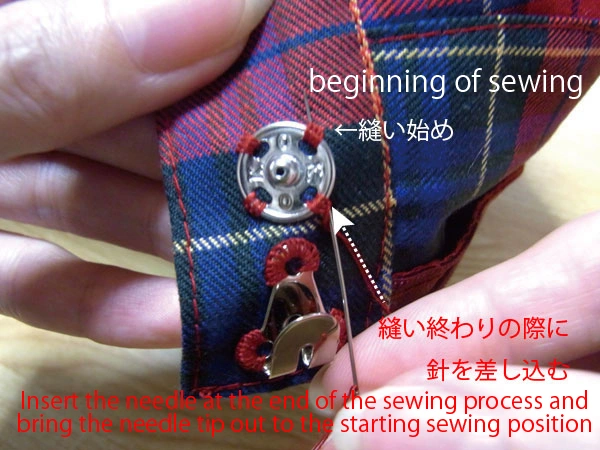
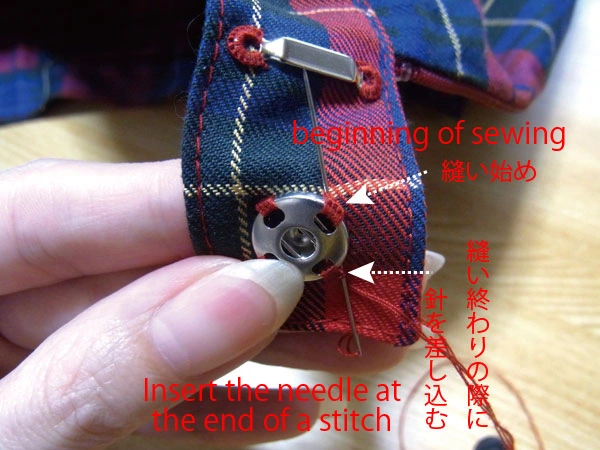
After sewing to the end, pass the thread to the beginning of the sew.
Insert the needle at the end of the stitch and bring the needle tip out near the fitting at the beginning of the stitch.
Be careful not to scoop the front side of the belt cloth.
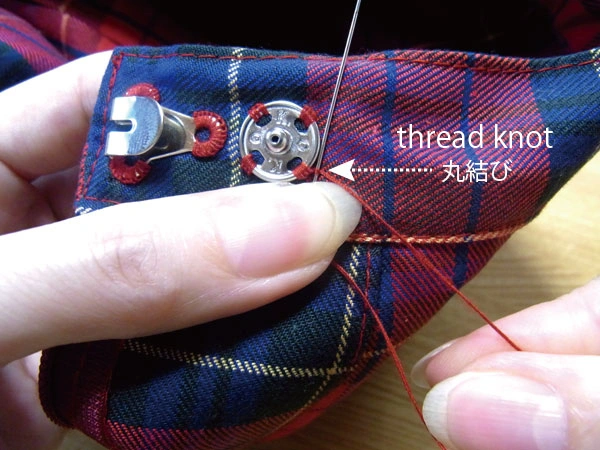
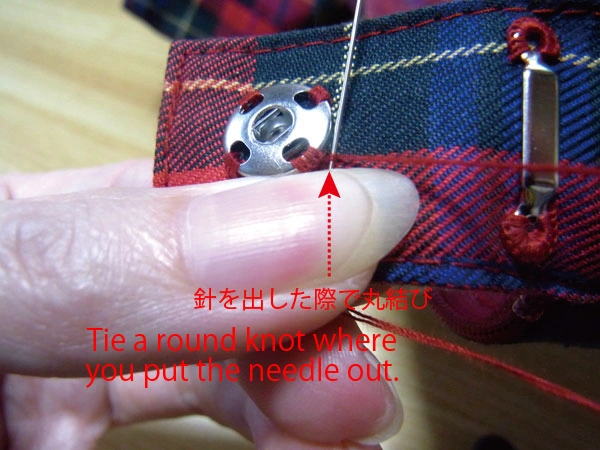
Tie a round knot with the yarn you have brought out near the metal fittings.
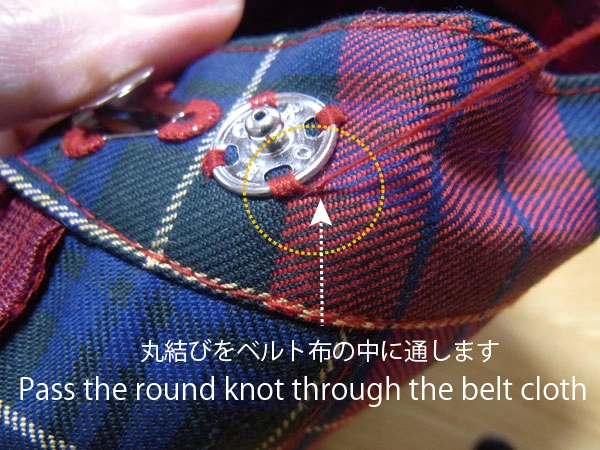
Thread the round knot through the belt cloth to hide it.
Insert the needle at the end of the stitch and let it out through the inside of the belt cloth.
Again, be careful not to scoop the front side!
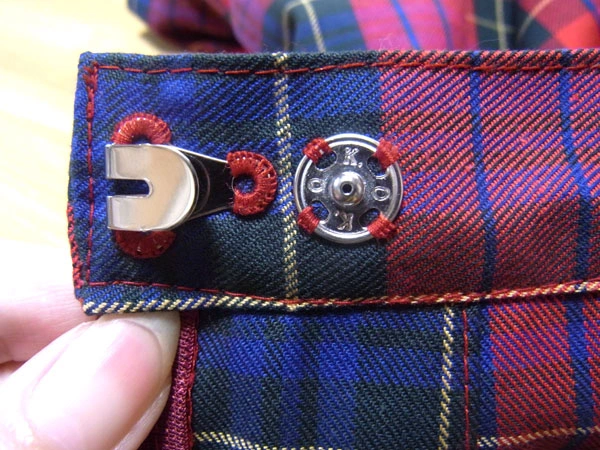
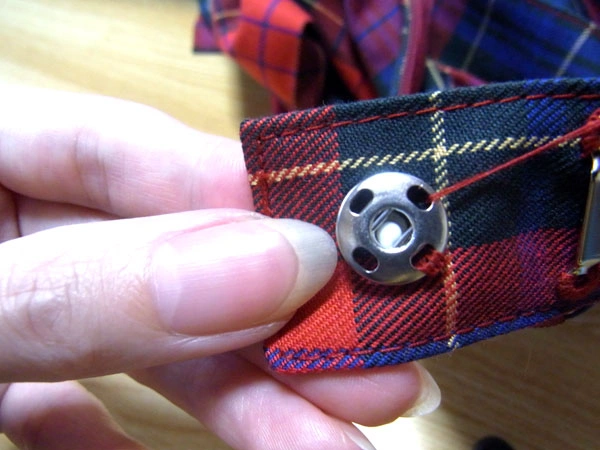
The "Male Snap Part" has been sewn on.
Front side.
If you accidentally scoop out the front side of the fabric, it will be very noticeable, so check the front side and sew carefully!
Next, the "Female Snap Part" is sewn on.
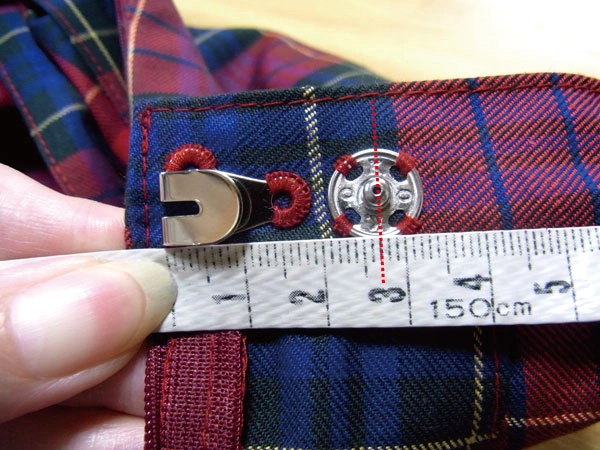
There is a hook, so we will match it this time. Measure the length to the Male Snap Part.
It's 2.7 cm from the edge of the hook to the center of the "Male Snap Part" of the snap.
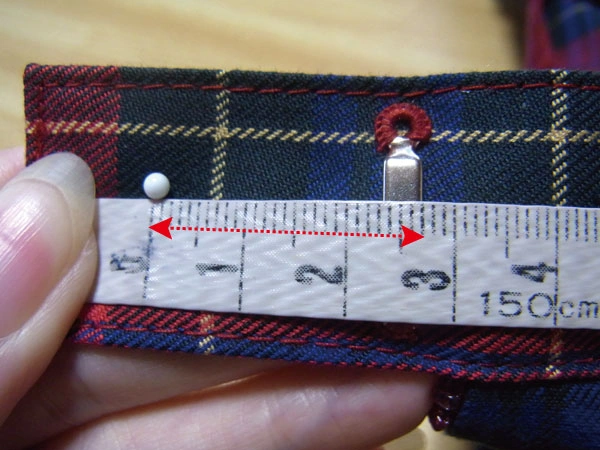
Sew so that the center of the Female Snap Part is 2.7 cm from the edge of the sewn Bar Eye.
First, measure the length and mark it with a marking pin.
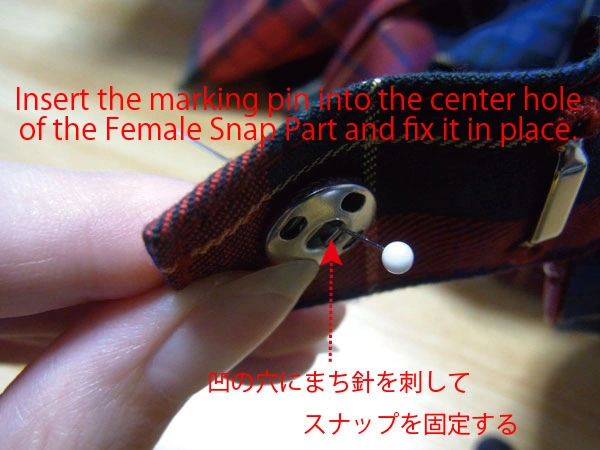
Fix the "Female Snap Part" at the position marked by the marking pin.
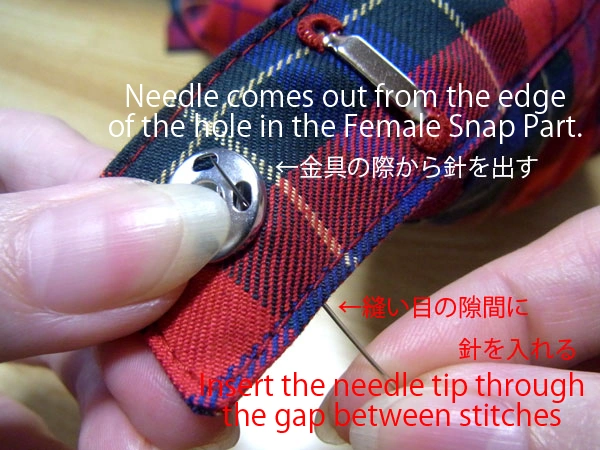
Insert the needle through the gap in the seam of the "Extension parts", then pass the needle through the belt fabric without scooping the fabric, and bring the needle tip out through the hole where you will sew the first stitch.
I sewed 3 stitches as in the previous "Male Snap Part". Move the needle to the upper right hole as before.
Insert the needle at the end of the sew and bring the needle tip out so that it passes through the hole in the fitting.
The needle has passed through the hole. Repeat the above to sew the remaining three holes.
When the end is sewn, pass the thread to the beginning of the sew.
Insert the needle at the end of the stitch and bring the needle out near the fitting at the beginning of the stitch.
Be careful not to scoop the underside of the belt cloth.
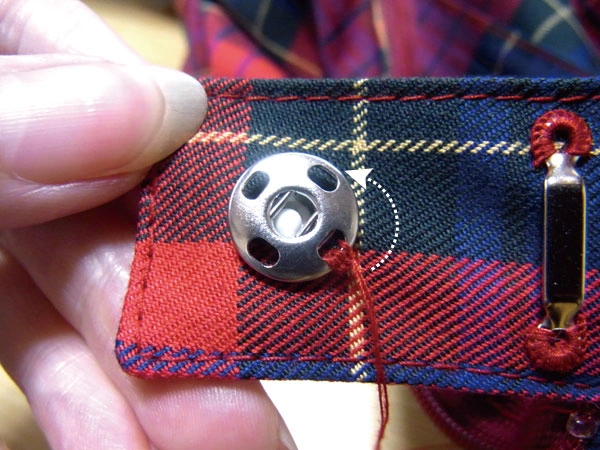
Tie a round knot with the yarn you have brought out near the metal fittings.
After pulling the thread to make a round knot, Then, hide it inside the belt cloth.
Insert the needle at the end of the stitch, pass through the belt cloth, and bring the needle tip out.
Be careful not to scoop the back side!
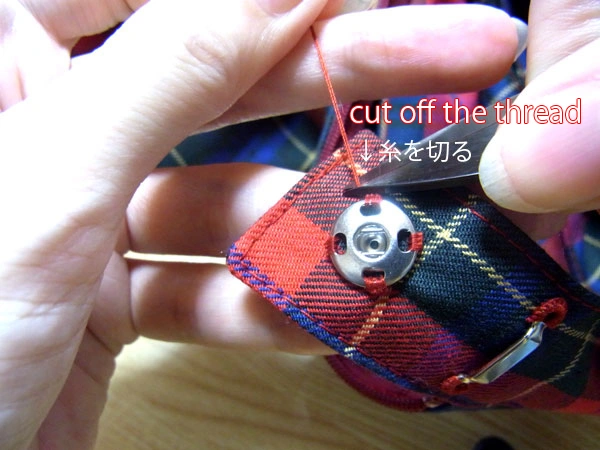
After pulling out the thread, cut it with Thread Clippers.
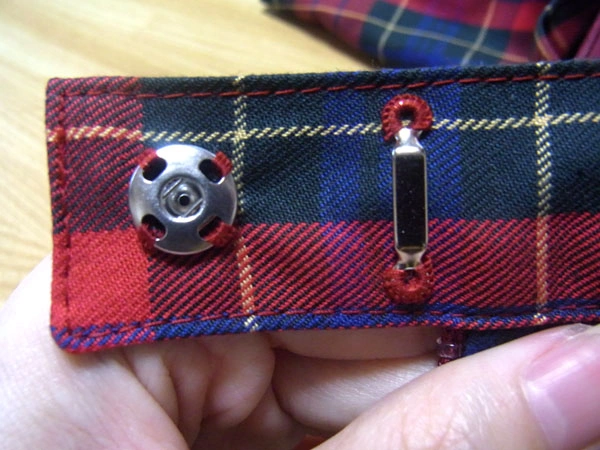
The "Female Snap Part" is now sewn in place.
Sew on snap is now finished.


