How to Sew the Hook (Part 1: Hook)
This section explains how to sew on the hooks used to fasten the waist of a skirt.
They are attached by hand sewing, but many people find it difficult and end up sewing them loosely...
I recommend sewing them neatly, as the stitches look beautiful when done properly.
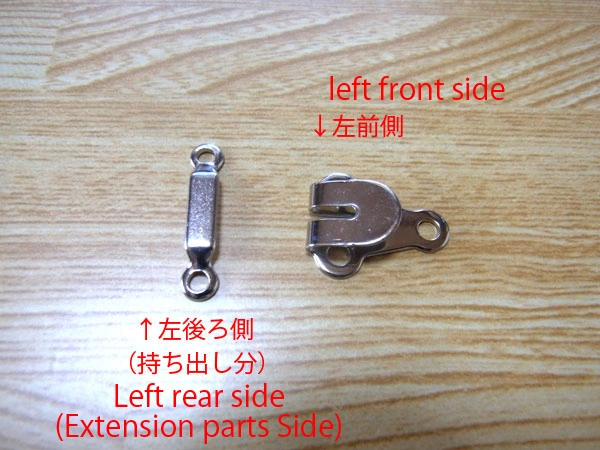
First, prepare the hooks. The one on the left is called a "Bar Eye," and the one on the right is the "Hook."
Although instructions often recommend using thicker thread such as "buttoning thread," I usually use sewing machine thread without worry.
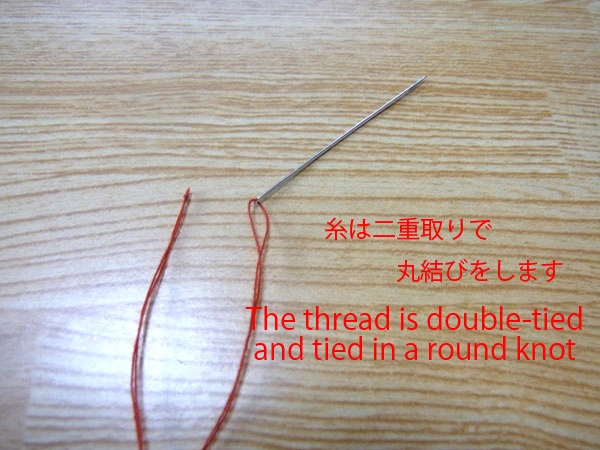
Since sewing machine thread is fine, use it doubled.
If you are using thicker thread, such as buttoning thread, a single strand is enough.
Be sure to tie a round knot at the end.
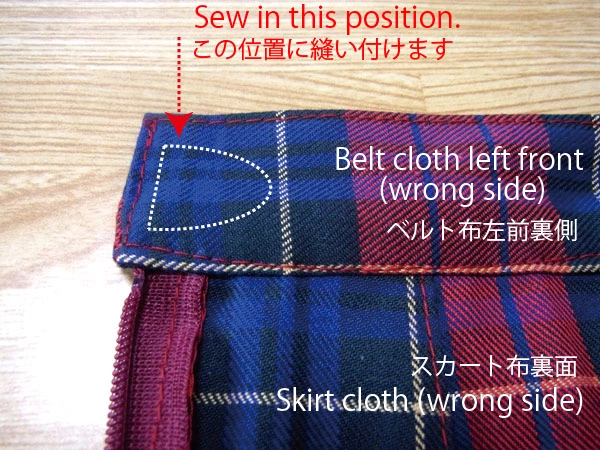
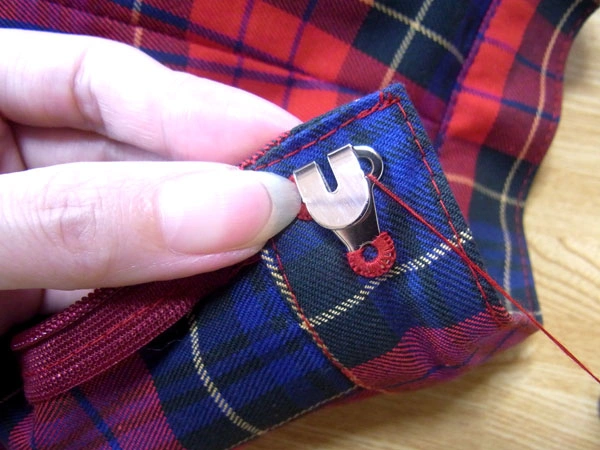
Sew the hook onto the back side of the left front waistband.
The white dotted line shows the sewing position for the hook.
Hold the waistband in front of you for easier sewing.
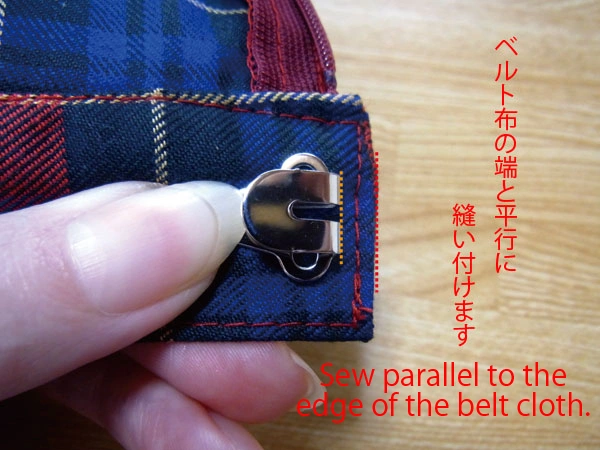
As shown by the dotted line, align the edge of the hook parallel with the edge of the waistband.
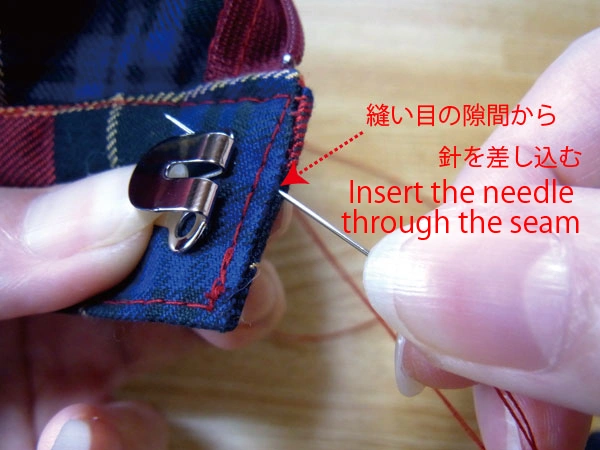
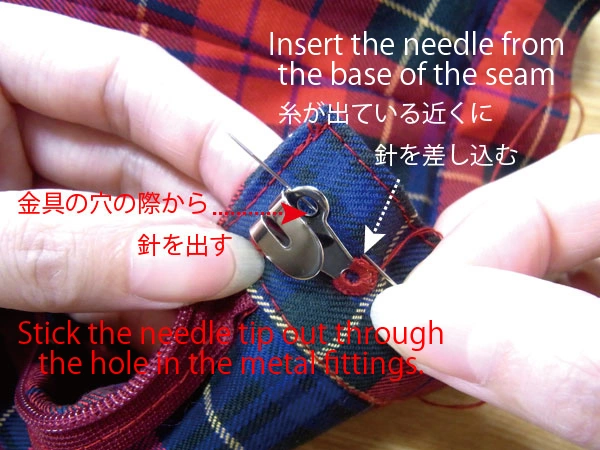
Insert the needle through the gap between stitches so the knot can slip inside without showing.
This way, the round knot is hidden inside the waistband fabric.
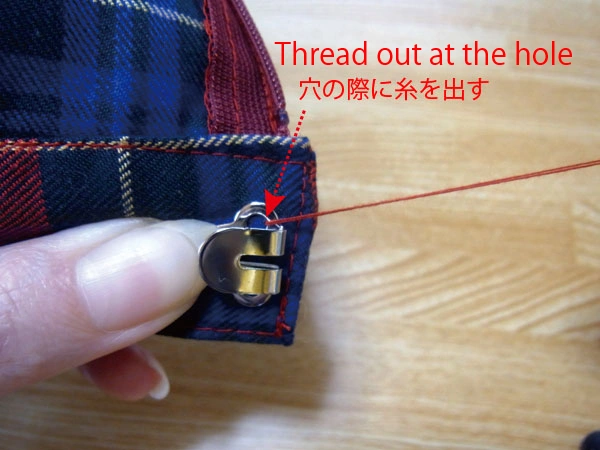
Pass the needle through the hole and pull the thread out as shown.
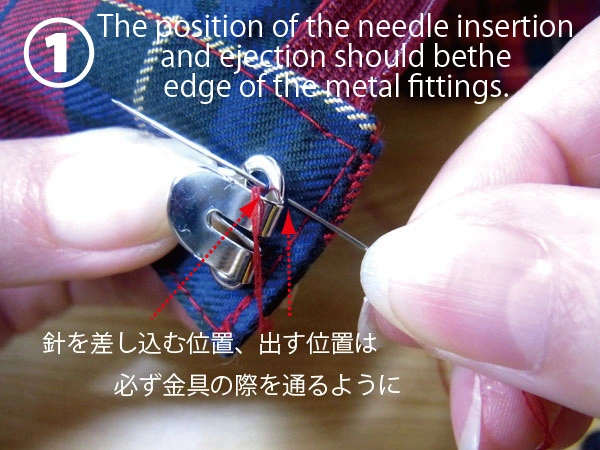
The key to sewing a hook neatly is to insert and bring out the needle right along the edge of the metal fitting.
Never scoop the surface fabric together—make sure the outer fabric remains unaffected.
It is also important to place stitches at equal intervals.
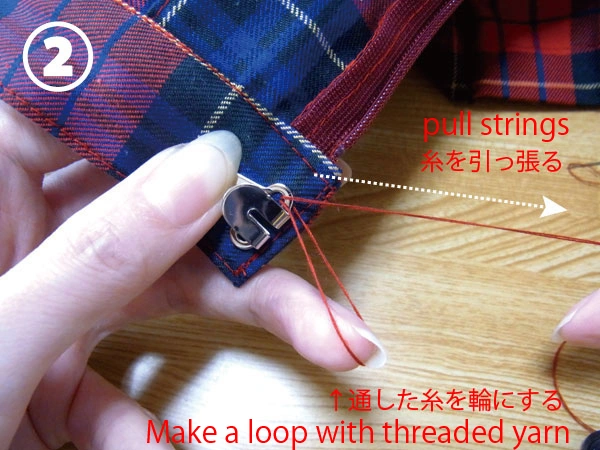
After threading the needle, pull the thread slowly.
The thread forms a loop that rests on your finger.
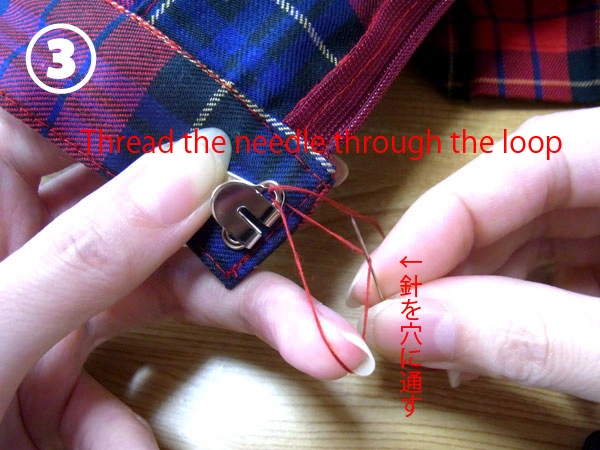
Pass the needle upward through this loop.
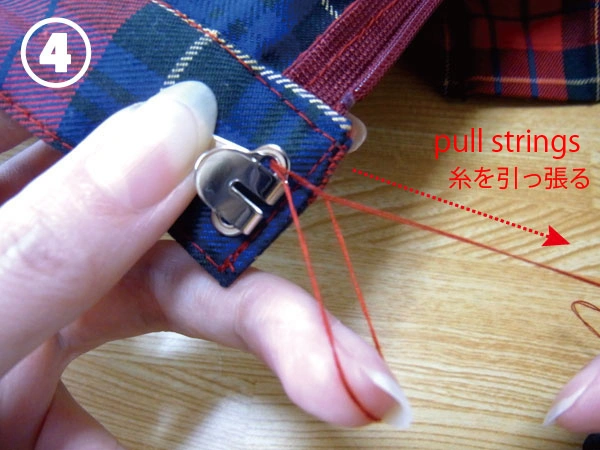
After passing through the loop, pull the thread slowly to prevent tangling.
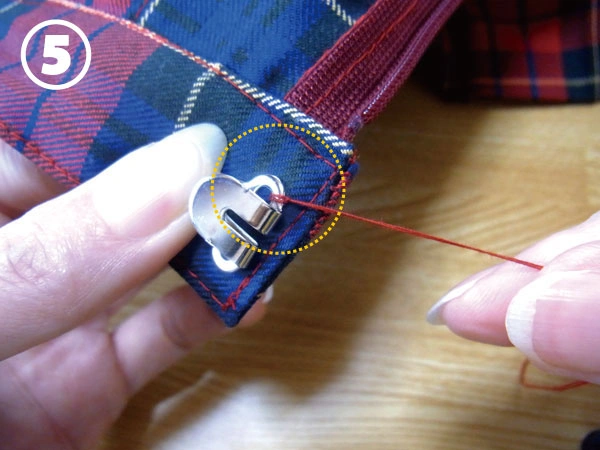
This strengthens the stitch with a half hitch. Repeat this series of steps, moving slightly along from (1) to (5).
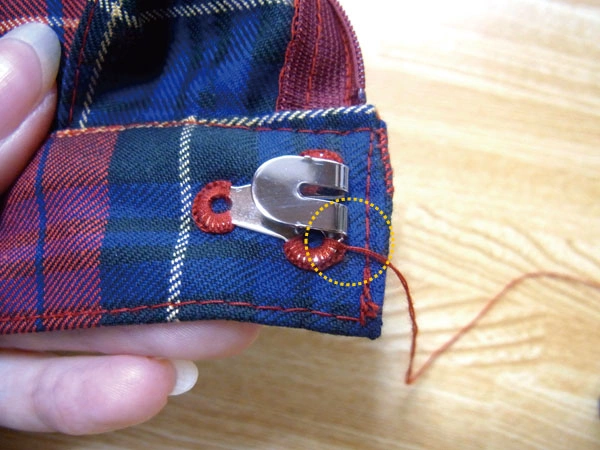
This is how it looks when you reach the end of the first section.
Next, pass the needle through the adjacent hole.
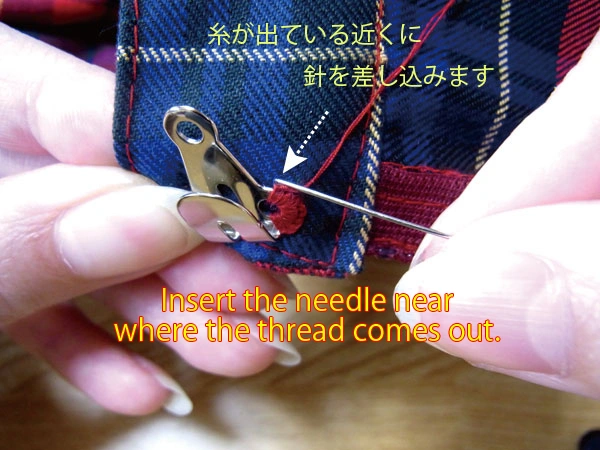
Insert the needle near where the thread comes out.
Again, be careful not to scoop the front fabric.
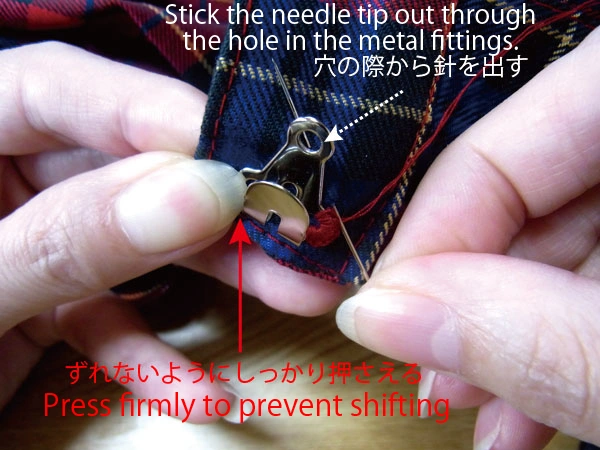
The hook is not yet secured, so hold it firmly with your left hand and stitch through the next hole.
Thread through the hole and sew as before.

If passing the needle through the loop is difficult, you can hook the thread onto the needle instead.
First, insert the needle.
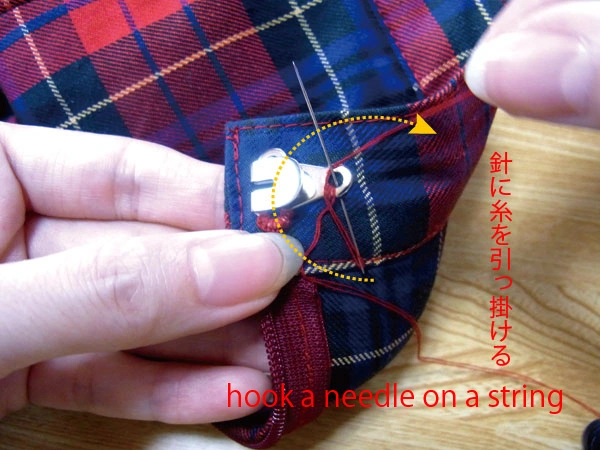
Hook the thread extending from the needle’s eye onto the needle.
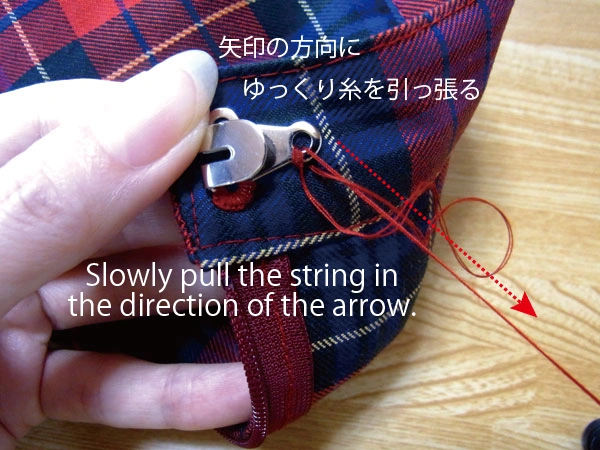
Pull the thread slowly in the direction of the arrow, watching carefully to avoid tangles.
You can sew either this way or the earlier method. Choose whichever you find easier.
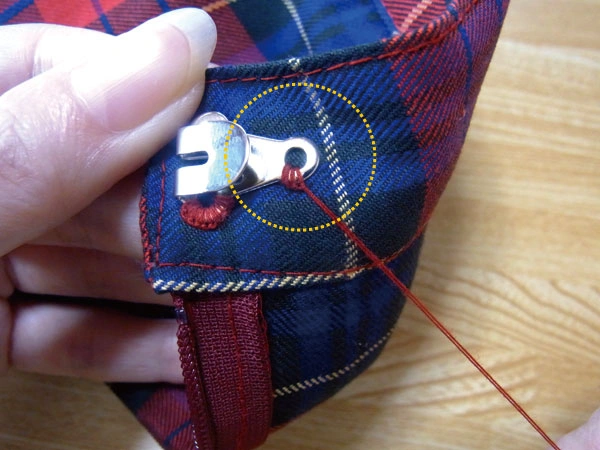
To sew hooks beautifully, practice is important, but also be aware of the difference between the "inner circle" and the "outer circle" of each hole.
Sew radially from the inner circle to the outer circle.
After this, the only hole left is the top right one.
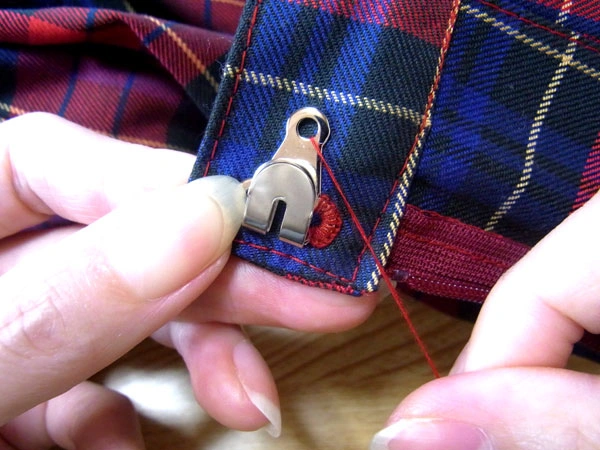
As before, insert the needle near where the thread comes out and bring it out at the fitting’s hole.
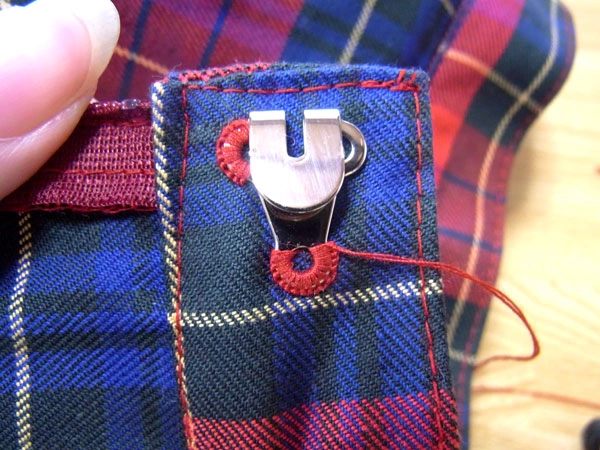
The thread has passed through the hole. Sew it in place.
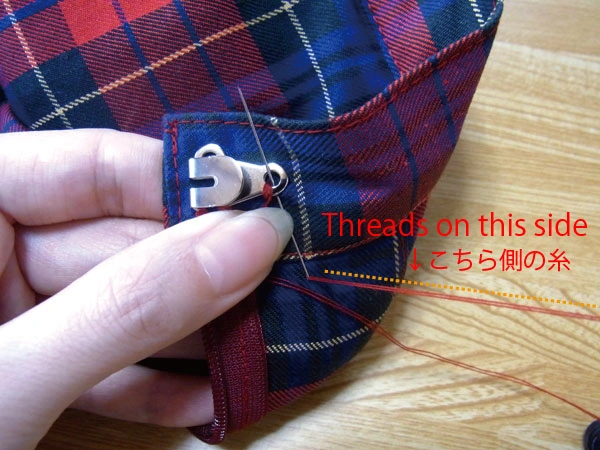
All holes are sewn. The last step is to finish the thread ends.
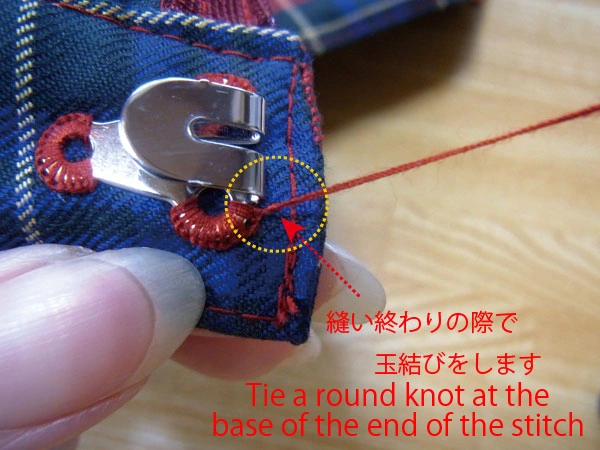
Tie a round knot at the end as shown. It may be tricky because of the fitting, but tie it as close to the edge as possible.
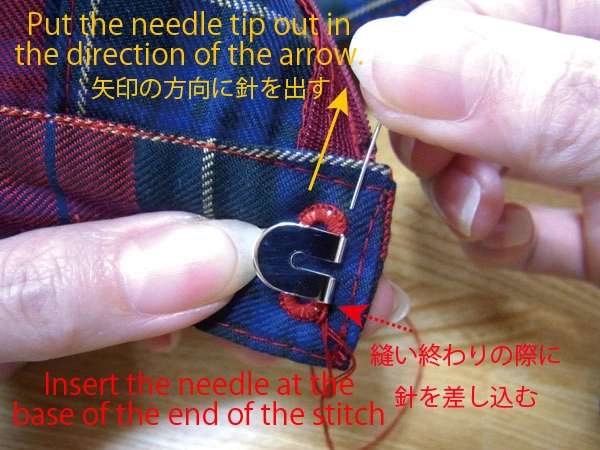
After tying, insert the needle at the end, passing it inside the waistband fabric without piercing through.
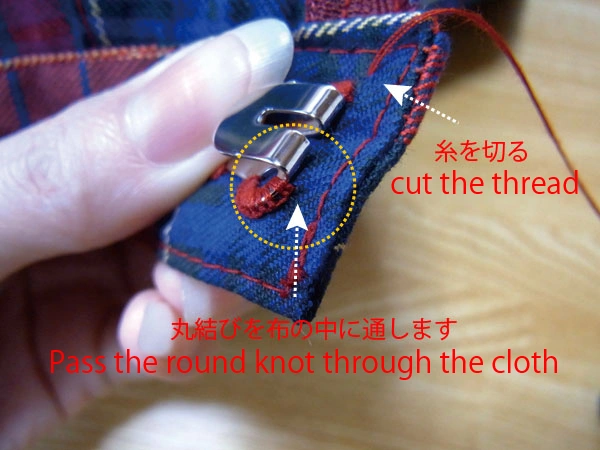
Pull the thread so the knot slips inside the fabric and gets hidden. Cut the thread while pulling gently so it stays inside.
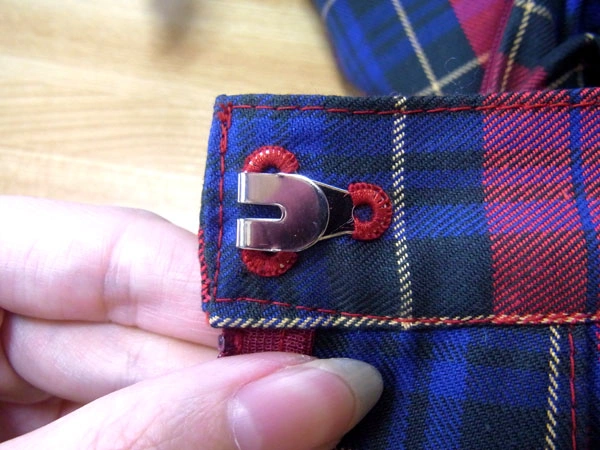
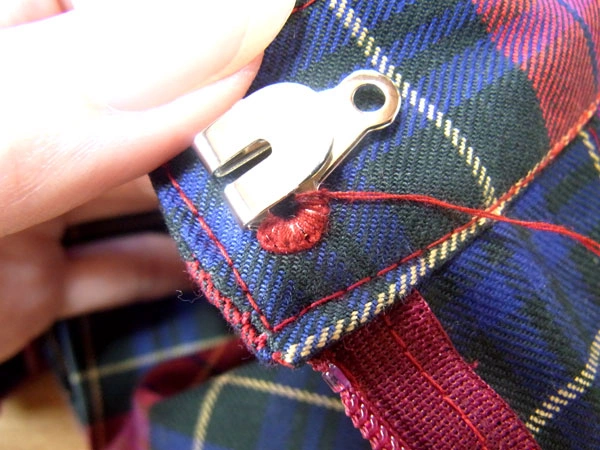
The hook has been sewn on. The stitches look beautiful.
Next, let’s attach the "Bar Eye"! Go to How to Sew the Hook (Part 2: Bar Eye) .


