


![]()
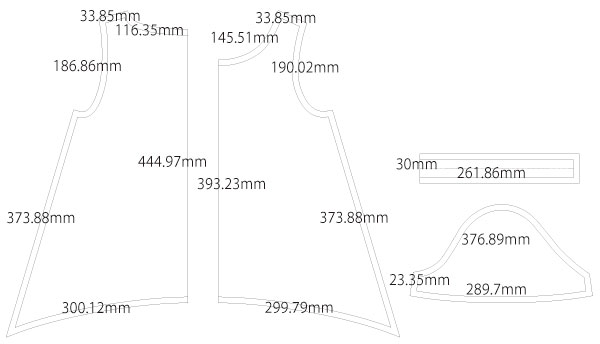
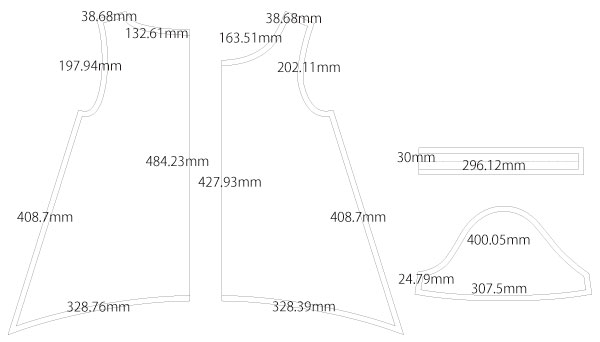
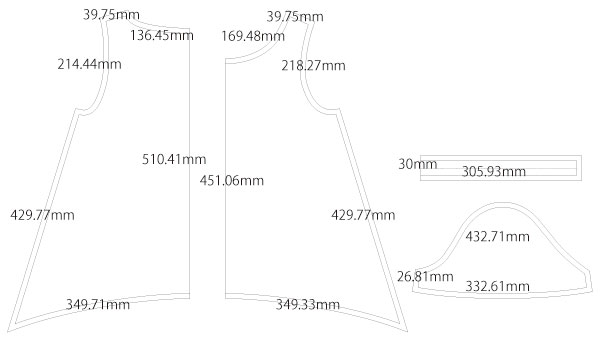
This is a sewing pattern and tutorial for a hemline T-shirt.
Please use knit fabric or other stretch materials such as 2-way fabric.
Fabrics with a soft drape also work well and create a cute finish.
The bust area is designed to be slim, so if you prefer a relaxed fit, please choose one size larger.
This pattern is for short sleeves. If you want long sleeves, please adjust the pattern to your desired sleeve length.
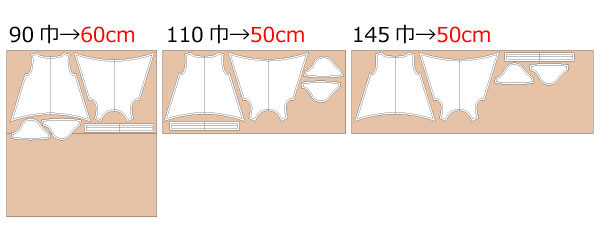
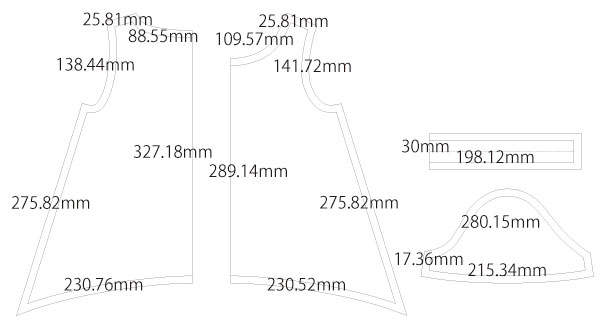
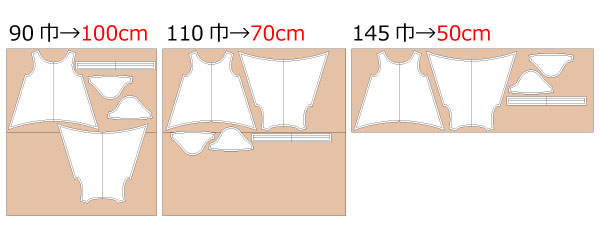
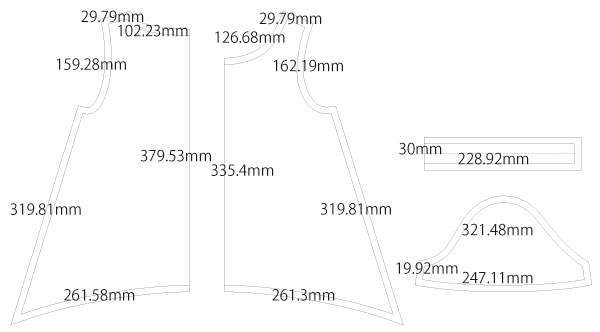
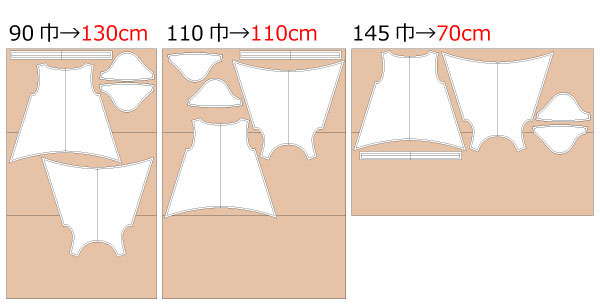
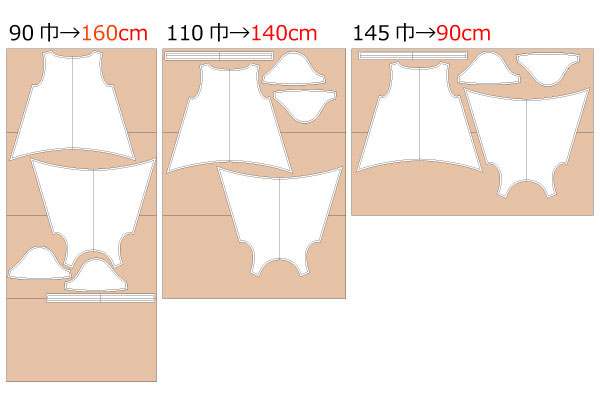
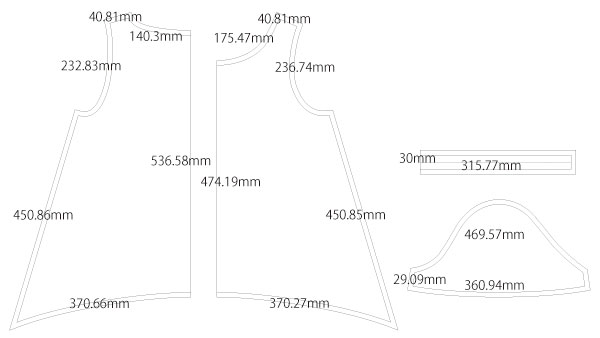
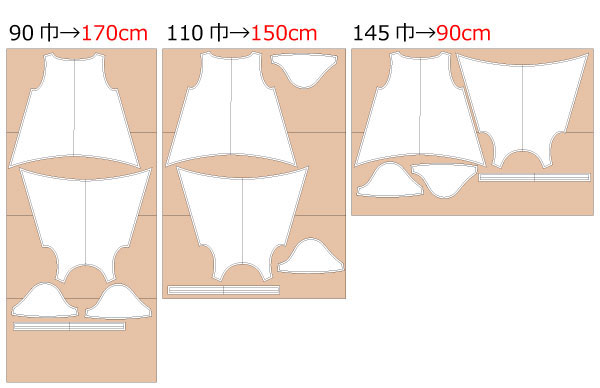
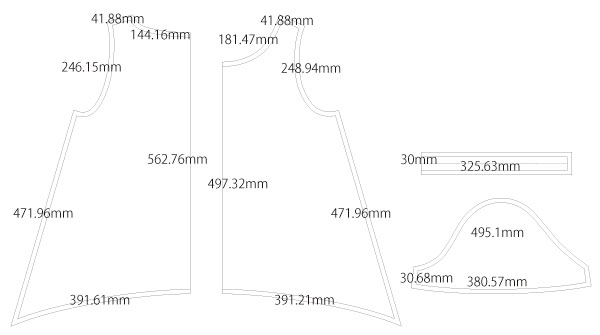
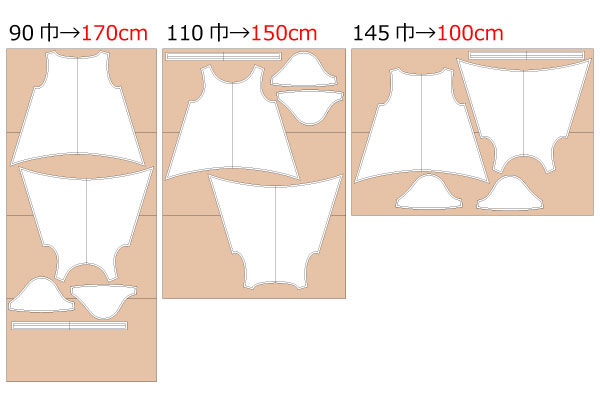
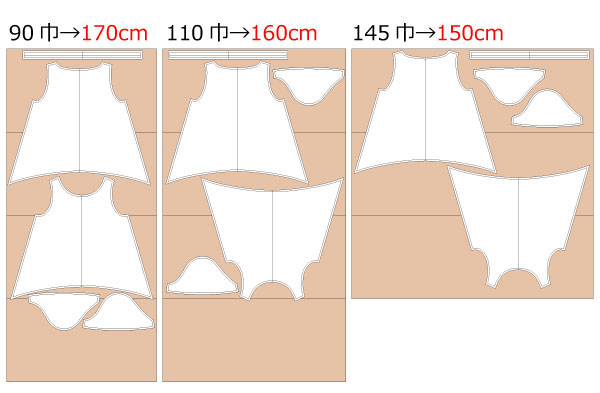
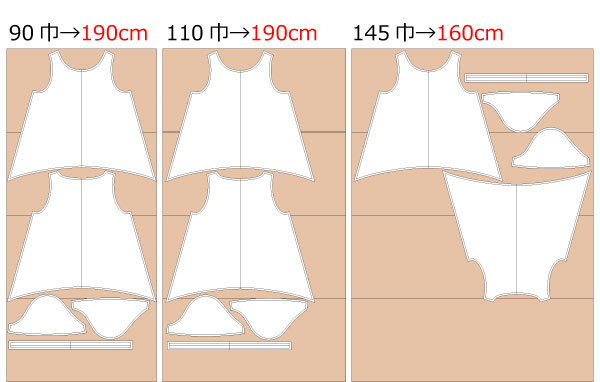
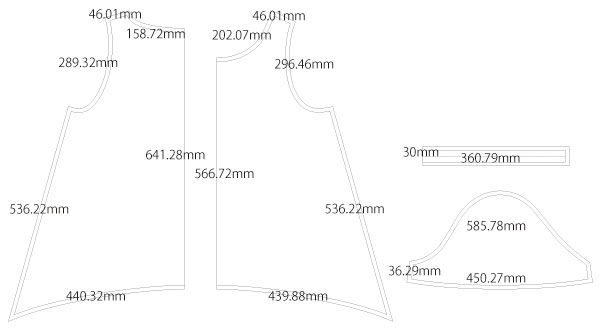
After printing, align and tape the joining lines, then cut out the pieces. The seam allowances are already included, so you can use the pattern as is.


What are “Grainline” and “Cut on Fold”? Please refer to this page
(1) Sew the shoulder seams and side seams of the front and back body together with a regular sewing machine. Serge/overlock the seam allowances and press.
How to serge/overlock (sewing machine & overlock sewing machine) Please refer to this page
(2) Sew the side of each sleeve (so you get two tubes) with a regular sewing machine. Serge/overlock the seam allowances and press.
How to sew sleeves and sleeve cuffs Please refer to this page
(3) Serge/overlock the hem of the body and the hem of the sleeves to prevent fraying. Fold the hem 0.5 inch (≈1 cm) inward and sew with a regular sewing machine.
(4) Attach the sleeves to the body and serge/overlock the armholes.
(5) Sew the neckband into a loop.
(6) Fold the neckband in half lengthwise and sew it to the neckline, sandwiching the seam allowance.
![]()
Free Paper Patterns are possible because of your support.
If you use Paper pattern, please post it on social networking sites and tell your friends about it!
Please help spread the word about DRCOS for future operations!
![]()
![]()
Children's-100
bust58cm 4sheets of A4 size (or legal size)

Children's-4
5sheets of letter size

Children's-120
bust65cm 6sheets of A4 size (or legal size)
Children's-8
6sheets of letter size
Children's-140
bust75cm 7sheets of A4 size (or legal size)

Children's-10
7sheets of letter size
Ladies'-S
bust80cm 8sheets of A4 size (or legal size)
Ladies'-S
8sheets of letter size
Ladies'-M
bust87cm 9sheets of A4 size (or legal size)

Ladies'-M
9sheets of letter size
Ladies'-L
bust94cm 9sheets of A4 size (or legal size)
Ladies'-L
10sheets of letter size
Ladies'-LL
bust101cm 10sheets of A4 size (or legal size)
Ladies'-LL
11sheets of letter size
Men's-S
bust93cm 9sheets of A4 size (or legal size)


Men's-S
10sheets of letter size
Men's-M
bust101cm 11sheets of A4 size (or legal size)
Men's-M
11sheets of letter size
Men's-L
bust109cm 12sheets of A4 size (or legal size)
Men's-L
13sheets of letter size
Men's-LL
bust115cm 14sheets of A4 size (or legal size)
Men's-LL
14sheets of letter size


