How to sew a zipper on pants
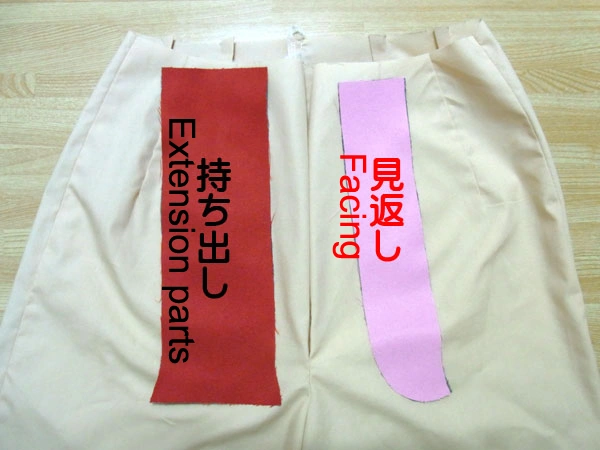
First, apply fusible interlining to "Extension parts" and "facing" respectively.
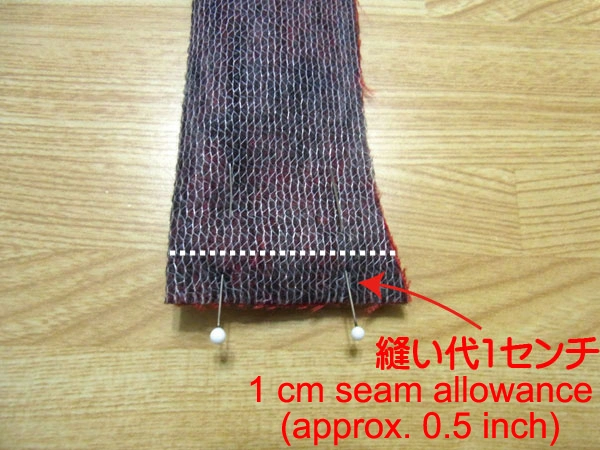
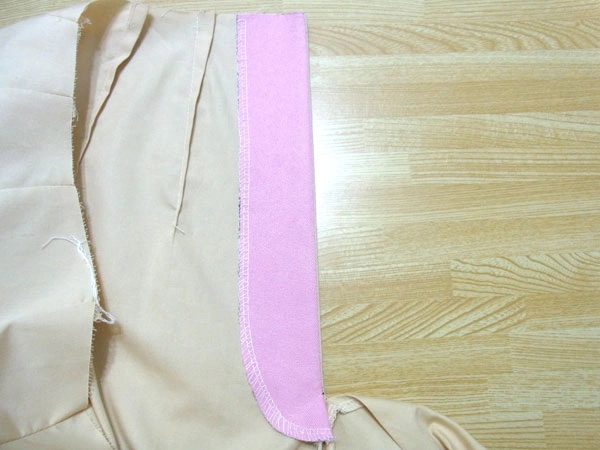
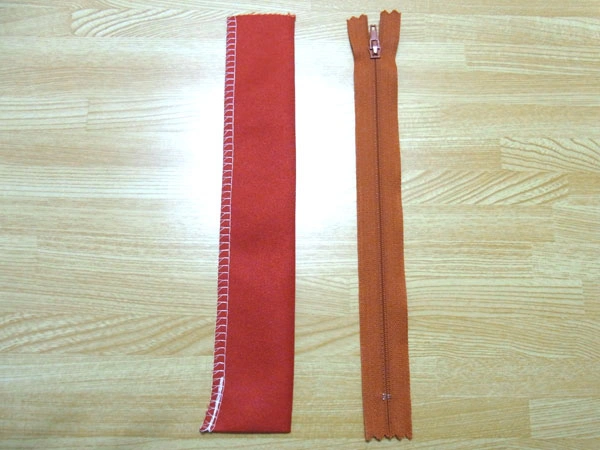
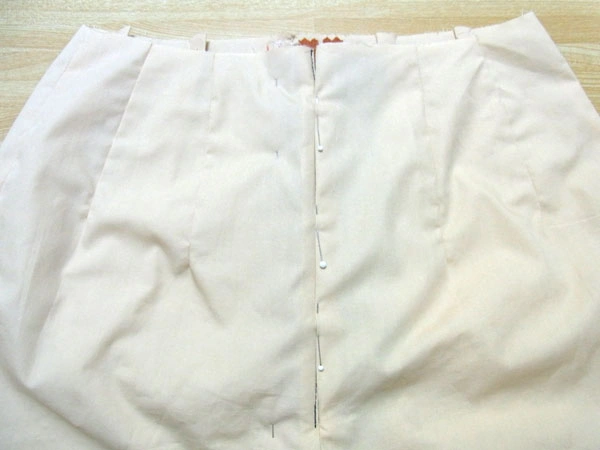
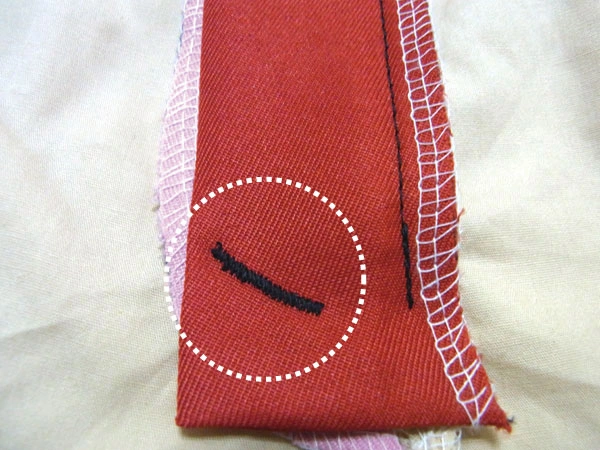
Stitch the white dotted line at the bottom of the "Extension parts".
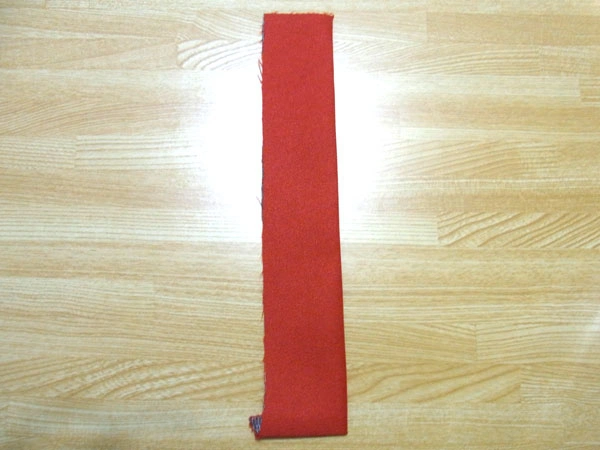
After sewing the bottom side together, turn it over and iron it in half.
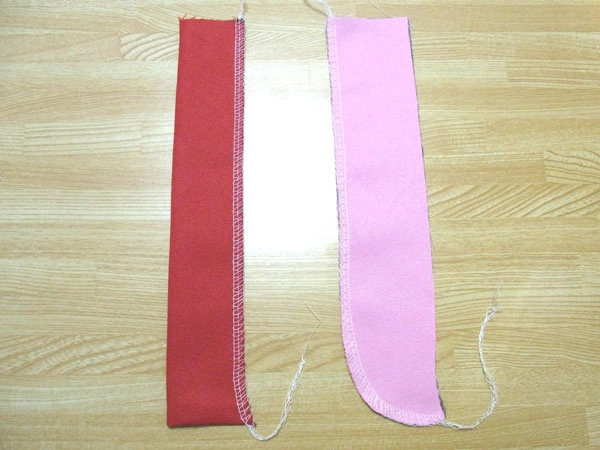
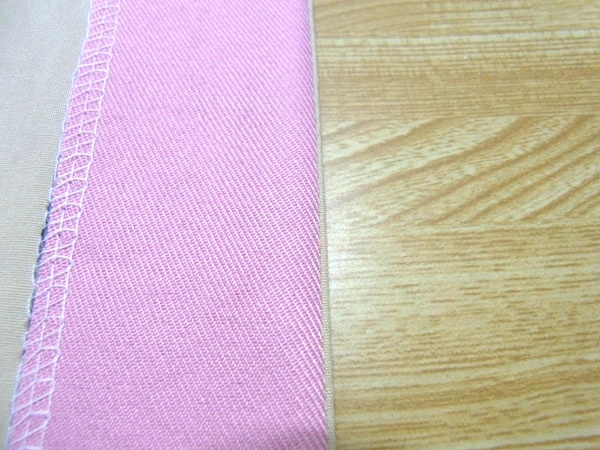
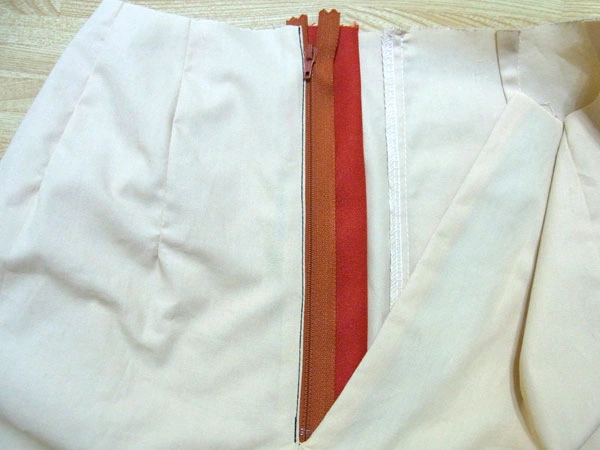
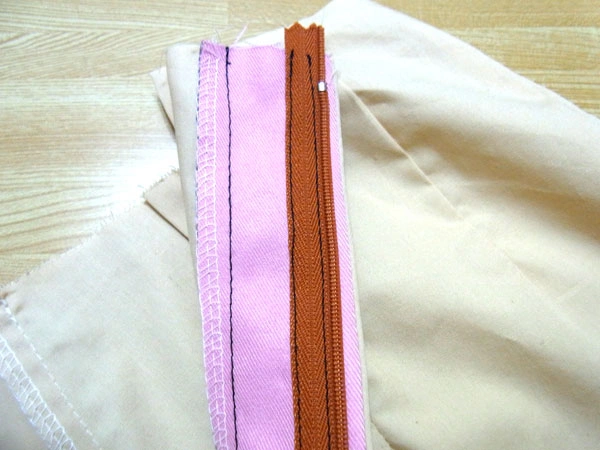
Serge/overlock the seam allowance for "Extension parts" and "facing" as shown in the image above.
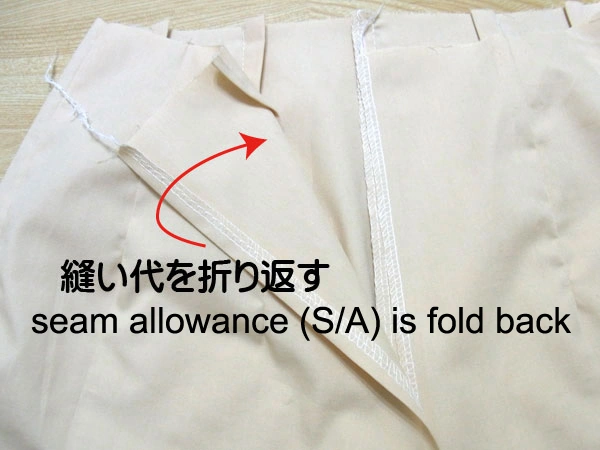
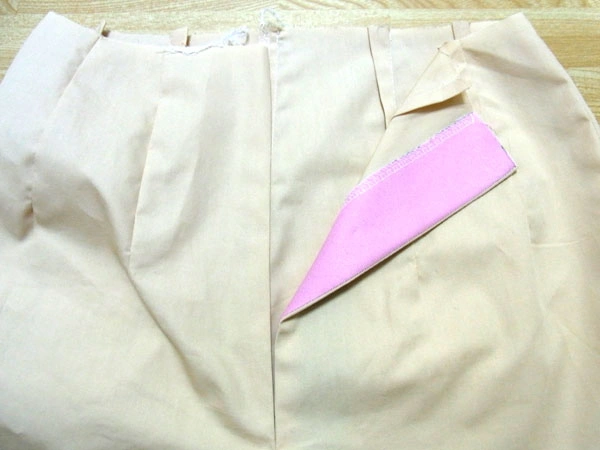
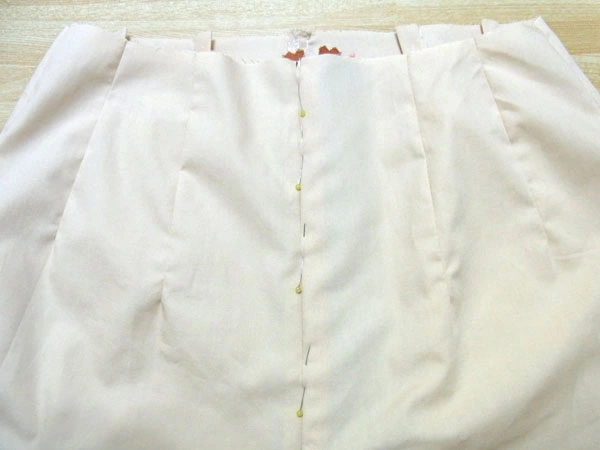
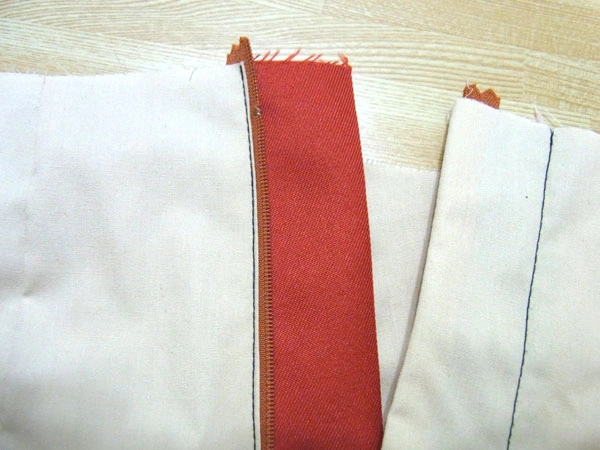
Fold over the seam allowance of the front pants and crotch by 1 cm (approx. 0.5 inch ≈1cm) (right side of the image is not folded over).
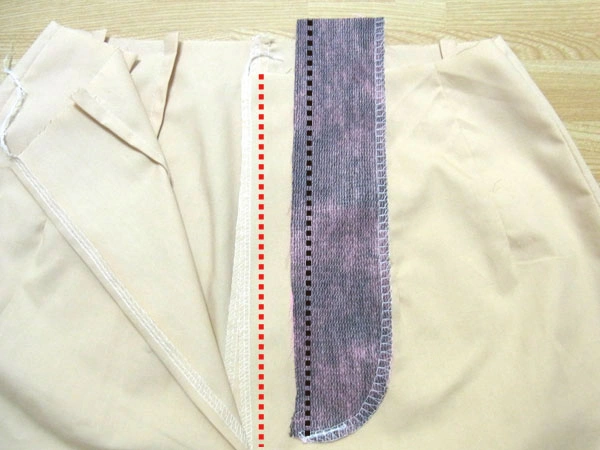
Sew the "facing" to the crotch without the seam allowance folded over. This is the red dotted line and the black dotted line part.
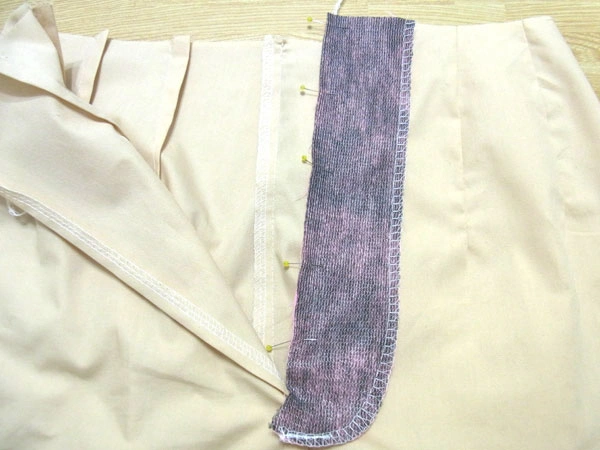
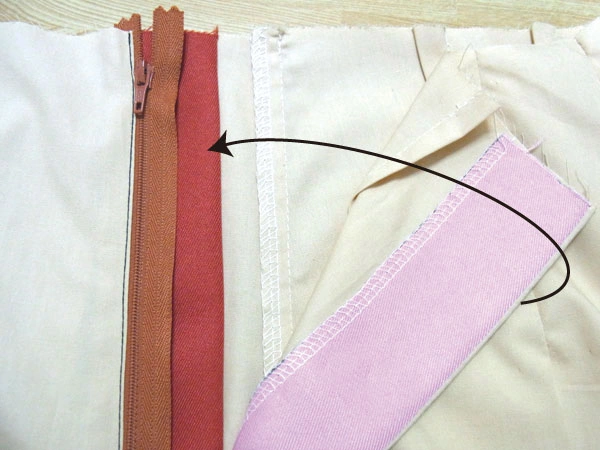
Match the front trousers and "facing" right side together.

Shift the front pants 1.5 to 2 mm as shown in the image and fasten the marking pin as shown in the image.
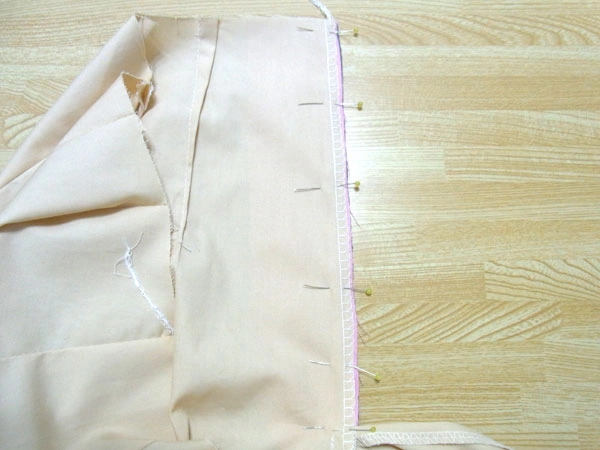
Sew 1 cm from the edge of "facing" with a sewing machine.
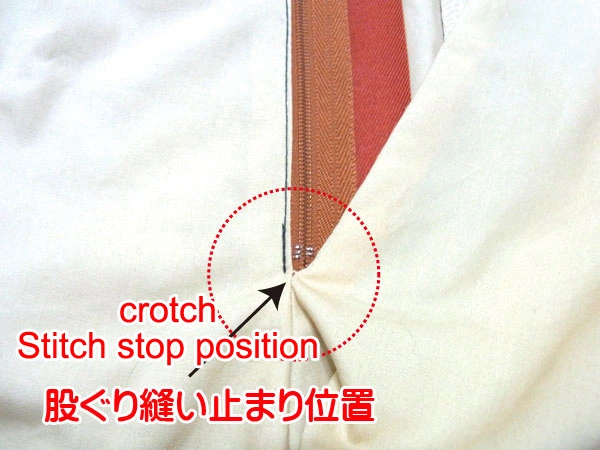
Sew to the end of the seam at the crotch.
After sewing, iron and fold the "facing" inside out.
Fold the stitches that have been shifted inward when ironing. In this way, the seams will not be visible from the front side.
The "facing" is now sewn.
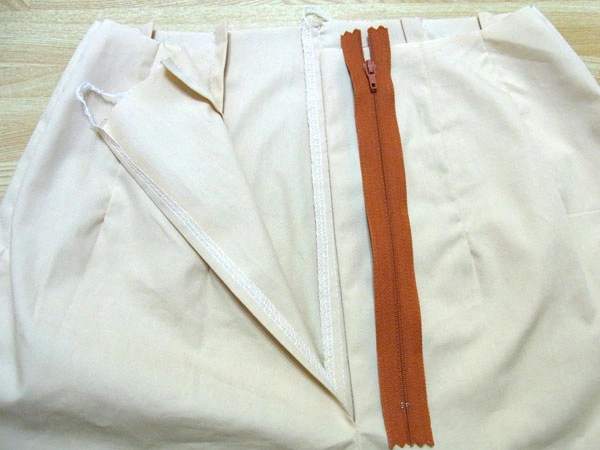
Next, sew on the zipper.
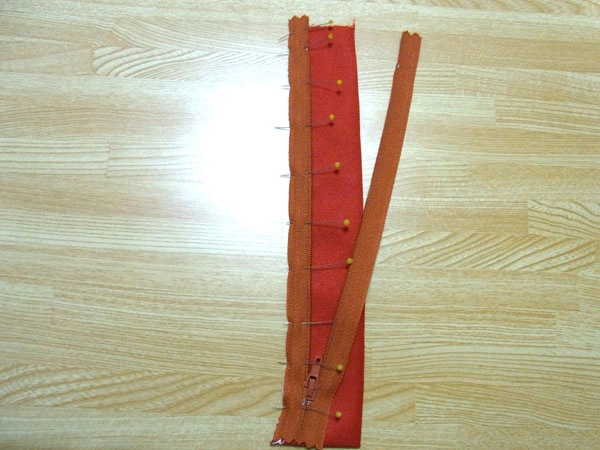
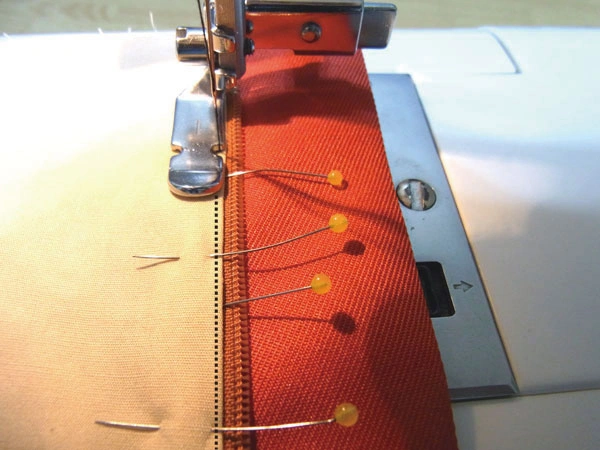
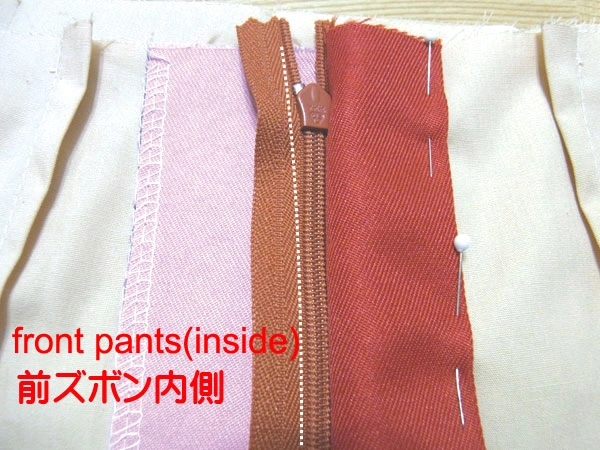
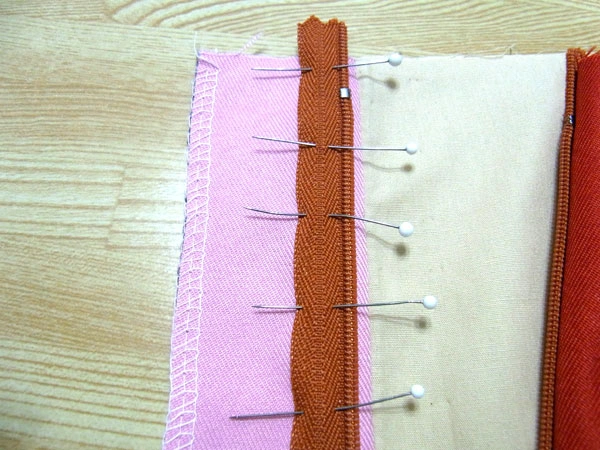
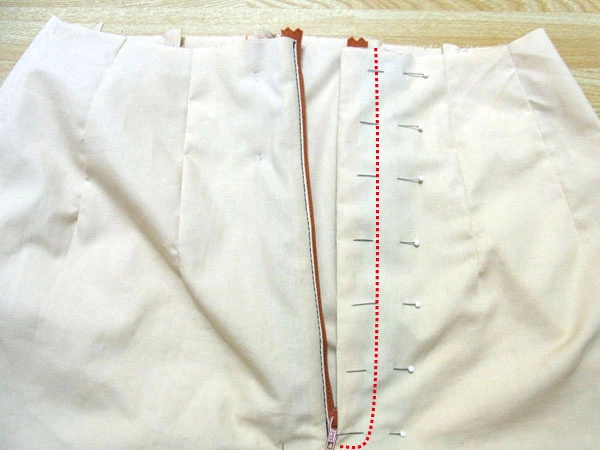
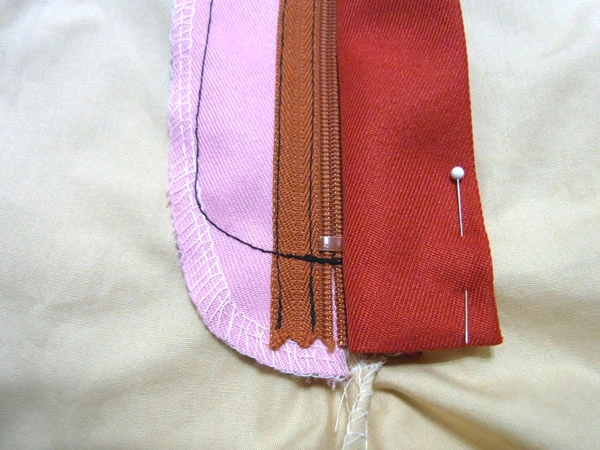
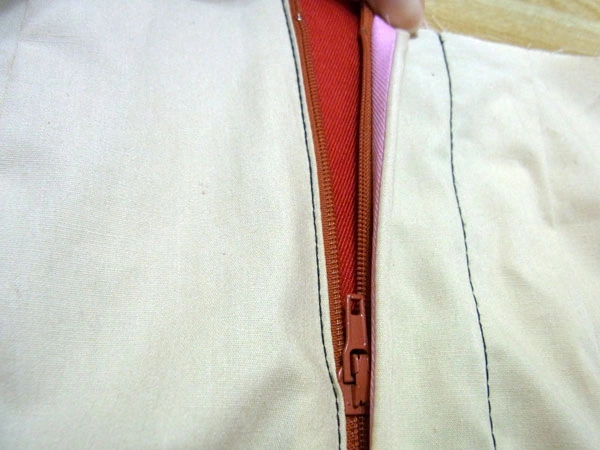
Fasten the zipper with a marking pin to the edge of the "Extension parts" that have been serge/overlocked and sewn together.
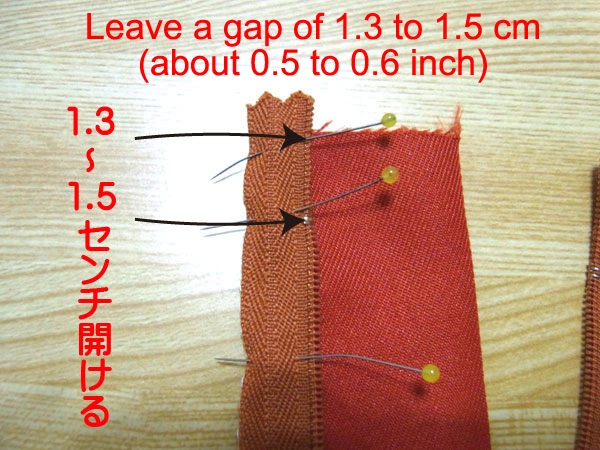
The zipper should be 1.3 to 1.5 cm from the edge of the take-out to match (the seam allowance is 1 cm).
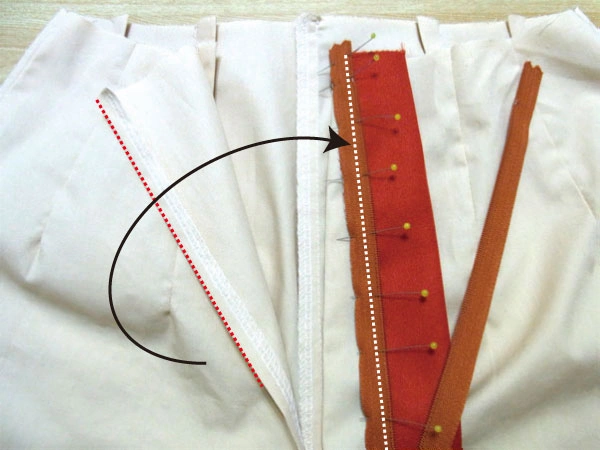
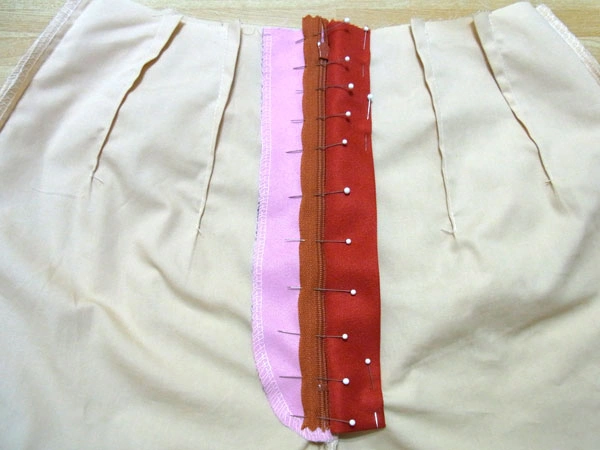
Once the "Extension parts" with the zippers secured with marking pins have been made, the next step is to fit them to the front trousers.
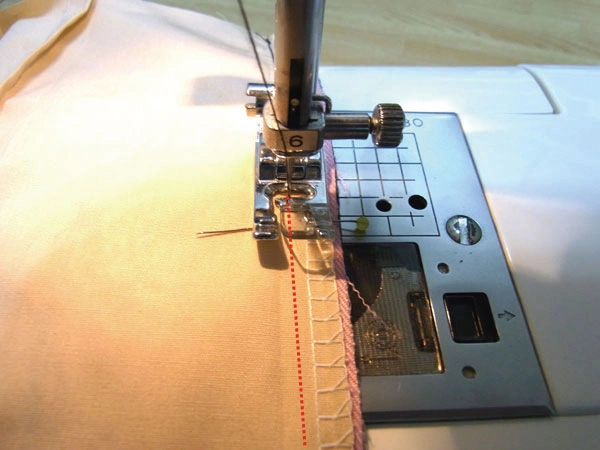
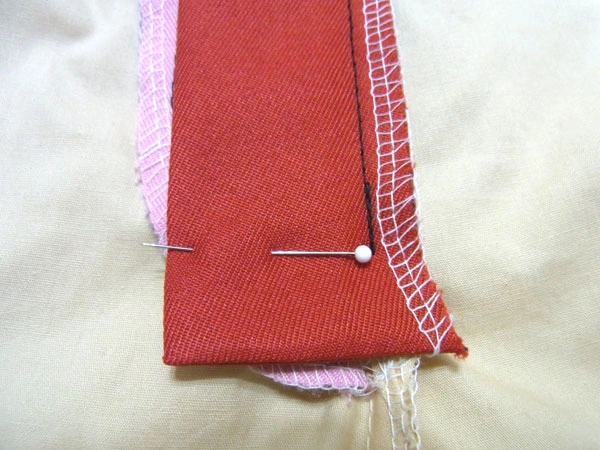
Align the fabric with the edge of the zipper as shown in the image (just enough so that the zipper does not bite the fabric).
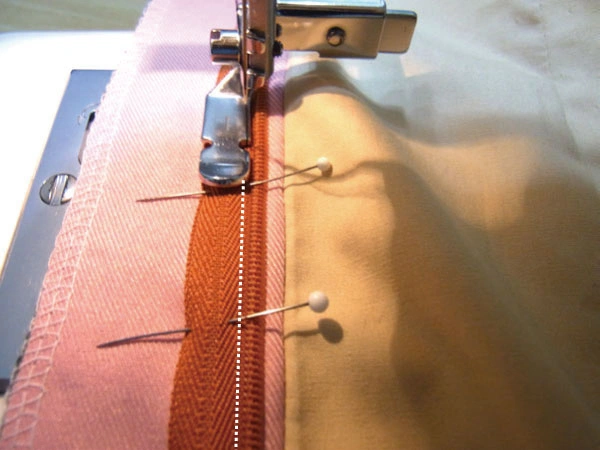
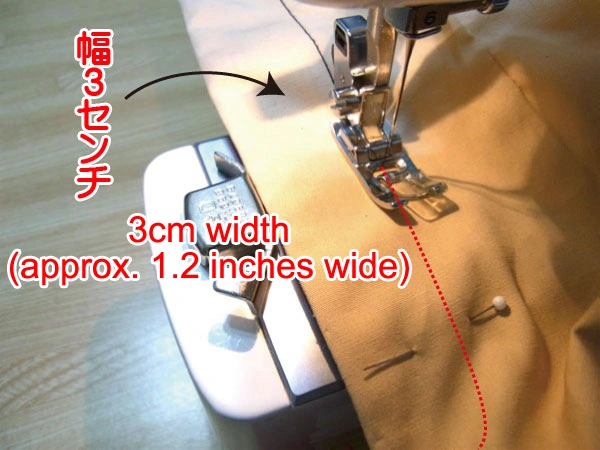
Once you have marked the end of the seam with a marking pin, sew the red dotted line with a sewing machine.
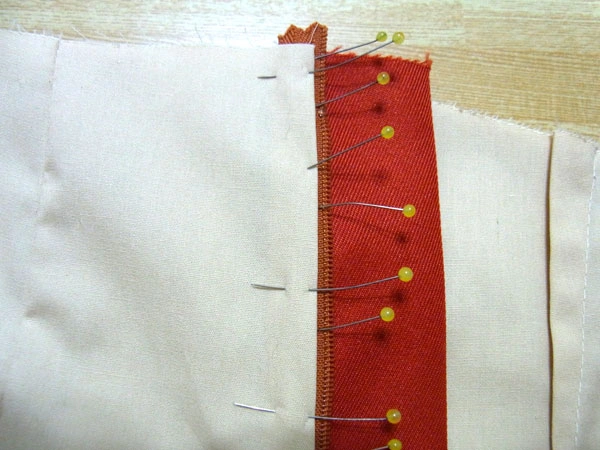
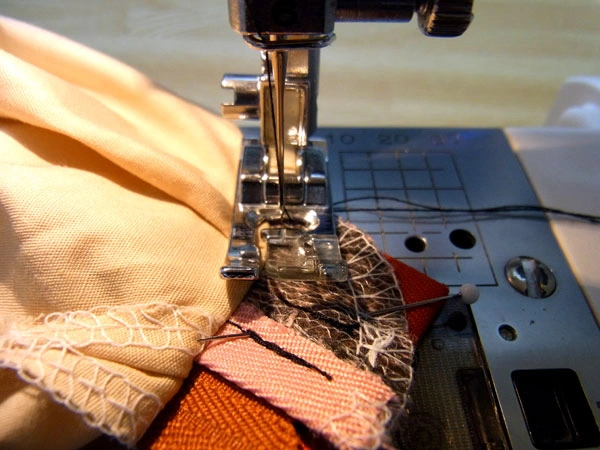
Change the sewing machine's hold down to Cording Foot and hold it down. Sew 1.5 to 2 mm from the edge of the black dotted line.
Sew from the waist to the end of the crotch seam.
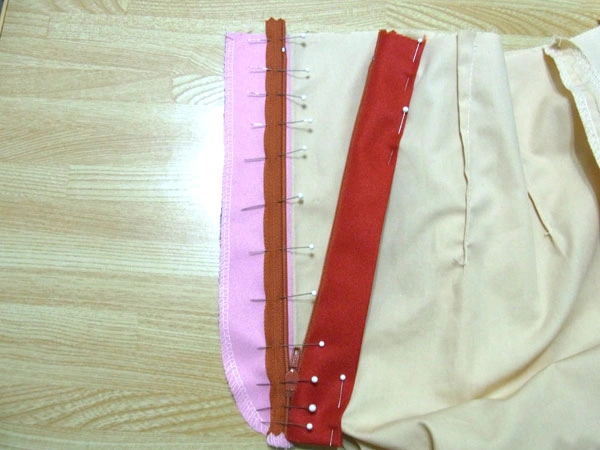
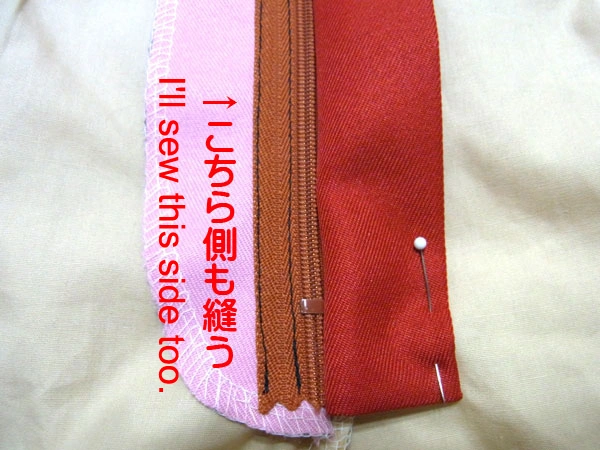
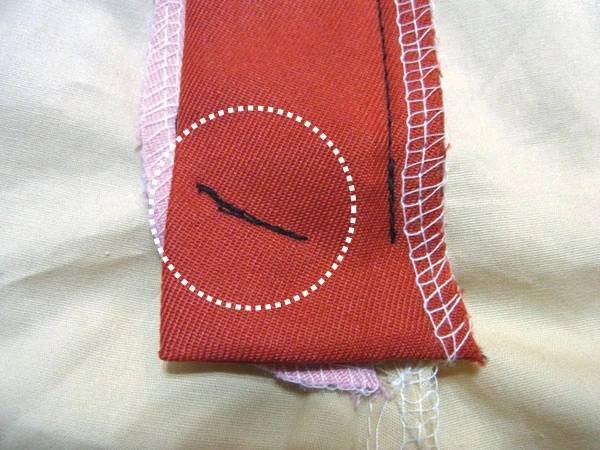
Next, sew the "facing" to the fastener.
Overlap the stitches slightly and fasten with a marking pin so that the sewn line you just sewed is hidden.
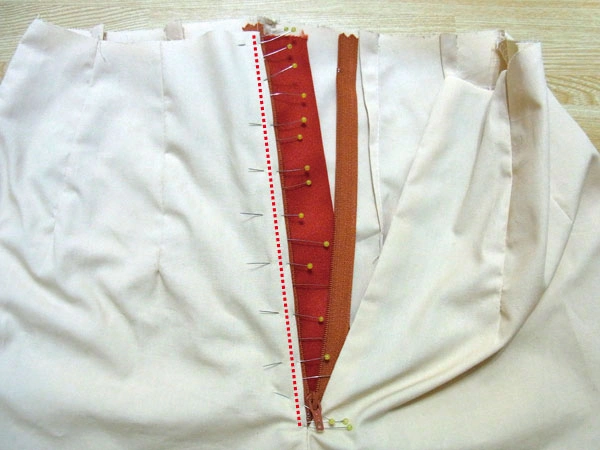
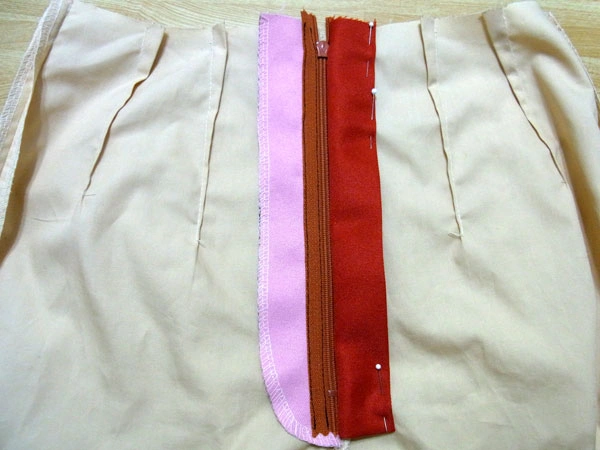
Turn the pants over. "Extension parts" are in the way, so use marking pins to hold them in place. The white dotted line is the area to be sewn later.
Fasten the zipper firmly with a marking pin to prevent it from slipping.
Remove the marking pin that has been temporarily fastened, and open the "facing" area so that it is easy to sew.
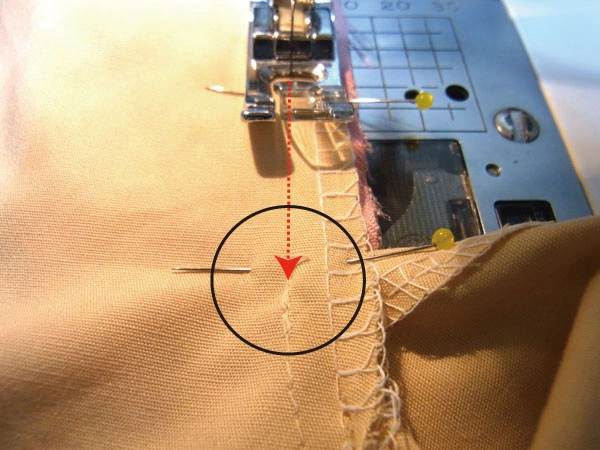
Sew 1.5 to 2 mm from the edge as on the "Extension parts" side.
When you have finished sewing just to the end of the zipper, the next step is to sew the edge of the zipper so that it does not float, as shown in the image!
The zipper is now sewn onto the "facing".
From the front, use a marking pin to keep the "facing" from spreading.
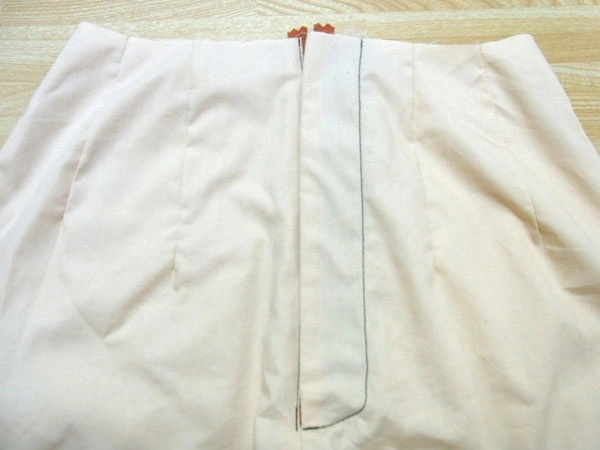
After fastening the "facing" and the front pants with marking pins, sew as shown in the red dotted line, and then sew the front pants to the "facing."
Sew the front trousers and "facing" together from the front side as shown in the image.
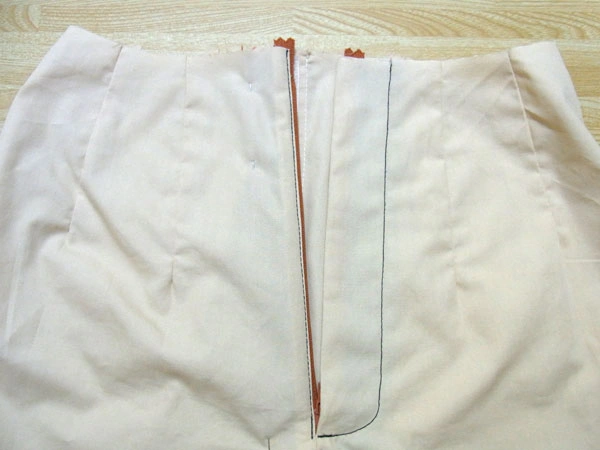
Sew the crotch seam tightly to the end of the crotch seam, and don't forget to do the reverse stitch.

This is what it looks like from the inside.
Now neither the zipper nor the "facing" will float!
Then sew "Extension parts" to this "facing".
Return the open "Extension parts" to their original position and fasten the "facing" only with a marking pin.
Sew only the "extension parts" from the "facing" side. (Be careful not to sew the body at this time.)

Bar tack stitch on the seam line as it is a load-bearing area.
The "facing" and "extension parts" are now sewn in place.
Zipper on "facing" side.
The front zipper on the pants is now complete!


