How to Sew a Double Piping Pocket
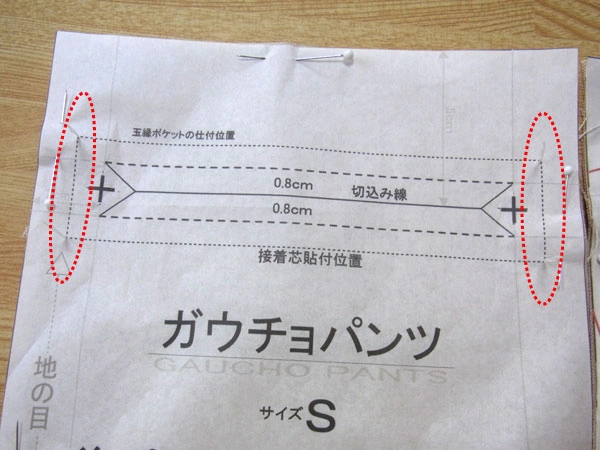
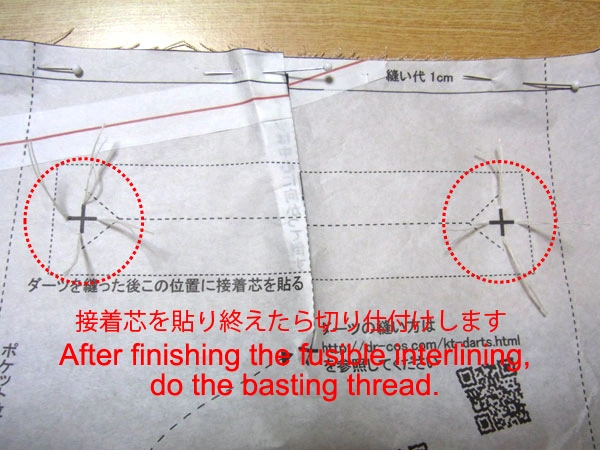
First, attach fusible interlining to the welt cloth. Mark the position where the interlining should be applied.
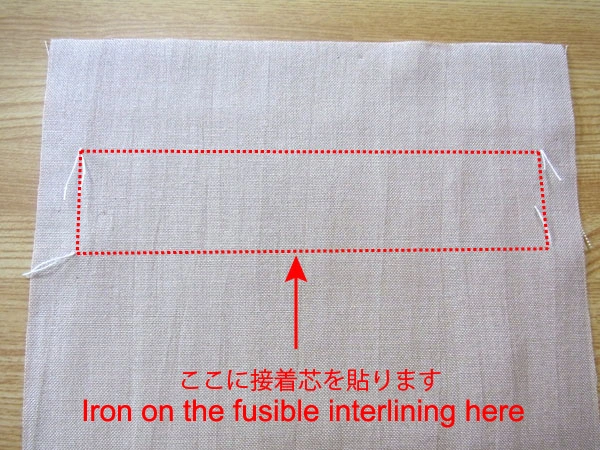
A simple basting thread is fine for marking. Attach the fusible interlining along the red dotted line.
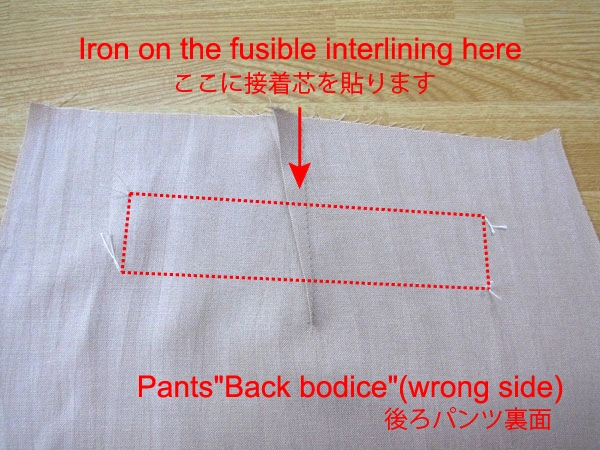
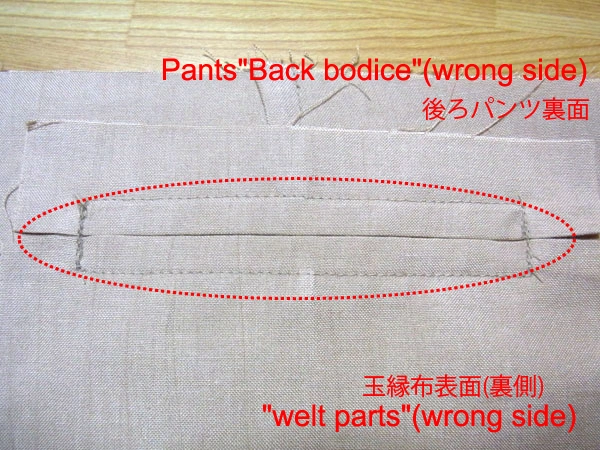
Mark the pants back bodice and apply fusible interlining along the red dotted line.
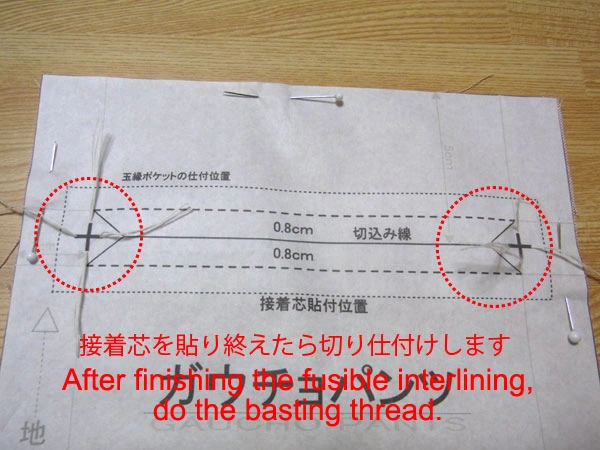
After attaching the interlining, baste the pocket position on the welt cloth.
Baste the pocket position on the pants back bodice as well. If the pattern has darts, fold them to match.
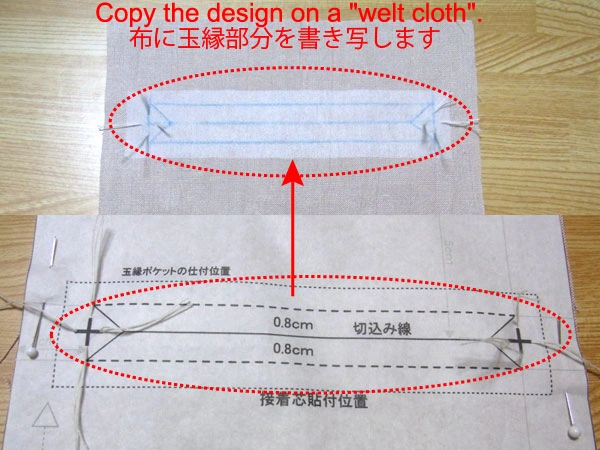
Trace the welt cloth with a heat-erase pen.
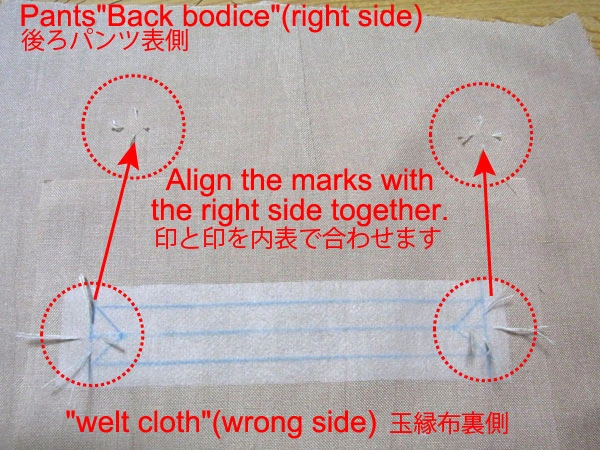
Sew the back bodice and welt cloth right sides together, aligning the marks.
Match the centers of the marks carefully.
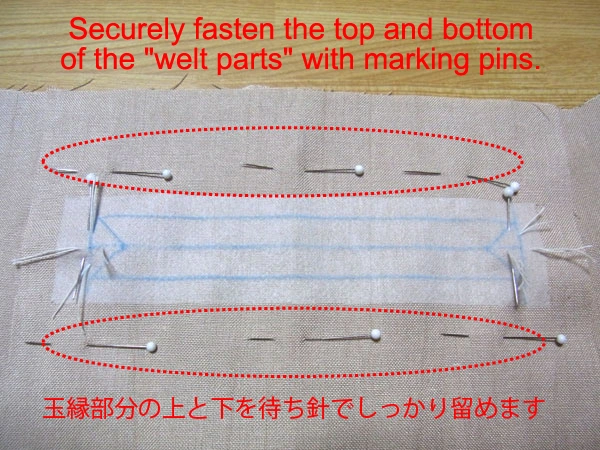
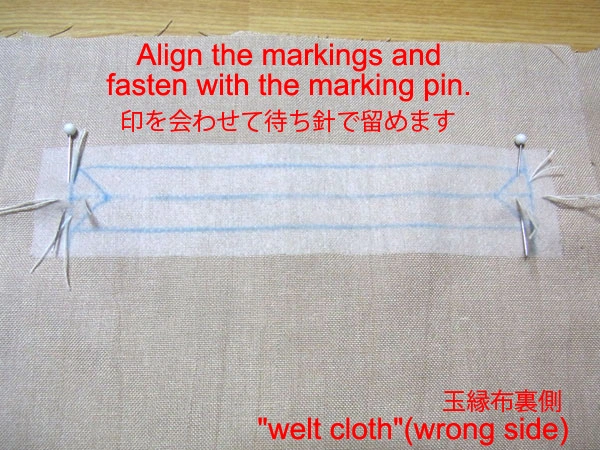
Secure the welt cloth firmly with pins to prevent shifting.
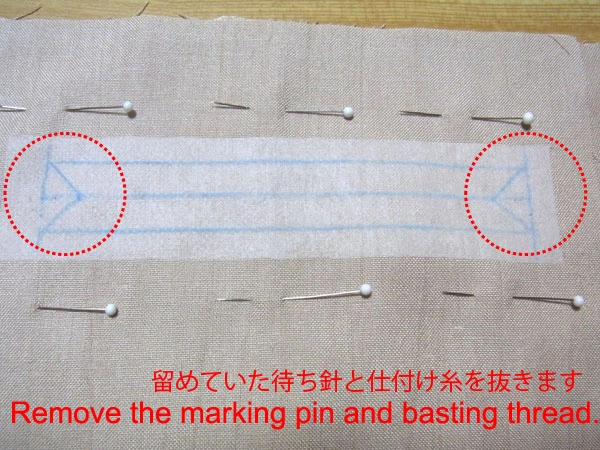
After fastening firmly, remove the basting thread and pins from the red dotted line.
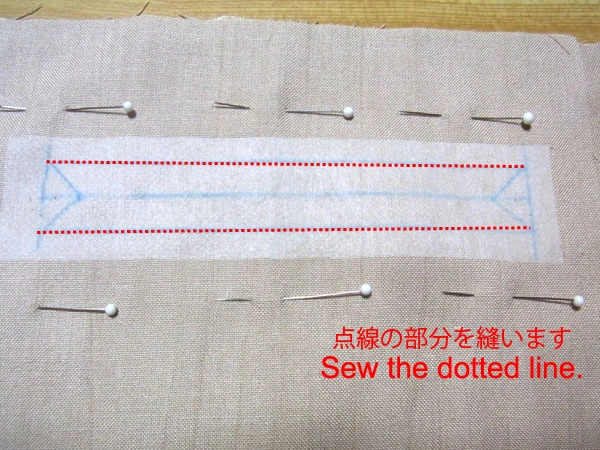
Sew along the red dotted line with a sewing machine.

Be sure to reverse stitch securely at the beginning and end.
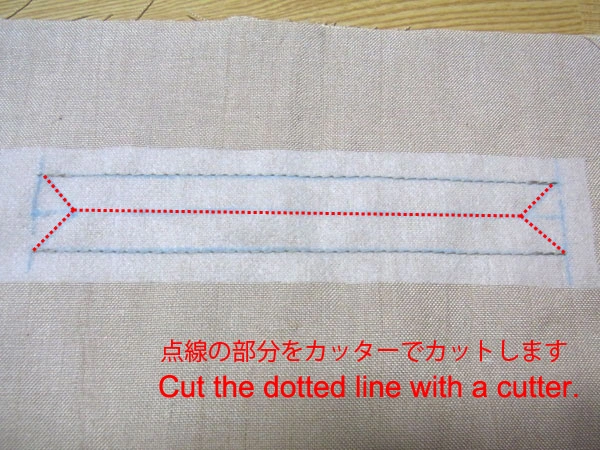
After sewing, cut along the red dotted line with a cutter.
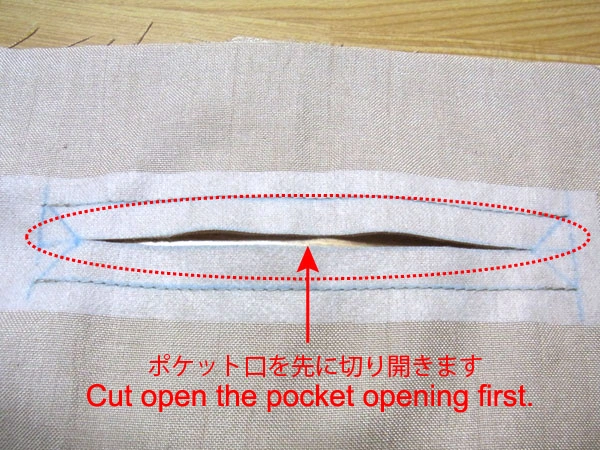
First, cut the center pocket opening.
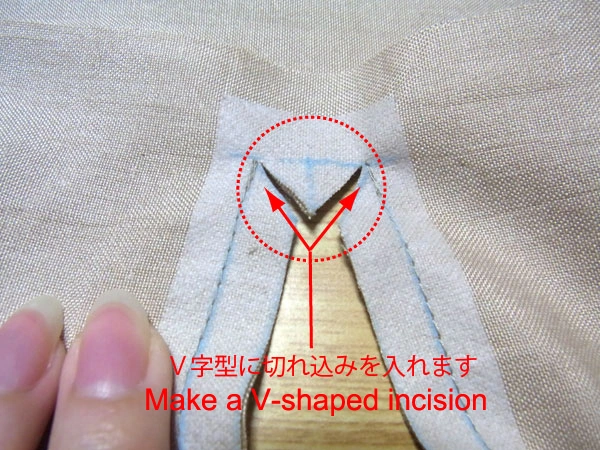
Cut the edges as shown in the image.
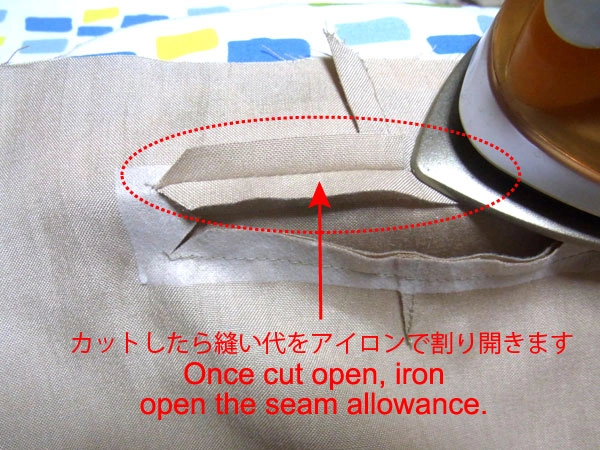
Press the seam allowances open with an iron at the cut lines.
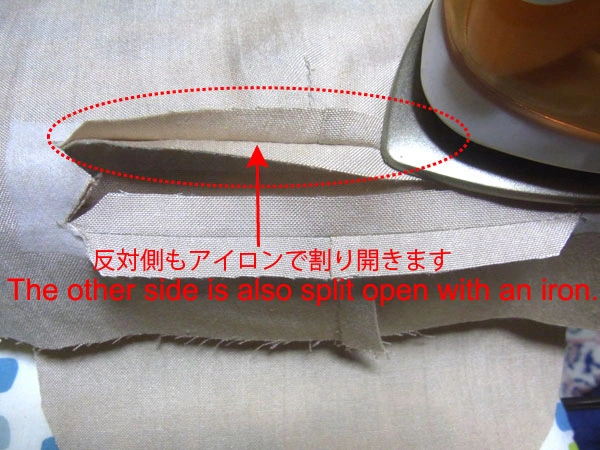
Do the same for the other side. Press neatly and carefully.
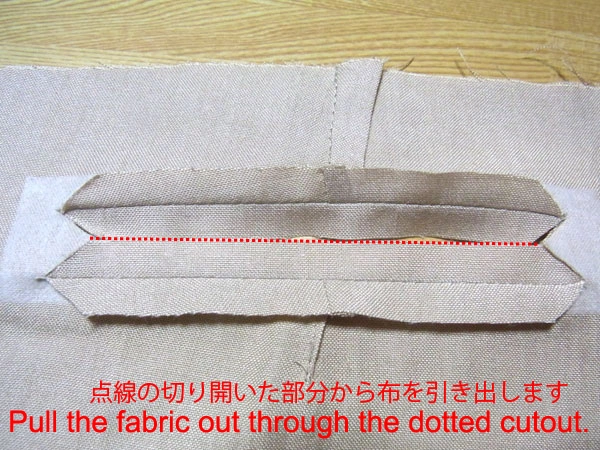
After pressing, pull the welt cloth out through the opening.
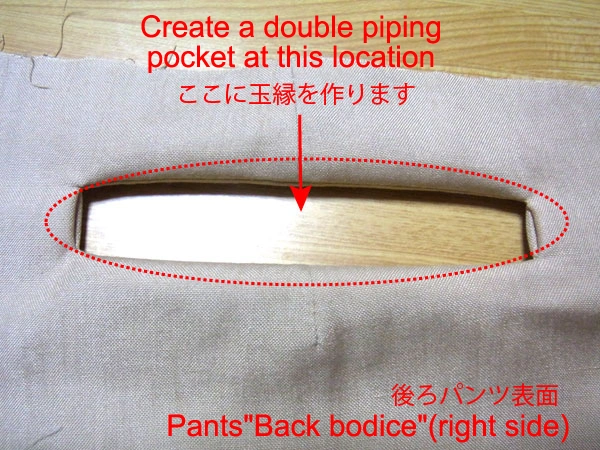
It looks like this when fully pulled out. The double piping pocket will be formed in this opening.
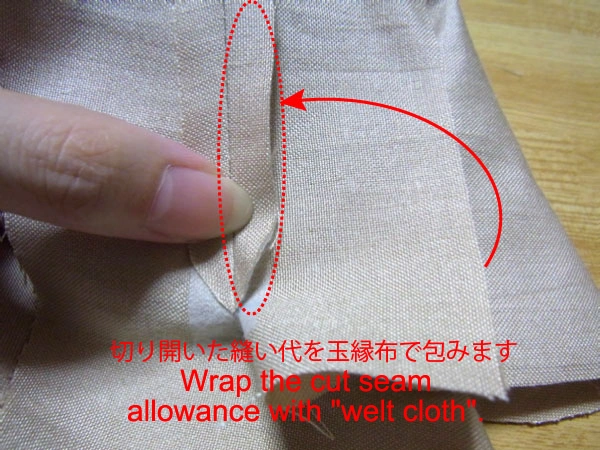
Wrap the pressed seam allowance with the welt cloth.
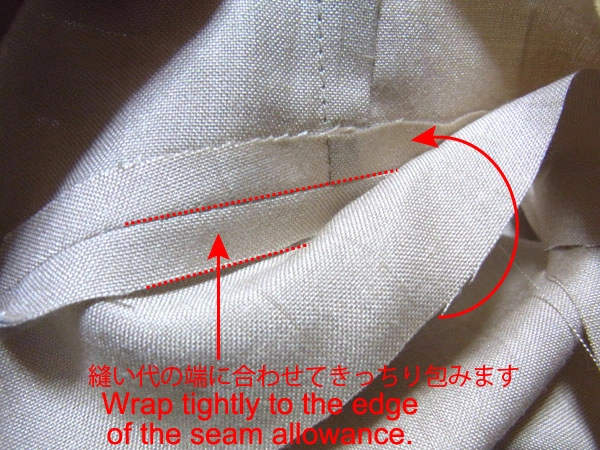
Wrap it tightly to the width of the split seam allowance.
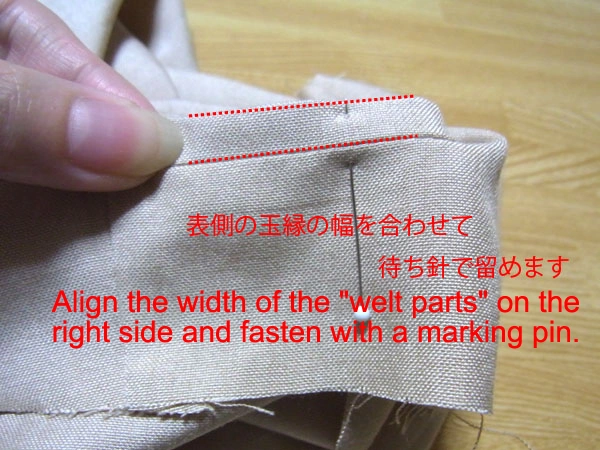
Fasten with pins while checking the width from the front side.
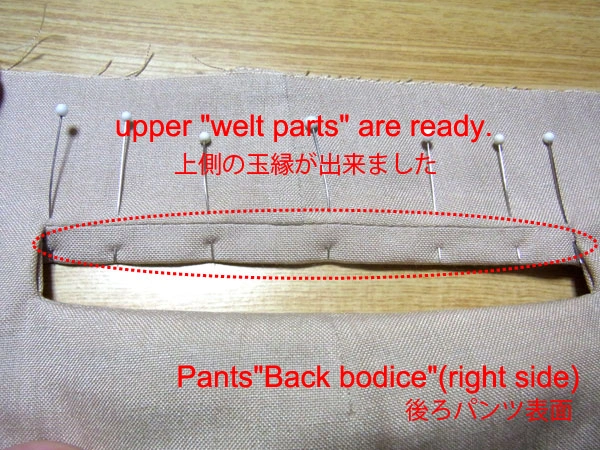
One side is finished.
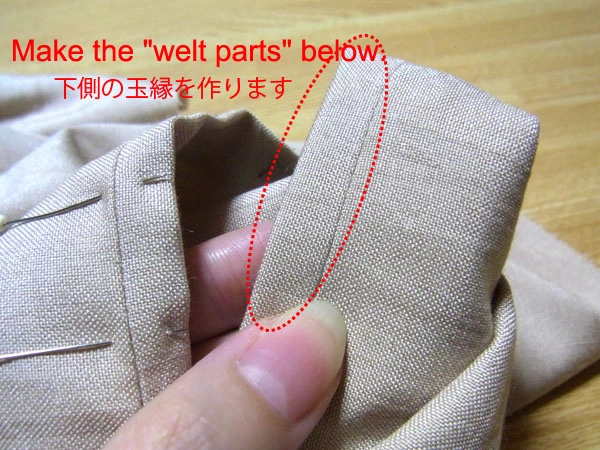
Make the bottom side in the same way.
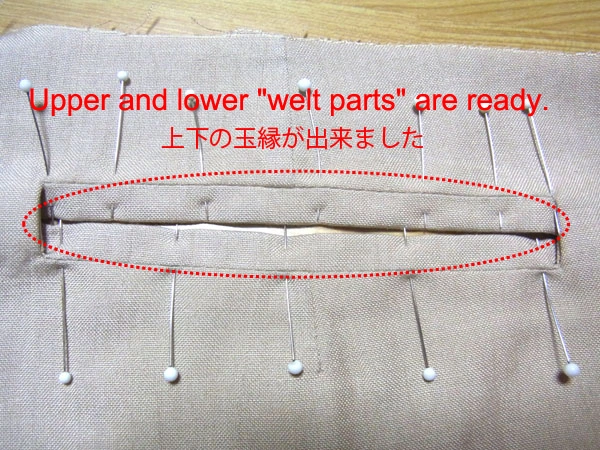
Both sides are now ready.
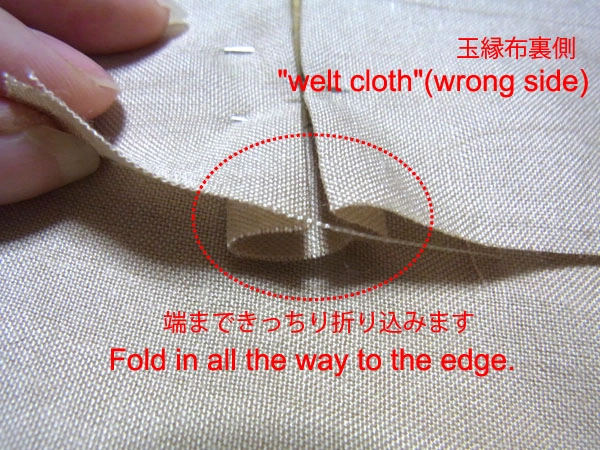
The welt cloth edges are folded in tightly to the ends, forming a box pleat shape.
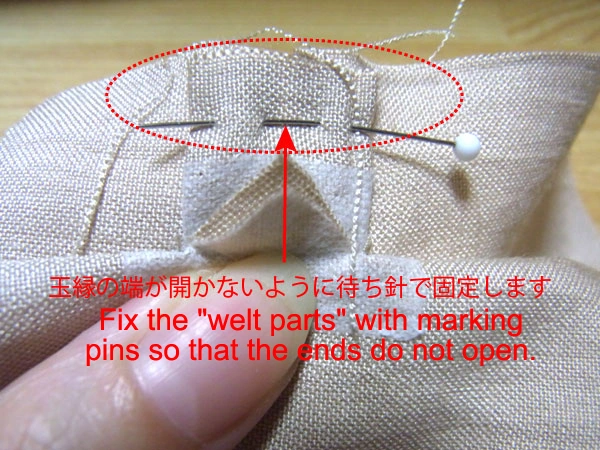
Pin the edges securely so they do not open.
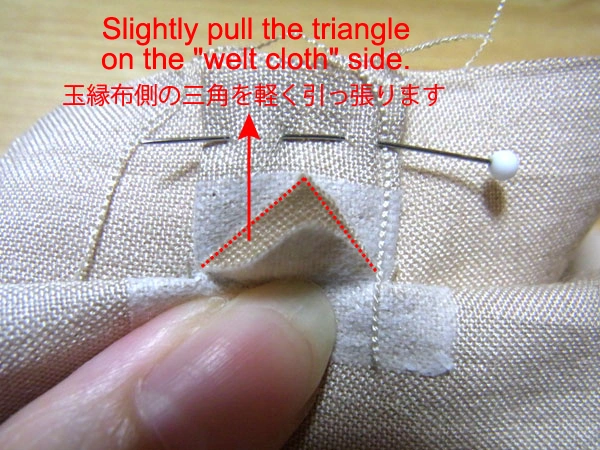
Next, handle the triangle created by the diagonal cut. Pull lightly to remove sagging.

Pin the triangle and sew along the solid line.
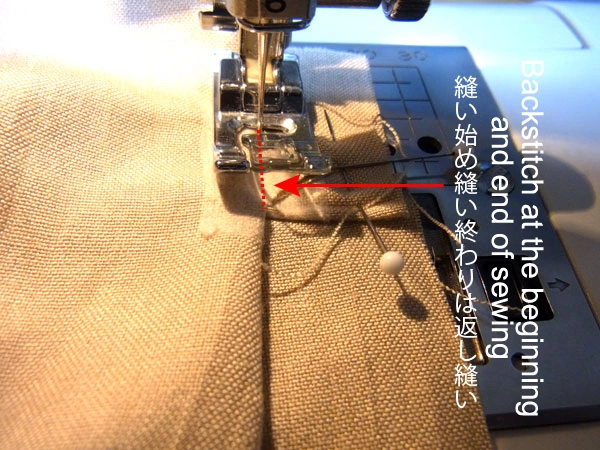
Reverse stitch securely at the beginning and end.
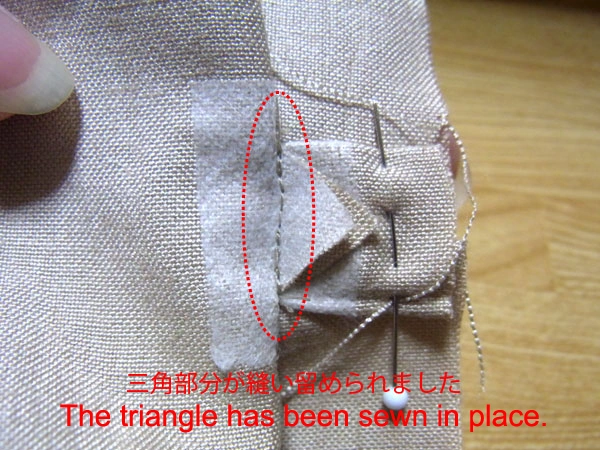
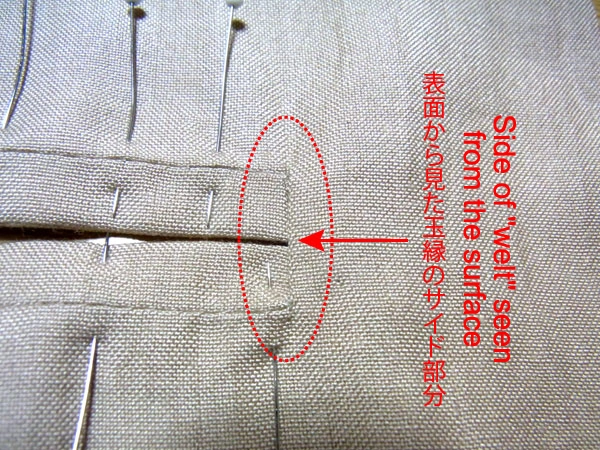
This is what it looks like from the front. Sewing the triangles completes the side portion.
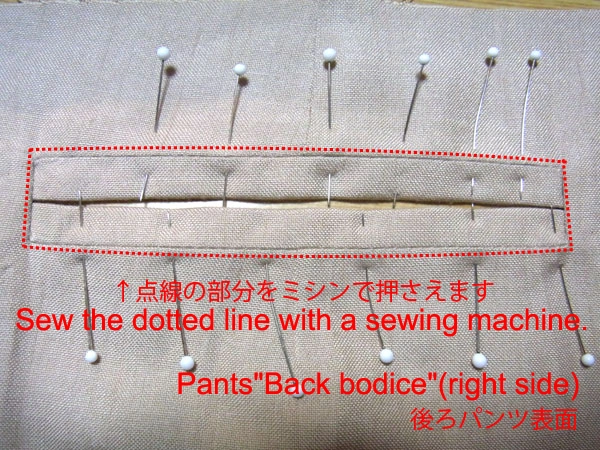
Sew the other side, then sew around the perimeter along the red dotted line.
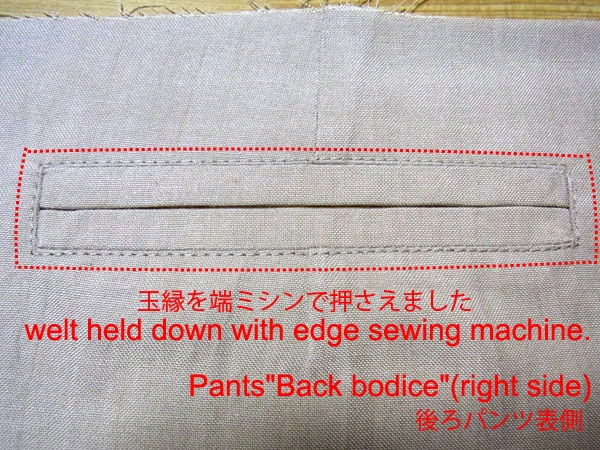
The piping is now stitched in place.
This is how it looks from the back.
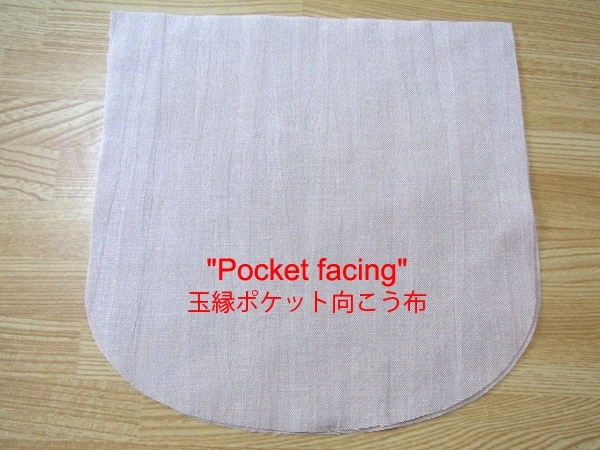
Once the piping is complete, sew the pocket facing to it.
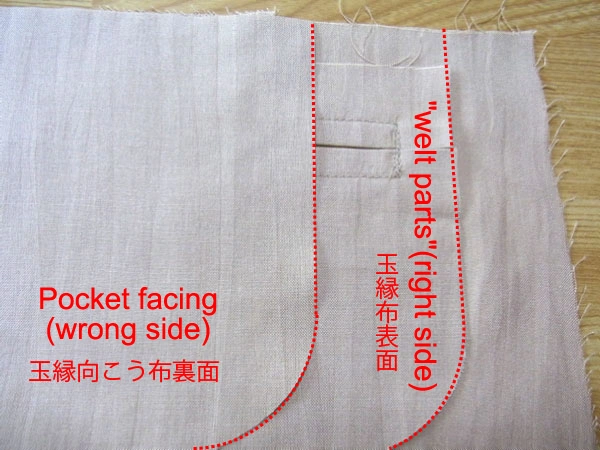
Place the welt cloth and pocket facing right sides together.
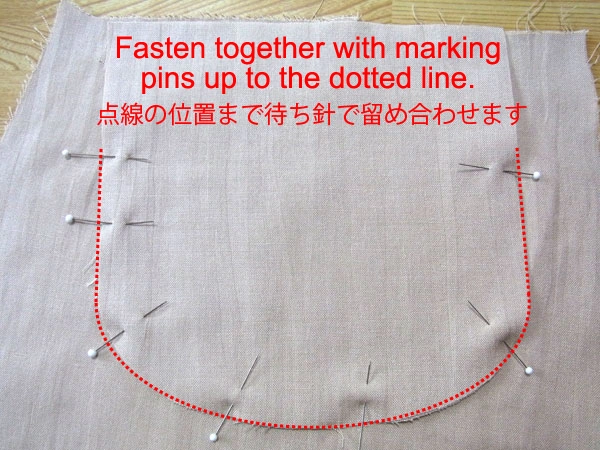
Pin up to the red dotted line.
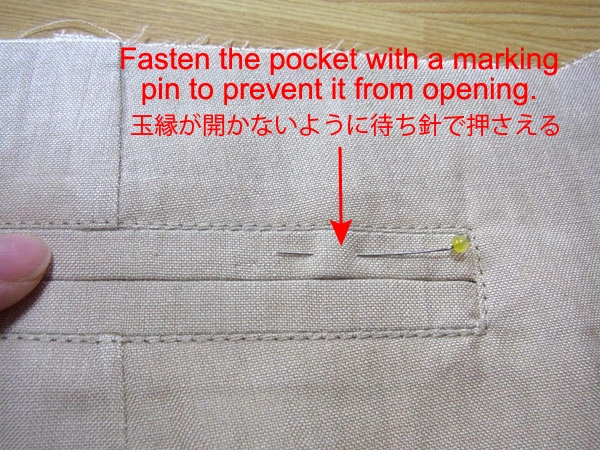
Pin securely to prevent the welt from opening.

After pinning, turn the fabric toward you as shown.
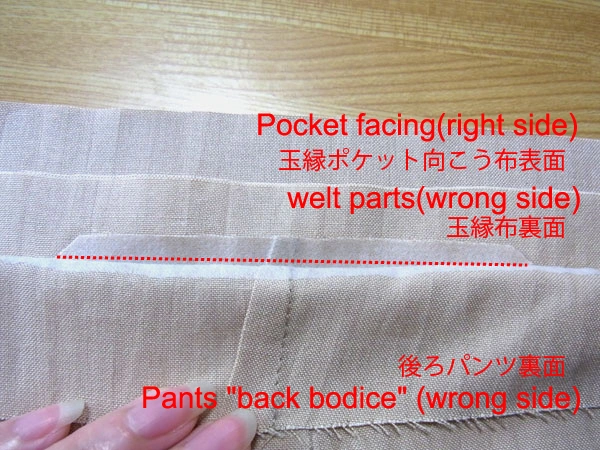
I turned up the pants fabric. The order of the layers is: pocket facing (front), welt cloth (back), pants back bodice (back).
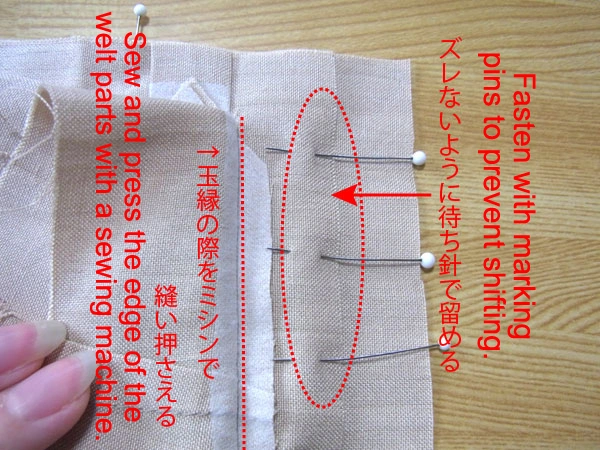
Pin the pocket facing and welt cloth to prevent misalignment, then sew along the edge.
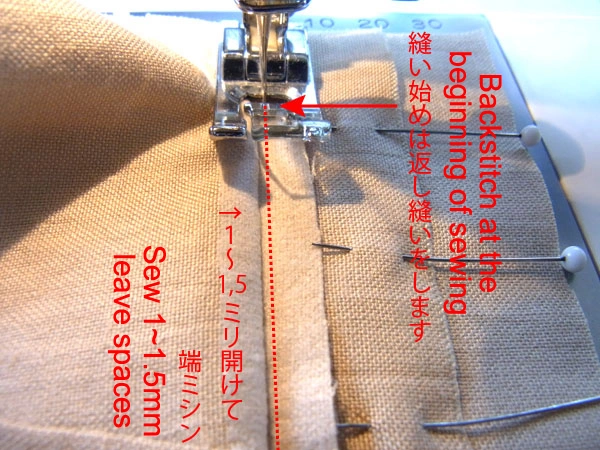
Sew with a 1–1.5 mm gap, reverse stitching at the beginning and end.
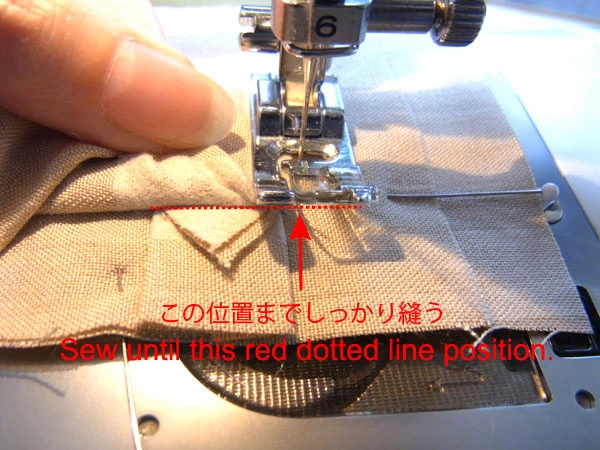
Sew tightly along the red dotted line as shown.
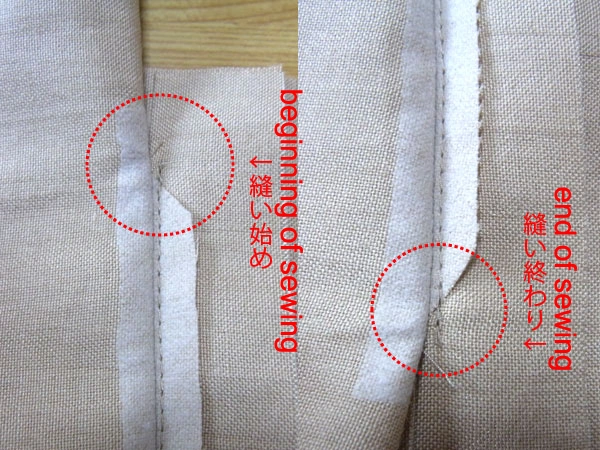
The welt cloth and pocket facing are now sewn together.
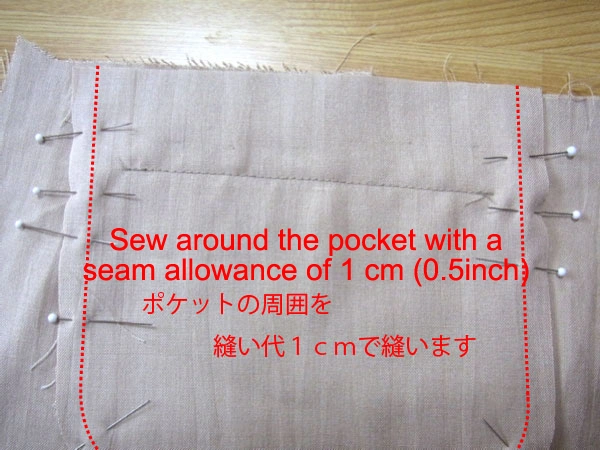
Pin all around the pocket and sew with a machine.

Reverse stitch at the beginning and end of sewing.
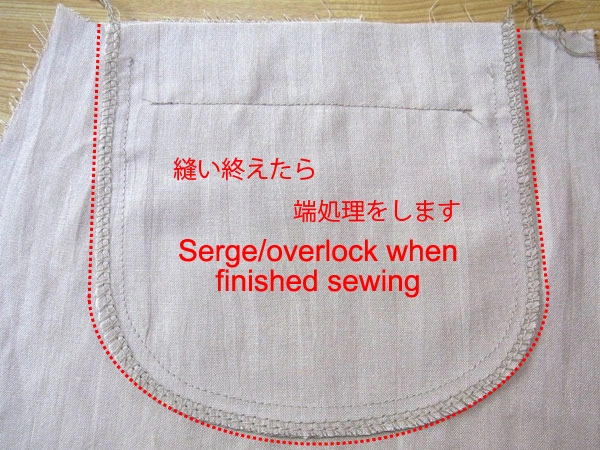
After sewing, finish the seam allowance with a serger or zigzag stitch.
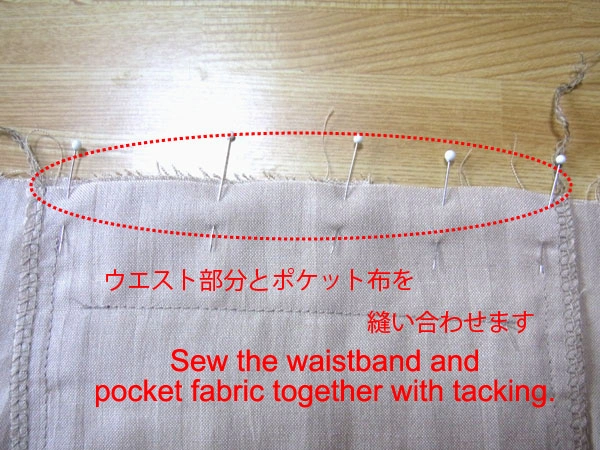
Finally, sew the pants back bodice and the finished pocket fabric together.
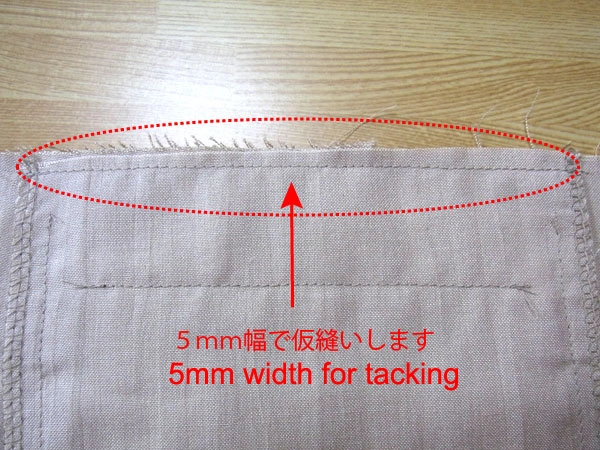
Temporary stitches about 5 mm wide are fine here.
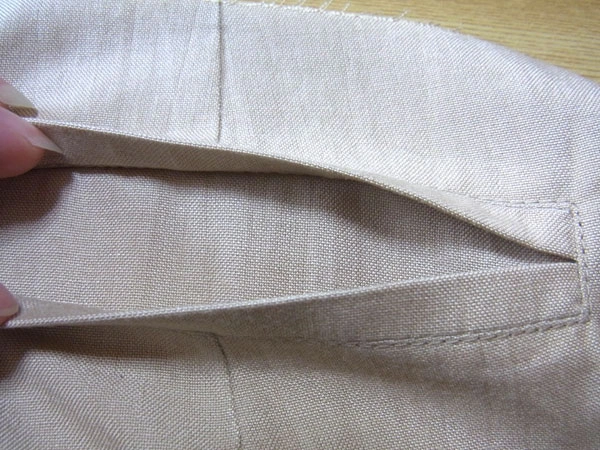
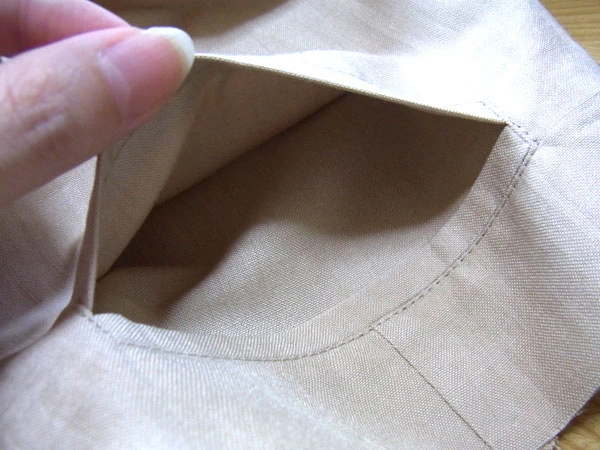
This completes the double piping pocket.


