Lower cost! Make your own original bias tape with your favorite fabric!
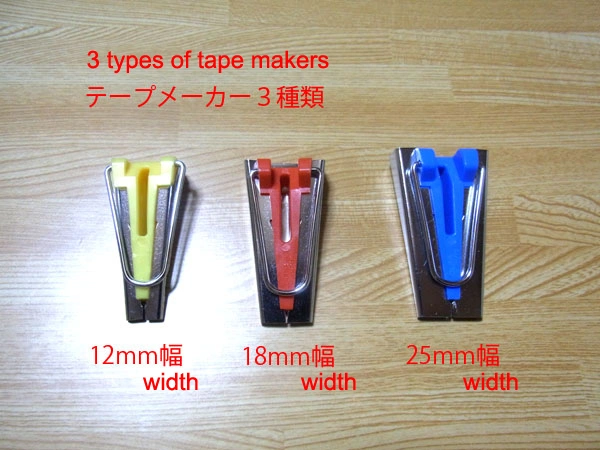
This is a tape maker that can easily make bias tape in 12mm, 18mm, and 25mm widths, and also other widths such as 6mm and 50mm.
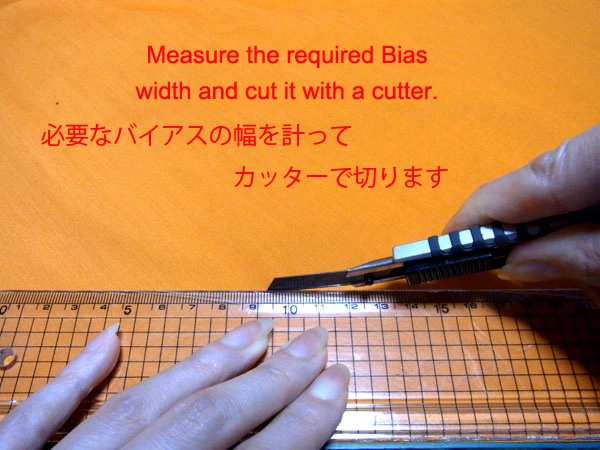
If the bias cut is not straight and clean, it is impossible to make bias tape of uniform width.
You can also draw a line with a Chaco pen and cut it with fabric scissors.
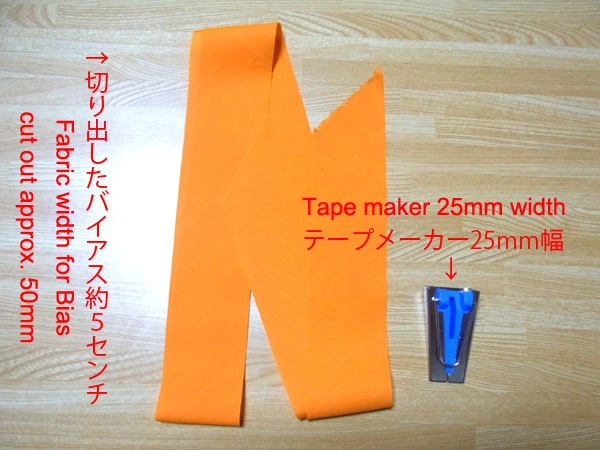
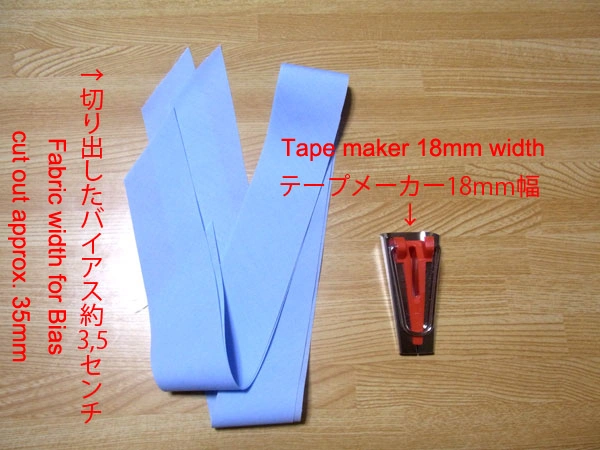
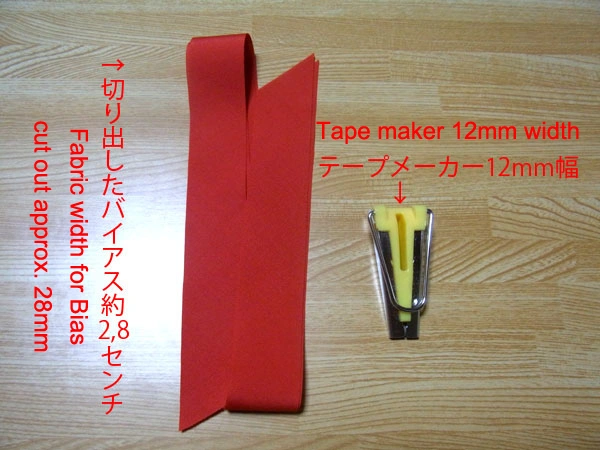
Now we will make bias tape in three sizes.
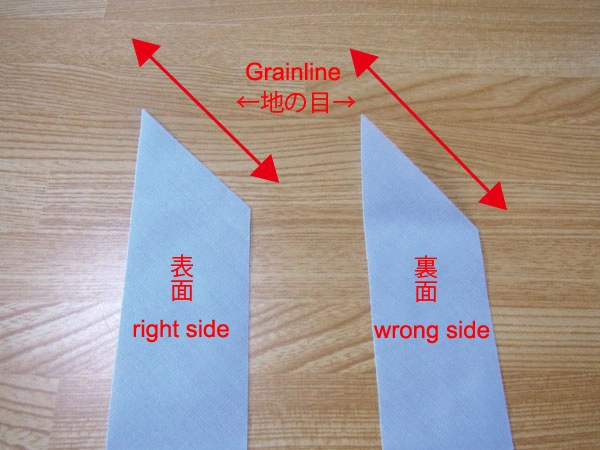
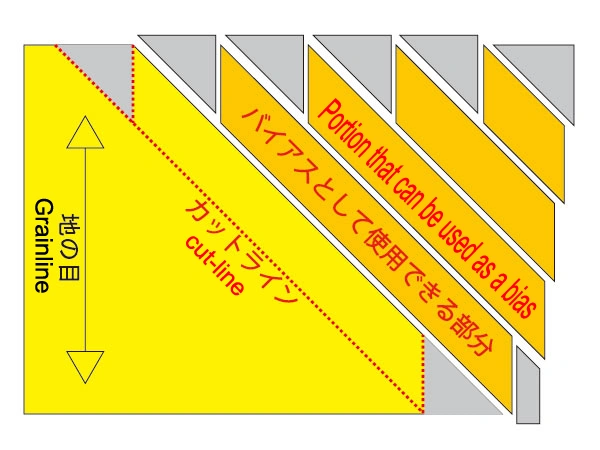
The bias is cut at a 45-degree angle to the Grainline.
The 45-degree angle is the original grainline of the fabric.
Why 45 degrees? People sometimes ask me why 45 degrees.
Wouldn't it be easier to cut straight? You may think so, right?
There is a reason for this.
If you cut along the grain vertically or horizontally, the threads will come undone and it will be very difficult to make.
Moreover, the unraveled threads get in the way when it comes time to use the bias.
Also, the finished bias will not stretch to fit the angled curves of the fabric.
The fabric is most stable and stretchable when cut at 45 degrees, so products on the market are also made by cutting at this angle.
However, when using knit fabrics, they can be cut horizontally because they already stretch.
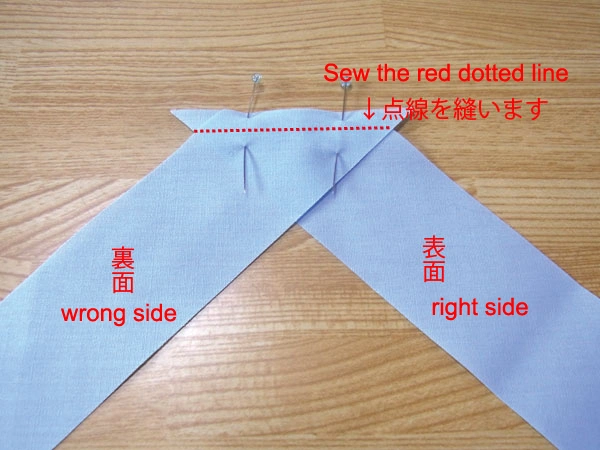
Align the right side of the fabric and sew along the red dotted line.
Too much seam allowance (S/A) will affect the finished product, so 7 to 8 mm is enough.
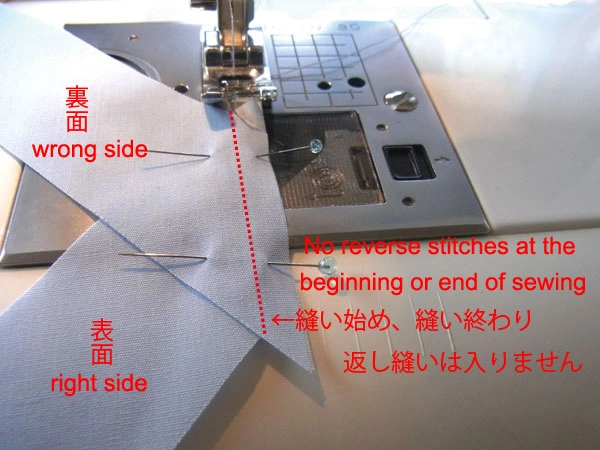
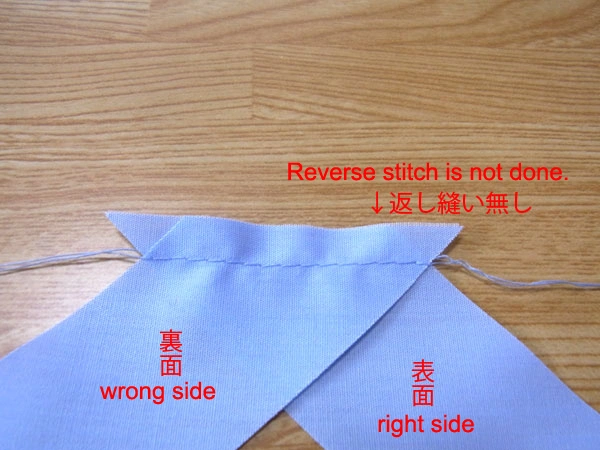
Reverse stitch is not required when sewing the bias together.
If you reverse stitch, the overlapping threads will become stiff and the surface of the bias tape will not look smooth.
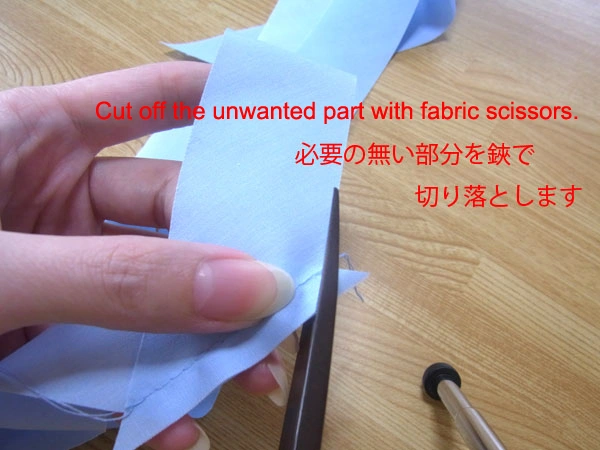
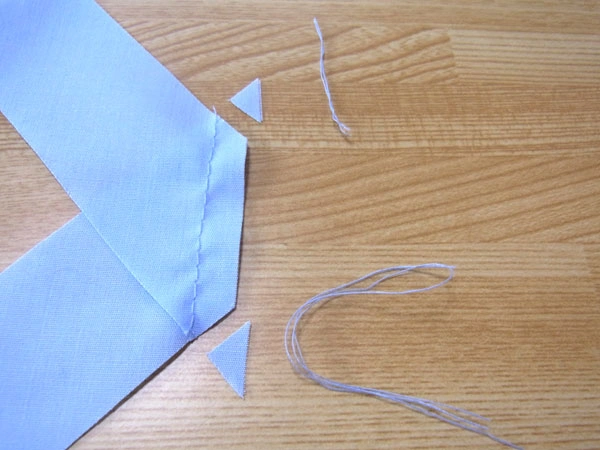
Cut off the unwanted part with fabric scissors.
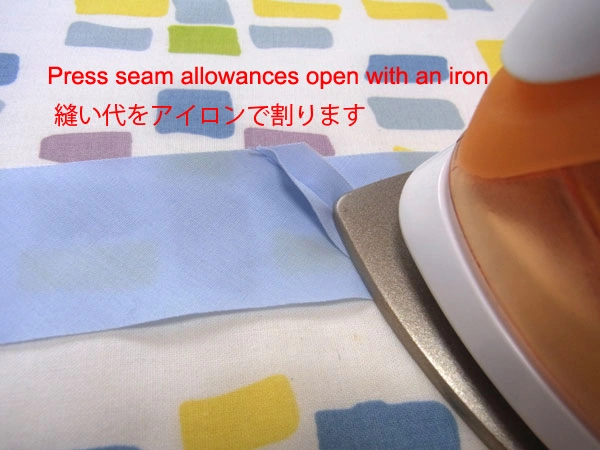
Press seam allowances open with an iron.
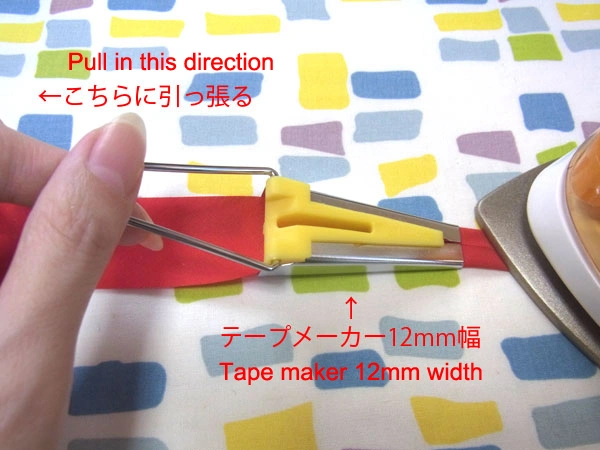
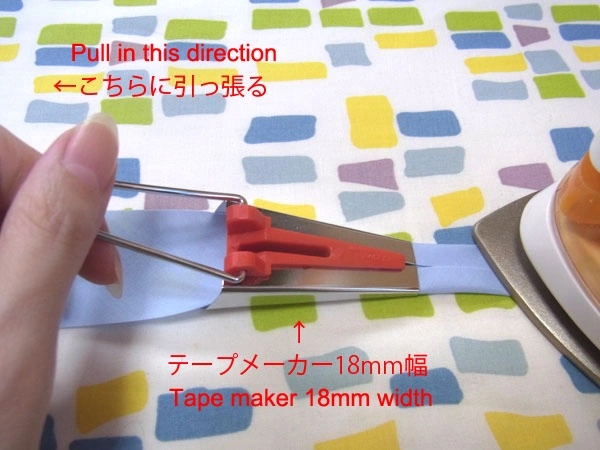
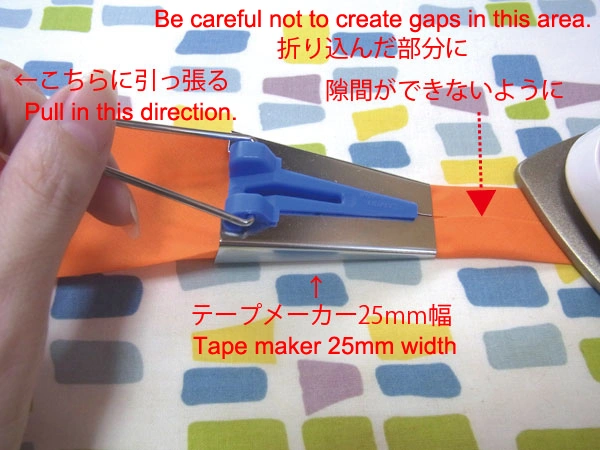
Use a tape maker to iron the shape.
It is difficult to get a uniform width of bias tape when you are not used to it, but iron slowly so that there are no gaps in the folded part as shown in the photo.
Be careful also not to overlap the folded part!
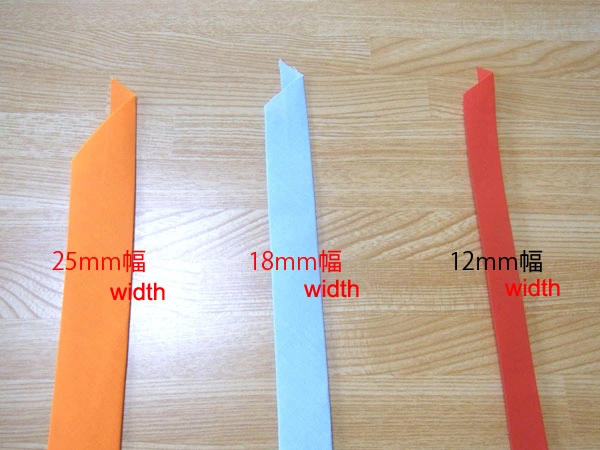
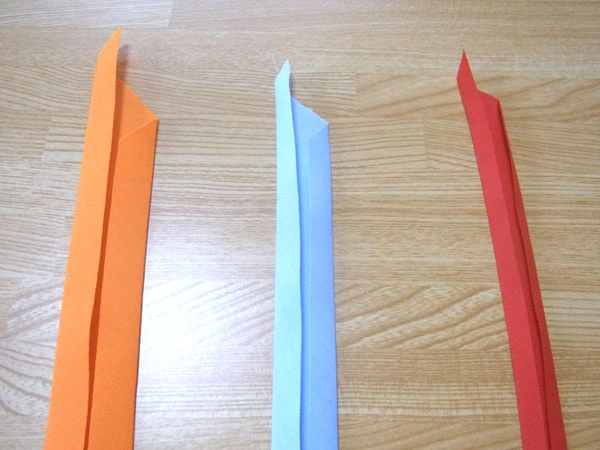
Each bias tape "single type" is now ready to be used.
Next, fold the 25mm width in half and make a "double type" that wraps around.
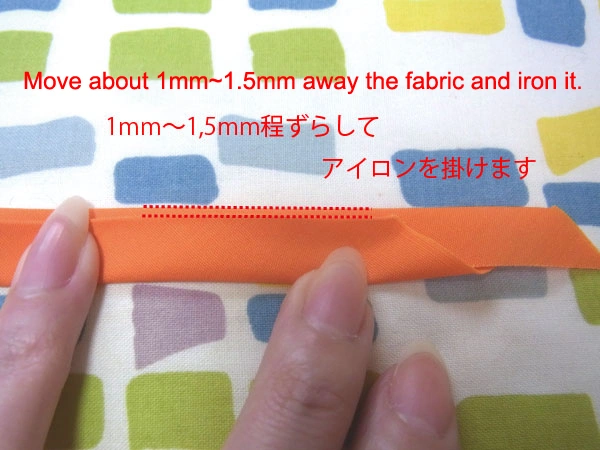
Move about 1mm to 1.5mm away from the edge and iron it.
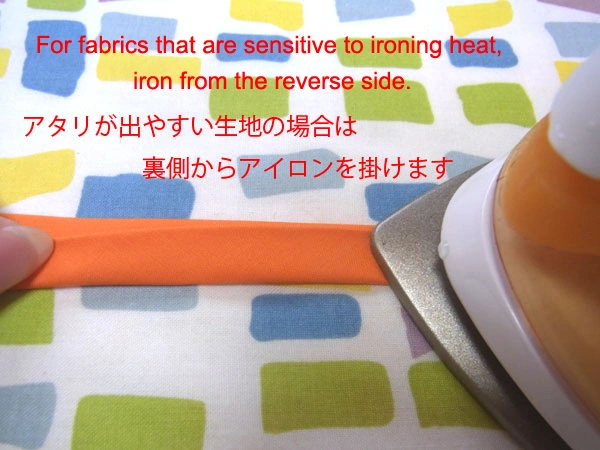
The fabric used in the photo is T/C broadcloth, which is resistant to ironing heat and allows quick pressing. However, if the fabric contains a lot of synthetic fibers or is fully synthetic, the surface of the bias tape may slightly melt due to heat.
For fabrics that are sensitive to ironing heat, iron from the reverse side.
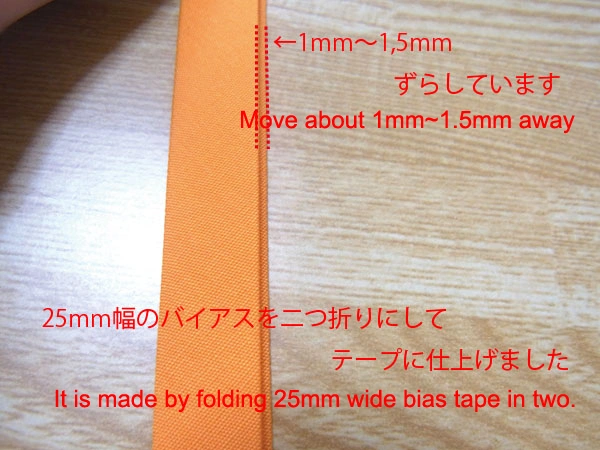
The "double type" bias tape is ready.
The finished width is approximately 12mm, which is almost the same as the 12mm wide single type bias tape.
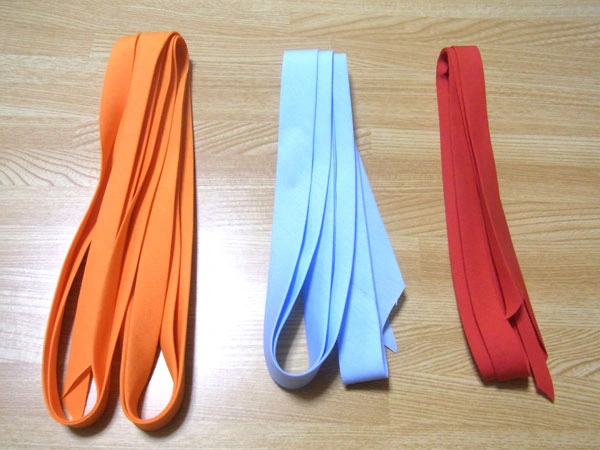
These are the basic methods of making bias tape.
This time we used solid colors, but you can also make original tapes with stripes, polka dots, floral prints, and more.


