


![]()
This is a free sewing pattern and tutorial for a simple blouson jacket with an open-front zipper.
The pattern has a basic shape, so when using it for cosplay costumes, you can adjust the pattern lines to match your desired silhouette.
The sleeves are designed with cuffs, but you can also replace them with ribbed cuffs for a more casual look.
Adding ribbing to the hem is also an option if you want a different style.
The collar features a slightly sharp shawl collar design. You can modify the collar lines to suit your preferred image.
This blouson jacket is recommended not only for costumes but also for everyday wear.
The body has no darts, making the construction simple. Except for the zipper installation, the sewing process is beginner-friendly.
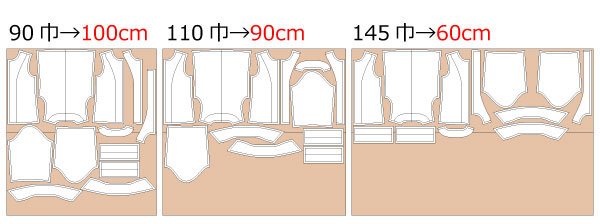
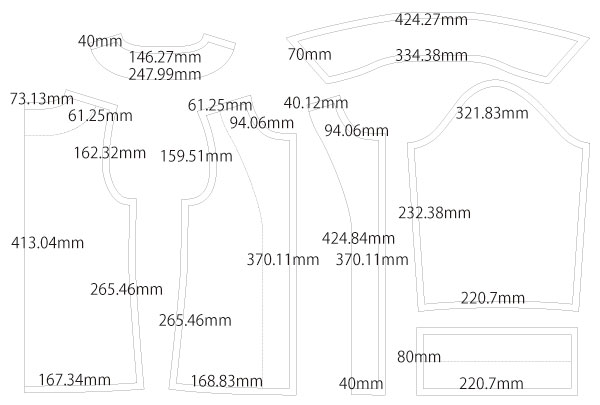
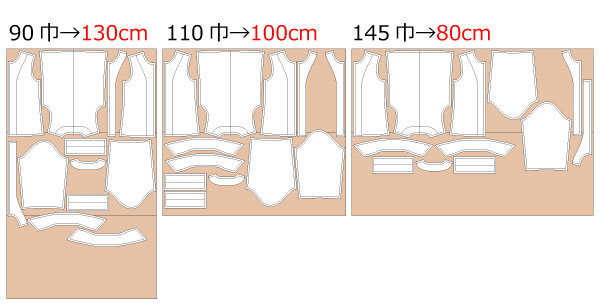
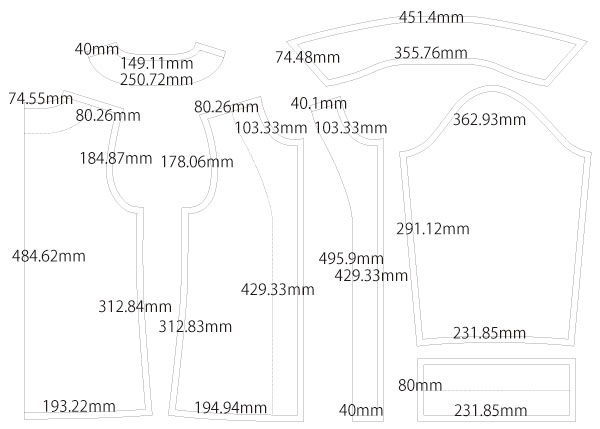
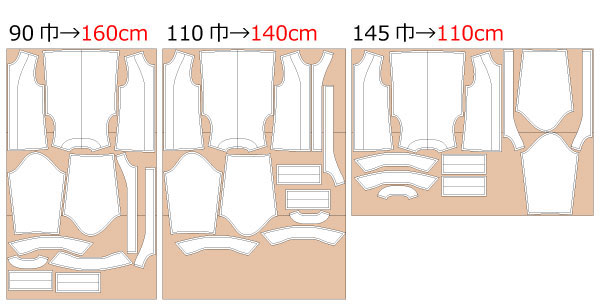
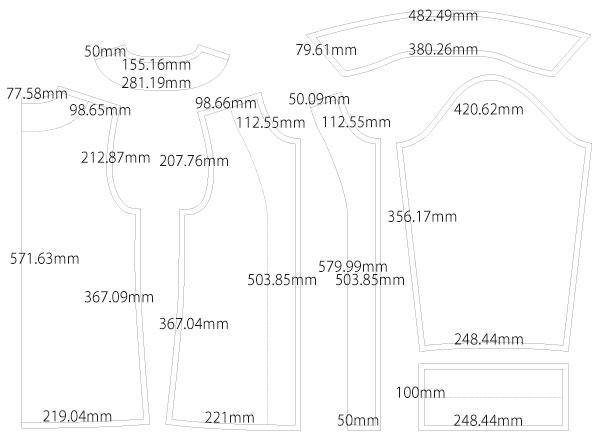
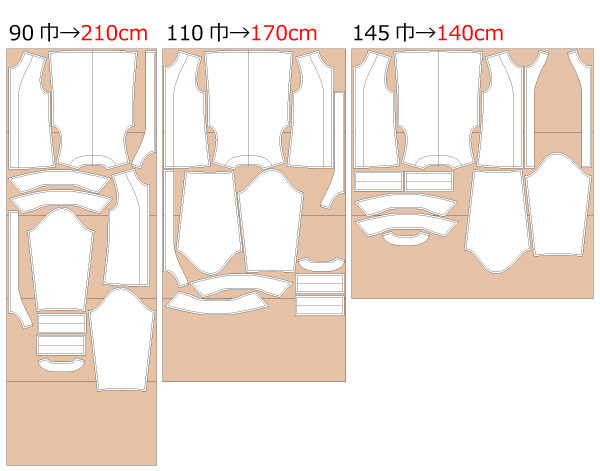
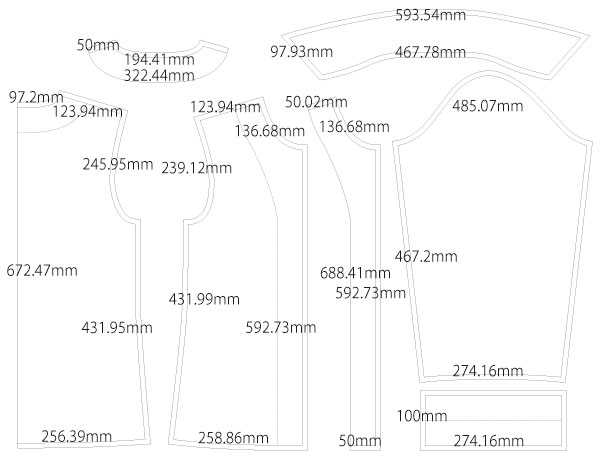
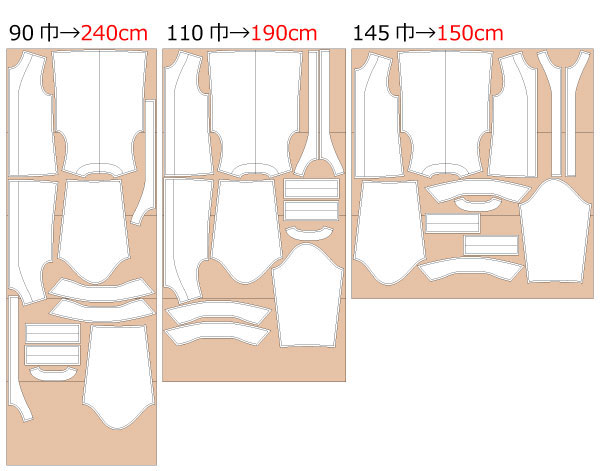
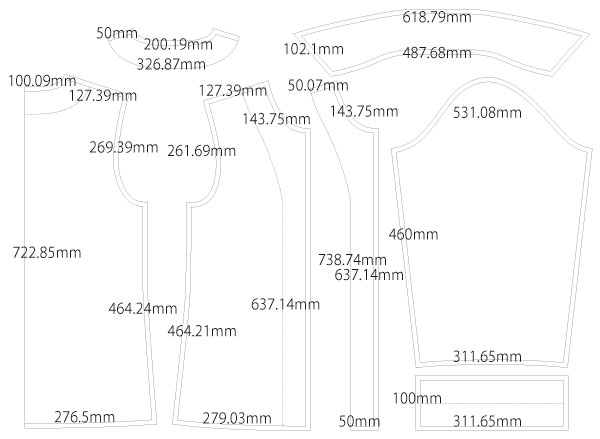
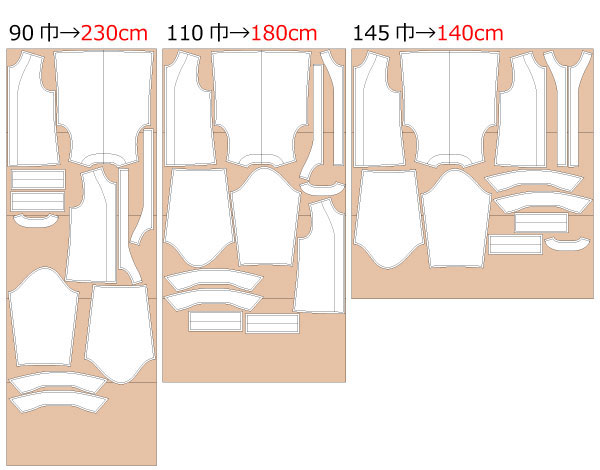
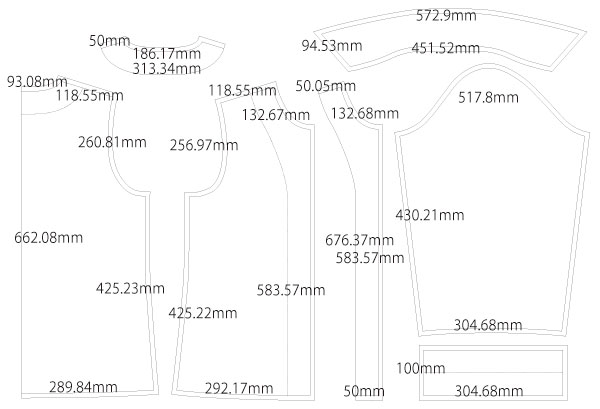
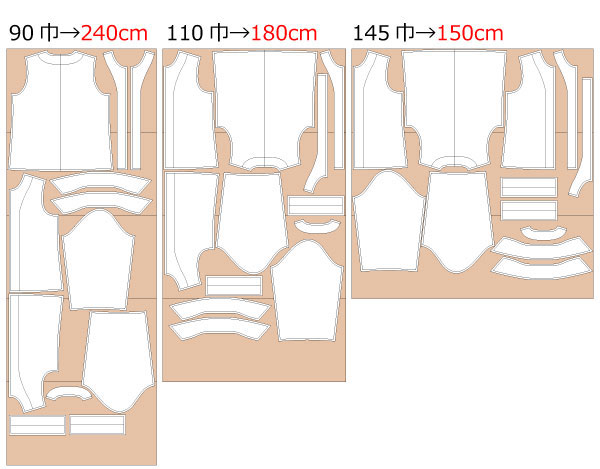
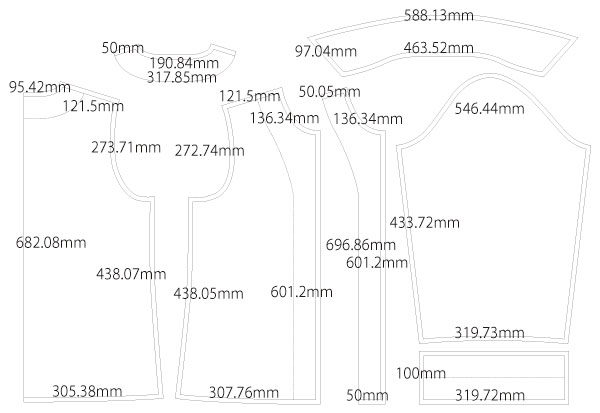
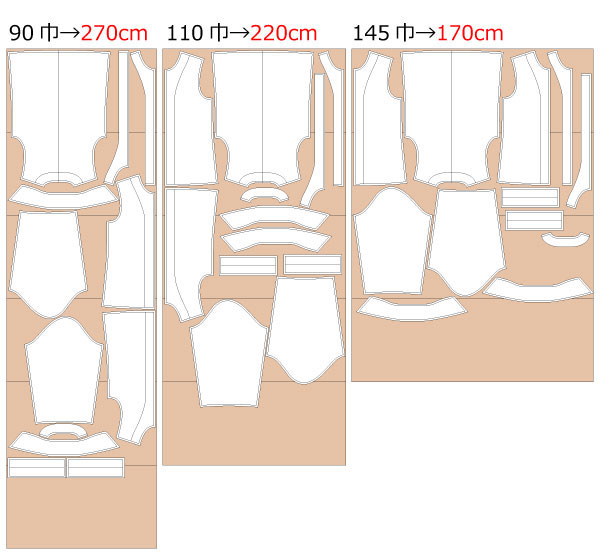
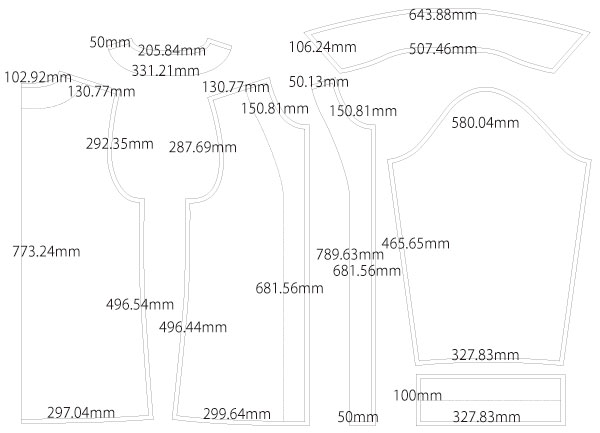
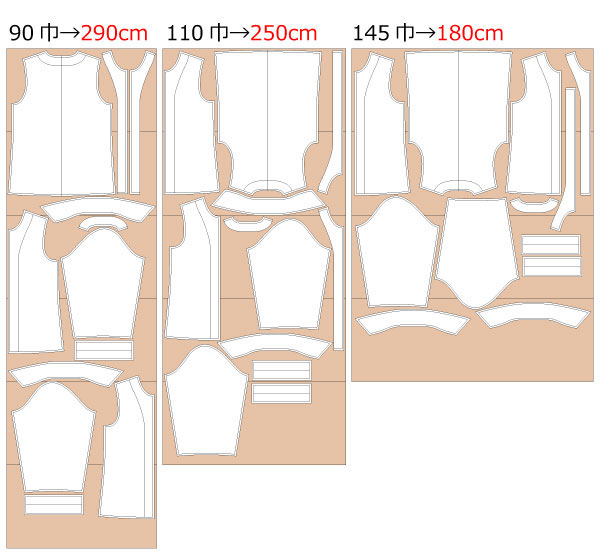
After printing, align the pages along the guide lines, paste them together, and cut out the pattern pieces.
Seam allowances are included in the paper pattern, so you can use it as-is without adding extra margins.


(1) Iron on fusible interlining to the facing, collar, and cuffs.
(2) Sew the facing pieces together with a sewing machine, and pre-fold the zipper area inward by 1 cm (0.5 in) with an iron.
(3) Finish the outer edge of the facing.
(4) Sew the collar pieces together, trim the seam allowances, turn the collar right side out, press with an iron, and add topstitching.
(5) Finish the shoulder and side edges of the front body and back body, sew them together, and press the seam allowances open with an iron.
*Pre-press the zipper placement line on the front body by folding it inward 1 cm (0.5 in) with an iron.
(6) Finish the hem edge and pre-fold it upward by 1 cm (0.5 in) with an iron.
(7) Sandwich the collar between the body and the facing, sew only around the neckline, then turn right side out and press with an iron.
(8) Sew the hem of the body and the hem of the facing together, turn right side out, and secure the hem with stitching.
(9) Insert the open zipper between the body and the facing, then sew them together.
(10) Finish the sleeve side edges, sew the sleeves together, and press the seam allowances open with an iron.
(11) Sew the cuffs together to form a loop, fold along the center line with an iron, and attach them to the sleeves.
![]() How to Sew Sleeves and Sleeve Cuffs
How to Sew Sleeves and Sleeve Cuffs
*Cuffs can be attached by sandwiching them in, or by sewing one side first, folding them back, and then sewing the other side.
(12) Sew the sleeves to the body and finish the armhole edges.
![]()
Free Paper Patterns are possible because of your support.
If you use our patterns, please share them on social media and tell your friends.
Your support helps DRCOS continue to provide patterns in the future.
![]()
![]()
Children's 100 size
bust61.5cm shoulder26cm length41.5cm A4 paper size 8 sheets (or legal size)

Children's 4 size
bust24.2in shoulder10.2in length16.3in letter paper size 9 sheets

Children's 120 size
bust70.5cm shoulder30cm length48.5cm A4 paper size 10 sheets (or legal size)
Children's 8 size
bust27.6in shoulder11.8in length19.1in letter paper size 11 sheets
Children's 140 size
bust80cm shoulder34cm length57cm A4 paper size 13 sheets (or legal size)
Children's 10 size
bust31.5in shoulder13.4in length22.4in letter paper size 12 sheets
Women's S size
bust92cm shoulder39cm length62cm A4 paper size 16 sheets (or legal size)
Women's S size
bust36.2in shoulder15.3in length24.4in letter paper size 16 sheets
Women's M size
bust99cm shoulder40cm length64cm A4 paper size 16 sheets (or legal size)
Women's M size
bust38.9in shoulder15.7in length25.1in letter paper 17 sheets
Women's L size
bust107cm shoulder41cm length66cm A4 paper size 17 sheets (or legal size)
Women's L size
bust42.1in shoulder16.1in length25.9in letter paper 20 sheets
Women's LL size
bust113cm shoulder42cm length68cm A4 paper size 18 sheets (or legal size)
Women's LL size
bust44.4in shoulder16.5in length26.7in letter paper 20 sheets
Men's S size
bust93cm shoulder43cm length67cm A4 paper size 18 sheets (or legal size)
Men's S size
bust36.6in shoulder16.9in length26.4in letter paper 18 sheets
Men's M size
bust101cm shoulder44cm length72cm A4 paper size 19 sheets (or legal size)
Men's M size
bust39.8in shoulder17.3in length28.3in letter paper 19 sheets
Men's L size
bust109cm shoulder45cm length77.5cm A4 paper size 21 sheets (or legal size)
Men's L size
bust42.9in shoulder17.7in length30.5in letter paper 21 sheets
Men's LL size
bust115cm shoulder46cm length82.5cm A4 paper size 23 sheets (or legal size)
Men's LL size
bust45.3in shoulder18.1in length32.5in letter paper 24 sheets


